Table of Contents
Advertisement
Quick Links
Advertisement
Table of Contents

Related Manuals for Home Theater Master MX700


Summary of Contents for Home Theater Master MX700
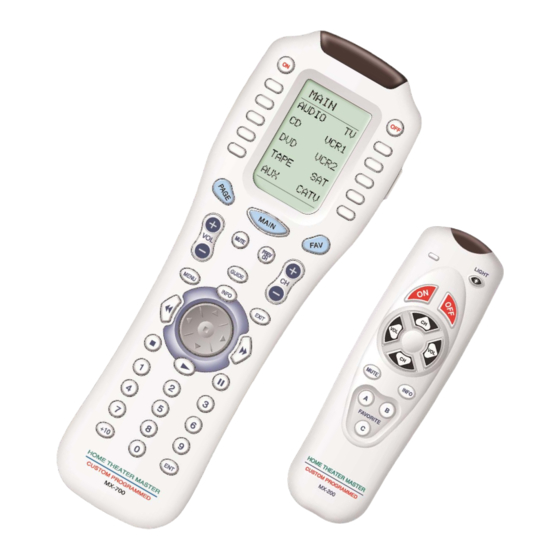
- Page 1 Presents: Guide to Programming the MX700 Dual Remote System...
- Page 2 The information in this manual may be subject to change without prior notice. Home Theater Master is a registered trademark of Universal Remote Control, Inc. Entertainment Made Simple is a trademark of Universal Remote Control, Inc. All other brand or product names are trademarks or registered trade- marks of their respective companies or organizations.
-
Page 3: Table Of Contents
Table of Contents EFORE TART Prequalifications You Need a Personal Computer With Serial Port You Need an RS232 Connecting Cable & Adapters As Necessary You Need to be Skilled With Windows and Home Theater Configuration How To Use This Book ASIC ROGRAMMING UIDELINES... - Page 4 Table of Contents MX700 Tree View or SideKick Via Tabs The Edit and Label Buttons Window The Edit and Label Buttons Toolbar The Delete Window Labels Shortcuts - Copying Buttons The Macro/Favorite Window The Macro Toolbar Re-Ordering Macro Steps Macro Details...
- Page 5 Programming the Power On Macro Programming a Power Off Macro Programming Activity Macros on MAIN LCD “Device” Buttons Programming FAVORITE Macros Programming Punch Through Programming the SideKick Backlight On Time Downloading to MX700 and SideKick Downloading Failures Uploading from the Remote to PC...
- Page 6 Table of Contents DVANCED ROGRAMMING ECHNIQUES AND DEAS Push and Hold Macros Push and Hold for Activity Macros and Tap to Switch Devices Two Functions on One LCD Button Status Messages for Impatient Clients with Long Macros Helping Confused Clients TV Input “Scrolls”...
-
Page 7: Before You Start
If you have questions about a specific feature, use the INDEX or the TABLE OF CONTENTS for page numbers for the feature. When you are ready to see how you can stretch the MX700 to fit unusual requirements with its advanced features, read the Advanced Programming section. -
Page 8: Basic Programming Guidelines
1 You have created a DEVICE (a set of hard buttons and 1 to 4 dedicated LCD pages) for each remote con- trol in the system. You have used the IR database or IR learning so that the MX700 replaces all the remote controls for normal operation. -
Page 9: D U A L
You can see the name of the device at the top of the screen. If it is not the one you want, return to the MAIN accomplish this on the MX700 system.You could program TV inter- Menu and select a new device or activity. -
Page 10: Fav Channel Macros Are Optional
Remember to hold Changing Contrast the remote steady and pointed at the macro of ANY MX700 button. All can be macros, all can be IR commands, or system until all components are cor- rectly powered on or off. Turning on... -
Page 11: The Programming Window
Tree view enables quick navigation, Sidekick enables drag and drop programming of the SideKick. The MX700 Simulator is used to navigate and to select a button to program, edit or record a macro to. Floating Edit and Label Buttons window is used to label buttons and move IR commands via shortcuts. -
Page 12: The Menu Bar And The Menus
(Power On, Power Off or an LCD button only).. Once you have selected a button, selecting Macro activates the MACRO recorder. Now, use the MX700 Simulator to select each step of your macro. The recorded steps appear in the Macro window. -
Page 13: Communications Menu
7. Sidekick - This switches the left hand tabs from TREE VIEW of the MX700 to a simulator of the the SideKick. Once the Sidekick is in view, you can drag and drop any button of the MX700 to the SideKick. -
Page 14: The Simulatoro
Choose the new device from the MAIN MENU by double clicking on it. On a real MX700, the double click is not necessary. But within MXEditor you sometimes will want to program an LCD button on the MAIN page and single clicking the button enables you to select it for editing or macro programming. -
Page 15: Tree View
Windows, Menus,Tools and Definitions Tree View Devices and Pages Tree View controls what you see in the Simulator. It serves as a the quickest way to navigate (especially when pro- gramming macros) and enables you to cut, copy and delete devices and/or pages via the right click context menus. A Page refers only to a group of ten LCD buttons, not to the hard buttons in the same device. -
Page 16: Mx700 Tree View Or Sidekick Via Tabs
Switch between the two views by left clicking on the tabs. MX700 tree view is useful for navigating while programming the MX700. Sidekick view is used to program the SideKick. SideKick programming is done via drag and drop.You simply drag any button on the MX700 to one of the SideKidk’s buttons. -
Page 17: The Edit And Label Buttons Window
TEST - For learned codes. Will only test pre-programmed codes if you have downloaded to the remote. LEARN - Puts the software into learning mode, if an MX700 remote control is connected to the PC. See p 23 CONTINUE - When you are learning a number of IR codes, use CONTINUE mode to automatically save and select the next button of that device.This saves tremendous time. -
Page 18: S Labels
Windows, Menus,Tools and Definitions Labels You can change the name of any button.When you change the name of a button, it not only affects how the button appears in an LCD display, it also changes how the button displays in the pull down Code list. Shortcuts - Copying Buttons You can create a SHORTCUT to another button by selecting it via the pull down lists under Device and IR Code. -
Page 19: The Macro/Favorite Window
Windows, Menus,Tools and Definitions The Macro/Favorite Window If the Macro Window is closed, reopen it by clicking on the shortcut button on the toolbar. The Macro Toolbar TEST - You must select the first step you want played back first, then connect the remote to the PC. All steps after the selected step will play back, including any delays. -
Page 20: E Step By Step Tutorial
Step by Step Tutorial Programming Overview A. New File, Existing File on PC or in Remote NEW - Starting from scratch on a new job, go to the File Menu, choose New from the File Menu and pick the type of template you would like to use to program with. None of the templates have any IR codes, just prelabelled empty devices (although the Audio device has codes for factory testing in both the 10 device and the 20 device templates). -
Page 21: Creating, Naming And Arranging Devices
A device is the basic grouping of a set of hard buttons and up to 4 LCD button pages.You will need one device group for each remote control that the MX700 is replacing. You can have a maximum of 20 devices in your config- uration. - Page 22 Once at the new device group, you can touch the MAIN button to return to the MAIN MENU etc. Both Tree View and the MX700 Simulator show the newly created devices.
-
Page 23: Using The Ir Database
Step by Step Tutorial Using the IR Database Discrete Codes,Toads,Toggles and other New Words The MXEditor database is unique in the industry because it includes “secret” discrete codes that are not on the actu- al remote controls for many components. These codes are highly sought after by professional installers because they make automation of the home theater possible via reliable macros! Here’s the facts you need to know: Discrete Commands versus Toggle Commands When a remote control’s only button to turn on and off a TV set is labeled Power, it is usually a “toggle”... - Page 24 Step by Step Tutorial 2 Category - Select the type or category of component (i.e.TV,VCR or DVD player). 3 Brand - Select the company that made the component (i.e. B & K, Sony, Krell) 4 Model - Select the model or the Code Set number (sometimes the actual model, sometimes a generic # assigned by us to a code set that operates many models over the years).
- Page 25 B.Turn on the Component C. Point the connected MX700 so that it is in range and within line of sight of the component. D. Click on the Test button as shown here: E. Observe the component. If it stays on, click on another Model and continue until you find the Code Set that turns the component off.When it turns off, Click on Save.
-
Page 26: Testing
Test ALL Buttons Begin testing the codes you downloaded to the MX700 remote control. Make sure that you test all but- tons (hard buttons and the LCD buttons on each page or every device). Don’t try to learn new commands yet, wait until you can do all of them at once systematically. -
Page 27: Using Lcd Button Editor
Step by Step Tutorial Using LCD Button Editor Device List - Select the device whose pages you would like to edit. Button Labels - Select the button you would like to rename by double clicking.To delete, single click then click on the Delete button in E. Hide Page Check Boxes - You must hide pages back to front. -
Page 28: Dragging And Dropping Buttons
Step by Step Tutorial Dragging and Dropping Buttons You can drag and drop a programmed button/label to any empty button. If there are no empty buttons, simply delete unused buttons first, then re-arrange as desired. Drag and drop requires that you click and hold on a button, then move to the new location and let go of the mouse button. -
Page 29: Learning Tips
LEARN mode. Wait for READY to Appear - The MX700 (not the SideKick) must be connected to the PC. Once you see the READY indicator, press and hold the corresponding button on the original remote control while pointing it at the TOP of the MX700.When the code is successfully learned, the window will say GOOD, confirming... -
Page 30: Learning A Batch Of Buttons Efficiently
Step by Step Tutorial Learning a Batch of Buttons Efficiently Tip - Find the correct “learning distance” using single code learning before beginning batch learning... Select the STARTING Button - Select the button that is the top left of the buttons you want to teach to. -
Page 31: Download And Test All Learned Buttons
Step by Step Tutorial Download and Test All Learned Buttons This time when you download, make sure that you choose FULL DOWNLOAD, otherwise your learned codes will not download to the remote control.Test all the learned buttons, and go ahead and correct the problems as you find them. -
Page 32: Importing And Exporting Devices
Step by Step Tutorial Importing and Exporting Devices If you right click on a device in Tree View, a context menu appears that enables you to Import or Export a device.When you select a device, right click and select Export.The entire contents of the selected device will be saved to your PC with a new file name.The original copy stays in place unchanged. -
Page 33: Macro Programming
Step by Step Tutorial Macro Programming What is a Macro? A macro is a recording of a sequence of commands that is played back when the user presses a single button. A macro can have up to 190 steps. A step can be: IR Command - Any IR command on any hard button, LCD button on any device. -
Page 34: Toggle Commands Create "Point 'N Pray" Macros
The client will pick out a videotape and insert it in the VCR (the VCR will now automatically turn on).The client sits down, picks up their MX700 and presses the MAIN Power On button.The three toggle type power commands are issued. -
Page 35: Programming The Power On Macro
Step by Step Tutorial EXAMPLE 2 - Any channel number and ENTER takes TV to the ANT A input (and the TV has 5 inputs -Ant A, Ant B, EXT1, EXT2 and EXT3) TV to EXT3 = 1) “0” 2) “2” 3) “Enter”... - Page 36 Step by Step Tutorial 4 Once you have all of your Power On Commands in the list, re-arrange them as desired by clicking and dragging them into whatever order you want. 5 Ask the client what they think they will watch most often (TV, satellite, dvd etc.). Program steps to select the correct TV and Receiver input for that activity.
- Page 37 7 First, turn the TV and the Receiver to the wrong input, then turn off everything in the theater. Point the connected MX700 at the system. Select the first step in the list by clicking on it. Now, click on the TEST...
- Page 38 Step by Step Tutorial 8 Programming additional delay in the macro is sometimes necessary. Each macro step usually takes some time, so there may be enough built in delay for the television and the receiver to both be fully active by the time the input commands are sent.
-
Page 39: Programming A Power Off Macro
9 Again, turn the TV and the Receiver to the wrong input, then turn off everything in the theater. Point the connected MX700 at the system. Select the first step in the list by clicking on it. Now, click on the TEST button. -
Page 40: Programming Activity Macros On Main Lcd "Device" Buttons
Step by Step Tutorial Programming Activity Macros on MAIN LCD “Device” Buttons An activity Macro is typically programmed to be as fast as possible. They simply select the correct input on both the television and the surround sound receiver, since all the components have already been powered on by the Power On macro. -
Page 41: Programming Favorite Macros
Step by Step Tutorial Programming FAVORITE Macros Programming fifty favorite channels may sound like a lot of work, but if you take advantage of MXEditor’s time saving capabilities, you can program all fifty in five minutes or less! First, get a program guide for the satellite service or cable tv provider your client uses. - Page 42 Step by Step Tutorial 3 In Tree View, click on one of the Pages of the device (SAT, CABLE) you are using to make the favorite.This instantly changes the Simulator from FAV to the device, whereas using the Simulator to navigate would have taken several mouse clicks.
-
Page 43: Programming Punch Through
Step by Step Tutorial 5 Add delay if needed.You should test the first favorite thoroughly for any need for delay. Components vary widely in their response time. Some brands will be fine with no delay step in between IR commands. Other brands require delays in the interval between commands. -
Page 44: Programming The Sidekick
Click on SAVE. Check the devices you programmed, you should see the yellow PT (punch through ) flag on every button affected on all the devices you programmed: VCR1 MAIN Repeat for any other groups of codes as you like. Programming the SideKick Switch from MX700 Tree View to SideKick view using the tabs aboveTree View. - Page 45 Step by Step Tutorial Navigate to the MAIN page and drag the MAIN Power On and the MAIN Power Off macros to the SideKick’s On and Off buttons.This is assuming that you have programmed the MAIN Power On macro to select TV or Satellite as the favorite activity. If you have not, program an LCD button somewhere (can be on a hidden page) to turn on the system and select the source you plan to use for the SideKick.
- Page 46 Step by Step Tutorial Navigate to the device with the surround sound receiver codes and drag and drop Volume Up/Down and Mute to the SideKick. Navigate to the Favorites pages. Drag and drop the three favorite channels into the appropriate SideKick buttons.Typically, you pick three favorites that are spread around the dial, so that the client does not get frustrated trying to surf up and down through all of their channels.
-
Page 47: Backlight On Time
Program Menu. Enter the amount of time you would like the backlighting to stay on (after the backlight button is pushed). Downloading to MX700 and SideKick You download to both remote controls the same way: Make sure the remote control has fresh batteries inserted correctly. -
Page 48: Downloading Failures
Step by Step Tutorial 4 Click on the Download to Remote Control shortcut button on the toolbar or choose Download from the Communications Menu. 5 When the Download window appears, select the Full Download checkbox and click on the Download but- ton. -
Page 49: Uploading From The Remote To Pc
Uploading from the Remote to PC Uploading is necessary when you arrive at a job site with an existing MX700 system that you would like to service, edit or clone. Simply upload the file to your PC, save it with a new file name and you can edit the file, send it to other remotes, make a touch up and download back into the customers remote.. -
Page 50: Advanced Programming Techniques And Ideas
Advanced Programming Techniques and Ideas Push and Hold Macros Any macro can be programmed so that nothing will happen if the button is simply tapped. You can force the client to press and hold for any time between .1 and 30 seconds to issue a macro. For most clients, this would be a bad idea since it makes things more difficult and more time consuming. -
Page 51: Status Messages For Impatient Clients With Long Macros
Advanced Programming Techniques and Ideas Status Messages for Impatient Clients with Long Macros For clients who have problems waiting for long macros to finish, it is helpful to design the system to give a dramatic status message while the macro is working, otherwise they may put the remote down in the middle of the macro, frustrating themselves.This is possible for a system with UP TO 10 DEVICES. - Page 52 Advanced Programming Techniques and Ideas 4 Program activity macros normally on all the MAIN page 2 buttons. 5 On Main Page 1, import the corresponding Macro from Page 2 to each LCD button on Page 1: 6 Add a page jump to each of the MACROs on MAIN Page 1 to the Devices with the IR Codes programmed in them: As you can see, when you pull down the list of devices, there...
-
Page 53: Helping Confused Clients
Advanced Programming Techniques and Ideas Helping Confused Clients When do clients get confused? When their system is full of old gear they couldn’t afford to replace! When the sales- men sells components without discrete codes! When the manufacturer of a cool new product blows it and incorpo- rates hard to use, but vital feature! In any event, by using MXEditor you can often solve some problems very effectively. -
Page 54: All The Components Have "Toggle" Power Commands
Advanced Programming Techniques and Ideas All the Components Have “Toggle” Power Commands 1 Create a new device named “Power”. 2 On the new device’s first page, create a shortcut to each problem components power command, by pulling down the device list, then the command list. 3 After the shortcut is created, rename it for the component it controls as shown above. -
Page 55: Main Page Only - Changing Devices Confuses Client
MAIN Page Only - Changing Devices Confuses Client With a small system, you may opt to program the MX700 so that it never changes devices. By keeping the set of commands to the minimum necessary many systems that consist of nothing more than a surround sound receiver, a TV, a satellite receiver and a DVD player can be completely operated from the MAIN page. - Page 56 Advanced Programming Techniques and Ideas 3 Program the MAIN pages to punch through to the other devices as desired: 4 Only a few hard buttons need to be programmed with shortcuts. In the example system, the Menu, Guide and cursor buttons are programmed with SAT commands. 5 Program Power On and Activity Macros as needed.
- Page 57 Advanced Programming Techniques and Ideas 6 To avoid confusing the client, delete the LABELS of devices you don’t want them to see. In the example system, the labels for the surround sound receiver and the TV have been backspaced and saved. Backspacing and saving empty labels is only one strategy.
- Page 58 Advanced Programming Techniques and Ideas 7 You can continue to use the LCD buttons on MAIN for other purposes, as long as you remember that any button you LABEL will create a new empty device of the same name in tree view. Make sure that each device’s pages are all HIDDEN! This is critical.
-
Page 59: Modular Macro Programming
Advanced Programming Techniques and Ideas Modular Macro Programming Utilize the Import Macro feature for speed in programming.The only catch to using Import Macro is that you must do it before you press record. By first programming macros on an unused device page (you can delete them after you are finished programming your macros), you can break up long macros into modules and greatly speed the macro recording process.