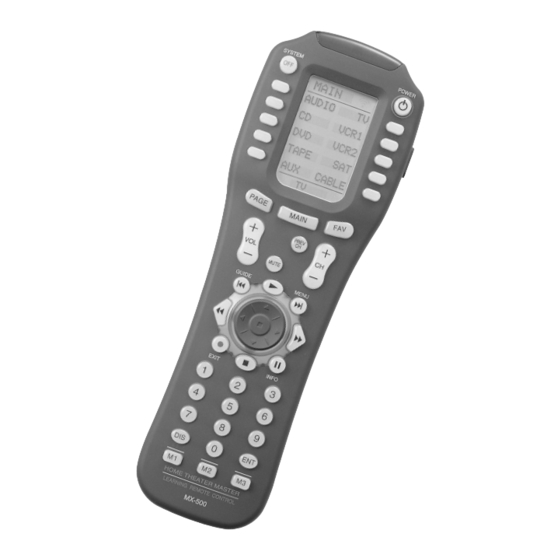
Home Theater Master MX-500 Operating Manual
Lcd screen preprogrammed and learning remote control
Hide thumbs
Also See for MX-500:
- Brochure (2 pages) ,
- User manual (49 pages) ,
- Operating manual (51 pages)

Related Manuals for Home Theater Master MX-500


Summary of Contents for Home Theater Master MX-500
- Page 1 Home Theater Master LCD Screen Preprogrammed and Learning Remote Control MX-500ª Operating Manual...
-
Page 2: Table Of Contents
C. Learning From Other Remote Controls D. Macro Operations E. Favorite Channel Buttons F. Punch Through Operations G. Editing LCD Text H. Cloning The MX-500 I. All Other Operations J. LCD Screen And Button Layout K. System Settings 4. Programming the MX-500... -
Page 3: Introduction
530 commands into the MX-500 your original remote controls, or a combination of both. The MX-500... -
Page 4: Batteries
However, each of the device buttons and corresponding functions can be changed to meet your individual requirements. Almost any device that uses infrared commands can be controlled by the MX-500 Home Automation, Personal computers and more. Tip: The auxiliary function (AUX) could be used to operate lighting controls;... -
Page 5: Learning From Other Remote Controls
C. Learning From Other Remote Controls The MX-500 can learn codes from your original remote controls. There are 26 LCD screens in the MX-500 screen (page) has ten function buttons, including the ten device buttons on the main menu screen that can be taught. -
Page 6: Editing Lcd Text
LCD screens. Please refer to page 39 in the manual for details. H. Cloning The MX-500 The MX-500 is capable of sending all the programmed codes and operations from one MX-500 MX-500 . Please refer to page 43 in the manual for details. I. All Other Operations You can set the duration of the backlight on time and change the LCD screen contrast. -
Page 7: System Settings
MX-500 . You must use the preprogrammed method for those devices. For the rest, you can program the MX-500 to make it compatible with your components by following the preprogrammed method instructions, by using your original remote controls to teach the MX-500 methods. -
Page 8: Programming The Mx-500
Everything that you need for watching a DVD on your TV without having to jump back and forth from Device to Device. You can decide where on the MX-500 functions to reside, relabeling the LCD screen buttons (explained on page 39) for those functions, and choosing... -
Page 9: Auto Scan With Three-Digit Number
DVD. The code table for Tuner is stored under Audio. 2. Auto Scan With Three-Digit Number You can also program your remote control by sending out a series of Power Off commands for different brands stored in the library by using the following steps. This is similar... - Page 10 4. Programming the MX-500 to Control Your Components 4. The remote will be flashing ÒSELECT BUTTONÓ. Press the device you wish to program. (For example, to program TV, press the TV button.) 5. The remote will be flashing ÒFROM TABLEÓ. Select the device from which the scanned code will be selected.
-
Page 11: Learning Method
0-9, and the joystick. Points to Remember If the remote control fails to learn a function after the first try: Keep the remotes stable by placing them on a flat surface. Make sure the original remote is pointed at the learning eye at the top end of the case and is not at an angle. -
Page 12: Programming The Ten Device Buttons
5. Select any of the ten device buttons you wish to program on the MX-500 original remote control you wish to program into the Device button you have chosen on the MX-500 MX-500 ÒGoodÓ on the LCD screen, indicating it learned the code correctly. -
Page 13: Programming Favorite Channels
4. Programming the MX-500 to Control Your Components 7. Once you complete the programming and wish to exit the Learning mode, press the MAIN button. Exit from the SETUP mode by pressing the MAIN button once again. Tip: Only follow these instructions if you actually want a code sent when changing devices. -
Page 14: Programming Macro Buttons
There are two types of macro functions you can program with the MX-500 The M1, M2, M3, POWER and SYSTEM OFF buttons are designed to send out up to twenty commands from each of the five hard buttons. -
Page 15: Programming Macro Functions To The Ten Device Buttons
6. Programming Macro Buttons 3. Press one of the macro buttons, M1-M3, Power or System Off you wish to store your macro on. 4. Press the functional buttons you wish to store in the device macro button you selected, in the order you want them stored. - Page 16 6. Programming Macro Buttons Tip: Remember that a single push of a Device Button that has a macro connected to it will take you to that device's function pages. You will need to hold the Device Button down for 1 second in order to send out the macro that you have created for that Device Button.
-
Page 17: Programming Punch Through Functions
6. Programming Macro Buttons 15. Press MAIN. 16. Press CABLE. (Back to the this device to enter the appropriate channel.) 17. Press 1, then 3, then 5. (Then press the ENT button if your cable device requires it.) 18. Press CH UP to save the macro. 19. -
Page 18: Erasing Existing Programming
2. Press the ERASE button next to the LCD screen. 3. Press the LEARN button. 4. If you wish to erase all the learned functions in the MX-500 , press the ALL button and then press the SURE? button at the next LCD screen. -
Page 19: Erasing Favorite Channel Buttons
2. Press the ERASE button next to the LCD screen. 3. Press the FAV button. 4. If you wish to erase all the favorite channel buttons in the MX-500 , press the ALL button and then press the SURE? button at the next LCD screen. -
Page 20: Erase Macro Functions In The Ten Device Buttons
8. Erasing Existing Programming 2. Erase Macro Functions In The Ten Device Buttons 1. Go to the SETUP mode by pressing the MAIN and ENTER buttons simultaneously for three seconds. 2. Press the ERASE button next to the LCD screen. 3. -
Page 21: Lcd Button Editing
4. The character to be changed on the button you selected will blink and you can change the character using the number pad buttons on the remote control. The characters assigned to each number pad button are shown below. It will be rotated to different character each time the same number pad button is pressed. -
Page 22: Recalling The Preprogrammed Three-Digit Number
9. LCD Button Editing 1. A B C 2. D E F 3. G H I 4. J K L 5. M N O 6. P Q R 7. S T U 8. V W X 9. Y Z Blank 0. -
Page 23: Cloning Mx-500
2. Press the CLONE button next to the LCD screen. 3. Press either the SEND or RECV button depending upon the role of the remote control. If the MX-500 copied from, press the SEND button. If it is to be copied to, press the RECV button. -
Page 24: Glossary
Delay: Usually a pause placed between two steps in a macro. Delays may be required in order for some devices to properly sense two separate commands, or may be used to wait for a device to finish powering up. The MX-500 allows you to change that delay. - Page 25 Emitters are always placed at the "top" of a remote control and are typically shielded by a red plastic window. The MX-500 strong IR emitters. Infrared receiver: The portion of a device that receives infrared commands from a remote control.
- Page 26 Thumbpad. Keypad: Generally refers to all hard buttons on a remote control, or more specifically the numeric keypad (0 through 9). LCD screen: The display device built into the MX-500 The MX-500 LCD screen displays mode and programming information, along with macro commands and soft buttons.
-
Page 27: Warranty
VCR/LD/DVD media operation controls, such as fast- forward, rewind, play, stop, pause, etc. Two-way: Some devices actually send information back to a remote control during use. This is known as 2-way communications. Most 2-way components can still be controlled via a 1-way remote, although certain workarounds must be used when learning signals. -
Page 28: Appendix
20. APPENDIX A. List of Preprogrammed LCD Text by Device AUDIO Button Name Functions Button Name System-OFF System-OFF POWER ON/OFF POWER VOL UP VOL UP VOL UP VOL DN VOL DN VOL DN CH UP PRESET+ CH UP PRESET - CH DN CH DN MUTE... - Page 29 20. APPENDIX CABLE DVD/LD Button Name Functions Button Name System-OFF System-OFF POWER ON/OFF POWER VOL UP VOL UP VOL UP VOL DN VOL DN VOL DN CH UP CH UP CH UP CH DN CH DN CH DN MUTE MUTE MUTE PRE-CH PREV CH...
-
Page 30: Three-Digit Preprogrammed Code Tables
20. APPENDIX Note : Because of the variety of Button Name Functions System-OFF function names for POWER ON/OFF different components in VOL UP VOL UP this mode, we list them VOL DN VOL DN CH UP CH UP in A, B, C, D...on the CH DN CH DN LCD. - Page 31 SANYO 047 059 SCOTT 019 091 SEARS SHARP 026 094 131 175 181 SHERWOOD 024 038 055 102 103 105 106 051 030 SONY 018 093 223 247 248 160 166 015 101 184 218 271 SOUNDESIGN SOUNDSTREAM 084 088...
- Page 32 Set-Up Code Table Manufacturer/Brand Set-Up Code Number ADMIRAL 072 081 161 160 AKAI 197 146 AMARK 112 143 AMPRO 073 167 157 183 AMSTRAD ANAM 043 054 056 080 112 131 197 004 112 058 AUDIOVOX BLAUPUNKT CAIRN CANDLE 197 002 003 004 CAPEHART CETRONIC CITIZEN...
- Page 33 Set-Up Code Table Manufacturer/Brand Set-Up Code Number AIWA 034 161 AKAI 016 043 046 124 125 142 146 AMPRO ANAM AUDIO DYNAMICS 012 023 039 043 BROOKSONIC 035 037 129 CANON 028 031 CAPEHART CRAIG 003 040 135 CURTIS MATHES 031 041 DAEWOO 005 007 010 065 108 110 111 112 116 117 119...
- Page 34 Set-Up Code Table Manufacturer/Brand Set-Up Code Number 103 003 004 039 042 046 053 AMERICAST ANTRONIX ARCHER 005 007 014 BELL SOUTH CENTURION CENTURY CITIZEN COMBANO 080 081 COMSAT COMTRONICS DIGICABLE EAGLE 020 030 040 EASTERN 057 066 ECHOSTAR ELECTRICORD GEMINI 008 054 GENERAL ELECTRIC...
- Page 35 SANSUI 044 069 107 128 171 190 125 SANYO SCOTT 069 102 SHARP 026 031 051 066 SHERWOOD 003 019 051 096 112 115 119 166 SIGNATURE SONY 048 081 097 126 133 177 225 226 164 SOUNDESIGN SUMO SYLVANIA...
- Page 36 003 039 047 050 066 098 222 QUASAR 007 088 SANSUI 027 113 119 224 SHARP 026 057 131 175 181 SHERWOOD 038 004 028 030 033 034 SONY 020 022 052 084 089 TEAC 009 059 212 TECHNICS 007 010 076 088 109 122 193...
- Page 37 Set-Up Code Table AUX - Light, Switch, Tivo, etc. Manufacturer/Brand Set-Up Code Number AIWA ARCHER AUTON DRAPER SCREEN DWIN EVERQUEST EXTRON FAROUDJA FUJI JERROLD KENWOOD LITE-TOUCH LUTRON 077 158 159 MAKITA 186 201 MINDPATH NILES 160 187 PIANO DISC PLUS PHILIPS POLK AUDIO REPLAY...