La Crosse Technology WS-9077U-IT - Wireless Forecast Station Manual
- Quick setup manual (2 pages) ,
- Faqs (9 pages)
Advertisement
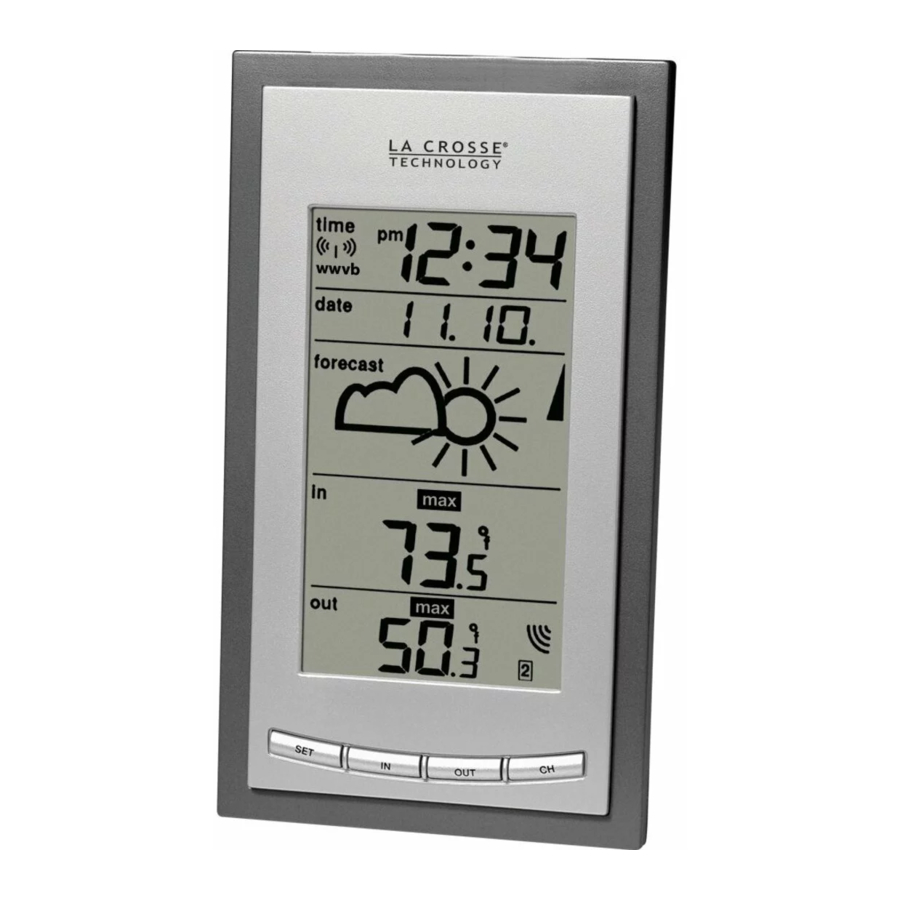
- 1 WIRELESS FORECAST STATION
- 2 SETUP INSTRUCTIONS STEP BY STEP
- 3 WWVB RADIO CONTROLLED TIME
- 4 FUNCTION BUTTONS
- 5 WEATHER FORECAST ICONS
- 6 VIEW CHANNELS
- 7 OUTDOOR TRANSMITTER RECEPTION ICON
- 8 MIN/MAX DATA
- 9 LOW BATTERY
- 10 POSITIONING THE OUTDOOR TRANSMITTER
- 11 POSITION THE WIRELESS FORECAST STATION
- 12 CARE AND MAINTENANCE
- 13 SPECIFICATIONS
- 14 Documents / Resources
WIRELESS FORECAST STATION

SETUP INSTRUCTIONS STEP BY STEP
Step 1:
- Remove battery cover from the outdoor transmitter.
![]()
- Slide the battery cover down and lift off the back of the transmitter
- Insert 2 NEW AA batteries (not included) into the TX29U-IT transmitter. Observe the correct polarity.
- Keep the Forecast Station and transmitter within 10 feet during setup (15 minutes).

Step 2:
- Remove battery cover from Forecast Station: insert a solid object in the space provided at the upper-central position of the battery cover, then push down and pull out to remove the battery cover.
- Insert 2 NEW AA batteries (not included) into the back of the Forecast Station. Observe the correct polarity (see marking inside the battery compartment).Do NOT mix old and new batteries.
- The Forecast Station will display, time (12:00) and indoor temperature.
- Within 3 minutes the Outdoor temperature should be displayed.
Trouble shooting:
- After 3 minutes, if the Outdoor temperature does not show up in the designated area on the Forecast Station, remove batteries from both units and start the setup process again.
- For optimal reception performance, of the 915MHz signal, the outdoor transmitter should be placed within 330 feet (100 meters) from the Forecast Station.
WWVB RADIO CONTROLLED TIME
The NIST radio station, WWVB, is located in Ft. Collins, Colorado and transmits the exact time signal continuously throughout the United States at 60 kHz. The signal can be received up to 2,000 miles away through the internal antenna in the Forecast Station. However, due to the nature of the
Earth's Ionosphere, reception is very limited during daylight hours. The Forecast Station will search for a signal every night when reception is best.
- The tower icon will show solid when the Forecast Station has received the WWVB signal.
- No tower icon displayed. The Forecast Station was unable to receive a signal at this time.
- Reposition the Forecast Station for better signal reception or try again at bedtime.
Note: In case the Forecast Station is not able to detect the WWVB signal (disturbances, transmitting distance, etc.); the time can be manually set by following the Program Menu.
FUNCTION BUTTONS

PROGRAM MENU:
The forecaste station has four function buttons on the front. The SET button will move through the program menu. The IN or OUT button will change a value. Press and release the SET button after each step to be moved to the next step. Exit the programming mode at any time by pressing the CH button.
- CONTRAST: Hold the SET button for five seconds. LCD and a number from 0-7 will flash. To increase or decrease the contrast of the LCD display, press and release the IN button. Press and release the SET button to confirm and move to the next item.
- TIME ZONE: The Time Zone will flash, showing a number following by the letter h. Use the IN to change the Time Zone. Note: North American Time Zones are negative numbers: -4h Atlantic, -5h Eastern,-6h Central, 7h Mountain, -8h Pacific, -9h Alaskan and -10h Hawaiian. Press and release the SET button to confirm and move to the next item.
- DAYLIGHT SAVING TIME: DST will show with either 0 (Off) or 1 (On) flashing. Most states use DST, so this should be set to 1. However if your location does not use DST, use the IN button to turn it 0. Press and release the SET button to confirm and move to the next item.
- RADIO-CONTROLLED TIME: RCC will show with ON or OFF flashing. Use the IN button to set the RCC signal. Press and release the SET button to confirm and move to the next item.
- 12/24-HOUR TIME MODE: Either 12h or 24h will flash on the display. Use the IN button to change from 12-hour to 24-hour time. Press and release the SET button to confirm and move to the next item.
- HOUR AND MINUTES: The Hour and Minutes will flash. Use the IN button to advance the Hour. Use the OUT button to advance the Minutes. Press and release the SET button to confirm and move to the next item.
- YEAR: The Year will flash. Use the IN button to set the year. Press and release the SET button to confirm and move to the next item.
- MONTH AND DATE: The Month and Day will flash. Use the IN button to advance the Month. Use the OUT button to advance the Date. Press and release the SET button to confirm and move to the next item.
- SNOOZE TIME: Although numbers will flash, this feature is not used as there is no alarm on this unit. Press and release the SET button to confirm and move to the next item.
- FAHRENHEIT OR CELSIUS: °F or °C will flash. Use the IN button to select your preference. Press and release the SET button to confirm and move to the next item.
- FORECAST SENSITIVITY: Two air pressure tendency arrows will appear and a number will flash under the forecast icon. Press and release the IN button to select the desired forecast sensitivity setting. The lowest number is used near the coastline, the highest number is for the desert, and middle number is for everywhere else. Press and release the SET button to confirm and exit.
WEATHER FORECAST ICONS
The weather forecasting feature is estimated to be 75% accurate. The weather forecast is based solely upon the change of air pressure over time. In areas where the weather is not affected by the change of air pressure, this feature will be less accurate.
![]()
There are 3 possible weather forecast icons that will be displayed:
Sunny—indicates that the weather is expected to improve (not that the weather will be sunny).
Sun with Clouds—indicates that the weather is expected to be fair (not that the weather will be sunny with clouds).
Clouds with Rain—indicates that the weather is expected to get worse (not that the weather will be rainy).
The weather icons change when the unit detects a change in air pressure.
The icons change in order, from "sunny" to "partly sunny" to "cloudy" or the reverse. If the symbols do not change then the weather has not changed, or the change has been slow and gradual.
Weather Tendency Arrows:
These arrows reflect current changes in the air pressure.
![]()
Up arrow: indicates air pressure is increasing, weather expected to improve or remain good.
Down arrow: indicates air pressure is decreasing, weather is expected to become worse or remain poor.
No arrow: No arrow means the pressure is stable.
VIEW CHANNELS

The Forecast Station can receive up to 3 outdoor transmitters. Extra TX29UIT transmitters may be found online or at your retailer. Additional transmitters allow you to monitor remote temperature of up to 3 locations within a 330 Ft wireless range of the Forecast Station.
Press and release the CH button to view a different channel. A shift from one "boxed" number to the next should be observed in the OUTDOOR LCD.
Note: When only one transmitter is connected, you cannot see other channels and the channel indicator will not show.
OUTDOOR TRANSMITTER RECEPTION ICON
- When the signal is successfully received from the outdoor transmitter, the
![]() icon will be solid.
icon will be solid. - The icon will flash when searching for the outdoor transmitter signal.
- If reception is not successful, the icon will not be shown in LCD.
MIN/MAX DATA
View Indoor MIN/MAX Data: Press and release the IN button to view the Minimum, Maximum and Current Indoor Temperatures and humidity records. The Time and Date will flash to show when the Minimum or Maximum Temperature occurred.
Note: The indoor Humidity is not time and date stamped.
Reset Indoor MIN/MAX Data:
- Press and release the IN button to select the individual indoor Max or Min record you wish to reset.
- Hold the SET button for five seconds. The record is now reset to the current day's reading.
View Outdoor MIN/MAX Data: Press and release the OUT button to view the Minimum, Maximum, and Current Outdoor Temperature records. The Time and Date will flash to show when the Minimum or Maximum Temperature occurred.
Reset Outdoor MIN/MAX Data Press and release the OUT button to select the individual outdoor Max or Min record you wish to reset.
- Hold the SET button for five seconds. The record is now reset to the current day's reading.
LOW BATTERY
- When this icon
![]() appears in the indoor (IN) reading section, replace the batteries in the Forecast Station.
appears in the indoor (IN) reading section, replace the batteries in the Forecast Station. - When this icon
![]() appears in the outdoor (OUT) readings section, replace the batteries in the outdoor transmitter.
appears in the outdoor (OUT) readings section, replace the batteries in the outdoor transmitter.
POSITIONING THE OUTDOOR TRANSMITTER
To achieve a true temperature reading, avoid mounting where direct sunlight can reach the remote temperature transmitter or Forecast Station. While the remote temperature transmitter is weather resistant, avoid submersion in water or snow. We recommend that you mount the remote temperature transmitter on an outside North-facing wall. The sending range is 330ft— obstacles such as walls, concrete, and large metal objects can reduce the range. Place both units in their desired location, and wait approximately 15 minutes before permanently mounting to ensure that there is proper reception.
Wall Mount:

- Remove the mounting bracket from the remote temperature transmitter.
- Place the mounting bracket over the desired shaded location (wall or table).
- Through the screw holes of the bracket, mark the mounting surface with a pencil.
- Screw mounting bracket onto the mounting surface. Ensure that the screws are flush with the bracket.
- Insert the remote temperature transmitter into the bracket.
Note: Mounting with adhesive tape is not recommended as a permanent mounting solution. Only use the adhesive tape during set-up process.
POSITION THE WIRELESS FORECAST STATION
Free Standing: The Forecast Station comes with the table stand already attached. Pull the stand out from the back of the Forecast Station and place in an appropriate location.
Wall Hanging

- Close the table-stand.
- Fix a screw (not included) into the desired wall, leaving approximately 3/16 of an inch (5mm) extended from the wall.
- Place the Forecast Station onto the screw using the hanging hole on the backside.
- Gently pull the Forecast Station down to lock the screw into place.
CARE AND MAINTENANCE
- Do Not Mix Old and New Batteries
- Do Not Mix Alkaline, Standard, Lithium or Rechargeable Batteries
- Do not expose the Forecast Station to extreme temperatures, vibration or shock.
- Keep the Forecast Station dry.
- Clean the Forecast Station with a soft damp cloth. Do not use solvents or scouring agents.
- The Forecast Station is not a toy. Keep it out of reach of children.
- The Forecast Station is not to be used for medical purpose or for public information, but is determined for home use only.
- The specifications of this product may change without prior notice.
- Improper use or unauthorized opening of housing will void the warranty. If the unit does not work properly, change the batteries.
SPECIFICATIONS
| Indoor Temperature: | 14.1°F to 139.8°F (-10°C to +59.9°C) |
| Update interval: | every 10 seconds |
| Outdoor Temperature: | -39.8°F to + 139.8°F (-39.9°C to 59.9°C) |
| Transmission range: | Up to 330 feet (open air) |
| Transmission frequency: | 915MHz |
| Update interval: | every 4 seconds |
| Power Requirements: | |
| Wireless Forecast Station: | 2-AA, IEC, LR6 batteries (not included) |
| TX29U-IT Transmitter: | 2-AA, IEC, LR6 batteries (not included) |
| Dimensions: | |
| Wireless Forecast Station: | 5.63" x 3.18" x 1.21" (143.2 x 80.8 x 30.9mm) |
| TX29U-IT Transmitter: | 5.05" x 1.5" x.83" (128.27 x 38.1 x 21.08mm) |


Contact Support: 1-608-782-1610
Product Registration: www.lacrossetechnology.com/support/register

Documents / ResourcesDownload manual
Here you can download full pdf version of manual, it may contain additional safety instructions, warranty information, FCC rules, etc.
Download La Crosse Technology WS-9077U-IT - Wireless Forecast Station Manual
Advertisement
Thank you! Your question has been received!


Need Assistance?
Do you have a question about the WS-9077U-IT that isn't answered in the manual? Leave your question here.