Samsung 8 VP-L600 Owner's Instruction Book
Video camcorder
Hide thumbs
Also See for 8 VP-L600:
- Owner's instruction manual (67 pages) ,
- Owner's instruction book (66 pages) ,
- Owner's instruction book (66 pages)
Table of Contents
Advertisement
Quick Links
All manuals and user guides at all-guides.com
ENGLISH
Video Camcorder
COLOUR LCD
VP-L600/L600B/L610/L610B/
L610D/L630/L650
VP-L600/L600B
Hi
VP-L610/L610B/L610D/
L630/L650
Owner's Instruction Book
Before operating the unit, please read
this instruction book thoroughly, and retain it for
future reference.
This product meets the intent of
Directive 89/336 CEE, 73/23 CEE, 93/68 CEE.
8mm
ELECTRONICS
GB
Advertisement
Table of Contents

Related Manuals for Samsung 8 VP-L600


Summary of Contents for Samsung 8 VP-L600
- Page 1 All manuals and user guides at all-guides.com ENGLISH Video Camcorder COLOUR LCD VP-L600/L600B/L610/L610B/ L610D/L630/L650 VP-L600/L600B VP-L610/L610B/L610D/ L630/L650 Owner’s Instruction Book Before operating the unit, please read this instruction book thoroughly, and retain it for ELECTRONICS future reference. This product meets the intent of Directive 89/336 CEE, 73/23 CEE, 93/68 CEE.
-
Page 2: Table Of Contents
All manuals and user guides at all-guides.com ENGLISH Table of Contents Precautions and Safety Instructions Getting to Know Your Camcorder Features..................................8 Descriptions Front View/Side View/Rear View......................9, 10, 11 OSD (On Screen Display)..........................12 Accessories Supplied with Camcorder ........................14 Remote Control (VP-L610/L610B/L630/L650 only) ....................15 Self Recording with the Remote Control ......................15 Preparing Adjusting the Hand Strap and Shoulder Strap ......................16... - Page 3 All manuals and user guides at all-guides.com ENGLISH Table of Contents (continued) DIS (Digital Image Stabilizer, VP-L630/L650 only) ....................35 MF/AF (Manual Focus/Auto Focus) .........................36 BLC (Back light compensation) ..........................37 Program AE (Automatic Exposure)..........................38 DSE (Digital Special Effects) in CAMERA mode.....................40 Setting and Recording DATE/TIME .........................42 Selecting and Recording a Title..........................44 Fade In and Out...............................46...
-
Page 4: Precautions And Safety Instructions
All manuals and user guides at all-guides.com ENGLISH Precautions and Safety Instructions Precautions regarding rotation of LCD screen Please rotate the LCD screen carefully as illustrated. Over rotation may cause damage to the inside of the hinge that connects the LCD screen to the Camcorder. 1) LCD screen closed. - Page 5 All manuals and user guides at all-guides.com ENGLISH Precautions and Safety Instructions Precautions regarding the electronic viewfinder 1) Do not place the camcorder so that the viewfinder is pointing towards the sun. Direct sunlight can damage the inside of the viewfinder. Be careful when placing the camcorder under sunlight or by a window.
- Page 6 All manuals and user guides at all-guides.com ENGLISH Precautions and Safety Instructions Precautions regarding the battery pack Make sure that the battery pack is charged before shooting outdoors. To preserve battery power, keep your camcorder turned off when you are not operating it. When your camcorder is in CAMERA mode, if it is left in STANDBY for more than 5 minutes without operation, it will automatically turn off to protect against un-necessery battery discharge.
- Page 7 All manuals and user guides at all-guides.com ENGLISH Precautions and Safety Instructions Precautions when Recording or Playback using LCD 1) High precision technology is used to manufacture the LCD display. However, there may be some tiny black specks (red, blue or green in colour) that constantly appear on the LCD display.
-
Page 8: Getting To Know Your Camcorder
All manuals and user guides at all-guides.com ENGLISH Getting to Know Your Camcorder Features Your camcorder has many features available when recording or during playback. Snap Shot (VP-L630/L650 only) The Snap Shot function allows you to take a still picture as well as time limited audio. (see page 48) PIP (VP-L630/L650 only) The PIP(Picture-In-Picture) function shows the whole shot while recording with the Digital Zoom in use. -
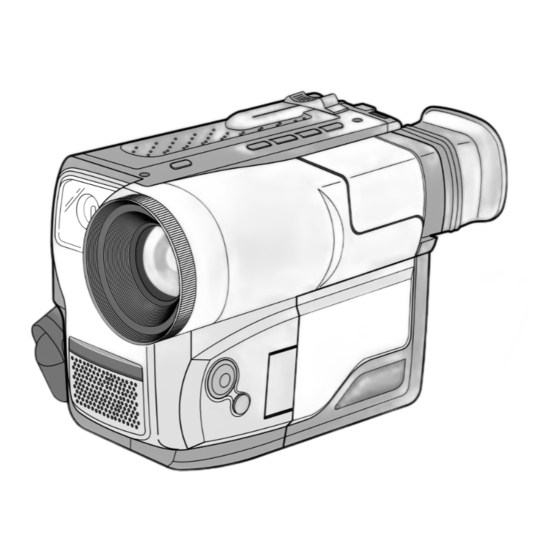
Page 9: Front View/Side View/Rear View
All manuals and user guides at all-guides.com ENGLISH Getting to Know Your Camcorder Front View 3. PLAY/STILL (LIGHT) 4. EDIT (FF) 5. DATE/TIME (STOP) 2. EDIT (REW) 7. EVF 6. TAPE EJECT 13. VIDEO LIGHT 1. LENS 10. LCD 9. Remote Sensor 8. - Page 10 All manuals and user guides at all-guides.com ENGLISH Getting to Know Your Camcorder Side View 24. BLC 14. MENU ON/OFF 23. FADE 15. ENTER (MF) 20. SPEAKER 16. UP/DOWN Dial (VOLUME) 22. LCD Open 17. S-VIDEO out 18. P.AE 19. DSE 21.
- Page 11 All manuals and user guides at all-guides.com ENGLISH Getting to Know Your Camcorder Rear View 25. ZOOM 26. CASSETTE 36. BATTERY EJECT Compartment 27. Hooks for shoulder strap 37. SNAP SHOT/D.ZOOM 28. AUDIO/VIDEO Out 33. External MIC 32. START/STOP (VP-L630/L650) 35.
-
Page 12: Osd (On Screen Display)
All manuals and user guides at all-guides.com ENGLISH Getting to Know Your Camcorder OSD (On Screen Display) You can turn the OSD on/off by setting the Display menu on/off. The TITLE, DATE/TIME, EASY and CUSTOM functions can be operated even after the OSD is turned off. - Page 13 All manuals and user guides at all-guides.com ENGLISH Getting to Know Your Camcorder OSD (On Screen Display) Time (see page 42) Shows the time the recording was made. k. Title (see page 44) Shows the title of the recording. It is superimposed on the scene. Self diagnosis (see page 59) (TAPE, TAPE END) Checks the operation of the Camcorder.
-
Page 14: Accessories Supplied With Camcorder
All manuals and user guides at all-guides.com ENGLISH Getting to Know Your Camcorder Accessories Supplied with Camcorder Make sure that the following basic accessories are supplied with your camcorder. Basic Accessory 1. AC Power Adapter 2. AC cord 3. Battery Pack 1. -
Page 15: Remote Control (Vp-L610/L610B/L630/L650 Only)
All manuals and user guides at all-guides.com ENGLISH Getting to Know Your Camcorder Remote Control (VP-L610/L610B/L630/L650 only) Description of Parts 1. Start/Stop (see page 23) 2. Self Timer 3. Still (see page 54) START/ COUNTER WIDE STOP DISPLAY RESET 4. WIDE (see page 30) SELF ZERO STILL... -
Page 16: Preparing
All manuals and user guides at all-guides.com ENGLISH Preparing 1. Set the power switch to CAMERA mode. CAMERA 2. Press the Self Timer button on the remote until START/ COUNTER WIDE the appropriate setting is displayed on the LCD: STOP DISPLAY RESET SELF... -
Page 17: Lithium Battery Installation
All manuals and user guides at all-guides.com ENGLISH Preparing Shoulder Strap The Shoulder Strap allows you to carry your camcorder with complete safety. 1. Insert each end of the strap into the hooks on the camcorder. 2. Put the end of each strap through the buckle, adjust the length of the strap, then pull it tight in the buckle. -
Page 18: Connecting The Power Source
All manuals and user guides at all-guides.com ENGLISH Preparing Connecting the Power Source There are two ways to connect to a power source. Using the AC Power Adapter : used for indoor recording. Using the Battery Pack: used for mobile/outdoor recording. To use the AC Power Adapter 1. -
Page 19: To Use The Battery Pack
All manuals and user guides at all-guides.com ENGLISH Preparing To use the Battery Pack How long will the battery last for shooting? Depends on how often you are likely to use the zoom feature during recording. Recharging the Battery Pack 1. -
Page 20: Using The Battery Pack
All manuals and user guides at all-guides.com ENGLISH Preparing Using the Battery Pack Table of continuous recording time based on model and battery type. VP-L630 VP-L650 VP-L600/L600B/L610/L610B/L610D Model Battery LCD ON, LCD OFF, LCD ON, LCD OFF, LCD ON, LCD OFF, Type EVF OFF EVF ON... -
Page 21: Display Of Battery Level
All manuals and user guides at all-guides.com ENGLISH Preparing Display of Battery Level The battery level display indicates the amount of power remaining in the battery pack. 1. Fully charged 2. 10~40% consumed 3. 40~60% consumed 4. 60~80% consumed (prepare a charged one) 5. -
Page 22: Inserting And Ejecting A Cassette
All manuals and user guides at all-guides.com ENGLISH Preparing Inserting and Ejecting a Cassette There are several cassette types, depending on: Colour system used (VP-L600/L600B/L610/L610B/L610D/L630/L650: PAL). Recording/playback time. Hi8/8mm (VP-L610/L610B/L610D/L630/L650 is Hi8). Inserting and Ejecting a Cassette Check to see if the battery pack is in place or AC adapter is connected. 1. -
Page 23: Basic Shooting
All manuals and user guides at all-guides.com ENGLISH Basic Shooting Making your First Recording Please make these preparations before shooting. Have you connected a power source? (Battery Pack or AC Power Adapter) BATTERY Did you set power switch to CAMERA position? CAMERA Have you inserted a cassette? (see page 22) Open the LCD monitor and make sure that STANDBY is displayed in the OSD. - Page 24 All manuals and user guides at all-guides.com ENGLISH Basic Shooting b. To stop shooting, press the red START/STOP STBY button again. Y:YY:YY When recording stops, STANDBY will be displayed on the LCD. When a cassette is loaded and the camcorder is left in STANDBY mode for over 5 minutes without being used, it will turn off automatically.
-
Page 25: Tips For Stable Recording
All manuals and user guides at all-guides.com ENGLISH Basic Shooting Tips for Stable recording While recording, it is very important to hold the camcorder correctly. When recording, clip the LENS cap on the hand strap to avoid the risk of the lens cap swinging into shot. (refer to figure) Recording with the LCD display 1. -
Page 26: Adjusting The Lcd
All manuals and user guides at all-guides.com ENGLISH Basic Shooting Adjusting the LCD You can view the image you are recording or watch a playback of recordings made by using your camcorder’s 2.5 inch colour Liquid Crystal Display (LCD) screen. Under curtain conditions you may need to adjust the settings for the LCD display (outdoors for example). -
Page 27: Adjusting Focus Of The Viewfinder
All manuals and user guides at all-guides.com ENGLISH Basic Shooting 9. Turn the UP/DOWN dial to adjust the LCD colour setting. 10. Press the ENTER. For further adjustment, repeat steps 7, 8, 9. 11. Press the MENU ON/OFF button to exit the menus. Notes: If you don't press a button within 30 seconds, the setting will disappear. -
Page 28: Playing Back The Tape On The Lcd
All manuals and user guides at all-guides.com ENGLISH Basic Shooting Playing back the tape on the LCD You can watch a recording on the LCD display. Make sure that the battery pack is in place. 1. Hold down the tab of the power switch and push the switch to select PLAYER mode. -
Page 29: Adjusting The Lcd During Play
All manuals and user guides at all-guides.com ENGLISH Basic Shooting Adjusting the LCD during PLAY The procedure for adjusting the LCD display in PLAYER mode is the same as that for adjusting it in CAMERA mode, except that the power switch must be set to PLAYER instead of CAMERA. Please refer to page 26. -
Page 30: Advanced Shooting
All manuals and user guides at all-guides.com ENGLISH Advanced Shooting Zooming In and Out Zoom is only available in CAMERA mode. Zooming is a technique that lets you magnify the size of the subject in the picture. For a more professional looking recording, don't use the zoom function too often. There are two zoom speeds to suit different needs : Gradual zoom (9~12 seconds from TELE/WIDE to WIDE/TELE) High-Speed zoom (3~6 seconds from TELE/WIDE to WIDE/TELE) -
Page 31: Digital Zoom
All manuals and user guides at all-guides.com ENGLISH Advanced Shooting Digital Zoom Digital Zoom is only available in CAMERA mode. Magnification above 22x is achieved using digital technology. The picture quality deteriorates as you go towards the “T” side. It is recommend that you use the DIS (VP-L630/L650) feature with the DIGITAL ZOOM for picture stability. - Page 32 All manuals and user guides at all-guides.com ENGLISH Advanced Shooting Switching the DIGITAL ZOOM ON/OFF (VP-L630/L650 only) The DIGITAL ZOOM feature is explained on page 31. 1. Set the power switch to CAMERA mode. (see page 18) 2. Press the MENU ON/OFF button. The MENU list will be displayed.
-
Page 33: Easy Mode (For Beginners)
All manuals and user guides at all-guides.com ENGLISH Advanced Shooting EASY Mode (for Beginners) Even a beginner can easily make a recording using the EASY mode. The EASY mode only operates in CAMERA mode. 1. Set the power switch to CAMERA mode (see page 18). 2. -
Page 34: Custom-Creating Your Own Customized Recording Settings
All manuals and user guides at all-guides.com ENGLISH Advanced Shooting CUSTOM-Creating your own customized recording settings You can customize the settings and save them for future use. The CUSTOM function only operates in CAMERA mode. 1. Set the power switch to CAMERA mode. (see page 18) LCD ADJUST CUSTOM CLOCK... -
Page 35: Dis (Digital Image Stabilizer,Vp-L630/L650 Only)
All manuals and user guides at all-guides.com ENGLISH Advanced Shooting DIS (Digital Image Stabilizer,VP-L630/L650 only) The DIS function only works in CAMERA mode. DIS (Digital Image Stabilizer) is a handshake compensation function that compensates for any shaking or moving of the hand holding the camcorder (within reasonable limits). It provides more stable pictures when: Recording with the Zoom. -
Page 36: Mf/Af (Manual Focus/Auto Focus)
All manuals and user guides at all-guides.com ENGLISH Advanced Shooting MF/AF (Manual Focus/Auto Focus) The MF/AF function works only in CAMERA mode. In most situations, it is better to use the Automatic Focus feature, as it enables you to concentrate on the creative side of your shooting. -
Page 37: Blc (Back Light Compensation)
All manuals and user guides at all-guides.com ENGLISH Advanced Shooting 4. Turn the UP/DOWN dial up or down until the object is focused. 5. If you can't get a sharp picture, zoom out until you can. 6. To return to AF(Auto Focus), press the MF button again. Note: The MF function will not operate in EASY, CUSTOM or MENU mode. -
Page 38: Program Ae (Automatic Exposure)
All manuals and user guides at all-guides.com ENGLISH Advanced Shooting PROGRAM AE (Automatic Exposure) The PROGRAM AE function only works in CAMERA mode. The PROGRAM AE modes allow you to adjust shutter speeds and aperture to suit different recording conditions. There are 6 automatic exposure modes. - Page 39 All manuals and user guides at all-guides.com ENGLISH Advanced Shooting Setting the PROGRAM AE(Automatic Exposure) mode 1. Set the power switch to CAMERA mode. (see page 18) STBY 2. Press the P.AE button, the ( ) symbol will be displayed. 0:00:00 CUSTOM 31.JAN.2001...
-
Page 40: Dse (Digital Special Effects) In Camera Mode
All manuals and user guides at all-guides.com ENGLISH Advanced Shooting DSE (Digital Special Effects) in CAMERA mode The digital effects enable you to give a creative look to your recording by adding various special effects. Select the appropriate digital effect for the type of picture that you wish to shoot and the effect that you wish to give. - Page 41 All manuals and user guides at all-guides.com ENGLISH Advanced Shooting Selecting and recording DSE effects 1. Set the power switch to CAMERA mode. (see page 18) STBY X:XX:XX GHOST 2. Press the DSE button, GHOST or SEPIA will be displayed. 3.
-
Page 42: Setting And Recording Date/Time
All manuals and user guides at all-guides.com ENGLISH Advanced Shooting Setting and Recording DATE/TIME Setting and recording the date/time is only available in CAMERA mode. You can record the date/time on your recording, so you know when it was made. The date and time are recorded whenever they are displayed on the viewfinder or LCD. - Page 43 All manuals and user guides at all-guides.com ENGLISH Advanced Shooting 7. Press ENTER. CLOCK SET The month setting will blink. 0:00 29. AUG. 2005 8. Turn the UP/DOWN dial to set the desired month. CLOCK SET 0:00 29. SEP. 2005 9.
-
Page 44: Selecting And Recording A Title
All manuals and user guides at all-guides.com ENGLISH Advanced Shooting Selecting and Recording a Title Selecting and recording a TITLE is possible in the CAMERA mode only. The TITLE feature allows you to select a preset title stored in the camcorder’s memory. You can also select the language of the titles. - Page 45 All manuals and user guides at all-guides.com ENGLISH Advanced Shooting 6. Turn the UP/DOWN dial to select the appropriate language. ENGLISH You may select languages from ENGLISH/FRENCH/ FRENCH GERMAN GERMAN/ITALIAN/SPANISH/RUSSIAN. ITALIAN SPANISH RUSSIAN 7. Press ENTER. Then, the title list in the language you chose will appear. 8.
-
Page 46: Fade In And Out
All manuals and user guides at all-guides.com ENGLISH Advanced Shooting Fade In and Out The FADE function only works in CAMERA mode. You can give your films a professional look by using special effects such as fade in at the beginning of a sequence or fade out at the end of a sequence. -
Page 47: Pip
All manuals and user guides at all-guides.com ENGLISH Advanced Shooting PIP(Picture-In-Picture, VP-L630/L650 only) The PIP(Picture-In-Picture) feature works in combination with the DIGITAL ZOOM function by using a small, super imposed screen to show an image that is wider than the image being shot. This should help you to get a clear idea of what you are recording. -
Page 48: Snap Shot
All manuals and user guides at all-guides.com ENGLISH Advanced Shooting Snap Shot (VP-L630/L650 only) With the SNAP SHOT feature, your camcorder can function like a normal film camera, allowing you to take single still pictures. - The SNAP SHOT function only operates in CAMERA mode. 1. -
Page 49: White Balance
All manuals and user guides at all-guides.com ENGLISH Advanced Shooting White Balance WHITE BALANCE (WHT.BAL.) is a recording function that preserves the unique colour of the object in any shooting condition. You may select the appropriate WHITE BALANCE mode to obtain good quality colour of the image. - AUTO: This mode is generally used to control the WHITE BALANCE automatically. -
Page 50: Demonstration
DEMO ....OFF 4. Press ENTER to select ON. DEMO DIS OFF Demonstration will start. SAMSUNG 5. Set the POWER switch to OFF to end the Demonstration. Note: The MENU ON/OFF function will not operate in EASY, REC or CUSTOM mode. -
Page 51: Lighting Techniques
All manuals and user guides at all-guides.com ENGLISH Advanced Shooting Lighting Techniques When you use your camcorder, there are normaly only two main recording environments. You will be shooting outdoors (Normal recording or through an ND(Neutral Density) filter). You will be shooting indoors (Video light recommended or required). The single greatest influence on picture quality is the level of brightness, measured in lux. -
Page 52: Playing Back The Tape
All manuals and user guides at all-guides.com ENGLISH Playing back the Tape To view a tape that you have recorded. Playback function works in PLAYER mode only. There are two ways to see a tape; To view on the LCD: recommended for outdoor use. To view on a TV monitor: recommended for indoor use. - Page 53 All manuals and user guides at all-guides.com ENGLISH Playing back the Tape Notes: VP-L600/L600B/L610/L610B/L610D/L630/L650 feature a monaural audio system. If your TV or VCR are stereo, connect the audio cable to the input “L” of TV or VCR. You can use an S-VIDEO cable to obtain better quality pictures if you have the S-VIDEO connector on your TV.
-
Page 54: Various Functions In Player Mode
All manuals and user guides at all-guides.com ENGLISH Playing back the Tape Various Functions in PLAYER mode To view a STILL picture (Playback pause) Press (PLAY/STILL) button during playback. PLAY/STILL To resume playback, press (PLAY/STILL) button again. Note: Your camcorder will automatically stop if it is left for more than 5 minutes in STILL mode without operation in order to prevent tape and head-drum wear. -
Page 55: Adjusting The Lcd
All manuals and user guides at all-guides.com ENGLISH Playing back the Tape Adjusting the LCD The procedure for adjusting the LCD display in PLAYER mode is the same as the procedure for adjusting the LCD display in CAMERA mode, except that the power switch must be set to PLAYER instead of CAMERA. -
Page 56: Dse In Player Mode
All manuals and user guides at all-guides.com ENGLISH Playing back the Tape DSE in PLAYER mode The procedure for using DSE in PLAYER mode is the same as the procedure for using DSE in CAMERA mode, except that the power switch must be set to PLAYER instead of CAMERA. Please refer to pages 40 and 41. -
Page 57: Cleaning The Video Heads
All manuals and user guides at all-guides.com ENGLISH Maintenance Cleaning the Video Heads To ensure normal recording and clear pictures, clean the video heads. When the playback pictures are noisy or hardly visible, the video heads may be dirty. Normal Picture b, c. -
Page 58: Using Your Camcorder Abroad
All manuals and user guides at all-guides.com ENGLISH Using Your Camcorder Abroad Using Your Camcorder Abroad Each country or area has its own electric and TV colour system. Before using your camcorder abroad, check the following: Power sources You can use your camcorder in any country or area that uses 100V to 240V, 50/60 Hz. Were necessery, use a commercially available AC plug adapter, depending on the power used. -
Page 59: Troubleshooting Check
All manuals and user guides at all-guides.com ENGLISH Troubleshooting Check Troubleshooting Check Before contacting a service centre, perform the following simple checks. They might save you the time and expense of an unnecessary call. Self Diagnosis Display Display Blinking Inform that... Action slow the battery pack is almost... -
Page 60: Checking
All manuals and user guides at all-guides.com ENGLISH Troubleshooting Check Checking If you run into any problem using the camcorder, use the following table to try to resolve the problem. If these instructions do not allow you to solve the problem, take a note of: The model and serial number marked on the bottom of the camcorder. - Page 61 All manuals and user guides at all-guides.com ENGLISH Troubleshooting Check Symptom Explanation/Solution Avertical stripe appears when The contrast between the subject and the background is too great for the camcorder to operate normally. Make the back- you shoot a bright subject against a dark background.
-
Page 62: Moisture Condensation
All manuals and user guides at all-guides.com ENGLISH Troubleshooting Check Moisture Condensation If the camcorder is brought directly from a cold place to a warm place, moisture may form inside the camcorder, on the surface of the tape, or on the lens. In this condition, the tape may stick to the head drum and be damaged or the unit may not operate correctly. -
Page 63: Specifications
All manuals and user guides at all-guides.com ENGLISH Specifications The design and technical specifications may be changed without notice. System VP-L600/L600B/L610/L610B/L610D/L630/L650 Recording system Video: 2 rotary heads Helical scanning FM Audio: FM monaural system Video signal PAL colour, CCIR standard Usable cassette VP-L600/L600B : 8 mm, VP-L610/L610B/L610D/L630/L650 : Hi8 or 8 mm... -
Page 64: Index
All manuals and user guides at all-guides.com ENGLISH Index - A - - E - ABROAD ............58 EASY ..............33 AC POWER ADAPTER ........18 EDIT ..............24 ADJUST (LCD) ..........26 EJECT...............22 AF ..............36 ENTER button...........26 AUDIO...............52 EXTERNAL MIC ..........63 AUTO FOCUSING ...........36 - F - AUTO MODE ............38 AUTO POWER OFF .........24... - Page 65 All manuals and user guides at all-guides.com ENGLISH Index - O - START/STOP ............23 STILL ..............54 OPERATION MODE .........13 STOP ...............53 OSD ..............12 STROBE ............40 SYSTEM ............63 - P - S-VIDEO ............53 PAL..............58 PIP ..............47 - T - PLAY ..............54 TAPE COUNTER ..........13 PLAYER ............54 TAPE EJECT ............22...
-
Page 66: Power Sources(United Kingdom Only)
All manuals and user guides at all-guides.com ENGLISH Power Sources (United Kingdom Only) The main lead on the power adapter is supplied with a molded plug incorporating a fuse. The value of the fuse is indicated on the pin face of the plug, and if it requires, replacing a fuse approved to BS1362 of the same rating must be used. - Page 67 All manuals and user guides at all-guides.com THIS CAMCORDER IS MANUFACTURED BY: ELECTRONICS *Samsung Electronics’ Internet Home Page United Kingdom http://www.samsungelectronics.co.uk France http://www.samsung.fr Australia http://www.samsung.com.au Germany http://www.samsung.de Sweden http://www.samsung.se Poland http://www.samsung.com.pl Spain http://www.samsung.es AD68-00334F Italia http://www.samsung.it...