
Related Manuals for RCA T20062BC


Summary of Contents for RCA T20062BC
- Page 1 15351790 P1 COVER 3/8/99 12:26 PM Page 1 T 2 0 0 6 2 B C U S E R ’ S G U I D E T V / V C R C O M B I N AT I O N...
-
Page 2: Warning
Keep your sales receipt to obtain warranty parts and service and for proof of purchase. Attach it here and record the serial and model numbers in case you need them. The numbers are located on the back of the TV/VCR combination. -
Page 3: Table Of Contents
Introduction Table of Contents Important Information Warning ______________________________ i Cautions ______________________________ i Note to Cable TV Installer _______________ i Product Registration ____________________ i Setting Up the TV/VCR Startup Check Accessories With Insert Batteries in Remote ___________ 2 Connect Antenna or Cable-TV... -
Page 4: Setting Up The Tv/Vcr
Setting Up the TV/VCR Startup 1. Check accessories with TV/VCR combination. Contact your dealer if any items are missing. 2 “AAA” Batteries Remote 2. Insert batteries in remote. -
Page 5: Connect Antenna Or Cable-Tv System
6. Turn on the TV/VCR. Press POWER on the TV/VCR or TV or VCR on the remote. The first time you turn on the TV/VCR after taking it out of the carton, the TV/VCR will display the AUTOMATIC CLOCK SET menu shown below. -
Page 6: Set The Clock And Auto Channel Search Automatically
Set the clock manually. If the AUTOMATIC CLOCK SET was unsuccessful or you want to manually set the clock: A. Press MENU on the remote to display the TV/VCR MAIN MENU. B. Press 3 to display the TIME menu. C. Press 1 to display the SET CLOCK screen. -
Page 7: Add Or Remove Channels From Tv/Vcr's Memory
This feature lets you select English, Spanish, or French as the language for your on-screen displays. A. Press MENU on remote to see the TV/VCR MAIN MENU. B. Press 6 to display the LANGUAGE/IDIOMA/LANGUE menu. The bullet (•) indicates the language selected. -
Page 8: Using The Remote Control
Used for slow-motion playback. Button When pressed, illuminates the CHAN , CHAN , VOL <, VOL >, DISPLAY, SLEEP, MUTE, and PREV CH buttons. The light turns off about 5 seconds after the last button is pressed. MENU Displays the TV/VCR MAIN MENU. -
Page 9: Buttons
When there is no tape in the VCR, initiates the Commercial Skip function. (See “Commercial Skip” description on page 9.) SLEEP Sets TV/VCR to automatically turn off in 30, 60, 90, or 120 minutes. SPEED (Tape Speed) Selects a recording speed (SP or SLP). -
Page 10: Using The Tv/Vcr Features
4. Press 1, 2, or 3 to SELECT PICTURE MODE (Normal, Theater, or Game). To Adjust the Video The TV/VCR can memorize adjustments for each of the three modes — Normal, Theater, or Game mode. 1. Press MENU to display the TV/VCR MAIN MENU. -
Page 11: Adjust The Video
4 minutes. After 4 minutes, each press increases the timer by 1 minute until 59 minutes is reached. 2. To cancel Commercial Skip, press CLEAR on the remote. The TV will not change channels. or , and then VOL < or > to select each letter of... -
Page 12: Closed Captions
Using the TV/VCR Features Closed Captions Closed captioning displays the sound of a program as words on the TV screen. It is useful for the deaf, hearing impaired, or anyone who wants to watch a program without sound. If you have turned closed captioning on and it does not appear on the screen, it is not available on the channel you are watching. -
Page 13: Wake-Up Timer
Using the TV/VCR Features Wake-Up Timer The timer turns the TV/VCR on to the channel you select in the menu at the desired time. You can set it to wake you up in the morning or remind you that a favorite program is about to start. The TV/VCR will turn on for an hour and then automatically turn off. -
Page 14: Playing A Tape
REW button is pressed, the TV/VCR will search backwards through the tape. If the REW button is pressed while the TV/VCR is not playing a tape, the tape will rewind back to its start. • After the tape reaches its end, it will automatically rewind back to the beginning. -
Page 15: Using The Playback Features
1. Press PAUSE on the remote during playback to pause the action. The TV/VCR will automatically switch from pause to stop after a few minutes to prevent tape wear. 2. Press PAUSE or PLAY to return to playback. -
Page 16: Automatic Tracking
The TV/VCR has automatic tracking which adjusts the picture when playing a tape that was recorded on another VCR. Automatic tracking is turned on whenever a tape is inserted or the TV/VCR’s power is turned on. Manual Tracking Occasionally, you may need to manually adjust tracking on a tape recorded on a different VCR or camcorder. -
Page 17: Auto Play Feature
(Most pre-recorded tapes have the safety tab removed.) Auto Repeat Feature This feature tells the TV/VCR to play a tape over and over. When Auto repeat ON is selected, the TV/VCR will play the tape to the end, automat- ically rewind the tape, and play the tape again. -
Page 18: Index Search
The TV/VCR automatically records index marks on the tape each time you begin recording. During playback you can locate the program you want to play by the number of index marks. Your TV/VCR has two index playback features. You can select a specific index number or search by scan and play. -
Page 19: Zero Search
FF. Blank Search The TV/VCR will search for blank portions of the tape that are more than six seconds in length. 1. Insert the pre-recorded tape and press STOP. -
Page 20: Recording A Program
This feature allows you to prevent recording short passages of unwanted material. • Press PAUSE during recording to stop and start recording. The TV/VCR will automatically switch from pause to stop after a few minutes to prevent tape wear. Recording Time 2Hr 40Min Tape Speed Indicator... -
Page 21: Types Of Recordings
Recording a Program Types of Recordings Your TV/VCR provides different types of recording. These types are explained in the following sections: Basic Recording – Operating Instructions Express Recording Recording While You're Away Timer Recording Copying and Editing Tapes Basic Recording –... -
Page 22: Express Recording
E x p r ess Recor d i n g Express recording lets you record up to four hours or to the end of the tape without programming the timer. You can begin recording immediately. The TV/VCR will stop automatically at the end of the recording. -
Page 23: Recording While You're Away Timer Recording
Recording a Program Recording While You’re Away (Timer Recording) Timer recording lets you program the TV/VCR to record up to eight different programs within a one year period. This is useful if you plan on being away from home for a long period of time. -
Page 24: Checking Or Clearing Timer Recordings
Press DISPLAY to review the next program in sequence. Press CLEAR to erase a program. Stopping A Timer Recording Press STOP/EJECT on the TV/VCR or STOP on the remote. A timer program in progress will be stopped. Only today’s recording of a daily, weekdays, or weekly program is canceled. -
Page 25: Copying And Editing Tapes
FF, REW, and PLAY. Press PAUSE on the playback VCR or camcorder. Press PAUSE at the same time on both the VCR or camcorder and the TV/VCR’s remote to resume copying. Press STOP on both the VCR or camcorder and the TV/VCR’s remote when you are finished. -
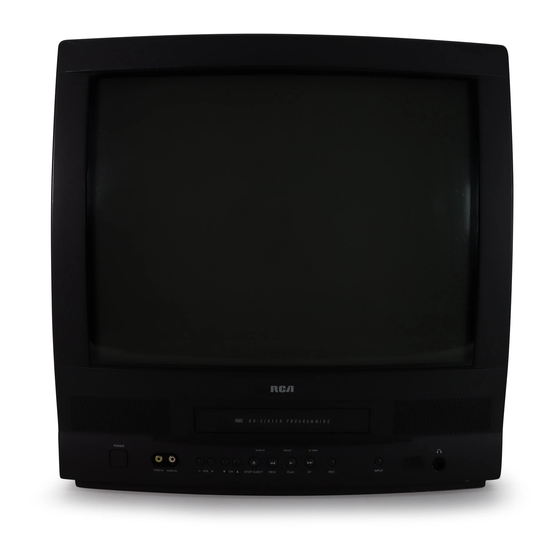
Page 26: Location Of Controls
Location of Controls Location of Controls — Front Panel VIDEO and AUDIO IN Jacks CH (Channel) Selects next higher or lower channel in the TV/VCR’s channel memory. Used for tracking when a tape is playing. FF (Fast Forward) Fast forwards the tape when the TV/VCR is stopped. -
Page 27: Back Panel
VHF/UHF (Antenna) Connector Receives the signal from an antenna or cable system. Choosing a Hookup Answer the questions to choose the hookup for your TV/VCR. 1. How do you receive your TV signals? Choose one answer from below. A. Antenna – Turn to page 26. -
Page 28: Connect Antenna Or Cable System Without A Cable Box
Without a Cable Box 1. Connect as shown. This connection may require additional accessories not provided. 2. Plug in TV/VCR’s power cord. 3. Turn to page 2 for “Setting Up the TV/VCR.” Match Your Type of Antenna or Cable Antenna... -
Page 29: Unscramble All Channels
A. Cable Box Required to Unscramble All Channels 1. Connect as shown. This connection may require additional accessories not provided. 2. Plug in power cords of TV/VCR and cable box. 3. Turn to page 2 for “Setting Up the TV/VCR.” B. Cable Box Required... -
Page 30: Connect Vcr Or Camcorder For Copying Tapes
Tapes.” Press 00 on the remote or INPUT on the TV/VCR to select the line (audio/video) input on the TV/VCR to receive the signal from the VCR. If your VCR has stereo AUDIO OUT jacks, connect the audio cable to the jack labeled MONO. -
Page 31: References
While cleaning, do not spray liquid directly on the screen, or allow liquid to run down the screen and inside the TV/VCR. Also, avoid placing drinks or vases with water on top of the TV/VCR. This could increase the risk of fire or shock hazard or damage to the TV/VCR. -
Page 32: Trouble Checks
References Trouble Checks Sometimes problems can be easily solved by checking a few basic things. Check below before you call for help or take your TV/VCR to an Authorized VCR Servicenter. Trouble o power TV/VCR does not respond to remote... -
Page 33: Trouble Checks
• Time zone or daylight savings time information incorrect. (See page 4.) • TV/VCR is removing tape from heads. This is normal. The head cylinder inside the TV/VCR will continue to rotate for a few minutes after you put the VCR in the stop mode. -
Page 34: Limited Warranty
Pay any Authorized RCA VCR Servicenter the labor charges to repair your TV/VCR. • Pay any Authorized RCA VCR Servicenter for the new or, at our option, refurbished replacement parts and picture required to repair your TV/VCR. How you get service: •... -
Page 35: Index
BLANK SEARCH Screen ...17 Brite (Brightness) Function ...9 Buttons, Remote Control ...6-7 Cable System (No Cable Box), Connecting.27 Cable System with Cable Box, Connecting.29 Camcorder, Connecting to TV/VCR ...28 Captions, Closed...10 Cautions...i CC DISPLAY Menu ...10 CC MODE Menu...10 CH and CHAN Buttons...5,6,9,11,24 Channel Memory, Programming ...5... - Page 36 If your TV/VCR needs service, please contact your dealer or the nearest servicenter from the yellow pages. Please do not send any products to the Indianapolis address listed in this manual or on the carton. This will only add delays in service for your product.