Table of Contents
Advertisement
Quick Links
Advertisement
Table of Contents

Related Manuals for Singer HD6360


Summary of Contents for Singer HD6360
- Page 1 Instruction Manual HD6360 Manual de Instrucciones Manuel d'Instruction...
- Page 3 IMPORTANT SAFETY INSTRUCTIONS This household sewing machine is designed to comply with IEC/EN 60335-2-28 and UL1594. IMPORTANT SAFETY INSTRUCTIONS When using an electrical appliance, basic safety precautions should always be followed, including the following: Read all instructions before using this household sewing machine. Keep the instructions in a suitable place close to the machine.
- Page 4 nearest authorized dealer or service center for examination, repair, electrical or mechanical adjustment. - Never operate the sewing machine with any air openings blocked. Keep ventilation openings of the sewing machine and foot control free from the accumulation of lint, dust, and loose cloth. - Keep fingers away from all moving parts.
- Page 5 SAVE THESE INSTRUCTIONS For Europe only This appliance can be used by children aged from 8 years and above and persons with reduced physical, sensory or mental capabilities or lack of experience and knowledge if they have been given supervision or instruction concerning use of the appliance in a safe way and understand the hazards involved.
- Page 6 SERVICING OF DOUBLE INSULATED PRODUCTS In a double-insulated product, two systems of insulation are provided instead of grounding. No ground means is provided on a double-insulated product, nor should a means for grounding be added to the product. Servicing of a double-insulated product requires extreme care and knowledge of the system and should be done only by qualified service personnel.
- Page 7 INSTRUCCIONES DE SEGURIDAD IMPORTANTES Esta máquina de coser doméstica ha sido diseñada de conformidad con las normas IEC/EN 60335-2-28 y UL1594. INSTRUCCIONES DE SEGURIDAD IMPORTANTES Cuando utilice un aparato eléctrico, debe respetar siempre las precauciones de seguridad básicas, incluyendo las siguientes: Lea todas las instrucciones antes de utilizar esta máquina de coser doméstica.
- Page 8 - No utilice nunca la máquina de coser si el cable o el enchufe están dañados, si no funciona adecuadamente, si se ha caído o se ha dañado, o si ha caído al agua. Envíe la máquina de coser al distribuidor autorizado o centro de servicio más cercano para su examen, reparación y ajuste eléctrico o mecánico.
- Page 9 - Si la bombilla LED está dañada o rota, debe ser reemplazada por el fabricante o su agente de servicio o una persona igualmente cualificada, para evitar riesgos. - Si el cable de alimentación conectado con el pedal está dañado, debe ser reemplazado por el fabricante o su agente de servicio o una persona igualmente cualificada, para evitar riesgos.
- Page 10 FUERA DE EUROPA : Esta máquina de coser no ha sido diseñada para ser utilizada por personas (incluyendo niños) con alguna discapacidad física, sensorial o mental o sin la experiencia y los conocimientos necesarios, salvo que hayan sido supervisados o recibido instrucciones sobre el uso de la máquina de coser por parte de una persona responsable de su seguridad.
- Page 11 INSTRUCTIONS IMPORTANTES DE SÉCURITÉ Cette machine à coudre à usage domestique est conçue pour répondre aux normes IEC/EN 60335-2-28 et UL1594. CONSIGNES DE SÉCURITÉ IMPORTANTES Lors de l'utilisation d'un appareil électrique, les précautions de sécurité essentielles doivent toujours être respectées, y compris les suivantes : Lisez attentivement toutes les instructions avant d'utiliser cette machine à...
- Page 12 N'utilisez que les accessoires recommandés par le fabricant, conformément aux indications fournies dans ce manuel. - Ne faites jamais fonctionner cette machine à coudre si la prise ou le cordon sont endommagés, si elle ne fonctionne pas correctement ou si elle est tombée par terre ou a été endommagée ou plongée dans l'eau.
- Page 13 retirez la prise du secteur. - Ne débranchez pas la machine en tirant sur le cordon. Pour débrancher, saisissez la prise et non le cordon. - La pédale est utilisée pour faire fonctionner la machine. Évitez de placer d'autres objets sur la pédale.
- Page 14 (China) / 4C-316Q 110-125V fabriquée par Wakaho Electric Ind. Co., Ltd. (Vietnam) POUR LES PAYS HORS EUROPE : Cette machine à coudre n'est pas destinée à être utilisée par des personnes (y compris des enfants) ayant des capacités physiques, sensorielles ou mentales réduites ou un manque d'expérience et de connaissances, sauf si une personne responsable de leur sécurité...
- Page 15 Congratulations Felicitaciones Félicitations As the owner of a new Singer sewing Como propietario/ a de una nueva Vous voici à présent propriétaire d'une machine, you are about to begin an máquina de coser Singer, usted acaba machine à coudre Singer et en cette de iniciar una gran oportunidad para qualité, vous allez...
- Page 16 List of contents Machine Basics Principle Parts of the Machine .................................2/4 Connecting Machine to Power Source..............................6 Two Step Presser Foot Lifter/ Adjusting Presser Foot Pressure ......................8 Accessories.......................................10 Threading the Machine Winding the Bobbin...................................12 Inserting the Bobbin ..................................14 Threading the Upper Thread................................16 Automatic Needle Threader ................................18 Raising the Bobbin Thread ................................20 Thread Tension ....................................22...
-
Page 17: Table Of Contents
Indice Partes de la máquina Partes de la máquina ..................................3/5 Conexión de la máquina a la fuente de alimentación eléctrica ......................7 Elevador del prensatelas de dos tiempos/ Ajuste de la presión del prensatelas ................9 Accesorios ......................................11 Enhebrado de la máquina Devanado de la bobina ..................................13 Colocación de la bobina... - Page 18 Table des matières L'essentiel de la machine Les composantes principales de la machine à coudre ........................3/5 Branchement de la machine à une source d'alimentation ........................7 Levier du pied presseur à deux niveaux/ Réglage de la pression du pied-presseur ................9 Accessoires.......................................11 Enfilage de la machine Remplissage de la canette................................13 Insertion de la canette..................................15...
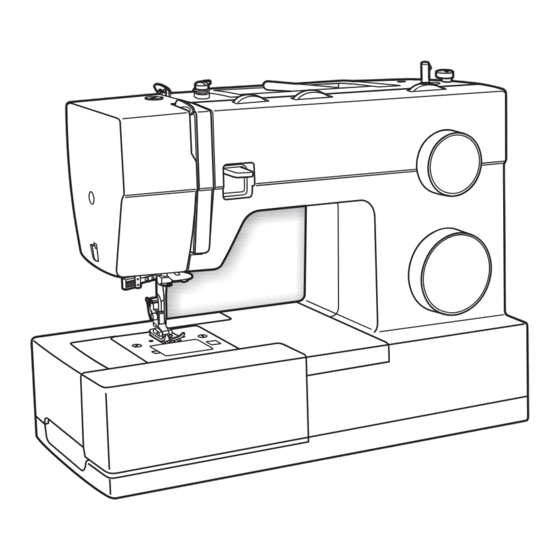
- Page 19 Principal Parts of the Machine 1. Thread tension dial 2. Presser foot pressure adjustment 3. Thread take-up lever 4. Reverse sewing lever 5. Thread cutter 6. Presser foot 7. Needle plate cover 8. Removable extension table/ accessory storage 9. Three needle position dial 10.
-
Page 20: Partes De La Máquina
Partes de la máquina Les composantes principales de la machine à coudre 1. Disco de tensión 2. Ajuste del prensatelas de presión 1. Réglage de la tension 3. Tirahilos 2. Commande de réglage de pression du pied-presseur Palanca de retroceso 3. - Page 21 Principal Parts of the Machine 16. Horizontal spool pin 17. Bobbin winding spindle 18. Hole for second spool pin 19. Handwheel 20. Buttonhole stitch balance adjustment slot 21. Power and light switch 22. Main plug socket 23. Bobbin thread guide 24.
- Page 22 Partes de la máquina Les composantes principales de la machine à coudre 16. Portacarrete 17. Devanador 16. Porte bobine horizontal 18. Orificio para el portacarrete auxiliar 17. Axe du bobineur 19. Volante 18. Trou pour insérer un deuxième axe de bobine Ranura de ajuste del balance de ojales 19.
- Page 23 Connecting Machine to Power Source Connect the machine to a power source as illustrated. (1) This appliance is equipped with a polarized plug which must be used with the appropriate polarized outlet. (2) Attention: Unplug power cord when machine is not in use. Foot control The foot control pedal regulates the sewing speed.
-
Page 24: Conexión De La Máquina A La Fuente De Alimentación Eléctrica
Conexión de la máquina a la fuente de Branchement de la machine à une source alimentación eléctrica d'alimentation Conecte la máquina a una fuente de alimentación según se ilustra. Brancher la machine comme indiqué ci-contre. (1) La fiche de la machine est dotée de broches normalisées et doit être utilisée (1) Esta máquina está... - Page 25 Two Step Presser Foot Lifter When sewing several layers or thick fabrics, the presser foot can be raised to a higher position for easy positioning of the work. (A) The presser foot will remain raised as long as you hold up the presser foot lifter.
-
Page 26: Elevador Del Prensatelas De Dos Tiempos/ Ajuste De La Presión Del Prensatelas
Elevador del prensatelas de dos tiempos Levier du pied presseur à deux niveaux Cuando se cosen varias capas de tela gruesa, el prensatelas Lorsque vous cousez plusieurs épaisseurs de tissus épais, le puede elevarse a una posición alta para facilitar la colocación pied presseur peut être soulevé... - Page 27 Accessories Standard accessories (1) 1 Standard accessories a. All purpose foot b. Zipper foot c. Buttonhole foot d. Button sewing foot e. Non-stick foot 006918008 006905008 006Q6A0150 006914008 f. Even feed / walking foot g. Clearance plate h. Needles (#16 x 5) i.
-
Page 28: Accesorios
Accesorios opcionales (2) (Ces 10 accessoires ne sont pas livrés avec votre machine (Estos 10 accesorios no los incluye la máquina, sin embargo mais sont disponibles chez votre détaillant SINGER) los puede adquirir con su distribuidor autorizado.) r. Prensatelas para aplicaciones r. - Page 29 Winding the Bobbin - Place thread and corresponding spool holder on to spool pin. (1/2) - Snap thread into thread guide. (3) - Wind thread clockwise around bobbin winder tension discs. (4) - Thread bobbin as illustrated and place on spindle. (5) - Push bobbin spindle to right.
-
Page 30: Devanado De La Bobina
Devanado de la bobina Remplissage de la canette - Coloque el hilo y sujete con la tapa grande o pequeña el - Placer le fil et le support correspondant sur le porte bobine. poste. (1/2) (1/2) - Deslice el hilo del carrete a través de la guía del hilo - Glisser le fil dans le guide. - Page 31 Inserting the Bobbin When inserting or removing the bobbin, raise the presser foot & make sure the needle is fully raised. 1. Remove the bobbin cover plate by pushing the small tab to the right of the cover towards the right. 2.
-
Page 32: Colocación De La Bobina
Insertion de la canette Colocación de la bobina Cuando inserte o remueva la bobina, asegúrese de Lorsque vous insérez ou retirez la canette, assurez-vous levantar la palanca del prenstelas y que la aguja esté en que le pied presseur est soulevé et que l 'aiguille est la posición mas alta. - Page 33 Threading the Upper Thread This is a simple operation but it is important to carry out correctly as by not doing so several sewing problems could result - Start by raising the needle to its highest point (1), and continue turning the handwheel* counterclockwise until the needle just slightly begins to descend.
-
Page 34: Enhebrado Del Hilo Superior
Enhebrado del hilo superior Enfilage supérieur Se trata de una operación sencilla pero es importante realizarla Cette opération est simple. Il est important de l'exécuter correctamente pues de no hacerlo podría surgir varios problemas correctement sous peine de faire éventuellement face à plusieurs en la costura. - Page 35 Automatic Needle Threader - Thread upper tension of machine up to the thin wire in front of the needle clamp. - Raise the needle to its highest position. - Set machine to straight stitch. - Press lever (A) down as far as it will go, and gently insert the hook of the threader into the eye of the needle by swinging the lever towards you when it is fully lowered.
-
Page 36: Ensartador Automático De La Aguja
Enfileur automatique d'aiguille Ensartador automático de la aguja - Enhebre la parte superior de la tensión de la máquina - Enfilez la tension supérieur jusqu'au mince fil métallique hasta enfrente del alambre delgado en frente de la devant le pince aiguille. abrazadera de la aguja. - Page 37 Raising the Bobbin Thread Hold the upper thread with the left hand. Turn the handwheel (1) towards you (counterclockwise) lowering, then raising needle. Note: If it is difficult to raise the bobbin thread, check to make sure the thread is not trapped by the hinged cover or the Removable Extension Table.
-
Page 38: Elevación Del Hilo De La Bobina
Elevación del hilo de la bobina Pour remonter le fil de canette Sujete el hilo superior con la mano izquierda. Gire el volante Tenir le fil supérieur avec la main gauche. Tourner le volant (1) (1) hacia usted hasta que baje totalmente la aguja, siga vers vous (sens anti-horaire) pour abaisser et lever l'aiguille. - Page 39 Thread Tension Upper thread tension Basic thread tension setting: "4". (1) To increase the tension, turn the dial to the next number up. To reduce the tension, turn the dial to the next number down. A. Normal thread tension for straight stitch sewing. B.
-
Page 40: Tensión Del Hilo
Tension du fil Tensión del hilo Tensión del hilo superior Tension du fil supérieur Réglage de base pour la tension du fil: "4". (1) Ajuste básico de la tensión del hilo: "4". (1) Pour augmenter la tension, tourner le cadran de réglage de la Para aumentar la tensión, girar el disco al siguiente número más tension vers une valeur plus élevée. - Page 41 How to Choose Your Pattern The diagram on this page display the stitch patterns available on the machine. Stitches in the top of the diagram are indicated on the pattern selector dial in gray. To select the patterns indicated with the gray color, turn the pattern selector dial.
-
Page 42: Cómo Seleccionar Su Puntada
Cómo seleccionar su puntada Comment choisir votre motif El diagrama en la página anterior muestra los diseños de las Le diagramme sur la page précédente présente les motifs de puntadas disponibles en la máquina. point disponibles sur la machine. Las puntadas en la parte superior del diagrama están Les points en haut du diagrame sont indiqués sur le sélecteur señaladas con gris en el Selector de Puntada. - Page 43 Three Needle Position Dial The needle position can be altered with the "Three needle position dial". For normal work, the needle position is middle. For edge stitching or sewing parallel lines of top stitch, select needle position left or right. For twin needle stitching, needle position is middle.
-
Page 44: Guía De Cambio De Posición De La Aguja
Guía de cambio de posición de la aguja Molette trois position d'aiguille La posición de la aguja puede ser cambiada utilizando el Il vous est possible de changer la position de l'aiguille en Guía de Cambio de Posición de la Aguja. Para trabajo utilisant la "Molette trois position d'aiguille". - Page 45 Stitch Width Dial & Stitch Length Dial Function of stitch width dial When doing a zig zag or a decorative pattern you can alter the width from 1mm to 6mm. To obtain a very narrow stitch, set the dial to 1, to obtain the maxinum 6mm width, set the dial to 6.
-
Page 46: Selector De Ancho De Puntada Y Selector De Largo De Puntada
Selector de ancho de puntada y Cadran de largeur de point et cadran de Selector de largo de puntada longueur de point Función del selector de ancho de puntada Fonction du cadran de largeur de point Cuando utilice zig zag o un patrón decorativo usted puede Lorsque vous cousez un point zigzag ou un point décoratif, vous pouvez modifier sa largeur de 1mm à... - Page 47 Sewing Straight Stitch To begin sewing, set the machine for straight stitch. (1) Set the stitch length to between 2 and 3. Place the fabric under the presser foot with the fabric edge lined up with the desired seam guide line on the needle plate. Lower the presser foot lifter, and then step on the foot controller to start sewing.
-
Page 48: Puntada Recta
Puntada recta Couture au points droits Para comenzar a coser, gire el selector de puntadas en la Pour commencer à coudre, régler la machine sur le point puntada recta, puede seleccionar la posición de la aguja en droit. (1) centro o a la derecha. (1) Réglez la longueur de point entre 2 et 3. - Page 49 Reverse Sewing To secure the beginning and the end of a seam, press down the reverse sewing lever (A). Sew a few reverse stitches. Release the lever and the machine will sew forward again. (1) Removing the Work Turn the handwheel toward you (counterclockwise) to bring the thread take up lever to its highest position, raise the presser foot and remove work behind the needle and presser...
-
Page 50: Remate/ Cómo Sacar La Tela/ Cómo Cortar El Hilo
Remate Couture en marche arrière Para fijar el comienzo y el final de la costura, presione la Afin de renforcer le début et la fin d'une couture, abaisser le palanca de retroceso. bouton marche arrière. Haga unas pocas puntadas hacia atrás. Suelte la palanca y Faire quelques points en marche arrière. - Page 51 Choosing Stretch Stitch Patterns The stretch stitch patterns are indicated with blue and red colors on the pattern selector dial. To select these stitches, turn the pattern selector dial to the desired pattern. Then, turn the stitch length dial to the indicator marked "S1" or "S2". Though there are several stretch patterns, here are two examples: Straight Stretch Stitch (1)
-
Page 52: Selección De Puntadas Elásticas
Selección de puntadas elásticas Choisir les motifs de point extensible Las puntadas flexibles están señaladas con azul y rojo en Les points extensibles sont indiqués en couleur bleues et los patrones del selector de puntadas. Para seleccionar rouges sur le cadran de sélecteur de point. Pour sélectionner ces points, tourner le cadran de sélection de motifs sur le estas puntadas, dé... - Page 53 (2) Unfold the fabric when hemming is completed and press. Note: To make blind hem sewing even easier, use a blind hem ® foot, available from your SINGER retailer. (See page 10 for part number)
-
Page 54: Dobladillo Invisible
Pour faciliter la couture d'ourlet invisible, utiliser un pied prensatelas para dobladillo invisible, disponible con un pour ourlet invisible, disponible auprès de votre revendeur Distribuidor Autorizado. (Ver número de parte en la página 10) ® SINGER . (Voir page 10 pour le numéro de pièce) - Page 55 Sew 1-step Buttonholes Buttonhole sewing is a simple process that provides reliable results. It is strongly suggested to always make a test buttonhole on a sample of your fabric before working on your garment. Stabilizer should alsways be used when making buttonholes.
-
Page 56: Ojal De Un Sólo Paso
Ojal de un sólo paso Couture de boutonnières en 1 étape Coser ojales de botones es un proceso simple que provee La couture de boutonnière est un processus simple qui assure des résultats fiable. Toutefois, il est fortement suggéré de toujours resulta-dos confiables. - Page 57 Left and Right Side Balance for Buttonhole Stitch density on right and left sides of buttonhole can be adjusted by buttonhole balance control dial. This dial should usually be in a neutral position (between "+" and " ") – If the stitches on the left side of buttonhole are too close together, turn the dial to the left (+).
-
Page 58: Balance A Izquierda Y Derecha Para Coser Ojales
Balance a izquierda y derecha para Équilibrage gauche et droit pour coser ojales boutonnière La densidad de la puntada en los lados derecho e izquierdo La densité des points de part et d'autre de la boutonnière del ojal puede ajustarse por el mando de control del balance peut être réglée au moyen du sélecteur d'équilibrage de del ojal. - Page 59 Sewing on Buttons Move the drop feed control to right side to lower the feed dogs. (1) Change the all purpose foot to the button sewing foot. (2) Set the stitch length to "0". Place the button and fabric under the Button Sewing foot, as illustrated in (3).
-
Page 60: Pegado De Botones
Pegado de botones Couture de boutons Mueva el control del alimentador hacia la derecha para bajar Déplacer le levier d'abaissement des griffes " " vers la los dientes de alimentación. (1) droite pour abaisser le système d'entraînement des griffes. (1) Cambie el prensatelas universal por el prensatelas para Changer le pied presseur multi-usage pour le pied de coser botones. - Page 61 Non-Stick Foot This foot is used when sewing fabrics such as leather or vinyl. 1. Snap on the Non-Stick Foot. Select desired stitch. Verify that the needle will line up with the opening of the foot before starting to sew. 2.
-
Page 62: Pie Anti-Adherente
Pie anti-adherente Pied anti-adhérent El Pie antiadherente se usa para coser telas como piel, Le Pied Anti-Adhérent est utilisé pour coudre les tissus plástico, vinil y hule. comme le cuir, le plastique, le vinyle et la toile-cirer. 1. Coloque el prensatelas. Seleccione la puntada deseada. 1. - Page 63 Even Feed / Walking Foot The Even Feed / Walking Foot has its own set of feed dogs that work in conjunction with the sewing machine's feeding system to aid the movement of the fabric. This is important when sewing several layers of fabric, especially when quilting.
-
Page 64: Pie De Avance Constante / Pasarela
Pie de avance constante / Pasarela Pied double entraînement El Pie de Avance Constante / Pasarela tiene su propio Le Pied Double Entraînement, comporte ensemble de griffes d'entraînement qui fonctionne en accord avec le système de conjunto de dientes impelentes en conjunción con el sistema griffe de la machine à... - Page 65 Clearance Plate The Clearance Plate is used to aid in removing or replacing needles. It can also be used to help stitch over thick seams, such as when hemming jeans. The presser foot tilts as it sews on and off thick seams areas. The Clearance Plate keeps the presser foot level when stitching over thick areas, preventing the needle from hitting the opening in the presser foot.
-
Page 66: Placa De Separación
Placa de separación La plaque élévatrice La Placa de Separación se usa para ayudar en la remoción o La Plaque Élévatrice est utilisée pour faciliter le retrait ou le remplacement des aiguilles. Elle peut aussi être utilisée pour faciliter la cambio de agujas. - Page 67 Installing the Removable Extension Table Hold the removable extension table horizontally, and push it in the direction of the arrow. (1) To remove the extension table, pull it toward the left. The inside of the removable extension table can be utilized as an accessory box.
-
Page 68: Instalación De La Cubierta Removible
Installation du bras amovible Instalación de la cubierta removible Coloque la máquina en una superficie estable, empuje la Maintenir le bras amovible en position horizontal et le cubierta removible como indica la flecha, y luego jale hacia pousser dans la direction de la flèche. (1) afuera. - Page 69 Attaching the Presser Foot Shank Raise the presser bar (a) with the presser foot lifter. Loosen or remove the presser shank screw. Line up the opening in the shank with the opening on the presser bar and then tighten the screw. (1) Attaching the presser foot Lower the presser foot shank (b) using the presser foot lifter, until the cut-out (c) is directly above the pin (d).
-
Page 70: Colocación Del Portaprensatelas
Colocación del portaprensatelas Installer le support du pied presseur Eleve la barra del prensatelas (a) con el levantador del pie. Soulevez la barre du pied presseur (a) à l'aide du releveur du Afloje o remueva el tornillo del prensatelas. Asegúrese de pied presseur. - Page 71 Leather, vinyl, upholstery. (Leaves smaller hole than standard SINGER 2032 large needle.) Note : ® 1. For best sewing results always use genuine SINGER needles. 2. Replace needle often (approximately every other garment ) and/ or at first thread breakage or skipped stitches.
-
Page 72: Guía De Selección De Agujas/ Telas/ Hilos
Cuero, vinilo, tapicería (deja un agujero más pequeño que la aguja grande estándar. Nota: ® 1. Para mejores resultados de la costura, utilice solamente agujas SINGER originales. 2. Cambie la aguja con frecuencia (aproximadamente cada dos prendas) y/ o a los primeros hilos rotos o fallas en las puntadas. - Page 73 (Fait de plus petits trous que les grandes aiguilles standard). NOTE: ® 1. Pour de meilleurs résultats, n'utilisez que des aiguilles authentiques SINGER . 2. Remplacez régulièrement l'aiguille (chaque fois que vous commencez un nouveau vêtement) et/ou quand le fil casse ou les points sautent.
- Page 74 How To Drop Feed Dog For ordinary sewing, keep the feed dogs engaged, for freehand embroidery, sewing on buttons and darning, drop the feed dogs. To rasie (a) and lower (b) feed dogs. (2) To lower feed dogs: Push lever towards position (b). (2) To raise feed dogs: Push lever towards position (a).
-
Page 75: Ocultar Dientes Transportadores
Comment abaisser les griffes Ocultar dientes transportadores d'entraînement Para costura regular, mantenga los dientes de alimentación arriba; para bordado libre, pegar un botón y zurcidos baje los Pour la couture régulière, gardez les griffes engagées, pour dientes de arrastre. coudre en mode broderie main libre, coudre des boutons et sans pression, abaissez les griffes. - Page 76 Change the needle regularly, especially if it is showing signs of wear and causing problems. For best sewing results ® always use SINGER needles. Insert the needle as illustrated as follows: A. Loosen the needle clamp screw and tighten again after inserting the new needle.
-
Page 77: Colocación Y Cambio De Agujas
® ® SINGER . fabriquées par SINGER . Inserta la aguja como se ilustra: Insérer l'aiguille tel qu'indiqué page 59. (1) A. Afloje el tornillo de la abrazadera de la aguja y vuélvalo A. - Page 78 Troubleshooting Guide Problem Cause Correction Upper thread 1. The machine is not threaded correctly. 1. Rethread the machine. 2. The thread tension is too tight. 2. Reduce the thread tension. (lower number) breaks 3. The thread is too thick for the needle. 3.
-
Page 79: Problemas Y Soluciones
Problemas y soluciones Problema Causa Solución El hilo superior se 1. La máquina está mal enhebrada. 1. Enhebrar la máquina correctamente. rompe 2. La tensión del hilo es demasiado fuerte. 2. Disminuir la tensión del hilo superior. (número menor) 3. El hilo es demasiado grueso para la aguja. 3. -
Page 80: Guide De Dépannage
Ne pas tirer sur le tissu lorsque vous cousez, laissez irrégulier plutôt les griffes tirer le tissu en dessous du pied presseur. ® 1. Demander un entretien à un magasin SINGER . 1. La machine doit être lubrifiée. La machine est 2. L'aiguille est endommagée. - Page 84 Please note that on disposal, this product must be safely recycled in accordance with relevant National legislation relating to electrical/electronic products. Do not dispose of electrical appliances as unsorted municipal waste, use separate collection facilities. Contact your local government for information regarding the collection systems available. When replacing old appliances with new ones, the retailer may be legally obligated to take back your old appliance for disposal free of charge.