Table of Contents
Advertisement
Advertisement
Table of Contents

Related Manuals for Singer HD0405S


Summary of Contents for Singer HD0405S
- Page 1 HD0405S (2 . 3 . 4 THREAD HEAVY DUTY OVERLOCK MACHINE) Instruction Manual...
- Page 3 * If the light is damaged, it must be replace by authorized dealer. ® SINGER is a exclusive trademark of The SINGER Company Limited S.à r.l. or its Affiliates. ©2020 The SINGER Company Limited S.à r.l. or its Affiliates. All rights reserved...
- Page 4 IMPORTANT SAFETY INSTRUCTIONS When using this machine, basic safety precautions should always be followed including the following. Read all instructions before using the machine. DANGER - To reduce the risk of electric shock: · The machine should never be left unattended when plugged in. Always unplug the machine from the electric outlet immediately after using and before cleaning.
- Page 5 · Do not use outdoors. · Do not operate where aerosol (spray) products are being used or where oxygen is being administered. · Do not allow to be used as a toy. Close attention is necessary when the machine is used by or near children. ·...
-
Page 6: Table Of Contents
CONTENTS Page Page 1. Selection of Stitches………………………………… 22. Starting and Ending Seams ……………………… 2. Handy Reference Chart …………………………… To Srart a Seam ……....………………… 3. Accessories ………………………………………… To End a Seam ………………………..………… 4. Needle Information ………………………………… 23. Suggested Tension Setting………………………… 5. Principal Parts ……………………………………… 1) 2-thread wrapped edge overlock ……………... -
Page 7: Selection Of Stitches
1. SELECTION OF STITCHES This machine is capable of producing various types of stitches according to the combination of needle positions, threading methods, tension adjustment. Reference Stitch Type Pages 1-needle 2-thread stitch is used for 1. Two-thread light weight or knits fabrics. Also,a wrapped edge 3.5mm and 5.7mm wrapped overlock seam width can be obtained by... -
Page 8: Handy Reference Chart
Also, for overedging heavyweight fabrics, the seam width can be increased still more by turning the overedge seam width adjustment knob. (See page 21) Overedge width 3.5mm 5.7mm Needle used Overedge right needle Overedge left needle Needle thread Green Blue tension dial 2. -
Page 9: Accessories
You can store these accessories in the accessory tray in the cloth plate after you open the carton. 4. NEEDLE INFORMATION SINGER needles #2022 size 100/16 (mounted on the machne) and size 90/14 (in the accessory case) are furnished with the machine. -
Page 10: Principal Parts
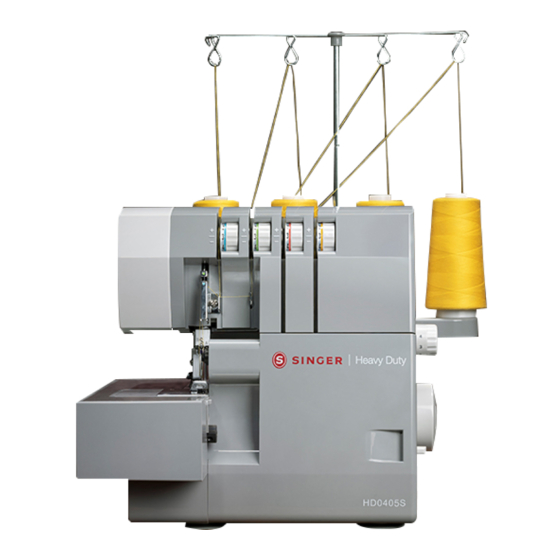
5. PRINCIPAL PARTS 1 Thread guides and holder 2 Handle 3 Left needle thread tension dial (blue) 4 Right needle thread tension dial (green) 5 Upper looper thread tension dial (orange) 6 Lower looper thread tension dial (yellow) 7 Throat plate 8 Cloth plate 9 Looper cover 10 Power &... -
Page 11: How To Open Looper Cover
6. HOW TO OPEN LOOPER COVER Caution: Be sure to turn off power switch. Push the cover to the right as far as it will go 1 . Pull cover down toward you 2 . Caution: Be sure looper cover is closed when sewing. 7. -
Page 12: Preparation For Threading
POLARIZED PLUG INFORMATION (FOR U.S.A. & CANADA ONLY) This appliance has a polarized plug (one blade wider than the other). To reduce the risk of electric shock, this plug is intended to fit in a polarized outlet only one way. If the plug does not fit fully in the outlet, reverse the plug. -
Page 13: How To Remove And Insert Needles
10. HOW TO REMOVE AND INSERT NEEDLES To Remove Needle(S) Caution: Be sure to disconnect the machine from the electric outlet before removing needle(s). Turn the hand wheel toward you until the needle is at its highest position. Loosen, but do not remove the needle set screw with the small screwdriver. -
Page 14: Threading The Machine
11. THREADING THE MACHINE Threading Diagram A color coded threading diagram is located inside the looper cover for quick reference. Thread the machine in the order 1 to 4 as shown. Understanding the Color Code 1. Upper looper thread……… Orange 2. - Page 15 Thread the top cover thread guide by pulling the thread d o w n w a r d u n t i l i t s l i p s under thread guide 2 . While holding thread with finger, pass it between the tension discs and pull thread down to make cartain it is properly located in between the tension discs 3 .
-
Page 16: Threading The Lower Looper (Yellow)
2) Threading the Lower Looper (Yellow) Thread the lower looper as indicated 1 ~ 9 . Pass thread from back to the front through the thread guide 1. Thread the top cover thread guide by pulling the thread downward until it slips under thread guide 2. - Page 17 Turn the hand wheel toward you until the lower looper is at the far right. Thread the looper area of the machine following the yellow color coded thread guides 4 ~ 7 . Note: Use the tweezers provided in the accessory set to aid in threading the looper.
-
Page 18: Threading The Right Needle (Green)
3) Threading the Right Needle (Green) Thread the right needle as indicated 1 ~ 8. Pass thread from back to the front through the thread guide 1 . T h r e a d t h e t o p c o v e r thread guide by pulling the thread downward until it slips under thread guide... - Page 19 Continue to thread points 4 ~ 7 . Note: Be sure to pass the thread through upper thread path of the thread guide 6 . Thread the eye of the right needle 8 . Note: Use of tweezers in the accessory set will make needle eye threading easy.
-
Page 20: Threading The Left Needle (Blue)
4) Threading the Left Needle (Blue) Thread the left needle as indicated 1 ~ 7. Pass thread from back to the front through the thread guide 1 . Thread the top cover thread guide by pulling the thread d o w n w a r d u n t i l i t s l i p s under thread guide 2 . -
Page 21: Important Threading Information
Continue to thread points 4 ~ 6 . Note: Be sure to pass the thread through lower thread path of the thread guide 5 . Thread the eye of the left needle 7 . Note: Use of tweezers in the accessory set will make needle eye threading easy. -
Page 22: How To Change Threads / Tie On Method
12. HOW TO CHANGE THREADS / TIE ON METHOD To change thread type or color, clip thread near the spool. Place new thread on stand. Tie new thread and old thread ends together. Clip thread tails to 2 ~ 3cm (1 inch) length. If clipped too short, threads may come untied. -
Page 23: How To Adjust The Stitch Length
13. HOW TO ADJUST THE STITCH LENGTH The stitch length dial should be set on the 3 mm (1/8 inch) setting for most sewing conditions. Adjust the stitch length to 4mm (5/32 inch) when sewing heavy weight fabrics. Adjust the stitch length to 2mm (5/64 inch) when sewing light weight fabrics to obtain excellent seams without puckering. -
Page 24: How To Adjust The Presser Foot Pressure
Width adjustment knob Caution: Before making adjustments, be sure to turn off power switch Opening the looper cover will make adjustment easier. / Rolled hem (When shipped from factory.) Push the upper knife to the right and while maintain the knife in this position,turn the knob away to adjuste the desired seam width,using te graduations on the throat plate as a guideline. -
Page 25: Differential Feed
16. DIFFERENTIAL FEED Differential feed is a system which “stretches” or “gathers” the fabric, when amount of feed of front feed dog in relation to the rear feed dog is changed. The differential feed ratio ranges from 1 : 0.7 ~ 1 : 2.0. -
Page 26: Stretch Overedge
Stretch Overedge Stretch overedge is ideal for sewing decorative collars, sleeves, skirt hems, etc. on loosely knit and woven fabrics. To set the differential feed adjusting lever Set differential feed adjusting lever knob above graduation “1.0”. To sew a seam, apply gentle tension to the fabric by holding the seam lightly in front and back of the presser foot. -
Page 27: How To Disengage Movable Upper Knife
17. HOW TO DISENGGE MOVABLE UPPER KNIFE Caution: Be sure to turn off power switch. To place movable knife in nonworking position Turn handwheel over toward you and raise upper knife to its highest position. Open looper cover (page 9) Movable Knife Holder Push the movable knife holder to the right as far as it will go. -
Page 28: Converting The Upper Looper Into Spreader
18. CONVERTING THE UPPER LOOPER INTO SPREADER Warning: Switch off the machine before installing or removing the spreader. Installing the spreader. Insert the pin (A) of the spreader in the hole (B) of the upper looper. Put the positioning rib (C) in contact with the upper surface of the looper. -
Page 29: Free Arm Sewing (Tubular Work)
19. FREE ARM SEWING (TUBULAR WORK) This machine become a free arm machine simply by removing the cloth plate. To remove the cloth plate Slide cloth plate to the left and remove from machine while pressing button (A) located on the underside. -
Page 30: Standard Overedge And Rolled Hem Stitching
20. STANDARD OVEREDGE AND ROLLED HEM STITCHING To Sew Standard Overedge Set seam width finger knob to S to move seam width finger to projected position. Note: Be sure to push seam width finger knob as far as it will go in the direction of Seam width finger knob setting S. -
Page 31: Chaining Off And Test Sewing
21. CHAINING OFF AND TEST SEWING When the machine is completely threaded, bring all of the threads over the throat plate and slightly to the left under the presser foot. Hold the threads and apply a slight tension. Turn the hand wheel toward you 2 or 3 complete turns to start the thread chain. -
Page 32: Starting And Ending Seams
Place the fabric on the feed dogs in front of the foot. Start sewing. Note: * For heavy or thick fabrics, it is recommended to use SINGER needles #2022 size 100/16. * Heavy or thick fabrics may be more difficult to feed than others. In these cases, start by cutting a notch at the beginning of the seam about 1"... -
Page 33: Suggested Tension Setting
23. SUGGESTED TENSION SETTING NEEDLE POSITION 1) 2-Thread wrapped edge overlock. SEAM WIDTH FINGER KNOB STITCH LENGTH 2 - 4 Note: * These are suggested tension settings only. SPREADER * Tension settings are effected by; 1) Type and thickness of fabric 2) Needle size 3) Size, type and fiber content of thread * See page 26 to converting the upper looper... -
Page 34: 2-Thread Standard Rolled Hem Stitching
2) 2-Thread standard rolled hem stitching Note: * These are suggested tension settings only. NEEDLE POSITION * Tension settings are effected by; SEAM WIDTH FINGER KNOB 1) Type and thickness of fabric STITCH LENGTH 2 - 4 2) Needle size 3) Size, type and fiber content of thread SPREADER * See page 26 to converting the upper looper... -
Page 35: 3-Thread Overlock
3) 3-thread Overlock Note: * These are suggested tension settings only. NEEDLE POSITION * Tension settings are effected by; SEAM WIDTH FINGER KNOB 1) Type and thickness of fabric STITCH LENGTH 2 - 4 2) Needle size 3) Size, type and fiber content of thread Upper looper thread Needle thread Correct Balance... -
Page 36: 3-Thread Flatlock
4) 3-thread Flatlock Note: * These are suggested tension settings only. NEEDLE POSITION * Tension settings are effected by; SEAM WIDTH FINGER KNOB 1) Type and thickness of fabric STITCH LENGTH 2 - 4 2) Needle size 3) Size, type and fiber content of thread Needle thread Needle thread Correct Balance... -
Page 37: 3-Thread Wrapped Edge Overlock
5) 3-thread Wrapped Edge Overlock Note: * These are suggested tension settings only. NEEDLE POSITION * Tension settings are effected by; SEAM WIDTH FINGER KNOB 1) Type and thickness of fabric STITCH LENGTH 2 - 4 2) Needle size 3) Size, type and fiber content of thread Needle thread Lower looper Upper looper... -
Page 38: 4-Thread Ultra Stretch Mock Safety Stitch
6) 4-thread Ultra Stretch Mock Safety Stitch Note: * These are suggested tension settings only. NEEDLE POSITION * Tension settings are effected by; SEAM WIDTH FINGER KNOB 1) Type and thickness of fabric STITCH LENGTH 2 - 4 2) Needle size Upper looper thread 3) Size, type and fiber content of thread Lower... -
Page 39: How To Sew A Rolled Hem
R mark on throat plate by turning seam width finger knob, as required. Set stitch length dial to “F~2” and a fine seam will be sewn. Needle: Singer Needle #2022 size 80/11 or 90/14 Thread: A variety of thread combinations can be used for rolled hemming. -
Page 40: A.2-Thread Wrapped Edge Overlock
Note: For a beautiful two-thread rolled hem thread the upper looper with wooly nylon and the needle with lightweight regular thread. NEEDLE POSITION SEAM WIDTH FINGER KNOB STITCH LENGTH F - 2 SPREADER 1) a.2-Thread wrapped edge overlock Correct Balance Set each tension dial to settings shown at right Needle thread Lower looper... -
Page 41: A.3-Thread Standard Rolled Hem Stitching
Note: For a beautiful rolled hem thread the upper looper with wooly nylon and the needle and lower looper with lightweight regular thread. NEEDLE POSITION SEAM WIDTH FINGER KNOB STITCH LENGTH F - 2 2) a.3-thread Standard Rolled Hem Stitching Upper looper thread Correct Balance Set Each Tension Dial to Settings Shown at Right... - Page 42 Additional lnformation About Rolled Hemming Hold the thread chain when you begin sewing to keep it from curling into the seam. Place a slight tension on the material in the sewing direction and a finer seam finish can be obtained. The minimum overedge stitch width that can be obtained for rolled hemming is approximately 1.
-
Page 43: Stitch Variations And Sewing Techniques
25. STITCH VARIATIONS AND SEWING TECHNIQUES How to Sew a Flatlock Decorative Seam A flatlock stitch is achieved by adjusting the tension of the 3-thread overlock stitch, sewing the seam and pulling the fabric apart to flatten the seam. The flatlock stitch can be used as a construction and decorative stitch or for ornamentation only. - Page 44 Pull on opposite sides of the seam to pull the stitches flat. (3) Decorative Flatlocking Place the movable upper knife in the nonworking position (page 25). The fabric is not trimmed or this stitch. Fold fabric wrong sides together. Position the fabric so the seam is sewn with par of the stitch extending off the fabric.
-
Page 45: How To Sew An Overlock Blind Hem
How to Sew an Overlock Blind Hem The excess fabric is trimmed and the hem is sewn and the raw edges are overlocked in one operation. The overlock blind hem is best suited for sewing knit wear. It provides a durable finish that is almost invisible. -
Page 46: Turning Square Corners
Fold the fabric with the wrong sides together and sew. Press the pin tucks in the same direction. Cutting line Turning Square Corners (1) Outside Corner Cut out approximately 2 cm (51/64 inch) from the corner, in line with the overedge seam edge. Sew one stitch beyond point (A) and stop. -
Page 47: Pin Placement
Place the movable upper knife in nonworking position (page 25). Needle position Stitch on cut edge of fabric. Stop sewing before you reach the corner and fold the fabric to the left to straighten the corner. Continue to sew slowly holding the fabric edge in a straight line moving the fold as you sew. -
Page 48: How To Reinforce A Seam
How to Reinforce a Seam Inserting twill tape while overedge sewing will stabilize the seam. Insert the tape through the hole in the front of the foot. Position the tape under the foot to the back of the machine and sew the garment seam. The tape is attached as the seam is sewn. -
Page 49: Machine Maintenance
26. MACHINE MAINTENANCE An overlock requires more maintenance than a conventional machine mainly due to two reasons. 1) A lot of lint is produced due to the cutting action of the knives. 2) An overlock runs at a very high speed and needs to be oiled frequently to lubricate the internal working parts. -
Page 50: How To Replace The Stationary Knife
The stationary knife can be replaced according to the directions provided, however if there are any difficulties experienced, consult your Singer representative to make the adjustments. Be sure that the power line plug is disconnected from the electric source. -
Page 51: Troubleshooting Chart
27. TROUBLE SHOOTING CHART Problem Solution Page - Lengthen stitch length. Fabric does not feed - Increase presser foot pressure for heavy weight fabric. well - Decrease presser foot pressure for light weight fabric. - Insert needle correctly. Needle breaks - Do not pull fabric while sewing. -
Page 52: Relationship Between Cloth,Thread And Needle
Wool (woven, knit) Tetron: #50 - #60 #11, #14 Woolly nylon Woolly tetron SINGER needle, Cat. No. 2022 is furnished with the machine. However, it is recommended that you select your needle in accordance with the material you are sewing. -
Page 53: Specification
Rolled hemming 1.5mm, ordinary overedge 3.0 ~ 6.7mm (standard 3.5mm) Needle bar stroke 27mm Presser foot rise 4.5 ~ 5.0mm Needle SINGER Cat. No. 2022 #14 SINGER Cat. No. 2022 #16 HD0405S Model 2,3,4 Number of threads Machine dimensions (mm) - Page 54 NOTES...
- Page 56 (English) Part No.600505-003 Rev.1 Printed in China www.singer.com SINGER (SHANGHAI) SEWING MACHINE CO.,LTD No.1078,Dayao Road,MinHang,Shanghai 200245,China.