Table of Contents
Advertisement
Quick Links
INSTRUCTIONS
MANUAL DE INSTRUCCIONES
HD MEMORY CAMERA
VIDEOCÁMARA HD CON MEMORIA
GZ-HM200
Please read the instruction manual prior to
connecting or operating this product.
Por favor, lea el manual de instrucciones antes
de conectar u operar este producto.
For more details on the operations,
refer to the GUIDEBOOK in the
supplied CD-ROM.
Para obtener más información sobre las
operaciones, consulte la GUÍA incluida
en el CD-ROM suministrado.
U
LYT1997-001A-M
EN SP
Dear Customers
Thank you for purchasing this HD
memory camera. Before use, please
read the safety information and
precautions contained on pages 2 and 3
to ensure safe use of this product.
For Future Reference:
Enter the Model No. (located on the
bottom of the HD memory camera) and
Serial No. (located on the battery pack
mount of the HD memory camera) below.
Model No.
Serial No.
Apreciado cliente
Gracias por la compra de esta
videocámara HD con memoria. Antes de
usarla, lea la información de seguridad
y las precauciones contenidas en las
páginas 2 y 3 para garantizar un uso
seguro de este producto.
Para futuras consultas:
Escriba a continuación el número
de modelo (situado en la base de
la videocámara HD con memoria)
y el número de serie (situado en el
compartimiento de la batería de la
videocámara HD con memoria).
Número de modelo.
Número de serie.
CASTELLANO
ENGLISH
Advertisement
Table of Contents

Related Manuals for JVC GZ-HM200 U


Summary of Contents for JVC GZ-HM200 U
- Page 1 LYT1997-001A-M INSTRUCTIONS EN SP MANUAL DE INSTRUCCIONES HD MEMORY CAMERA Dear Customers Thank you for purchasing this HD VIDEOCÁMARA HD CON MEMORIA memory camera. Before use, please read the safety information and GZ-HM200 precautions contained on pages 2 and 3 to ensure safe use of this product.
- Page 2 Safety Precautions When the equipment is installed in a cabinet or on CAUTION a shelf, make sure that it has suffi cient space on RISK OF ELECTRIC SHOCK DO NOT OPEN all sides to allow for ventilation (10 cm (3-15/16") or more on both sides, on top and at the rear).
- Page 3 IMPORTANT SAFETY INSTRUCTIONS Remember that this camcorder is intended for 1. Read these instructions. private consumer use only. 2. Keep these instructions. Any commercial use without proper permission is prohibited. (Even if you record an event such 3. Heed all warnings. as a show, performance or exhibition for personal 4.
- Page 4 • Charge the battery pack Battery Pack before use. ( p. 18) • Be sure to use JVC battery The battery pack packs. If you use any other is not charged battery packs besides JVC at the time of battery packs, safety and AC Adapter purchase.
- Page 5 Date/Time Setting Open the LCD monitor to Select the city closest to turn on the camcorder the area where you use the camcorder Power Button LCD monitor AREA SETTING JAN.10.2009 01:00AM QUIT Select [ON] or [OFF] Select [YES] within Select [ON] if daylight saving time is 10 seconds effective.
- Page 6 Video recording CAUTION • This camcorder records video in accordance with the AVCHD format. • Try recording with easy [AUTO] mode fi rst. Select ! (video) mode S elect recording mode The auto recording PLAY/REC indicator appears. 3 h 59 m 0 : 04 : 01 Start recording Remaining space on the SD card.
- Page 7 Playing back Select playback mode PLAY/REC The mode changes when you press the button. Select the desired fi le Index screen VIDEO PLAYBACK NOV. 01.2009 04:55PM DIGEST Select F(Touch OK) Playback screen 0. 00 : 00 J A N . 1 . 2 0 0 9 04 :55 PM To perform operations such as forward search or reverse search ( p.
- Page 8 ANY PROBLEM ARISING FROM OR CAUSED owned by JVC and its licensor, and remain BY THE PROGRAM, YOU SHOULD SETTLE vested in JVC and such licensor. The Program is ALL SUCH PROBLEM AT YOUR OWN COST protected under the copyright law of Japan and AND EXPENSE.
- Page 9 Agreement, JVC may terminate this Agreement without giving any notice to You. In this event, CAUTIONS: • JVC may claim against You for any damages Operate this equipment according to the caused by Your breach. Should this Agreement operating procedures described in this manual.
- Page 10 Read This First! Make a backup of important recorded data How to use the Touch Sensor JVC will not be responsible for any lost data. It is recommended to copy your important After the menu is displayed on the LCD...
-
Page 11: Table Of Contents
Contents GETTING STARTED EDITING Accessories .......... 12 Managing Files ........32 Attaching the Core Filter ......12 Capturing a Still Image from a Video ... 32 Preparing the Remote Control ..... 13 Deleting Files ..........32 Index ............14 Indications on LCD Monitor ....16 COPYING Necessary Settings before Use ... -
Page 12: Accessories
Accessories AC Adapter Battery Pack Component Cable Audio/Video Cable AP-V21U BN-VF808U USB Cable CD-ROM Remote Control Lithium Battery RM-V751U CR2025 Pre-installed in the remote control unit. (x 1) (x 2) (Component Cable) (USB Cable and AC Adapter) Core Filter NOTE Make sure to use the provided cables for connections. -
Page 13: Preparing The Remote Control
Preparing the Remote Control A battery is included inside the remote control at the time of purchase. Remove the insulation sheet before use. Beam Effective Area To Reinsert the Battery Pull out the battery holder by pressing the lock tab. Remote Sensor Lock Tab Lithium Battery... -
Page 14: Index
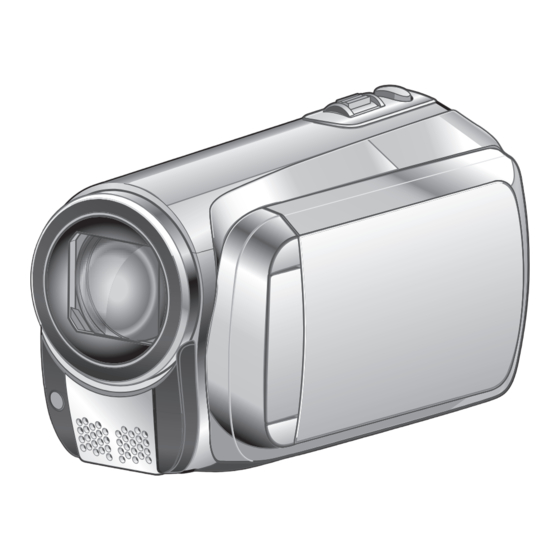
Index NOTE • Be careful not to cover 3, 4, 5, 6 and 7 during shooting. • The LCD monitor can rotate 270°. - Page 15 Camcorder Remote Control ! Touch sensor Q Infrared Beam Transmitting Window # LCD Monitor R ZOOM (T/W) Buttons $ SD Cover (Zoom in/out during playback.) % SD Card Slot B ( p. 21) S Up Button & SD Card Slot A ( p.
-
Page 16: Indications On Lcd Monitor
Indications on LCD Monitor During both Video and Still Image During Video Recording Only Recording [3h59m] LIB. RE C 0 : 0 4 : 0 1 PHOTO 1/4000 NOV.10. 2009 4:55PM ! Mode Indicator # Export Mode Indicator ( p. 42) ! Selected Operation Mode Indicator $ Counter p. - Page 17 During Video Playback During Still Image Playback 1: 55 : 01 101 - 0098 NOV.10. 2009 4:55PM NOV.10. 2009 4:55PM ! Mode Indicator ! Mode Indicator # Wipe/Fader Effect Indicator ( p. 29) # Folder/File Number $ 6 : Playlist Playback Indicator (Appears $ Slide Show Playback Indicator when playing back a playlist.) % Card Slot Indicator...
-
Page 18: Necessary Settings Before Use
Necessary Settings before Use Required charging/recording time Charging the Battery Pack (approx.) *When the LED light is off and the monitor backlight is set to [STANDARD] mode. Close the LCD monitor to turn off the Battery pack Charging time Recording camcorder. -
Page 19: Date/Time Setting
Date/Time Setting Set the date and time. Select the item by using the touch sensor and select [ ] to set. Open the LCD monitor to turn on the camcorder. CLOCK SETTING Touch MENU. DATE TIME Select [DISPLAY SETTINGS]. 2009 GMT+ 9:00 VIDEO SAVE... -
Page 20: Other Settings
Other Settings Language Setting Tripod Mounting Align the camcorder stud hole with the tripod The language on the display can be changed. stud, and the mounting socket with the screw, Open the LCD monitor to turn on the and lock it in place. camcorder. -
Page 21: Using An Sd Card
NOTE Using an SD Card • Insert and remove the SD card only while the power is turned off. Otherwise, data on • Operations are confi rmed on the following SD the card may be corrupted. cards: • Do not touch the terminal on the reverse Class 4 or higher compatible SD or SDHC card. -
Page 22: Recording Files
Recording Files Video Recording • Preparation: Open the LCD monitor to turn on the camcorder. • Insert an SD card. Press PLAY/REC to select the recording Select (video) mode. mode. PLAY/REC [3 h 59 m] 0:00:00 SNAPSHOT Press START/STOP to start recording. [3 h 59 m] 0:00:01 Approximate remaining time... -
Page 23: Still Image Recording
Still Image Recording • Preparation: Open the LCD monitor to turn on the camcorder. • Insert an SD card. Press PLAY/REC to select the recording Select (still image) mode. mode. PLAY/REC Press and hold SNAPSHOT halfway. FINE The ? indicator becomes green when the captured image is focused. -
Page 24: Zooming
Recording Files (Continued) Zooming LED Light Preparation: Preparation: • • Select mode. Select mode. • • Select the recording mode. Select the recording mode. Zoom out Zoom in Touch MENU. Select [LIGHT]. Select the desired setting. W: Wide angle T: Telephoto The LED light remains on regardless of the surrounding You can also zoom out/zoom in by selecting... -
Page 25: Turning On The Face Detection Mode
NOTE Turning on the Face Detection Mode The recordable time display should only be used as a guide. It is displayed in 10-minute If you set this mode on, the camcorder detects units. the faces and adjust brightness and focus so that the faces are recorded clearly. -
Page 26: Manual Recording
Manual Recording Manual recording mode enables you to set the Manual Setting in Menu focus and screen brightness, etc. manually. In the manual recording mode; Changing to Manual Recording Mode Touch MENU. Preparation: Select [MANUAL SETTING]. • Select mode. • Select the recording mode. - Page 27 Items for effect setting Scene Select/Effect • SEPIA: The image is given a brownish tint like an Scene Select old photo. You can record videos or still images with • MONOTONE: optimum brightness by adjusting the exposure This effect skips frames to give images of and shutter speed to suit your surroundings or an old movie atmosphere.
-
Page 28: Playing Back Files
PLAYBACK Playing Back Files Select the desired fi le. Video/Still Image Playback Preparation: • Open the LCD monitor to turn on the camcorder. • Insert an SD card. Select (video) or (still image) To move to the previous or next page mode. -
Page 29: Playback With Special Effects
Items for WIPE/FADER setting Playback with Special Effects • O FADER-WHITE: Fades in or out with a white screen. Wipe or fader effects • P FADER-BLACK: Add effects at the beginning and end of Fades in or out with a black screen. videos. -
Page 30: Viewing Files On Tv
Viewing Files on TV This camcorder is designed to be used with To connect using the COMPONENT/AV high-defi nition or NTSC-type color television connector signals. It cannot be used with a television of COMPONENT a different standard. Connector DC Connector AV Connector Connection with TV You can output videos from the HDMI mini... -
Page 31: Operating Together With Tv Via Hdmi
Playback on TV NOTE When the video was recorded with x.v.Color™ set to [ON], change the x.v.Color™ setting on TV. For details, refer to the TV’s instruction manual. Operating Together with TV via HDMI Select the The TV playback mode. automatically Connecting the camcorder to an HDMI-CEC*- switches to the... -
Page 32: Managing Files
EDITING/PRINTING Managing Files CAUTION Deleting Files Do not remove the recording medium (SD cards) or perform any other operation (such • Protected fi les cannot be deleted. To delete as turning off the power) while accessing fi les. them, release the protection fi rst. Also, be sure to use the provided AC adapter, •... -
Page 33: Copying Files
Files are moved to the destination p. 36) NOTE medium while deleting original fi les • It is recommended to use the JVC DVD (except read-only fi les) in the source burner (CU-VD50/CU-VD3). When using medium. CU-VD20 or CU-VD40, the recording time may take approx. -
Page 34: Using A Bd/Dvd Burner
When connecting to a BD burner, use a Using a BD/DVD Burner USB cable with Mini-A(Male) and B(Male) connectors. JVC’s QAM0852-001 (optional) The fi les in the camcorder can be backed up is recommended. Refer to page 41 for to a disc using a BD/DVD burner. - Page 35 • The fi les are copied on the disc. When Backup All Files [COMPLETED] appears, touch OK. Preparation: • When [INSERT NEXT DISC PRESS • Connect the camcorder to the BD/DVD [STOP] TO EXIT CREATE] appears, burner. change the disc. Remaining fi les are •...
-
Page 36: Dubbing Files To A Vcr/Dvd Recorder
Copying Files (Continued) Dubbing Files to a VCR/DVD Recorder Open the LCD monitor to turn on the camcorder. Preparation: • Create a playlist. Set the VCR/DVD recorder to its AUX • Turn off all units. input mode. Check that the images from the camcorder To connect using the AV connectors are input correctly to the VCR/DVD (analog dubbing) -
Page 37: Creating A Disc Using A Pc
Creating a Disc using a PC NOTE Creating a Disc using a PC • Make sure your PC has a recordable BD/DVD drive. You can copy the data from the camcorder • If your system does not meet the and create a disc using a PC. requirements, it is recommended to copy fi... - Page 38 Creating a Disc using a PC (Continued) Click [Finish]. Connector Everio Media Browser icon is created on the desktop. USB Cable AC adapter Connector To AC outlet INFORMATION Everio MediaBrowser video editing capability is available for fi les copied from the camcorder to the PC.
- Page 39 Click [+]. Click [Start]. Input the name of the new user list Backup starts. and click [OK]. To disconnect the camcorder from the 1) Right-click the icon (Safely Remove Hardware) on the task bar and select [Safely remove USB Mass Storage Device].
- Page 40 Creating a Disc using a PC (Continued) T Copying Files to a disc Input the disc name, select the top Everio MediaBrowser supports 3 disc formats. menu style and click [Next]. Select the one that suits your purpose. DVD-Video Suitable if you will give the disc disc: to your friends and relatives.
- Page 41 Use of this software is authorized according to the terms of the software licence. When contacting the nearest JVC offi ce or agency in your country (refer to the JVC Worldwide Service Network at http://www.jvc-victor.co.jp/english/worldmap/index-e.html) about this software, please have the following information ready.
-
Page 42: Using With A Portable Media Player
Using with a Portable Media Player Select [DONE]. Turning on the Export Mode You can easily transfer videos recorded in To cancel the export setting ® export mode to iTunes . All the fi les with the Select the fi le and press LIB. again. export setting turned on are transferred to PC. -
Page 43: Uploading Files To Websites
Uploading Files to Websites Turning on the Upload Mode Uploading Files You can upload the fi le to video sharing For details on uploading fi les, refer to the websites (YouTube™) quickly after recording. operation guide of MediaBrowser in the For more information on YouTube™, visit CD-ROM. -
Page 44: Changing The Menu Settings
If the solutions indicated in the malfunctions. chart do not solve the problem, consult your • The camcorder heats up when it is used for nearest JVC dealer or JVC service center for a long time. instructions. • The battery heats up during charging. - Page 45 Trouble Action • The LCD monitor is The LCD monitor may be diffi cult to see if used in bright areas diffi cult to see. such as under direct sunlight. • Fully charge the battery, run it down, and then recharge it again. •...
-
Page 46: Warning Indications
Consult your SET DATE/TIME! nearest JVC dealer. • Be sure to use JVC battery packs. COMMUNICATING ERROR • Replace the SD card. (Files recorded with other devices that CANNOT USE IN support AVCHD cannot be played back on this camcorder.) -
Page 47: Cleaning
Indication Action • RECORDING FAILURE Remove and re-insert the SD card. (MultiMediaCard cannot be used.) • Remove any dirt from the SD card terminals. PLAYBACK FAILED • Insert the SD card before switching the power on. • Use the AC Adapter as power supply. USE AC ADAPTOR •... -
Page 48: Specifi Cations
Specifi cations Recording mode (video) Camcorder UXP: 1920 x 1080 pixels, average of 24 Mbps (VBR) For general 1920 x 1080 pixels, average of 17 Mbps Power supply (VBR) DC 11 V (Using AC adapter) 1920 x 1080 pixels, average of 12 Mbps DC 7.2 V (Using battery pack) (VBR) Power consumption... - Page 49 Dimensions (W x H x D) Remote Control 42 mm x 14.5 mm x 91 mm (1-11/16" x 5/8" x 3-5/8") Power supply Weight DC 3 V Approx. 30 g (0.07 lbs) Battery life (incl. battery) Approx. 1 year (depending on the frequency of use) Design and specifi...
-
Page 50: Cautions
AC plug adapter, called a “Siemens Plug”, as shown. • Be sure to follow the guidelines below For this AC plug adapter, consult your nearest JVC dealer. to prevent corruption or damage to your Plug Adapter recorded data. - Page 51 ... in places subject to extremely high (over 40°C Changes or modifi cations not approved or 104°F) or extremely low (under 0°C or by JVC could void the user’s authority to 32°F) temperatures. operate the equipment. This equipment has •...
-
Page 52: Terms
Terms Lens ..............15 AC Adapter ............18 AV Connection ........... 30, 36 Manual Recording ........... 27 Menu Settings ..........44 Battery Pack ..........18, 25 Moving Files ............ 33 BD (Blu ray) ..........33, 34 Quick Review..........22, 23 Clock Adjust ............