Advertisement
INTRODUCTION
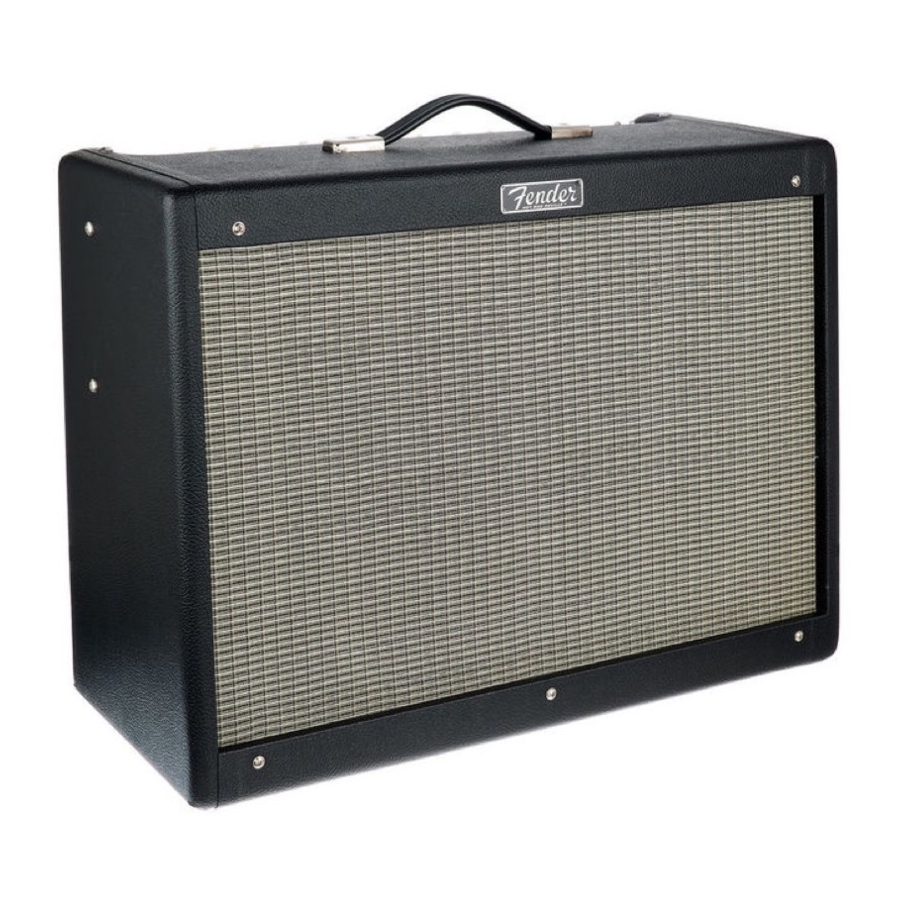
Working guitarists everywhere prize Hot Rod amps for their great volume, reliability, responsiveness to effects pedals, and affordability. The Hot Rod Deluxe IV is a scorching 40-watt 1x12" tube combo decked out with power and performance to spare, great features and a classic look.
The Hot Rod DeVille is the standard for gigging guitarists worldwide and the ideal amp for crafting your own signature sound. The Hot Rod DeVille IV combo delivers the goods and then some, with 60 watts of tube power driving a scorching pair of 12" speakers, hot-rodded performance to spare, great features and a classic look.
Features include:
- Modified preamp circuitry for increased note definition in the overdrive channels
- Spring Reverb smoothness mod
- Celestion® 12" A-TYPE speakers
- Steel-reinforced strap handle
- Ivory pointer knobs
- Improved control panel texture and graphics
- Lightly aged silver grille cloth
- Pine cabinet for weight reduction
- Cover and two-button footswitch
CONTROL PANEL

- INPUT 1: Normal sensitivity input ideal for use with most guitars. Either input jack can be used with any type of guitar depending on the tonal character you prefer. Experiment and use the input that sounds best to you.
- INPUT 2: Lower sensitivity input (-6dB) provides cleaner response with high-output and pre-amplified guitars. You can use input 1 and Input 2 simultaneously with two guitars or a guitar and a microphone, for example. Input sensitivities become equal when used simultaneously.
- NORMAL/BRIGHT: Press in to boost high-frequency tones of NORMAL channel.
- VOLUME: Adjusts volume of NORMAL channel.
- MORE DRIVE: Press in to boost gain and distortion of the DRIVE channel.
- DRIVE: Increase DRIVE setting to produce more distortion and sustain. Use lower DRIVE settings to produce cleaner sounds.
- CHANNEL INDICATOR: NORMAL channel (off), DRIVE channel (yellow), MORE DRIVE channel (red).
- TREBLE: Adjusts high-frequency tone.
- BASS: Adjusts low-frequency tone.
- MIDDLE: Adjusts mid-frequency tone.
- CHANNEL SELECT: NORMAL channel (out), DRIVE channel (in).
- MASTER: Use to adjust loudness of the DRIVE and MORE DRIVE channels in conjunction with DRIVE (F).
- REVERB: Adjusts level of the reverb effect.
- PRESENCE: Adjusts tone at a point in the signal path after the preamp circuitry to provide unique ultra highfrequency tone shaping.
- PREAMP OUT/POWER AMP IN: Multi-functional input/output jacks that can be used in a variety of configurations:
Effects Loop: Connect PREAMP OUT to the input of your effects device and connect effects output to the POWER AMP IN jack.
Multiple Hot Rod Amps: Connect PREAMP OUT on primary unit to POWER AMP IN on auxiliary unit. The primary unit is used to control all auxiliary units, except for REVERB and PRESENCE, which remain active on each auxiliary unit.
Recording/Sound Reinforcement: Connect PREAMP OUT to input jack of sound equipment.
Use instrument (shielded) cables with TS (tip-sleeve) plugs for connections. Both PREAMP OUT and POWER AMP IN jacks are located before Reverb and Presence in signal path. - FOOTSWITCH: Connect included footswitch here to enable remote selection of NORMAL/DRIVE/MORE DRIVE channels. CHANNEL SELECT (K) button on control panel is disabled when footswitch is connected. Speaker cable (unshielded) is superior to instrument cable (shielded) for connecting footswitch.
- POWER INDICATOR: Illuminates when unit is on. Unscrew red jewel to access bulb (type T47) for replacement.
- STANDBY: Use STANDBY instead of switching power off during short breaks to avoid having to wait for tubes to warm up when you want to start playing again. Also, keep amplifier on STANDBY for first 30 seconds when you first switch power on to give tubes a gentle warm up cycle. Using STANDBY will extend lifespan of amplifier's tubes by reducing shock of heat-up / cooldown cycle on tube filaments.
- POWER: Turns amplifier on and off.
CHASSIS REAR VIEW

- POWER CORD: Connect to a grounded outlet in accordance with the voltage and frequency ratings specified on the rear panel of your amplifier.
- FUSE: The fuse protects the unit from electrical faults. Replace fuses only with the type and rating specified on the fuse holder. If the unit repeatedly blows fuses, have the unit tested at an authorized Fender Service Center.
- MAIN SPEAKER JACK: One of the following speaker configurations (internal or external) must always be connected when the unit is ON to prevent damage to the amplifier:
![]()
* Insert an open plug (without speakers connected) into Main Speaker jack (V) for configuration three. - EXTERNAL SPEAKER JACK: This jack is wired in parallel with the main speaker jack and must only be used with a speaker load or an open plug connected to the main speaker jack, as shown above in the MAIN SPEAKER JACK diagram.
- TUBES: Your new Fender amplifier comes equipped with the highest quality tubes available, sourced from various manufacturers worldwide. Because of occasional irregularities in supply, the specific tube type used in each amplifier is subject to change without notice.
When replacing output tubes, please note the specific tube markings on the original tubes factory supplied with your amplifier. For example, 6L6 output tube types used by Fender include, but are not limited to: 6L6GC; 6L6WXT; 6L6C; 6L6GE; etc. The installation of a different type may require significant adjustment by a qualified technician to avoid reduction in performance and tube life.
Additionally, Fender tests and sorts many of our output tubes based on their measured performance. The sorted tubes are marked with a label on the base with coarse ratings of blue, white and red plus fine ratings of 1-10. If your amp came supplied with, for example, a pair of matched GT-6L6-GE power tubes ranked at white-6, then any pair of GT-6L6-GE power tubes marked with a course rating of white will be a good replacement. If the tube replacements are marked as white-6, they will be a perfect direct replacement.
If you have questions or concerns, contact your Fender dealer or authorized service center. - PREAMP TUBE STABILIZER: A vibration-absorbing stabilizer is installed around the preamp tubes to minimize the tube microphonics that normally develop over time. The stabilizer can be used with all preamp tubes compatible with your Hot Rod amplifier.

SPECIFICATIONS
| HOT ROD DEVILLE IV | HOT ROD DELUXE IV | |
| TYPE | PR 1123 | PR 1110 |
| POWER REQUIREMENT/POWER OUTPUT | 180W/60W into 4Ω or 2Ω at 5% THD | 180W/40W into 4Ω or 2Ω at 5% THD |
| INPUT 1/INPUT 2 IMPEDANCES | 1MΩ/136kΩ | 1MΩ/136kΩ |
| PREAMP OUTPUT IMPEDANCE | 1.5kΩ max | 1.5kΩ max |
| POWER AMP INPUT IMPEDANCE/SENSITIVITY | 200 mV for clipping/54kΩ | 200 mV for clipping/54kΩ |
| TUBES | 3 – 7025/12AX7A/ECC83 2 – 6L6GC | 3 – 7025/12AX7A/ECC83 2 – 6L6GC |
| FUSE | F3AL 250V fuse (100V-120V) F1.6AL 250V fuse (220V-240V) | F3AL 250V fuse (100V-120V) F1.6AL 250V fuse (220V-240V) |
| SPEAKERS | 2 12" 8Ω Celestion® A-TYPE | 1 12" 8Ω Celestion® A-TYPE |
| FOOTSWITCH | 2 button gain/channel (079606) | 2 button gain/channel (079606) |
| HEIGHT | 21" (53.3 cm) | 18.75" (47.6 cm) |
| WIDTH | 24.25" (61.6 cm) | 23.5" (59.7 cm) |
| DEPTH | 10.75" (27.3 cm) | 10.5" (26.7 cm) |
| WEIGHT | 55.75 lbs. (25.28 kg) | 41.65 lbs. (18.89 kg) |
Product specifications are subject to change without notice.

Documents / Resources
References
Download manual
Here you can download full pdf version of manual, it may contain additional safety instructions, warranty information, FCC rules, etc.
Download Fender Hot Rod Deluxe IV, DeVille IV - Guitar Amplifier Manual
Advertisement
Thank you! Your question has been received!


Need Assistance?
Do you have a question about the Hot Rod Deluxe IV that isn't answered in the manual? Leave your question here.