Table of Contents
Advertisement
Quick Links
Advertisement
Table of Contents

Related Manuals for Samsung AM BXVGFH/AA Series


Summary of Contents for Samsung AM BXVGFH/AA Series
- Page 1 Technical Data Book DVM S2 for America (R410A, 60Hz, HP) Model : AM***BXVGFH/AA, AM***BXVGJH/AA...
- Page 2 History Version Modification Date Remark Ver.1.0 Release DVM S2 HP TDB for America 22.02.23 Ver.1.1 22.09.26 Modified some errors...
- Page 3 Nomenclature Outdoor Unit Model Name Buyer (1) Classification (5) Feature 1 Inverter (6) Feature 2 (2) Capacity Standard + General Temp.+ Module kBtu/h (3 digits) High EER + Low Temp. + Module High EER + General Temp. + Module Standard + General Temp. + Non-Module (3) Version (7) Rating Voltage 2022...
- Page 4 Features & Benefits Rebuilt on all new innovations Rethink your approach to air conditioning with the Samsung DVM S2. It delivers outstanding comfort and energy efficiency, even in extreme climates. Its intelligent features make installation and maintenance easier and more cost-effective.
- Page 5 Triple Profile Scroll and efficient Optimal Discharge Superheat (DSH) Control technology. * Samsung circulates 14,400cc/sec refrigerant (= 90cc (displacement volume) x 160rps (revolutions per second)), while Company A circulates 12,480cc/sec (= 96cc x 130rps), Company B circulates 14,080cc/sec (= 88cc x 160rps) and Company C circulates 12,320cc/sec (= 88cc x 140rps).
- Page 6 Contents 1. Combination Table / Design Procedure & Combination Ratio 2. Specification 3. Electric Characteristics 4. Dimensional Drawing 5. Center of Gravity 6. Electrical Wiring Diagrams 7. Sound Data 8. Operation Range 9. Piping Diagram 10. Installation 11. AHRI Data...
-
Page 7: Table Of Contents
1. Combination Table : Outdoor units DVM S2 HP (208~230V) System Model Capacity (Ton) Number of Capa individual Model Name (Ton) outdoor units AM072BXVGFH/AA AM096BXVGFH/AA AM120BXVGFH/AA AM144BXVGFH/AA AM168BXVGFH/AA AM192BXVGFH/AA AM216BXVGFH/AA AM240BXVGFH/AA AM264BXVGFH/AA AM288BXVGFH/AA AM312BXVGFH/AA AM336BXVGFH/AA AM360BXVGFH/AA AM384BXVGFH/AA AM408BXVGFH/AA AM432BXVGFH/AA AM456BXVGFH/AA AM480BXVGFH/AA NOTE •... - Page 8 1. Combination Table : Outdoor units DVM S2 HP (460V) System Model Capacity (Ton) Number of Capa individual Model Name (Ton) outdoor units AM072BXVGJH/AA AM096BXVGJH/AA AM120BXVGJH/AA AM144BXVGJH/AA AM168BXVGJH/AA AM192BXVGJH/AA AM216BXVGJH/AA AM240BXVGJH/AA AM264BXVGJH/AA AM288BXVGJH/AA AM312BXVGJH/AA AM336BXVGJH/AA AM360BXVGJH/AA AM384BXVGJH/AA AM408BXVGJH/AA AM432BXVGJH/AA AM456BXVGJH/AA AM480BXVGJH/AA NOTE •...
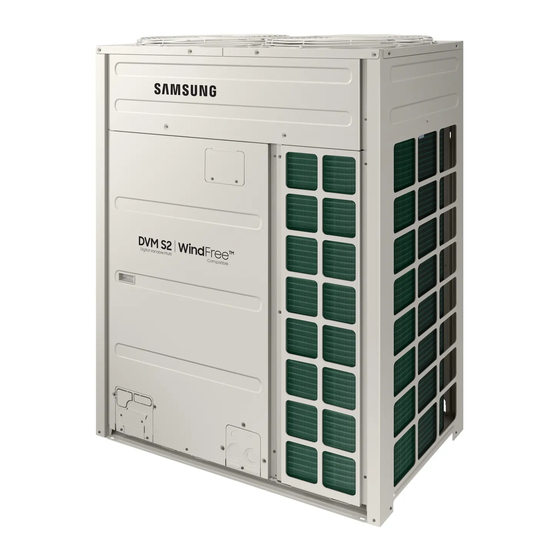
- Page 9 1. Combination Table : Outdoor units External Appearance DVM S2 HP (208~230V) Capa Capa Model Name Model Model Name Model [TON] [TON] AM288BXVGFH/AA AM312BXVGFH/AA AM072BXVGFH/AA AM336BXVGFH/AA AM360BXVGFH/AA AM096BXVGFH/AA AM120BXVGFH/AA AM384BXVGFH/AA AM144BXVGFH/AA AM408BXVGFH/AA AM168BXVGFH/AA AM432BXVGFH/AA AM192BXVGFH/AA AM216BXVGFH/AA AM240BXVGFH/AA AM456BXVGFH/AA AM480BXVGFH/AA AM264BXVGFH/AA...
- Page 10 1. Combination Table : Outdoor units External Appearance DVM S2 HP (460V) Capa Capa Model Name Model Model Name Model [TON] [TON] AM288BXVGJH/AA AM312BXVGJH/AA AM072BXVGJH/AA AM336BXVGJH/AA AM360BXVGJH/AA AM096BXVGJH/AA AM120BXVGJH/AA AM384BXVGJH/AA AM144BXVGJH/AA AM408BXVGJH/AA AM168BXVGJH/AA AM432BXVGJH/AA AM192BXVGJH/AA AM216BXVGJH/AA AM240BXVGJH/AA AM456BXVGJH/AA AM480BXVGJH/AA AM264BXVGJH/AA...
- Page 11 Design Procedure & Combination Ratio Combination Ratio (Connection Ratio) Definition of Combination Ratio, CR Sum of Nominal Cooling Capacity of Indoor units CR = * 100% Nominal Cooling Capacity of Outdoor unit Constraints of Allowable Combination Ratio DVM S systems are normally designed to utilize a CR 50% to 130% to ensure effective load balancing between indoor units and outdoor unit.
- Page 12 Satisfying cooling & heating comfort The Maximum Capacity of outdoor unit at design condition calculated from Samsung capacity data table or design tool (DVM Pro) should always be the same or greater than System Peak Load (Block Load) defined in table 1.
- Page 13 Design Procedure & Combination Ratio Combination Ratio (Connection Ratio) Allowable CR limit to avoid abnormal sound level risks in heating operation f If the CR exceeds 130%, in a specific case of heating operation, an indoor unit may have higher sound level than the level specified in the technical documents.
- Page 14 NOTE Fig. 2. Please contact your local Samsung representative for further details if the project requires you to design the project with a connection ratio greater than 130%.
-
Page 15: Am072Bxvgfh/Aa
2. Specification DVM S2 (208~230V) Model Name AM072BXVGFH/AA AM096BXVGFH/AA AM120BXVGFH/AA Outdoor unit module 1 Outdoor unit module 2 Outdoor unit module 3 Power Supply Ø, #, V, Hz 3, 3, 208~230, 60 3, 3, 208~230, 60 3, 3, 208~230, 60 Mode Heat Pump Heat Pump... - Page 16 2. Specification DVM S2 (208~230V) Model Name AM072BXVGFH/AA AM096BXVGFH/AA AM120BXVGFH/AA Outdoor unit module 1 Outdoor unit module 2 Outdoor unit module 3 Min. TransmissionCable Wiring Remark F1, F2 F1, F2 F1, F2 Connections Power supply intake Both indoor and outdoor unit Both indoor and outdoor unit Both indoor and outdoor unit Type...
-
Page 17: Am144Bxvgfh/Aa
2. Specification DVM S2 (208~230V) Model Name AM144BXVGFH/AA AM168BXVGFH/AA AM192BXVGFH/AA Outdoor unit module 1 Outdoor unit module 2 Outdoor unit module 3 Power Supply Ø, #, V, Hz 3, 3, 208~230, 60 3, 3, 208~230, 60 3, 3, 208~230, 60 Mode Heat Pump Heat Pump... - Page 18 2. Specification DVM S2 (208~230V) Model Name AM144BXVGFH/AA AM168BXVGFH/AA AM192BXVGFH/AA Outdoor unit module 1 Outdoor unit module 2 Outdoor unit module 3 Min. TransmissionCable Wiring Remark F1, F2 F1, F2 F1, F2 Connections Power supply intake Both indoor and outdoor unit Both indoor and outdoor unit Both indoor and outdoor unit Type...
-
Page 19: Am216Bxvgfh/Aa
2. Specification DVM S2 (208~230V) Model Name AM216BXVGFH/AA AM240BXVGFH/AA AM264BXVGFH/AA Outdoor unit module 1 AM096BXVGFH/AA Outdoor unit module 2 AM168BXVGFH/AA Outdoor unit module 3 Power Supply Ø, #, V, Hz 3, 3, 208~230, 60 3, 3, 208~230, 60 3, 3, 208~230, 60 Mode Heat Pump Heat Pump... -
Page 20: Am264Bxvgfh/Aa
2. Specification DVM S2 (208~230V) Model Name AM216BXVGFH/AA AM240BXVGFH/AA AM264BXVGFH/AA Outdoor unit module 1 AM096BXVGFH/AA Outdoor unit module 2 AM168BXVGFH/AA Outdoor unit module 3 Min. TransmissionCable Wiring Remark F1, F2 F1, F2 F1, F2 Connections Power supply intake Both indoor and outdoor unit Both indoor and outdoor unit Both indoor and outdoor unit Type... -
Page 21: Am288Bxvgfh/Aa
2. Specification DVM S2 (208~230V) Model Name AM288BXVGFH/AA AM312BXVGFH/AA AM336BXVGFH/AA Outdoor unit module 1 AM096BXVGFH/AA AM096BXVGFH/AA AM096BXVGFH/AA Outdoor unit module 2 AM192BXVGFH/AA AM216BXVGFH/AA AM240BXVGFH/AA Outdoor unit module 3 Power Supply Ø, #, V, Hz 3, 3, 208~230, 60 3, 3, 208~230, 60 3, 3, 208~230, 60 Mode Heat Pump... - Page 22 2. Specification DVM S2 (208~230V) Model Name AM288BXVGFH/AA AM312BXVGFH/AA AM336BXVGFH/AA Outdoor unit module 1 AM096BXVGFH/AA AM096BXVGFH/AA AM096BXVGFH/AA Outdoor unit module 2 AM192BXVGFH/AA AM216BXVGFH/AA AM240BXVGFH/AA Outdoor unit module 3 Min. TransmissionCable Wiring Remark F1, F2 F1, F2 F1, F2 Connections Power supply intake Both indoor and outdoor unit Both indoor and outdoor unit Both indoor and outdoor unit...
-
Page 23: Am360Bxvgfh/Aa
2. Specification DVM S2 (208~230V) Model Name AM360BXVGFH/AA AM384BXVGFH/AA AM408BXVGFH/AA Outdoor unit module 1 AM120BXVGFH/AA AM192BXVGFH/AA AM192BXVGFH/AA Outdoor unit module 2 AM240BXVGFH/AA AM192BXVGFH/AA AM216BXVGFH/AA Outdoor unit module 3 Power Supply Ø, #, V, Hz 3, 3, 208~230, 60 3, 3, 208~230, 60 3, 3, 208~230, 60 Mode Heat Pump... - Page 24 2. Specification DVM S2 (208~230V) Model Name AM360BXVGFH/AA AM384BXVGFH/AA AM408BXVGFH/AA Outdoor unit module 1 AM120BXVGFH/AA AM192BXVGFH/AA AM192BXVGFH/AA Outdoor unit module 2 AM240BXVGFH/AA AM192BXVGFH/AA AM216BXVGFH/AA Outdoor unit module 3 Min. TransmissionCable Wiring Remark F1, F2 F1, F2 F1, F2 Connections Power supply intake Both indoor and outdoor unit Both indoor and outdoor unit Both indoor and outdoor unit...
-
Page 25: Am432Bxvgfh/Aa
2. Specification DVM S2 (208~230V) Model Name AM432BXVGFH/AA AM456BXVGFH/AA AM480BXVGFH/AA Outdoor unit module 1 AM216BXVGFH/AA AM120BXVGFH/AA AM120BXVGFH/AA Outdoor unit module 2 AM216BXVGFH/AA AM144BXVGFH/AA AM168BXVGFH/AA Outdoor unit module 3 AM192BXVGFH/AA AM192BXVGFH/AA Power Supply Ø, #, V, Hz 3, 3, 208~230, 60 3, 3, 208~230, 60 3, 3, 208~230, 60 Mode... - Page 26 2. Specification DVM S2 (208~230V) Model Name AM432BXVGFH/AA AM456BXVGFH/AA AM480BXVGFH/AA Outdoor unit module 1 AM216BXVGFH/AA AM120BXVGFH/AA AM120BXVGFH/AA Outdoor unit module 2 AM216BXVGFH/AA AM144BXVGFH/AA AM168BXVGFH/AA Outdoor unit module 3 AM192BXVGFH/AA AM192BXVGFH/AA Min. TransmissionCable Wiring Remark F1, F2 F1, F2 F1, F2 Connections Power supply intake Both indoor and outdoor unit...
- Page 27 2. Specification DVM S2 (460V) Model Name AM072BXVGJH/AA AM096BXVGJH/AA AM120BXVGJH/AA Outdoor unit module 1 Outdoor unit module 2 Outdoor unit module 3 Power Supply Ø, #, V, Hz 3, 3, 460, 60 3, 3, 460, 60 3, 3, 460, 60 Mode Heat Pump Heat Pump...
- Page 28 2. Specification DVM S2 (460V) Model Name AM072BXVGJH/AA AM096BXVGJH/AA AM120BXVGJH/AA Outdoor unit module 1 Outdoor unit module 2 Outdoor unit module 3 Min. TransmissionCable Wiring Remark F1, F2 F1, F2 F1, F2 Connections Power supply intake Both indoor and outdoor unit Both indoor and outdoor unit Both indoor and outdoor unit Type...
- Page 29 2. Specification DVM S2 (460V) Model Name AM144BXVGJH/AA AM168BXVGJH/AA AM192BXVGJH/AA Outdoor unit module 1 Outdoor unit module 2 Outdoor unit module 3 Power Supply Ø, #, V, Hz 3, 3, 460, 60 3, 3, 460, 60 3, 3, 460, 60 Mode Heat Pump Heat Pump...
- Page 30 2. Specification DVM S2 (460V) Model Name AM144BXVGJH/AA AM168BXVGJH/AA AM192BXVGJH/AA Outdoor unit module 1 Outdoor unit module 2 Outdoor unit module 3 Min. TransmissionCable Wiring Remark F1, F2 F1, F2 F1, F2 Connections Power supply intake Both indoor and outdoor unit Both indoor and outdoor unit Both indoor and outdoor unit Type...
- Page 31 2. Specification DVM S2 (460V) Model Name AM216BXVGJH/AA AM240BXVGJH/AA AM264BXVGJH/AA Outdoor unit module 1 AM096BXVGJH/AA Outdoor unit module 2 AM168BXVGJH/AA Outdoor unit module 3 Power Supply Ø, #, V, Hz 3, 3, 460, 60 3, 3, 460, 60 3, 3, 460, 60 Mode Heat Pump Heat Pump...
- Page 32 2. Specification DVM S2 (460V) Model Name AM216BXVGJH/AA AM240BXVGJH/AA AM264BXVGJH/AA Outdoor unit module 1 AM096BXVGJH/AA Outdoor unit module 2 AM168BXVGJH/AA Outdoor unit module 3 Min. TransmissionCable Wiring Remark F1, F2 F1, F2 F1, F2 Connections Power supply intake Both indoor and outdoor unit Both indoor and outdoor unit Both indoor and outdoor unit Type...
- Page 33 2. Specification DVM S2 (460V) Model Name AM288BXVGJH/AA AM312BXVGJH/AA AM336BXVGJH/AA Outdoor unit module 1 AM096BXVGJH/AA AM096BXVGJH/AA AM096BXVGJH/AA Outdoor unit module 2 AM192BXVGJH/AA AM216BXVGJH/AA AM240BXVGJH/AA Outdoor unit module 3 Power Supply Ø, #, V, Hz 3, 3, 460, 60 3, 3, 460, 60 3, 3, 460, 60 Mode Heat Pump...
- Page 34 2. Specification DVM S2 (460V) Model Name AM288BXVGJH/AA AM312BXVGJH/AA AM336BXVGJH/AA Outdoor unit module 1 AM096BXVGJH/AA AM096BXVGJH/AA AM096BXVGJH/AA Outdoor unit module 2 AM192BXVGJH/AA AM216BXVGJH/AA AM240BXVGJH/AA Outdoor unit module 3 Min. TransmissionCable Wiring Remark F1, F2 F1, F2 F1, F2 Connections Power supply intake Both indoor and outdoor unit Both indoor and outdoor unit Both indoor and outdoor unit...
- Page 35 2. Specification DVM S2 (460V) Model Name AM360BXVGJH/AA AM384BXVGJH/AA AM408BXVGJH/AA Outdoor unit module 1 AM120BXVGJH/AA AM192BXVGJH/AA AM192BXVGJH/AA Outdoor unit module 2 AM240BXVGJH/AA AM192BXVGJH/AA AM216BXVGJH/AA Outdoor unit module 3 Power Supply Ø, #, V, Hz 3, 3, 460, 60 3, 3, 460, 60 3, 3, 460, 60 Mode Heat Pump...
- Page 36 2. Specification DVM S2 (460V) Model Name AM360BXVGJH/AA AM384BXVGJH/AA AM408BXVGJH/AA Outdoor unit module 1 AM120BXVGJH/AA AM192BXVGJH/AA AM192BXVGJH/AA Outdoor unit module 2 AM240BXVGJH/AA AM192BXVGJH/AA AM216BXVGJH/AA Outdoor unit module 3 Min. TransmissionCable Wiring Remark F1, F2 F1, F2 F1, F2 Connections Power supply intake Both indoor and outdoor unit Both indoor and outdoor unit Both indoor and outdoor unit...
- Page 37 2. Specification DVM S2 (460V) Model Name AM432BXVGJH/AA AM456BXVGJH/AA AM480BXVGJH/AA Outdoor unit module 1 AM216BXVGJH/AA AM120BXVGJH/AA AM120BXVGJH/AA Outdoor unit module 2 AM216BXVGJH/AA AM144BXVGJH/AA AM168BXVGJH/AA Outdoor unit module 3 AM192BXVGJH/AA AM192BXVGJH/AA Power Supply Ø, #, V, Hz 3, 3, 460, 60 3, 3, 460, 60 3, 3, 460, 60 Mode...
- Page 38 2. Specification DVM S2 (460V) Model Name AM432BXVGJH/AA AM456BXVGJH/AA AM480BXVGJH/AA Outdoor unit module 1 AM216BXVGJH/AA AM120BXVGJH/AA AM120BXVGJH/AA Outdoor unit module 2 AM216BXVGJH/AA AM144BXVGJH/AA AM168BXVGJH/AA Outdoor unit module 3 AM192BXVGJH/AA AM192BXVGJH/AA Min. TransmissionCable Wiring Remark F1, F2 F1, F2 F1, F2 Connections Power supply intake Both indoor and outdoor unit...
- Page 39 3. Electric Characteristics DVM S2 (208~230V) Module #1 Module #2 Module #3 Capacity Power Supply Model Name FLA[A] FLA[A] FLA[A] Voltage FAN1 FAN2 FAN1 FAN2 FAN1 FAN2 AM072BXVGFH 208~230 28.0 35.0 AM096BXVGFH 208~230 36.0 40.0 AM120BXVGFH 208~230 40.8 45.0 AM144BXVGFH 208~230 52.6 60.0...
- Page 40 4. Dimensional Drawing Outdoor unit • AM072BXVGFH/AA, AM072BXVGJH/AA Unit: mm (inches) NOTE 1 Detail A and SECTION B-B indicate the dimension after fixing the attached piping. 2 Item 3-6: Knock-out hole 3 View C indicate the dimension of knock-out hole (bottom) 4 Pipe [Ø, mm(inch)]: Brazing connection kBtu Liquid pipe...
- Page 41 4. Dimensional Drawing Outdoor unit • AM096/120/144/168BXVGFH/AA, AM096/120/144/168BXVGJH/AA Unit: mm (inches) NOTE 1 Detail A and SECTION B-B indicate the dimension after fixing the attached piping. 2 Item 3-6: Knock-out hole 3 View C indicate the dimension of knock-out hole (bottom) 4 Pipe [Ø, mm(inch)]: Brazing connection kBtu Liquid pipe...
- Page 42 4. Dimensional Drawing Outdoor unit • AM192/216/240BXVGFH/AA, AM192/216/240BXVGJH/AA Unit: mm (inches) NOTE Liquid pipe Gas pipe Table of descriptions Remark Table of descriptions Remark Gas Ref.pipe See NOTE 4. Knock-out Hole for Ref.Piping (bottom) Liquid Ref.pipe See NOTE 4. Knock-out Hole for Ref.Piping (front) Power wiring conduit Ø44 Communication wiring conduit...
- Page 43 5. Center of Gravity Outdoor unit Unit: mm (inches) Model AM072BXVG*H/AA 358 [14 - 1/8] 463 [18 - 1/4] 715 [28 - 1/8]...
- Page 44 5. Center of Gravity Outdoor unit Unit: mm (inches) Foundation bolt hole Model AM096BXVG*H/AA AM120BXVG*H/AA 520 [20 - 1/2] 678 [26 - 11/16] 324 [12 - 3/4] AM144BXVG*H/AA AM168BXVG*H/AA...
- Page 45 5. Center of Gravity Outdoor unit Units : mm [inches] Foundation bolt hole Model AM192BXVG*H/AA 350 [13 - 3/4] 1,130 [44 - 1/2] 688 [27 - 1/16] AM216BXVG*H/AA AM240BXVG*H/AA...
- Page 46 6. Electrical Wiring Diagrams Outdoor unit AM072BXVGFH/AA, AM072BXVGJH/AA INV PCB Printed circuit board (inverter) EVI-OUT(10K) Thermistor (EVI-out_10kohm) HOTGAS1 BYPASS V/V Solenoid valve (Hot Gas Bypass1) EMI PCB Printed circuit board (emi) EVI-IN(10K) Thermistor (EVI-in_10kohm) EVI BYPASS1 V/V Solenoid valve (EVI BYPASS) MAIN PCB Printed circuit board (main) SUCT1(10K)
- Page 47 6. Electrical Wiring Diagrams Outdoor unit AM096/120/144BXVGFH/AA, AM096/120/144/168BXVGJH/AA INV PCB1 Printed circuit board (inverter1) EEV1 Electronic expansion valve 1 HOTGAS1 BYPASS V/V Solenoid valve (Hot Gas Bypass1) INV PCB2 Printed circuit board (inverter2) EEV2 Electronic expansion valve 2 EVI BYPASS1 V/V Solenoid valve (EVI BYPASS) EMI PCB1 Printed circuit board (emi1)
- Page 48 6. Electrical Wiring Diagrams Outdoor unit AM168BXVGFH/AA INV PCB1 Printed circuit board (inverter1) EEV1 Electronic expansion valve 1 LIQUID(10K) Thermistor (Liquid Tube Temp._10Kohm) INV PCB2 Printed circuit board (inverter2) EEV2 Electronic expansion valve 2 HOTGAS1 BYPASS V/V Solenoid valve (Hot Gas Bypass1) EMI PCB1 Printed circuit board (emi1) EVI-OUT(10K)
- Page 49 6. Electrical Wiring Diagrams Outdoor unit AM192BXVGJH/AA INV PCB1 Printed circuit board (inverter1) EEV1 Electronic expansion valve 1 HOTGAS1 BYPASS V/V Solenoid valve (Hot Gas Bypass1) INV PCB2 Printed circuit board (inverter2) EEV2 Electronic expansion valve 2 EVI BYPASS1 V/V Solenoid valve (EVI BYPASS) EMI PCB1 Printed circuit board (emi1)
- Page 50 6. Electrical Wiring Diagrams Outdoor unit AM192/216/240BXVGFH, AM216/240BXVGJH/AA INV PCB1 Printed circuit board (inverter1) EEV1 Electronic expansion valve 1 LIQUID(10K) Thermistor (Liquid Tube Temp._10Kohm) INV PCB2 Printed circuit board (inverter2) EEV2 Electronic expansion valve 2 HOTGAS1 BYPASS V/V Solenoid valve (Hot Gas Bypass1) EMI PCB1 Printed circuit board (emi1) EVI-OUT(10K)
- Page 51 7. Sound Data Sound Pressure level Unit: dB(A) Cooling Heating Microphone Model Silent 1 Silent 2 Silent 3 AM072BXVGFH/AA 1.5m Front AM096BXVGFH/AA AM120BXVGFH/AA AM144BXVGFH/AA • NC Curve 2) AM096BXVGFH/AA 1) AM072BXVGFH/AA Cooling NC 75 Cooling NC 75 Heating Heating NC 70 NC 70 Silent 1 Silent 1...
- Page 52 7. Sound Data Sound Pressure level Unit: dB(A) Cooling Heating Microphone Model Silent 1 Silent 2 Silent 3 AM168BXVGFH/AA 1.5m Front AM192BXVGFH/AA AM216BXVGFH/AA AM240BXVGFH/AA • NC Curve 6) AM192BXVGFH/AA 5) AM168BXVGFH/AA Heating Heating Cooling Silent 1 NC 75 NC 75 Silent 2 Silent 3 NC 70...
- Page 53 7. Sound Data Sound Pressure level Unit: dB(A) Cooling Heating Microphone Model Silent 1 Silent 2 Silent 3 AM072BXVGJH/AA 1.5m Front AM096BXVGJH/AA AM120BXVGJH/AA AM144BXVGJH/AA • NC Curve 2) AM096BXVGJH/AA 1) AM072BXVGJH/AA Cooling NC 75 Cooling NC 75 Heating Heating NC 70 NC 70 Silent 1 Silent 1...
- Page 54 7. Sound Data Sound Pressure level Unit: dB(A) Cooling Heating Microphone Model Silent 1 Silent 2 Silent 3 AM168BXVGJH/AA 1.5m Front AM192BXVGJH/AA AM216BXVGJH/AA AM240BXVGJH/AA • NC Curve 6) AM192BXVGJH/AA 5) AM168BXVGJH/AA Heating Heating Cooling Silent 1 NC 75 NC 75 Silent 2 Silent 3 NC 70...
- Page 55 7. Sound Data Sound Power level Unit: dB(A) Model Power AM072BXVGFH/AA AM096BXVGFH/AA AM120BXVGFH/AA AM144BXVGFH/AA • NC Curve 2) AM096BXVGFH/AA 1) AM072BXVGFH/AA NC 75 NC 75 NC 70 NC 70 NC 60 NC 60 NC 55 NC 55 NC 50 NC 50 NC 45 NC 45 NC 40...
- Page 56 7. Sound Data Sound Power level Unit: dB(A) Model Power AM168BXVGFH/AA AM192BXVGFH/AA AM216BXVGFH/AA AM240BXVGFH/AA 86.5 • NC Curve 5) AM168BXVGFH/AA 6) AM192BXVGFH/AA NC 75 NC 75 NC 70 NC 70 NC 60 NC 60 NC 55 NC 55 NC 50 NC 50 NC 45 NC 45...
- Page 57 7. Sound Data Sound Power level Unit: dB(A) Model Power AM072BXVGJH/AA AM096BXVGJH/AA AM120BXVGJH/AA AM144BXVGJH/AA • NC Curve 9) AM072BXVGJH/AA 10) AM096BXVGJH/AA NC 75 NC 75 NC 70 NC 70 NC 60 NC 60 NC 55 NC 55 NC 50 NC 50 NC 45 NC 45 NC 40...
- Page 58 7. Sound Data Sound Power level Unit: dB(A) Model Power AM168BXVGJH/AA AM192BXVGJH/AA AM216BXVGJH/AA AM240BXVGJH/AA 86.5 • NC Curve 13) AM168BXVGJH/AA 14) AM192BXVGJH/AA NC 75 NC 75 NC 70 NC 70 NC 60 NC 60 NC 55 NC 55 NC 50 NC 50 NC 45 NC 45...
- Page 59 8. Operation Range Outdoor unit Cooling Heating Warming Continuous Continuous Operation Range Operation Operation Range Range "Expand operational temperature range" Option Indoor temperature(ºF WB) Indoor temperature(ºF DB) (1) The operating range is shown in these figures (2) The assumed installation condtions are as follows - Outdoor units and indoor units combination - The Pipe length(including elbow) is 5m (16.4ft) - The Level difference is 0m...
- Page 60 8. Operation Range Outdoor unit Defrosting correction factor The heating capacity tables do not take account of the reduction in capacity, when frost has accumulated or while the defrosting operation is in progress. The capacity values, which take these factors into account, in other words, the integrated heating capacity values, can be calculated as follows : Formula : A = B ×...
- Page 61 9. Piping Diagram Outdoor unit (1) AM072BXVGFH/AA, AM072BXVGJH/AA Ball Valve - Gas pipe Outdoor Fan 1 (OF1) (BV_G) Thermistor - Ambient (T_A) Motor for Outdoor Fan 1 (OFM1) Thermistor - Cond Out (T_CO) Heat Exchanger - Main (HX_M) Thermistor - Suction pipe Electronic (T_S)
- Page 62 9. Piping Diagram Outdoor unit (2) AM096/120/144/168BXVGFH/AA, AM096/120/144/168BXVGJH/AA Ball Valve - Outdoor Fan 1 (OF1) Gas pipe Outdoor Fan 2 (OF2) (BV_G) Thermistor - Ambient (T_A) Motor for Outdoor Fan 1 (OFM1) Motor for Outdoor Fan 2 (OFM2) Thermistor - Cond Out (T_CO) Heat Exchanger - Main (HX_M)
- Page 63 9. Piping Diagram Outdoor unit (3) AM192BXVGFH/AA, AM192BXVGJH/AA Ball Valve - Outdoor Fan 1 (OF1) Outdoor Fan 2 (OF2) Gas pipe Thermistor - (BV_HG) Ambient (T_A) Motor for Outdoor Fan 1 (OFM1) Motor for Outdoor Fan 2 (OFM2) Thermistor - Thermistor - Cond Out Suction pipe...
- Page 64 9. Piping Diagram Outdoor unit (4) AM216/240BXVGFH/AA, AM216/240BXVGJH/AA Ball Valve - Outdoor Fan 1 (OF1) Outdoor Fan 2 (OF2) Thermistor - Gas pipe Ambient (BV_HG) (T_A) Motor for Outdoor Fan 2 (OFM2) Motor for Outdoor Fan 1 (OFM1) Thermistor - Reservoir Thermistor - Cond Out...
- Page 65 10. Installation Choosing the installation location Outdoor unit location requirements Decide the installation location, with the consideration of the following conditions, under user’s approval. • Place where hot discharge air or noise from the outdoor unit may not disturb the neighbor (Especially in residential areas, keep the operation hours in mind.) •...
- Page 66 7 Check the condition of the product periodically. – Check the installation site every 3 months and perform anticorrosiontreatment such as R-Pro supplied by SAMSUNG (Code : MOK-220SA) or commercial water repellent grease and wax, etc., based on the product condition.
- Page 67 10. Installation Choosing the installation location • Do not install the product in places where corrosive gases such as sulfur oxides, ammonia, and sulfurous gas are produced. (e.g. Toilet outlet, ventilation opening, sewage works, dyeing complex, cattle shed, sulfuric hot spring, nuclear power plant, ship etc.) When installing the product in those places, contact an installationspecialty store as the copper pipe and brazing part will need additional corrosion proof or anti- rust additive to prevent corrosion.
- Page 68 10. Installation Choosing the installation location Module installation Unit : mm (inch) Over Front Over 100 (4) 100 (4) side Over 100(4) <Case 1> Over 300 (12) Height of the wall is Over 400 Over 400 Front unlimited (16) (16) side <Case 2>...
- Page 69 10. Installation Preparing materials and tools • You must keep the installation manual until the installation is finished. • Hand over the installation manual to the customer after finishing the installation. Installation manual (1) Packing socket (1) ※ Certain models are supplied with a packing socket. The socket type may differ, depending on the model. Optional accessories •...
- Page 70 10. Installation Outdoor unit installation WARNING • Make sure to remove the wooden pallet before installing the outdoor unit. If you do not remove the wooden pallet, there is risk of fire during welding the pipes. If the outdoor unit is installed with wooden pallet on, and it was used for long period time, wooden palette may break and cause electrical hazard or high pressure may damage the pipes.
- Page 71 10. Installation Outdoor unit installation Unit : mm (inch) Base ground H beam or anti- Over vibration frame 200 (8) Outdoor unit base mount and anchor bolt position Unit : mm (inch) Outdoor unit - Anti-vibration Anti-vibration - Base ground Unit : mm (inch) DVM S2 DVM S2...
- Page 72 10. Installation Outdoor unit installation Examples of draining work • Construct the drainage ditch with reinforced concretes and make sure that water-proofing work is done. • For smooth draining of defrost water, make sure to apply 1/50 slope. • Construct a drainage around the outdoor unit to prevent the defrost water (from the outdoor unit) from stagnating, overflowing or freezing near the installation space.
- Page 73 10. Installation CAUTION • Cautions regarding on connecting the anchor bolt – Tighten the rubber washer to prevent the bolt connection part of the outdoor unit from corroding. Rubber washer – Anchor specification Diameter Anchor Sleeve Insert Fastening Size of drill bit length (b) length (c) depth...
- Page 74 10. Installation • Cautions regarding on anti-vibration frame installation – During installation, make sure there is no gap between thebase ground and the supporting structures such as antivibrationframe or H beam. – Base ground must be constructed strongly to support the bottom part of the anti-vibration mount. –...
- Page 75 10. Installation Outdoor unit installation WARNING • Should adopt bar type louver. Don’t use a type of rain resistance louver. [Bar type louver] [Rain resistance louver] • Louver specifications. – Angle criteria : less than 20˚ – Opening ratio criteria : greater than 80% Installing the outdoor unit in cold region •...
- Page 76 10. Installation Unit : mm (inch) 558 (21.97) 932 (36.69) 558 (21.97) 871 (34.29) 788 (31.02) 2048 (80.63) (30.12) (21.26) DVM S2 Small type 558 (21 .97) 1330 (52.36) 558 (21 .97) 1153 (45.39) 871 (34.29) 345 (13.58) 2413 (95) (22.32) (21.26) (30.12)
- Page 77 10. Installation Refrigerant pipe installation WARNING • When installing, make sure there is no leakage. When collecting the refrigerant, stop the compressor first before removing the connection pipe. If the refrigerant pipe is not properly connected and the compressor works with the service valve open, the pipe inhales the air and it makes the pressure inside of the refrigerant cycle abnormally high which may lead to explosion and injury.
- Page 78 10. Installation Selecting refrigerant pipe First branch joint Increase the main pipe size • Install the refrigerant pipe according to main pipe size of each outdoor unit capacity. • When the pipe length (including elbow) between an outdoor unit and the farthest indoor unit exceeds 90m (295ft), you must increase the size of the pipe (main pipe) by one grade which connects between the outdoor unit to the first branch joint.
- Page 79 10. Installation 16Ton 12Ton 6Ton Ex.) 34 Ton Pipe size (O.D) Liquid pipe Gas pipe inch inch 15.88 28.58 11/8 19.05 34.92 13/8 19.05 41.28 15/8 Size of the pipe connected to the outdoor unit (A) Branch joint (C~E) Select the size of the main pipe according to the below table. Branch joint between outdoor units (C) Select a branch joint according to the sum of the capacity of outdoor units connected to the branch *Maximum pipe length within...
- Page 80 10. Installation Refrigerant pipe installation When all the following conditions are met, install the main liquid pipe that is one step smaller to reduce piping load and the amount of refrigerant. Note that the refrigerant for the main liquid pipe must be added by the specified amount upon reduction. Condition 1: The vertical piping length is less than 131 ft (40m) Condition 2: For BG uni t s, allowable length A (ft) ≥...
- Page 81 10. Installation Additional refrigerant 144MBH (12Ton) 1/2” (5m/16.4’) 12MBH 1/2” (5m/16.4’) 1/4” (5m/16.4’) 24MBH 1/2” (5m/16.4’) 1/4” (10m/32.8’) 3/8” (10m/32.8’) 24MBH 1/4” (15m/49.2’) 3/8” 1/4” (5m/16.4’) (10m/32.8’) 3/8” 3/8” (10m/32.8’) (10m/32.8’) 3/8” (10m/32.8’) 18MBH 12MBH 18MBH 18MBH 18MBH Refrigerant pipe installation •...
- Page 82 10. Installation • Amount of additional refrigerant for each indoor unit ( ⓑ ) Unit : lb(kg) Capacity Index (MBH) 1way cassette 0.55 0.55 0.55 (AM****N1DCH/**) (0.25) (0.25) (0.25) 1way cassette 0.33 0.33 0.55 0.55 0.71 0.71 0.71 (AM****N1PCH/**) (0.15) (0.15) (0.25) (0.25)
- Page 83 10. Installation • Example of refrigerant calculation for HP models Unit amount of refrigerant Amount of additional Total amount of additional Length [m (ft)] Size of liquid pipe [kg/m (lb/ft)] refrigerant [kg (lb)] refrigerant [kg (lb)] Classification [mm (inch)] × ×...
- Page 84 10. Installation Refrigerant pipe installation Pipe installation for an outdoor unit 1 Direction of the pipe Refrigerant pipe can be withdrawn from the front, left and right side. Take necessary method to install the pipes according to the condition of the installation site. Right side connection Left side...
- Page 85 10. Installation Refrigerant pipe installation Pipe installation for an outdoor unit 2 Connecting refrigerant pipe for outdoor unit Classification Front side connection Right/left (and bottom) side connection • First, remove the piping cover from the outdoor unit. • Separate the knock-out hole at th e bottom side of th e unit and install the pipe.
- Page 86 10. Installation 3 Pipe installation between the outdoor units • You will need branch joints, which is an optional accessory, for connecting in between outdoor units in order to combine outdoor units in module. ※ For optimal distribution of the refrigerant, you must use Y-joint as branch joint for connecting outdoor units. (Do not use T-joint) •...
- Page 87 10. Installation Refrigerant pipe installation Examples of refrigerant pipe installation Using Y-joint 2 Using distribution header...
- Page 88 10. Installation Refrigerant pipe installation Allowable length of the refrigerant pipe and the installation examples Classification Single Installation Module installation Outdoor unit Outdoor unit Branch joint Branch joint Installing only with Y-joint Indoor unit Indoor unit Outdoor unit Outdoor unit Branch joint Distribution header Branch joint...
- Page 89 10. Installation Classification Example Remarks Installing only with Y-joint 45m (148') Installing with Y-joint Maximum First branch and distribution header or less allowable Pipe length Installing only with length after Farthest distribu-tion header branch joint Indoor unit Required conditions must be satisfied Note 1) EEV kit Model name...
- Page 90 10. Installation How to connect the pipes 70 mm Protect with wet towel when welding 70 mm Pipe connection from outdoor unit ← Default installing direction. Low pressure gas pipe connection (welding) High pressure gas pipe connection (welding) Liquid pipe connection (welding) Pipe connection to indoor unit Liquid pipe (welding) Gas pipe (welding)
- Page 91 10. Installation Electrical wiring work Electric Characteristics 1 Heat Pump / Heat Recovery (208~230V) Module #1 Module #2 Units Nom. Power Supply Power Supply Power Supply Model Volts Comp1 Comp2 FAN1 FAN2 MCA MOP Comp1 Comp2 FAN1 FAN2 MCA MOP Comp1 Comp2 FAN1 FAN2 MCA 6Ton AM072BXVGF* 60 18.7 28.0...
- Page 92 10. Installation Electrical wiring work CAUTION • Caution for electrical work – You must install ELCB or MCCB + ELB – ELCB: Earth leakage breaker – MCCB: Molded case circuit breaker – ELB: Earth leakage breaker – o not o erate the outdoor unit before com leting the refrigerant i e work –...
- Page 93 10. Installation Specification of the protection tube Name Temper grade Applicable conditions When the protection tube Flexible PVC is installed indoor and not exposed to outside, because conduit it is embedded in concrete structure When the protection tube is installed indoor but Class 1 flexible Galvanized exposed to outside so there are risk of damage to...
- Page 94 10. Installation Power wiring diagram 3 phase 3wires 208-230V [AM****XV*F*] 3 phase 3wires 460V [AM****XV*J*] Main unit Sub unit 1 Sub unit 2 MCCB+ MCCB+ MCCB+ ELCB ELCB ELCB Main unit Sub unit Communication Single phase 2 wires 208-230V Outdoor unit) MCCB+ Communication Indoor unit)
- Page 95 10. Installation Selecting solderless ring terminal • Select a solderless ring terminal for a power cable according to the nominal dimensions for cable • Apply insulation coating to the connection part of the solderless ring terminal and the power cable Silver solder Nominal dimensions for cable 4/6 (0.006/0.009)
- Page 96 10. Installation Connecting the power terminal • Connect the cables to the terminal board with solderless ring terminals. • Properly connect the cables by using certified and rated cables and make sure to fix them properly so that external force is not applied to the terminal. •...
- Page 97 10. Installation Fixing the power cable 3 phase 4 wires (380-415 V~) ELCB MCCB+ Sub unit communication cable Sub unit 3 phase 380- 415 V~ CAUTION • Do not let the power cable come into contact with the pipes inside the outdoor unit. If the power supply cable touches the pipes, the vibration of the compressor is transferred to the pipes and can damage the power supply cables or pipes, creating the danger of fire or explosion.
- Page 98 10. Installation Connect the ring terminal of 3 phase cable 1 Cut the power cable to an appropriate length and connect it with the solderless terminal. 2 After connecting the power cable to the terminal as seen in the illustration, fix it with cable tie. 3 Fix the housing, which has an insulator, to the terminal board.
- Page 99 10. Installation Installing the Solution device When the number of indoor units installed with the outdoor unit is 16 or less Terminal block with Terminal block with outdoor Terminal block with unit sub module indoor unit solution device Where to install the interface module •...
- Page 100 11. AHRI Data Rated Capacity IEER High COP(47F) Low COP(17F) SCHE (Btu/h) (Btu/h) (Btu/h) (W/W) (W/W) (Btu/h /W) Model Non- Non- Non- Non- Non- Cooling Heating Ducted Ducted Ducted Ducted Ducted Ducted Ducted Ducted Ducted Ducted AM072BXVG** 69,000 77,000 13.55 11.50 34.60 24.20...
- Page 101 2022.09 Ver.1.1 Samsung Electronics Co., LTD. Head Office (Suwon Korea) 129, Samsung-Ro, Yeongtong-Gu, Suwon City, Gyeonggi-Do, Korea 16677 Website : www.samsung.com, https://partnerhub.samsung.com E-mail : airconditioner@samsung.com Images and data in this book may subject to change without prior notice.