Axor Montreux Showerpipe 16572 1 Series Installation/User Instructions/Warranty
Hide thumbs
Also See for Montreux Showerpipe 16572 1 Series:
- Installation/user instructions/warranty (36 pages)

Related Manuals for Axor Montreux Showerpipe 16572 1 Series


Summary of Contents for Axor Montreux Showerpipe 16572 1 Series
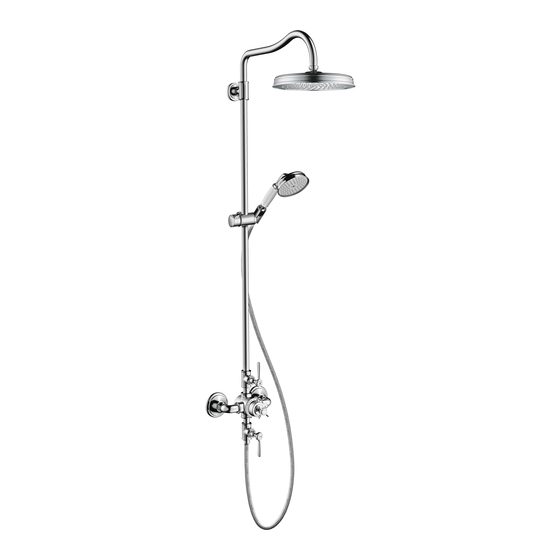
- Page 1 EN Installation / User Instructions / Warranty AXOR Montreux Showerpipe 16572XX1 FR Instructions de montage / Mode d'emploi / Garantie 16574XX1 ES Instrucciones de montaje / Manejo / Garantía I N S T A L L A T I O N...
-
Page 2: Technical Information
E N G L I S H T EC HN IC A L I N F ORMAT IO N Water pressure Recommended 15 - 75 PSI (0.1 - 0.5 MPa) Max. 145 PSI (1 MPa) Hot water temp. Recommended 120°-140° F (49°C - 60°C)* Max. - Page 3 F R A N A I S D ON N É E S T EC HN I Q UES Pression d’eau Recommandée 15 - 75 PSI (0.1 - 0.5 MPa) Maximum 145 PSI (1 MPa) Température d'eau chaude recommandée 120°-140°...
-
Page 4: Datos Tecnicos
E S P A Ñ O L DATOS TEC N ICO S Presión en servicio Recomendada 15 - 75 PSI (0.1 - 0.5 MPa) Max. 145 PSI (1 MPa) Temperatura del agua caliente Recomendada 120°-140° F (49°C - 60°C)* Max. 158°F (70°C)* Caudal máximo 16572XX1... - Page 5 S UG GESTE D I NSTA L L ATION S / S U GG ESTI ONS D'INSTA LL ATION / SUGE REN CIAS DE I NSTA L AC IÓ N 17¾" ¼" Ø9⅝" Ø⅞" max. 12⅛" 6¾" 2½" 10¼" 6" 7"...
- Page 6 R O U G H - I N / P I È C E I N T É R I E U R E / P I E Z A S I N T E R I O R E S Install ½"...
- Page 7 I N S T A L L A T I O N / I N S T A L L A T I O N / I N S T A L A C I Ó N Wrap the threads on the NPT ½ side of the s-union with plumber's tape.
- Page 8 Make sure that the s-unions are level. Seal the wall around the female fittings using waterproof sealant. FAILURE TO SEAL THE WALL MAY LEAD TO WATER DAMAGE. Assurez-vous que les raccords unions en S soient de niveau. " ( 6 ¾ Scellez le mur autour des raccords à...
- Page 9 Connect the valve body to the s-unions. Do not over-tighten the nuts. Raccordez le corps de valve aux raccords unions en S. Ne serrez pas les écrous excessivement. Conecte el cuerpo de la válvula a las uniones tipo s. No apriete excesivamente las tuercas.
- Page 10 Inspect the alignment of the volume control handles. Inspectez l’alignement des poignées. Inspeccione la alineación de los asideros. If necessary, remove the handle. Si ce n’être pas satisfaisant, enlèvez la poignée. 3 mm Si no es satisfactorio, quite la manija.
- Page 11 Rotate the handle slightly. Reinstall the handle. Repositionnez la poignée. Installez la poignée. Recoloque la manija. Instale la manija. Reinspect the alignment of the handle. Inspectez l’alignement de la poignée. Inspeccione la alineación de las manijas.
- Page 12 If it is stll unsatisfactory, remove the handle, adapter, and snap connetctor. Rotate the snap connector slightly. Reinstall the adapter and the handle. S'il n'est toujours pas satisfaisante, retirez la poignée, l'adapteur, et le connecteur. Repositionnez le connecteur. Installez l'adapteur et la poignée. Si no es satisfactorio, retire la manija, el adaptador, y el connector de la manija.
- Page 13 Lubricate the o-rings on the shower arm. Install the bushing. Install the shower arm on the riser. Lubrifiez les joints toriques sur le bras de douche. Installez le douille. Installez le bras de douche sur le colonne montante. Lubrique las juntas toroidales en el brazo de ducha. Installez el castillo.
- Page 14 Install the sleeve. Installez la douille. 3 ft-lb 4 Nm Instale el casquillo. Push the mounting piece into the sleeve. Poussez la plaque de montage sur la douille. Empuje la pieza de montaja al casquillo.
- Page 15 Lubricate the o-rings on the riser. Install the riser on the mixer. Lubrifiez les joints toriques sur le mitigeur. Installez la colonne montante sur le mitigeur. Lubrique las juntas toroidales en la válvula mezcladora. Instale tubería de subida a la válvula mezcladora. Make sure that the riser is level.
- Page 16 Remove the riser. Retirez la colonne montante. Retire la tubería de subida. Cover the mixer assembly. Drill the holes for the mounting plate using a ¼" (6 mm) bit. Install the anchors. Seal the wall around the anchors with waterproof sealant. Ø...
- Page 17 Remove the mounting piece. Retirez la plaque de montage. Retire la placa de montaje. Install the shower arm mounting plate using the included screws and washers. Install the escutcheon. Installez la plaque de montage du bras de douche en utilisant les vis et rondelles fournies. Installez le rosace.
- Page 18 Push the riser firmly over the valve outlet. Installez la colonne montante sur le mitigeur. Instale la tubería de subida en la mezcladora. Make sure that the riser is level. Tighten the screw using a 3 mm Allen wrench. Push the escutcheon over the mounting piece. 0 - ³⁄₁₆"...
- Page 19 Loosen the showerhead screw. Install the showerhead. Tighten the screw. 17 mm 7.4 ft-lb 10 Nm Enlevez la vis de la pomme de douche. Installez la pomme de douche sur le bras de douche. Serrez la vis. Quite el tornillo de la ducha cabezal. 2 mm Instale la ducha cabezal en el brazo de ducha.
- Page 20 O P T I O N A L I N S T A L L A T I O N / E N O P T I O N / O P C I O N A L If the tile does not go all the way up the wall, install the mounting plate with the tile matching disk, #95239000 (not included).
- Page 21 J U S T I F Y T H E H A N D L E / R É G L E Z L A P O I G N É E / A J U S T E L A M A N I J A...
- Page 22 S E T THE H I G H T EM P ER ATU R E L I M IT STOP / R ÉGLE Z L A B UTÉ E DE LIM ITE D’E AU C HAUDE / F IJE E L TO P E D E L ÍMITE DE ALTA TEM P ER ATU RA * To prevent scald injury, the maximum output temperature of the shower valve should be no higher than 120°F (49°C).
- Page 23 3 mm 1.5 ft-lb 2 Nm...
- Page 24 R E P L A C E M E N T P A R T S / P I È C E S D É T A C H É E S / R E P U E S T O S 96179000 AXOR Montreux Showerpipe 16572XX1...
- Page 25 U S E R I N S T R U C T I O N S / I N S T R U C T I O N S D E S E R V I C E / M A N E J O ouvert ouvert ouvert...
- Page 26 U S E R I N S T R U C T I O N S / I N S T R U C T I O N S D E S E R V I C E / M A N E J O cold chaud froid...
- Page 27 C L E A N I N G / N E T T O Y A G E / L I M P I E Z A 2 mm 17 mm scale remover détartrant commercial desincustante comercial ¾" 20 mm 2 mm 0.7 ft-lb 1 Nm...
- Page 28 C L E A N I N G / N E T T O Y A G E / L I M P I E Z A scale remover détartrant commercial desincustante comercial ¾" (20 mm) > 1 min...
- Page 29 C H EC K VA LVE M A IN T EN AN CE / E NTR ETIE N D E LE S CL APETS AN TI-R ETOUR/ MAN T EN IM I E N TO D E L AS VÁ LV U L A S ANTIR R ETORN OS 3 mm 30 mm 10 mm...
- Page 30 chaud caliente cold froid frío rouge rojo 30 mm 10 mm 12.5 ft-lb 14.75 ft-lb 17 Nm 20 Nm 3 mm 3 ft-lb 4 Nm...
-
Page 31: Troubleshooting
T R O U B L E S H O O T I N G SY M P TO M PO SS IB L E C AUS E SUGGE STED ACTION Insufficient water Supply pressure inadequate Check water pressure (If a pump has been installed check to see if the pump is working). -
Page 32: Localización De Fallas
L O C A L I Z A C I Ó N D E F A L L A S S ÍN TO M A C AU SA POS IBLE ACCÍON SUGE RIDA Sale poca agua Presión insuficiente Comprobar presión Filtros sucios (96922000) Limpiar filtros en las uniones a las tomas de agua caliente y fría (96922000) y... - Page 33 C L E A N I N G R E C O M M E N D A T I O N F O R H A N S G R O H E P R O D U C T S Modern bathroom faucets, kitchen faucets and shower products are made from different materials to comply with the needs of the market with regard to design and functionality.
- Page 34 I M PO RTAN T ⁄ Les residus de produits pour le corps comme les savons liquides, shampooings, gels de douche, teintures pour cheveux, parfums, apres-rasage et vernis a ongles peuvent causer des deteriorations. Rincez le produit avec de l’eau propre après chaque utilisation.
-
Page 35: What We Will Do
Hansgrohe, Inc. (ii) a limited warranty on our hansgrohe and AXOR branded products. any hansgrohe or AXOR product sold for display purposes or (iii) hans- ® ® grohe or AXOR products purchased from unauthorized sellers. - Page 36 This warranty gives you specific legal rights, and you may also us or call us toll-free at 800 -334- 0455. have other rights which vary from state to state. AXOR ⁄ Hansgrohe, Inc. 1490 Bluegrass Lakes Parkway Alpharetta, GA 30004 Tel.