Table of Contents
Advertisement
Quick Links
Advertisement
Table of Contents

Related Manuals for Plustek OpticPro A360


Summary of Contents for Plustek OpticPro A360
- Page 1 Installation Usage & Maintenance...
-
Page 2: Environmental Information
Trademarks © 2008 Plustek Inc. All rights are reserved. No portion of this document may be reproduced without permission. All trademarks and brand names mentioned in this publication are property of their respective owners. Liability While all efforts have been made to ensure the accuracy of all contents in this manual,... -
Page 3: Table Of Contents
Placing Documents... 14 Using the Flatbed ... 14 Scanning Documents... 14 Scanning via TWAIN Interface ... 15 Scanning from Plustek DI Capture Program ... 17 Scanning from the Scanner’s Panel or On-screen DocAction's Execute Menu... 18 III. C HAPTER ARE AND AINTENANCE Cleaning the Scanner ... -
Page 4: Introduction
Like all of our products, your new scanner is thoroughly tested and backed by our reputation for unsurpassed dependability and customer satisfaction. We hope you will continue to turn to us for additional quality products as your computing needs and interests grow. -
Page 5: A Note About Icons
Seal this device in a plastic bag for it to adapt to room conditions. ii. Wait for 1-2 hours before removing this device from the bag. 2. Do use the AC adapter, power cable and USB cable provided with the scanner. Use of other AC adapter and cables may lead to malfunction. -
Page 6: Minimum System Requirements
7. Be sure not to bump or knock the scanner glass as it is fragile and could break. 8. Do not subject the scanner to excessive vibration. It may damage the internal components. -
Page 7: Box Contents
4. AC Adapter 5. Scanner User’s Guide 6. Setup/Application CD-ROM Save the box and packing materials in case you need to transport this scanner in the future. The scanner illustration(s) in this manual may appear different than from the actual scanner itself. -
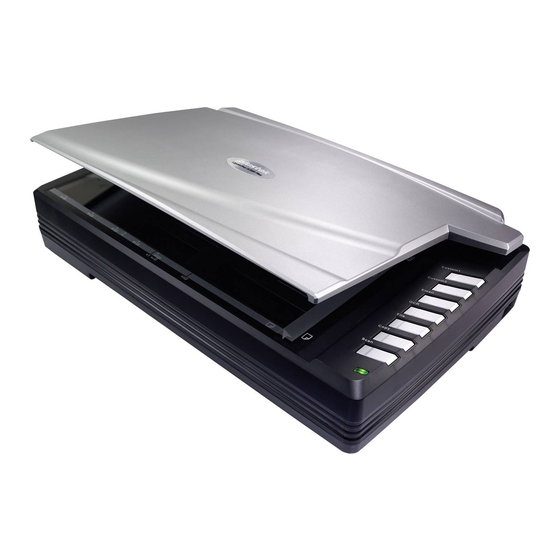
Page 8: The Scanner Features
CANNER EATURES 1. DOCUMENT COVER— Helps keep the paper in place and protects the scanner glass. 2. DOCUMENT PAD— Keeps the paper in place and improves accuracy of image quality. 3. SCANNER GLASS— Where you put items for flatbed scanning. - Page 9 8. POWER SWITCH— Use this to turn the scanner ON or OFF. 9. POWER RECEPTOR— Connects the scanner to a standard AC power outlet by the AC adapter included. 10. USB PORT— Connects the scanner to a USB port on your computer by the USB cable included. Status...
-
Page 10: Chapter I. Installing The Scanner
(NewSoft Presto! PageManager), Adobe Reader, the scanner’s driver, the task management software (Plustek DocAction) and the image capture software (Plustek DI Capture). All of these software applications use approximately 400 megabytes of hard disk space after they are installed into your computer. To ensure ample room for the installation, as well as for scanning and saving images, a minimum of 1 GB of hard disk space is recommended. -
Page 11: Installing And Setting Up The Scanner
If you don’t find such USB ports on your computer, then you need to purchase a certified USB interface card to add USB capabilities to your computer. NSTALLING AND Please follow the step-by-step procedures described below to install the Plustek scanner. Attention This scanner is designed with a locking mechanism to hold the scanning head in place during transportation. -
Page 12: Step 2. Connecting The Scanner To Your Computer
Attention 1. Plug the AC adapter into the scanner’s power receptor. 2. Attach the power cable to the AC adapter. 3. Plug the other end of the power cable into a standard AC power outlet. Please make sure the scanner is turned OFF before you plug or unplug the scanner power adapter. -
Page 13: Step 3. Installing The Software
6. If you plan to connect your scanner to a USB hub connected to the USB port in your computer. Next, connect the scanner to the USB hub. 1. Switch on the scanner power from the side of the scanner. -
Page 14: Step 4. Testing The Scanner
6. When the system completes the installation, click the Finish button. 7. Follow the on-screen instructions to install all software that your new scanner requires. 8. After the software is installed, close all open applications and click the Finish button to restart your computer. -
Page 15: Installing Additional Software
2. Gently close the document cover. 3. Click the Windows Start button to launch NewSoft Presto! ImageFolio. 4. (If you have only one scanner connected with your computer, please skip to Step 5.) If you have more than one scanner or other imaging device installed on your computer: Click Select Source from the File menu of Presto! ImageFolio and then choose this scanner as the default scanning source. -
Page 16: Chapter Ii. Scanning
With DocAction, you don't need to adjust settings every time you scan. Simply press any button on the scanner's front panel or click any scanning menu item of DocAction on the screen. The scanner starts to scan your paper documents and transfer them to your assigned destination. -
Page 17: Checking Document Conditions
Checking Document Conditions Make sure the paper sizes of your documents are acceptable by the scanner. Refer to “Appendix A: Specifications” of this guide for more information. LACING OCUMENTS 1. Open the scanner's document cover. 2. Place the document onto the scanner glass headfirst and face-down. Align the top left corner of the document with the arrow on the reference mark. -
Page 18: Scanning Via Twain Interface
The TWAIN program is a very important piece of software that comes with your scanner. This program acts as an interface between the scanner hardware and the image-editing software you are using to view and edit images. The TWAIN program allows you to adjust a number of settings to define the quality of the scanned image. - Page 19 Scan within I.R.I.S. Readiris Pro 10 Corporate Edition: 1. Click the Windows Start button to launch Readiris Pro 10 Corporate Edition. If you have more than one scanner or other imaging devices installed on your computer, you need to set this scanner as the default scanning source before you acquire the TWAIN program.
-
Page 20: Scanning From Plustek Di Capture Program
Pane Scan Settings Pane 2. Within DI Capture, select this scanner from the drop-down list of 3. Select a document from the Folder Pane to store the scanned images. (To create a new folder and/or a new document, click the New Folder and/or New Document button from the toolbar. -
Page 21: Scanning From The Scanner's Panel Or On-Screen Docaction's Execute Menu
They are especially useful when you need to repeatedly scan with the same settings and send images to the same destination. Buttons on the scanner panel will be used in this guide to demonstrate the scanner operations. You may also use DocAction's on-screen Execute menu to perform the same scanning tasks. - Page 22 Scan from the Buttons Scanning documents or images from this scanner is very easy. Follow the two steps described below: 1. Place the document or images onto the scanner. (Refer to “Chapter II. Scanning” of this guide for more information in placing paper on the flatbed glass properly.)
-
Page 23: Chapter Iii. Care And Maintenance
Paper powder, dust, ink and toner from paper being scanned may make the scanner glass dirty, which leads to poor image quality or document-feeding errors. How often to clean your scanner depends on the type of paper and number of pages being scanned. -
Page 24: Aligning The Scanner
In most cases, the scanner doesn’t need to be aligned but there are instances when the alignment might be required. You need to align the scanner only if parts of the scanned document are missing from any of its edges. For example, the heading of a document might be missing from the top edge after the document has been scanned. -
Page 25: Power Save
6. When the alignment completes, click on OK button to save settings and exit. OWER You may opt to keep the scanner lamp always on or define an idle time for the scanning lamp to automatically turn itself off. 1. Right click the icon Utility from the menu that pops up. -
Page 26: Scanner Lock
Always Unlock: A scanning-ready status. Furthermore, if you place your scanner on a long-term position, you can also keep your scanner lock in this status. To unlock the scanner, slide the locking switch on the scanner’s underside toward the back panel of the scanner until it snaps into place. -
Page 27: Chapter Iv. Troubleshooting
The first step to take when troubleshooting connection problems with your scanner is to check all physical connections. The icon system tray, indicates if the scanner software is properly launched and the scanner and computer are communicating with each other. -
Page 28: Appendix
PPENDIX Plustek OpticPro A360 Optical Resolution: 600 dpi Resolution Max. Hardware Resolution: 600 x 1200 dpi Color: Input 48-it; Output 24-bit Scan Modes Grayscale: Input 16-bit; Output 8-bit Black & White: 1-bit Lamp Type Cold Cathode Fluorescent Lamp Scan Area Maximum 304.8 x 431.8 mm (12”... -
Page 29: Appendix B: Customer Service And Warranty
Monday through Friday during office working hours. To avoid delays, please have the following information available before calling: Scanner name and model number Scanner serial number (located at the bottom of the scanner) Scanner CD version and part number A detailed description of the problem... -
Page 30: Fcc Radio Frequency Statement
If this product is an optional feature, this Limited Warranty applies only when the feature is used in a machine for which it was designed. If you have any questions about your Limited Warranty, contact the approved retailer from whom you bought the product or the manufacturer. THIS LIMITED WARRANTY REPLACES ALL OTHER WARRANTIES, EXPRESS OR IMPLIED, INCLUDING, BUT NOT LIMITED TO, THE IMPLIED WARRANTIES OF MERCHANTABLITY AND FITNESS FOR A PARTICULAR PURPOSE. - Page 31 Shielded interconnect cables and shielded power cord which are supplied with this equipment must be employed with this equipment to ensure compliance with the pertinent RF emission limits governing this device. Consult the dealer or an experienced radio/TV technician for help if the conditions persist.
-
Page 32: Contacting Plustek
ONTACTING LUSTEK Plustek Technology GmbH Europe: Gutenbergring 38 22848 Norderstedt Germany Tel.: +49 (0) 40 523 03 130 Fax: +49 (0) 40 523 03 500 E-mail: support@plustek.de Website: www.plustek.de North America: Plustek Technology Inc. 17517 Fabrica Way, Suite B Cerritos, CA 90703 U.S.A.