Table of Contents
Advertisement
Quick Links
Advertisement
Table of Contents

Related Manuals for Bose S1 PRO+


Summary of Contents for Bose S1 PRO+
- Page 1 S 1 P R O + W I R E L E S S PA S Y S T E M...
- Page 2 I M P ORTA N T SA F ET Y I N STR UCT IO NS Please read and keep all safety, security, and use instructions. Bose Corporation hereby declares that this product is in compliance with the essential requirements and other relevant provisions of Directive 2014/53/EU and all other applicable EU directive requirements.
- Page 3 (including amplifiers) that produce heat. • Do not use the Bose S1 Pro+ Wireless PA System with a tripod/stand that is unstable. The speaker is only designed for use on a 35 mm post, and the tripod/stand must be capable of supporting a speaker with a minimum weight of 15 lbs (6.8 kg) and an overall size of 13.1 x 9.4 x 11 inches (332.6 x 240 x 279.8 mm).
- Page 4 • Connect the equipment into an outlet on a circuit different from that to which the receiver is connected. • Consult the dealer or an experienced radio/TV technician for help. Changes or modifications not expressly approved by Bose Corporation could void the user’s authority to operate this equipment.
- Page 5 R EG U LATORY A N D L E G AL I NFO RM AT I O N Product Power State Table The product, in accordance with the Ecodesign Requirements for Energy Related Products Directive 2009/125/EC and the Ecodesign for Energy-Related Products and Energy Information (Amendment) (EU Exit) Regulations 2020, is in compliance with the following norm(s) or document(s): Regulation (EC) No.
- Page 6 EU Importer: Bose Products B.V., Gorslaan 60, 1441 RG Purmerend, The Netherlands Mexico Importer: Bose de México S. de R.L. de C.V., Avenida Prado Sur #150, Piso 2, Interior 222 y 223, Colonia Lomas de Chapultepec V Sección, Miguel Hidalgo, Ciudad de México, C.P. 11000 Phone Number: +5255 (5202) 3545 Taiwan Importer: Bose Limited Taiwan Branch (H.K.), 9F., No.10, Sec.
- Page 7 The serial and model numbers are located on the bottom of the product. Serial number: ____________________________________________________________________ Model number: 436469 Please keep your receipt with your owner’s guide. Now is a good time to register your Bose product. You can easily do this by going to worldwide.Bose.com/ProductRegistration worldwide.Bose.com/ProductRegistration Security Information This product is capable of receiving security updates from Bose.
- Page 8 LI CEN SE D I S CLOS UR E S The following license disclosures apply to certain third-party software packages used as components in the product. Package: FreeRTOS Copyright © Amazon Web Services, Inc. or its affiliates. All rights reserved. Package: LVGL - Light and Versatile Graphics Library Copyright ©...
-
Page 9: Table Of Contents
CON TE NTS WHAT’S IN THE BOX Contents ..........................15 BOSE MUSIC APP SETUP Download the Bose Music app .................. 16 Add the system to an existing account ..............16 CONTROL AND CONNECTION PANEL Panel overview ......................... 17 POWER Connect the system to power ..................18 Power on/off ........................ - Page 10 Access channel and system settings ............... 26 ToneMatch preset settings ..................27 Select ToneMatch presets (Channels 1 and 2 only) ........27 Customize ToneMatch presets using the Bose Music app ..... 28 Clear a custom ToneMatch preset ..............28 Channel insert settings ....................29 Channel wireless settings ....................
- Page 11 CON TE NTS WIRELESS TRANSMITTER CONTROLS Compatible wireless transmitters ................37 Pair a wireless transmitter to Channel 1 or 2 ............37 Connect a paired wireless transmitter to an audio source ......38 Power on/off a wireless transmitter ................ 39 Auto-off timer ......................
- Page 12 General-purpose PA ....................... 49 Stereo .......................... 49 Dual mono/daisy-chain ..................51 DJ with Bose Sub1 or Sub2 Powered Bass Module ........... 52 Dual Wireless Streaming with the Bose Music app ........... 53 Musician recording or live streaming to computer ..........53 BATTERY Charge the system battery..................
- Page 13 CON TE NTS SYSTEM STATUS Signal/clip lights ......................57 Power light ........................58 Bluetooth light ......................... 58 Channel displays......................59 How to read the channel displays ..............59 Status icons ....................... 59 Battery icons ......................60 WIRELESS TRANSMITTER STATUS Power light ........................62 Connection light ......................
- Page 14 CON TE NTS TROUBLESHOOTING Try these solutions first ....................69 Other solutions ........................ 69 System ........................69 Wireless transmitter ....................73 Enable/Disable the Expanders setting ..............75 Reset the system ......................77 Reset a wireless transmitter ..................77 E N G...
- Page 15 WHAT ’S I N T H E BOX CONTENTS Confirm that the following parts are included: Bose S1 Pro+ Wireless PA System Power cord (with battery included) NOTE: If any part of the product is damaged, don’t use it. Contact your authorized Bose dealer or Bose customer service.
-
Page 16: Bose Music App Setup
BOSE M U SI C A P P SET UP The Bose Music app lets you set up and control the system from any mobile device, such as a smartphone or tablet. Using the app, you can control the system remotely, manage system settings, and access exclusive features like ToneMatch preset customization, channel and reverb mute, saved Scenes, and Dual Wireless Streaming (see page 36). -
Page 17: Control And Connection Panel
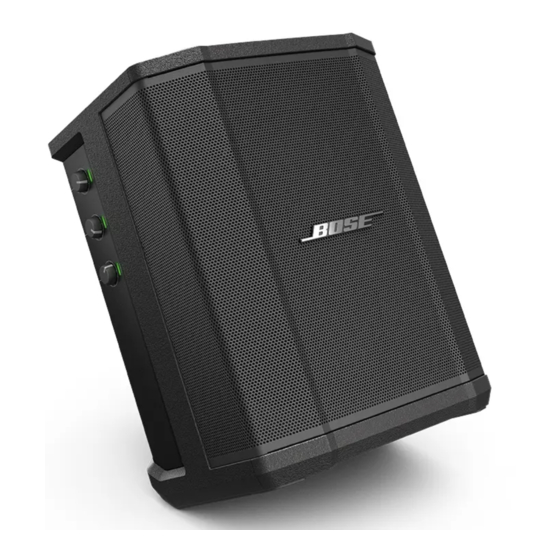
CON TR OL A N D CO NN E CT I O N PA NE L PANEL OVERVIEW Wireless transmitter charging ports. USB charging port (USB-A). See page 55. See page 56. Channel inputs (balanced/unbalanced USB Type-C® port. combined l or 6.35 mm TS/TRS and Use for Live Stream mode (see XLR). -
Page 18: Power
P OW E R CONNECT THE SYSTEM TO POWER 1. Connect the power cord to the power port on the back of the system. 2. Plug the other end of the power cord into an AC (mains) outlet. POWER ON/OFF Press the Power button I. -
Page 19: Auto-Off Timer
3. Rotate the channel control to highlight Off, then press to select it. 4. Press and hold the channel control until the additional controls menu disappears. TIP: You can also disable the auto-off timer using the Bose Music app. You can access this option from the Settings menu. -
Page 20: Connect Sources
CON N ECT SO UR CE S CONNECT SOURCES TO CHANNEL 1 AND 2 Channels 1 and 2 are for instruments and microphones. The channel inputs are suited for a wide range of input types and have the proper gain staging to minimize noise when channel volume is set for your desired output level. -
Page 21: Connect Sources To Channel 3
NOTE: The Bluetooth menu is usually found in the Settings menu. 3. Select your system from the device list. NOTE: Look for the name you entered for your system in the Bose Music app. If you didn’t name your system, the default name appears. -
Page 22: Connect To The Ts/Trs Line Input
CON N ECT SO UR CE S Connect to the TS/TRS line input A mono input. Use a l (6.35 mm) TRS cable to connect a line-level audio source, such as a mixer or instrument effect. Connect to the AUX line input A stereo input. -
Page 23: Adjust Channel Audio
(Channel 1 and 2 only) using the channel controls located on the right side of the control panel. Channel controls Adjust volume Rotate the channel control to adjust channel volume. VOLUME TREBLE NOTE: You can also mute channels using the Bose Music app (see page 36). E N G... -
Page 24: Adjust Treble
A DJUST CHA N NE L AUD I O Adjust treble 1. Press and release the channel control until TREBLE appears on the channel display. VOLUME VOLUME TREBLE TREBLE BASS 2. Rotate the channel control to either boost or cut the high-frequency balance of the channel. -
Page 25: Adjust Reverb (Channels 1 And 2 Only)
2. Rotate the channel control to adjust the amount of reverb applied to the channel. BASS REVERB VOLUME NOTES: • After 10 seconds of inactivity, the channel display resets to VOLUME. • You can also mute reverb effects for a channel using the Bose Music app (see page 36). E N G... -
Page 26: Channel And System Settings
C HA N N EL A N D SYST E M S ET T I N G S ACCESS CHANNEL AND SYSTEM SETTINGS You can adjust channel and system settings to best support your setup scenario. To access channel and system settings, press and hold one of the channel controls until the additional controls menu appears on the channel display. -
Page 27: Tonematch Preset Settings
NOTES: • To customize these presets to match your specific microphone or instrument model or apply generic EQ filters, use the Bose Music app (see page 28). • Selecting Off bypasses the ToneMatch preset for that channel. 4. Press and hold the channel control until the additional controls menu disappears. -
Page 28: Customize Tonematch Presets Using The Bose Music App
C HA N N EL A N D SYST E M S ET TI NG S Customize ToneMatch presets using the Bose Music app Using the Bose Music app, you can customize the default Microphone or Instrument presets on Channels 1 and 2 to better optimize system EQ for your setup scenario. -
Page 29: Channel Insert Settings
C HA N N EL A N D SYST E M S ET TI NG S CHANNEL INSERT SETTINGS Channel insert settings let you enable or disable the effects loop functionality for a channel. When enabled, you can connect your effects units or pedals to the channel input while using a wireless transmitter for your source. -
Page 30: Live Stream Mode Settings
In this mode, the channel volume controls behave like faders on a mixer. Adjusting channel volume using either the channel controls or the Bose Music app adjusts the level of that channel within the mix being sent to your computer. - Page 31 C HA N N EL A N D SYST E M S ET TI NG S 2. Rotate the channel control to highlight Live Stream, then press to select it. Auto O Auto O Live Stream Live Stream Sub EQ Sub EQ Expanders Expanders...
-
Page 32: Connect The System To Your Computer
C HA N N EL A N D SYST E M S ET TI NG S Connect the system to your computer 1. Connect one end of a USB-C cable (not provided) to the USB-C port on the system. 2. Connect the other end to your computer. E N G... -
Page 33: Adjust Monitor Volume In Live Stream Mode
NOTE: The monitor volume control isn’t available in the Bose Music app. 1. Press and release the channel control for Channel 3 until MONITOR VOLUME appears on the channel display. -
Page 34: Sub Eq Settings
Once you enable Sub EQ, it stays enabled until you disable it or the system powers off. For sample setup scenario images, see page 52. NOTES: • For information on how to connect the system to a Bose Sub1 or Sub2 Powered Bass Module, refer to the Bose Sub1/Sub2 Powered Bass Module owner’s guide. Visit: support.Bose.com/Sub1 support.Bose.com/Sub1 or support.Bose.com/Sub2... - Page 35 C HA N N EL A N D SYST E M S ET TI NG S 2. Rotate the channel control to highlight Sub EQ, then press to select it. Auto O Auto O Live Stream Live Stream Sub EQ Sub EQ Expanders Expanders...
-
Page 36: Bose Music App Exclusive Features
BOSE M U SI C A P P EXC LU SI VE F E ATU R E S MUTE CHANNELS AND CHANNEL REVERB EFFECTS You can mute channels and mute reverb effects for a channel in the Bose Music app. -
Page 37: Wireless Transmitter Controls
W I REL ESS T RA N S M ITT E R CO N T RO L S COMPATIBLE WIRELESS TRANSMITTERS With the optional Bose wireless transmitter accessories, you can wirelessly connect your instrument or microphone to the system through the wireless receivers built in to Channels 1 and 2. -
Page 38: Connect A Paired Wireless Transmitter To An Audio Source
(see page 63). VOLUME 5. If you’re using the Bose Wireless Mic/Line Transmitter, change between mic and line input settings if necessary to match the input requirements of your source (see page 40). -
Page 39: Power On/Off A Wireless Transmitter
W I REL ESS T RA N S M ITT E R CO NT R O L S POWER ON/OFF A WIRELESS TRANSMITTER Press the Power button I. MUTE MUTE When powered on, the power light glows solid white (see page 62). Auto-off timer The auto-off timer conserves power when the wireless transmitter isn’t in use. -
Page 40: Change Between Mic And Line Input
W I REL ESS T RA N S M ITT E R CO NT R O L S CHANGE BETWEEN MIC AND LINE INPUT With the Bose Wireless Mic/Line Transmitter, you can change between mic and line input settings to match the input requirements of your source. -
Page 41: Enable/Disable Channel Insert Functionality
W I REL ESS T RA N S M ITT E R CO NT R O L S Enable/Disable channel insert functionality 1. Press and hold the channel control for either Channel 1 or 2 until the additional controls menu appears on the channel display. Press + Hold ToneMatch to access... -
Page 42: Enable/Disable Wireless Transmitter Functionality
W I REL ESS T RA N S M ITT E R CO NT R O L S ENABLE/DISABLE WIRELESS TRANSMITTER FUNCTIONALITY NOTE: Regardless of a channel’s wireless setting, the system still charges any wireless transmitter inserted into the wireless transmitter charging ports. 1. -
Page 43: Speaker Stand
EQ automatically updates to maintain optimum tonal balance. WARNING: Do NOT use the Bose S1 Pro+ Wireless PA System with a tripod/stand that is unstable. The loudspeaker is only designed for use on a 1.38 in (35 mm) post, and the tripod/stand must be capable of supporting a speaker with a minimum weight of 15 lbs (6.8 kg) and an overall size of 13.1 x 9.4 x 11 in... -
Page 44: System Setup Scenarios
SYSTEM SETU P SC E NA R IOS SYSTEM CONFIGURATIONS The Bose S1 Pro+ Wireless PA System can be used in four positions. With Auto EQ, the system EQ automatically updates to maintain optimal tonal balance for each position. NOTE: You can also rotate the Bose logo on the system counterclockwise to match your position. -
Page 45: Musician With Mobile Device
SYST EM SETU P SC E NA R IOS MUSICIAN WITH MOBILE DEVICE ToneMatch Insert Auto Wireless Auto Expanders ToneMatch Insert Auto Wireless Auto Expanders MUSICIAN WITH MOBILE DEVICE AND WIRELESS TRANSMITTERS ToneMatch Insert Auto Wireless Auto Expanders ToneMatch Insert Auto Wireless Auto... -
Page 46: Multi-Instrumentalist
SYST EM SETU P SC E NA R IOS MULTI-INSTRUMENTALIST ToneMatch Insert Auto Wireless Auto Expanders ToneMatch Insert Auto Wireless Auto Expanders MUSICIAN WITH EFFECTS MIXER E N G... -
Page 47: Musician With Wireless Transmitters, Effects Pedal, And Vocal Processor
SYST EM SETU P SC E NA R IOS MUSICIAN WITH WIRELESS TRANSMITTERS, EFFECTS PEDAL, AND VOCAL PROCESSOR NOTE: When using AC (mains)-powered effects units, a hum eliminator may be required. You can purchase a hum eliminator at your local music retailer. ToneMatch Insert Auto... -
Page 48: Guitarist With Wireless Transmitter And Amp Modeler Pedal
SYST EM SETU P SC E NA R IOS GUITARIST WITH WIRELESS TRANSMITTER AND AMP MODELER PEDAL When using an amp modeler pedal, for best performance, use the Bose Music app to select the Full Range Flat Response (FRFR) ToneMatch preset for that channel. ToneMatch... -
Page 49: General-Purpose Pa
SYST EM SETU P SC E NA R IOS GENERAL-PURPOSE PA You can connect two systems in either stereo or mono for use as a conventional PA system. Stereo When connecting systems in stereo through a mixer, on both systems, set reverb to the lowest setting and set ToneMatch to Off on the channel you’re connecting the mixer line out to (see page 25 and page 27). - Page 50 SYST EM SETU P SC E NA R IOS Stereo wireless Before connecting Bose Wireless Mic/Line Transmitters to a mixer, make sure to set the transmitter input setting to line input for each transmitter (see page 40). LINE LINE LINE...
-
Page 51: Dual Mono/Daisy-Chain
SYST EM SETU P SC E NA R IOS Dual mono/daisy-chain When connecting systems in dual mono, on the secondary system(s), adjust the following settings on the channel you’re connecting the primary system’s line out to: • Set reverb to the lowest setting (see page 25). •... -
Page 52: Dj With Bose Sub1 Or Sub2 Powered Bass Module
SYST EM SETU P SC E NA R IOS Dual mono wireless DJ WITH BOSE SUB1 OR SUB2 POWERED BASS MODULE For detailed connection instructions, refer to the Bose Sub1/Sub2 Powered Bass Module owner’s guide. Visit: support.Bose.com/Sub1 support.Bose.com/Sub1 support.Bose.com/Sub2 support.Bose.com/Sub2... -
Page 53: Dual Wireless Streaming With The Bose Music App
SYST EM SETU P SC E NA R IOS DUAL WIRELESS STREAMING WITH THE BOSE MUSIC APP MUSICIAN RECORDING OR LIVE STREAMING TO COMPUTER ToneMatch Insert Auto Wireless Auto Expanders ToneMatch Insert Auto Wireless Auto Expanders Auto O Live Stream... -
Page 54: Charge The System Battery
BATT E RY CHARGE THE SYSTEM BATTERY To charge the system battery, connect the system to power (see page 18). If the system is powered off, the power light pulses white to indicate that the system battery is charging. When the battery is fully charged, the power light turns off. If the system is powered on, on the Channel 3 display, a lightning bolt icon appears next to the battery icon to indicate that the system battery is charging. -
Page 55: Charge A Wireless Transmitter
BATT E RY CHARGE A WIRELESS TRANSMITTER Using the charging ports Fully insert the wireless transmitter into the wireless transmitter charging port for either Channel 1 or 2 until you hear or feel a click. If the system is powered on, on the channel display, a battery icon with a lightning bolt next to it briefly appears to indicate that the transmitter battery is charging. -
Page 56: Charging Time
BATT E RY Charging time Allow up to 2 hours to fully charge the wireless transmitter battery. With typical usage, the battery lasts up to 5 hours. Check the wireless transmitter battery level To check the wireless transmitter battery level, remove the transmitter from the wireless transmitter charging port and check the battery icon on the channel display (see page 60). -
Page 57: System Status
SYST EM STATU S The signal/clip lights, power light, Bluetooth light, and channel displays located on the side of the system show the system status. SIGNAL/CLIP LIGHTS Shows the signal or clip status for Channels 1, 2, and 3. LIGHT ACTIVITY SYSTEM STATE Solid green Signal is present. -
Page 58: Power Light
Charging. connected to power System error. Power the system off and on again Solid red (see page 18). If the error persists, contact Bose customer service. Slowly blinking red Thermal error. Let the system cool to a lower temperature. Quickly blinking red Battery error. -
Page 59: Channel Displays
Live Stream mode is enabled. A wireless transmitter is connected to the channel. NOTE: If the transmitter is a Bose Wireless Mic/Line Transmitter, this icon indicates that the transmitter input setting is set to mic input. A Bose Wireless Mic/Line Transmitter is connected to the channel, and the transmitter input setting is set to line input. -
Page 60: Battery Icons
SYSTEM STATUS Battery icons The battery icons show the battery level and charging status of either the system or a paired wireless transmitter, depending on the channel display. Channel 1 or 2 display On the Channel 1 or 2 display, battery icons show the battery level and charging status of a paired wireless transmitter. - Page 61 SYSTEM STATUS Channel 3 display On the Channel 3 display, battery icons show the system battery level and charging status. They appear in the upper-right corner of the display. ICON SYSTEM BATTERY LEVEL 67% - 100% 34% - 66% 10% - 33% 0% - 9% 67% - 100% and charging 34% - 66% and charging...
-
Page 62: Wireless Transmitter Status
25% - 50% battery level (when powering on) Blinks white 1 time 10% - 25% battery level (when powering on) Solid white Powered on or charging Blinking red Transmitter battery low Solid red Error - contact Bose customer service E N G... -
Page 63: Connection Light
WI R ELESS TR A NS MI T TE R STAT U S CONNECTION LIGHT Shows the connection and mute status of the transmitter. LIGHT ACTIVITY SYSTEM STATE Solid blue Connected Blinking blue Muted E N G... -
Page 64: Bluetooth Connections
B LU E TO OT H CO NN E CT I O NS CONNECT YOUR MOBILE DEVICE For connection instructions, see page 21. DISCONNECT A MOBILE DEVICE Disable the Bluetooth feature on your device. NOTE: Disabling the Bluetooth feature disconnects all other devices. RECONNECT A MOBILE DEVICE When powered on, the system tries to reconnect with the most recently-connected device. -
Page 65: Care And Maintenance
CA RE A N D M A IN T E N AN CE REPLACE THE SYSTEM BATTERY 1. Press the Power button I to power off the system, then disconnect the system from power. 2. Turn the system upside down. Loosen the two screws, then remove the bottom plate. - Page 66 CA R E A N D M AI NTE N AN CE CA R E A N D M AI NTE N AN CE 4. Insert the new battery, ensuring the connector pins line up appropriately. 5. Replace the bottom plate, then tighten the two screws until secure. 6.
-
Page 67: Update The System
To check for and download system software updates, use your computer to visit the Bose updater website at: btu.Bose.com btu.Bose.com For more detailed instructions, visit: support.Bose.com/S1ProPlusUpdate support.Bose.com/S1ProPlusUpdate NOTE: To update the system, you need to connect the system to your computer using a USB-C cable (not provided). -
Page 68: Transport And Store The System
NOTE: Before storing the system for more than a few months, make sure the system battery is fully charged. REPLACEMENT PARTS AND ACCESSORIES Replacement parts and accessories can be ordered through Bose customer service. Visit: support.Bose.com/S1ProPlus support.Bose.com/S1ProPlus LIMITED WARRANTY The system is covered by a limited warranty. -
Page 69: Troubleshooting
If you couldn’t resolve your issue, see the table below to identify symptoms and solutions to common problems. You can also access troubleshooting articles, videos, and other resources at: support.Bose.com/S1ProPlus support.Bose.com/S1ProPlus If you’re unable to resolve your issue, contact Bose customer service. Visit: worldwide.Bose.com/contact worldwide.Bose.com/contact System... - Page 70 TR OUBL ES H O OTI N G SYMPTOM SOLUTION Make sure your instrument or audio source is firmly connected to the channel input. Increase the volume on the instrument or audio source and the system. Check that the signal/clip lights are lit to confirm that the system detects an audio signal from the source.
- Page 71 TR OUBL ES H O OTI N G SYMPTOM SOLUTION Turn the volume down on the source. If your audio source volume can’t be adjusted, you can purchase input pads from your local music retailer. Try a different source or instrument. Distorted audio from an If you’re playing audio from a mobile device connected to instrument or...
- Page 72 Music app and meets minimum system requirements. For more Bose Music app doesn’t information, refer to the app store on your mobile device. work on mobile device Uninstall the Bose Music app on your mobile device, then reinstall the app (see page 16). E N G...
-
Page 73: Wireless Transmitter
TR OUBL ES H O OTI N G Wireless transmitter SYMPTOM SOLUTION Fully charge the transmitter (see page 55). Power on again. Wireless transmitter doesn’t power on Reset the transmitter (see page 77). Power on again. System battery may be in protection mode or discharged. Connect the system to AC (mains) power. - Page 74 Unusually quiet or loud audio from a source Make sure that the transmitter is set to the appropriate input connected to a Bose setting for your source (mic or line input). See “Change between Wireless Mic/Line mic and line input” on page 40.
-
Page 75: Enable/Disable The Expanders Setting
TR OUBL ES H O OTI N G ENABLE/DISABLE THE EXPANDERS SETTING The Expanders setting determines whether the system reduces the volume of low-level background noise for a channel, such as noise caused by electrical feedback, radio frequency interference, or your environment. You can disable this feature for one or more channels if necessary for your setup scenario. - Page 76 TR OUBL ES H O OTI N G 3. Rotate the channel control to highlight your preferred setting, then press to select it: • On (default): Enables the Expanders setting for this channel, causing the system to reduce the volume of low-level noise. •...
-
Page 77: Reset The System
NOTE: You can easily restore your channel and system settings after a system reset using the Bose Music app. To do so, before you reset, save your current settings as a Scene in the app (see page 36). Once the reset is complete, select the Scene in the app to restore all settings except for Bluetooth and wireless transmitter connections. - Page 78 ©2023 Bose Corporation 100 The Mountain Road, Framingham, MA 01701-9168 USA AM872237-0010 Rev. 01...