Advertisement
Quick Links
Advertisement

Related Manuals for Breville Smart Grill Pro


Summary of Contents for Breville Smart Grill Pro
- Page 1 Smart Grill ™ Instruction Book - BGR840...
-
Page 2: Table Of Contents
SAFETY FIRST where it could touch a heated oven. At Breville we are very safety • Position the grill at a minimum conscious. We design and distance of 20cm away from manufacture consumer... - Page 3 • Always ensure the grill is This appliance is properly assembled before marked with a hot use. Follow the instructions surface symbol, the lid provided in this book. and the outer surface will be hot when the appliance is operating •...
- Page 4 Breville Service Centre for examination and/ or repair. • Any maintenance other than cleaning should be performed at an authorised Breville Service Centre. • This appliance is for household use only. Do not use this appliance for anything other than its intended use.
-
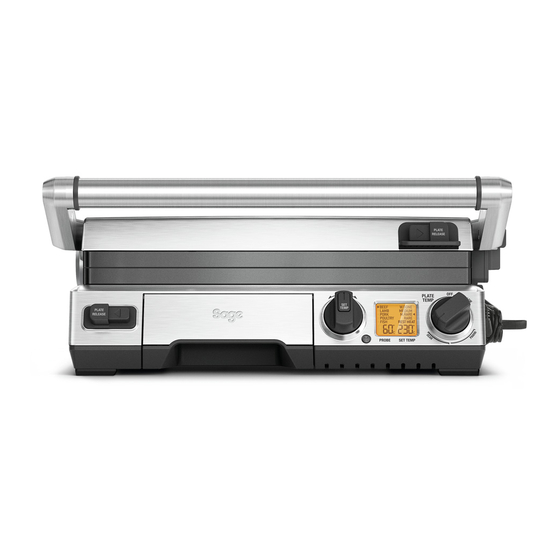
Page 5: Components
With Low, Panini (sandwich) and Sear Flat plate for eggs and pancakes, ribbed modes. plate to sear meats. H. Integrated Probe with Breville Assist™ D. Food type selection dial with Sound Alert Loop & Probe Storage Pressing the centre button of the dial For precision cooking and easy storage. - Page 6 Adjusts the angle of the bottom cooking 1-Hour auto shut-off automatically stops plate to drain fats, or can be made flat for heating the cooking plates after 1 hour eggs and pancakes. of inactivity. J. Height Control & Locking Storage Clip ELEMENT IQ™...
-
Page 7: Assembly
Assembly PREPARING THE GRILL FOR USE The grill features 2 x PLATE RELEASE. These allow you to independently remove the top and 1. Remove and safely discard any packing bottom cooking plates for easy cleaning, or to material and promotional labels from interchange plate positions. -
Page 8: Functions
ADJUSTABLE TILT CONTROL Functions The angle of the cooking plates can be adjusted by turning the PLATE TILT dial. The PLATE TILT dial is located on the lower back, right side of the grill. The unique indent PREHEATING THE GRILL between the two cooking plates channels juices from both plates into the same drip tray while 1. - Page 9 SET TEMP PLATE TEMP cook the meat during the rest phase. The Smart Grill Pro™ has a REST MEAT indicator, which alerts you to remove your meat before the SET TEMP is reached to prevent FOOD over cooking.
- Page 10 6. Once meat type is selected, press the 8. Use the handle to close the top cooking plate. When cooking with the probe it is SET TEMP button to scroll through doneness settings. An arrow indicator recommended that the top plate of the grill will show alongside selected doneness.
- Page 11 USE IN OPEN FLAT BBQ MODE 4. Place food on either or both of the cooking plates. Refer to grilling tips (page 15) and The grill opens flat into a 1650 sq. cm grilling recipes (page 19). surface. The ribbed cooking plate is perfect for 5.
- Page 12 USE AS A SANDWICH OR FOR BEST RESULTS PANINI PRESS When toasting sandwiches on the PANINI setting: 1. Repeat Preparation and Preheating Steps • Always place sandwiches in the centre on pages 7 & 8. bottom plate. 2. While the grill is preheating, adjust the •...
-
Page 13: Tips
Tips GRILLING TIPS Meats Recommended cuts: • Beef - sirloin (New York), rump, rib eye (scotch fillet), fillet. • Lamb - trim lamb leg steaks, fillet eye of loin and cutlets. • Pork - butterfly loin steaks, spare ribs, leg steaks, fillets, diced pork. -
Page 14: Care & Cleaning
WARNING Care & Cleaning Extreme caution must be used when handling the drip tray containing hot fats and juices. Do not immerse the body, power cord or power Ensure the grill is turned OFF by turning the plug in water or any other liquid as this may PLATE TEMP dial to the OFF position. - Page 15 The underside of the cooking plate may discol- our over time and can form a layer of corrosion. This is normal. Any discolouration that may occur to either side of the cooking plate will only detract from the appearance of the plate and will not affect the cooking performance.
-
Page 16: Troubleshooting
4. The LCD screen should no longer display ‘Er1’ error Mode. ‘Er3’ error Mode. 3. If the problem continues, call Breville 5. If the problem continues, call Breville Customer Service at 1300 139 798. Customer Service at 1300 139 798. -
Page 17: Recipes
Recipes MARINATED NEW YORK CUT STEAK OREGANO LAMB Serves 4 Serves 4 INGREDIENTS INGREDIENTS ½ cup red wine 1 tablespoon olive oil 2 tablespoons olive oil 1 tablespoon lemon juice 1 tablespoon Dijon mustard 1 tablespoon chopped fresh oregano 1 small clove garlic, crushed 1 small clove garlic, crushed 4 New York cut steaks –... - Page 18 Recipes TERIYAKI CHICKEN FILLETS LEMON AND SOY MARINATED SALMON Serves 4 Serves 4 INGREDIENTS INGREDIENTS 2 tablespoons mirin ¼ cup Japanese soy sauce 4 x 300g piece salmon fillet, skin removed 1 tablespoon caster sugar 3 tablespoons light soy sauce 1 tablespoon cooking sake 1–2 teaspoons wasabi paste 4 single chicken breast fillets...
- Page 19 BAGEL WITH SMOKED SALMON PASTRAMI ON TURKISH WITH AND CAPERS MUSTARD MAYONNAISE Serves 4 Serves 6 INGREDIENTS INGREDIENTS 4 bagels – split Turkish bread cut into 6 equal sections 4 tablespoons cream cheese butter 8 slices smoked salmon 18 slices pastrami 2 green onions, peeled and sliced finely 6 tablespoons djionase 1 tablespoon drained capers, chopped...
- Page 20 Web: www.breville.com www.breville.com Breville, the Breville Logo, Barista Express and Temp Control are trademarks of Breville Pty Ltd (“Breville”) and Breville's products are distributed in Australia and New Zealand under license. Copyright Breville Pty. Ltd. 2021. Due to continued product improvement, the products illustrated/photographed in this brochure may vary slightly from the actual product.