Table of Contents
Advertisement
Quick Links
Advertisement
Table of Contents

Related Manuals for Bernina 710


Summary of Contents for Bernina 710
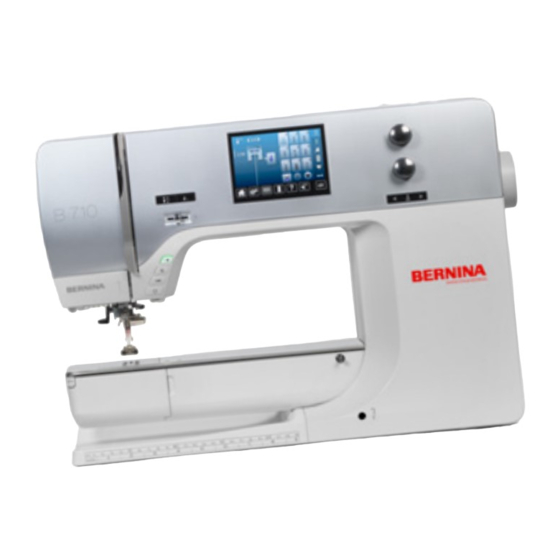
- Page 1 BERNINA 710...
- Page 2 LOOKING FOR A NEW SEWING PROJECT? You can find what you want in “inspiration”, our sewing magazine. Thanks to great sewing patterns and detailed sewing instructions, every project succeeds right away. * Not available in all countries.
- Page 3 Enjoy the creative sewing on your new BERNINA 710 and keep informed about the various accessories at www.bernina.com. On our homepage you will also find a lot of inspiring sewing instructions, to be downloaded for free.
-
Page 4: Safety Instructions
This may deflect the needle, causing it to break. WarnInG! 10. Do not use bent needles. 11. Always use the original BERNINA stitch plate. The wrong stitch plate can cause needle To reduce the risk of burns, fire, electric shock or breakage. -
Page 5: Environmental Protection
Safety Instructions SerVIcInG DouBLe- environmental protection InSuLateD proDuctS BERNINA is committed to the protection of the environment. We strive to minimize the environmental impact of In a double-insulated product, two systems of our products by continuously improving insulation are provided instead of grounding. No... -
Page 6: Table Of Contents
Contents contents Safety Instructions feed Dog and fabric feed feed Dog lowered/ready to sew environmental protection functions Key to Signs overview «function»-buttons sewing Glossary ⦁ «Start/Stop»-button accessory ⦁ «Presser foot position»-button ⦁ «Automatic thread cutter»-button Standard accessoryies ⦁ «Quick reverse»-button presser feet ⦁... - Page 7 Contents monitoring Double overlock Information top stitching edges ⦁ Language Blind hem ⦁ Version Visible hem ⦁ Dealer details Securing program ⦁ Service data Basting stitch update flat joining seam calibrating buttonhole foot no. 3a/cleaning Height compensation of uneven layers reset/Delete user data ⦁...
- Page 8 Deactivating the BSR Sewing Function by using the «Start/Stop»-button Index ⦁ BSR Function deactivation BernIna Dual feed ⦁ Presser Feet Selection ⦁ Switching On BERNINA Dual Feed ⦁ Switching Off BERNINA Dual Feed fabrics alphabets overview alphabet ⦁ Lettering ⦁...
- Page 9 Notes notes 033805.51.04_2014-02_Manual_B710_EN...
-
Page 10: Key To Signs
Correcting abnormalities in stitch formation due to the fabric fabric fold Folded edge of material BERNINA-Stitch-Regulator. Quilting with consistent stitch length within a certain speed Clear. Deleting settings or data Hook «Catches» the needle-thread loop, forming the stitch together with the lower thread... -
Page 11: Accessory
Accessory accessory Standard accessories 1 Presser foot lifter 2 Foot control 3 Soft Cover With Pocket 4 Accessory Box 5 Power cable 6 Slide-on table 7 3 spool discs 8 4 bobbins (one of them in the bobbin case) 9 Height compensation tool 10 Selection of needles 11 Seam guide, right 12 Seam ripper... -
Page 12: Presser Feet
Accessory presser feet 1 No. 1C Reverse pattern foot 2 No. 1D Reverse pattern foot 3 No. 3A Automatic buttonhole foot with slide 4 No. 4D Zipper foot 5 No. 5 Blindstitch foot Visit www.bernina.com for more accessory information. 033805.51.04_2014-02_Manual_B710_EN... -
Page 13: Accessory Box Free Standing
Accessory accessory box free standing ⦁ on the back of the box, pull both extensions out until they click into place Lay-out The box is equipped as standard with one large 1 and one small 2 drawer as well as a compartment for bobbin holders 5 and presser feet 7. ⦁... -
Page 14: Overview Sewing Computer
Overview sewing computer overview sewing computer front view Detail view 033805.51.04_2014-02_Manual_B710_EN... - Page 15 18 Display 45 Slide-on table socket 19 «Sewing support»-buttons 46 Darning hoop connection ⦁ «Home»-button 47 Special-accessories port ⦁ «Setup»-button 48 BSR-connection ⦁ 49 BERNINA Dual Feed «Tutorial»-button ⦁ «Creative Consultant»- button ⦁ «Help»-button ⦁ «eco»-button ⦁ «clr»-button 20 «Needle position»-buttons...
-
Page 16: Important Sewing Information
Important sewing information Important sewing information thread Be sure to select the appropriate thread type and weight for the fabric. For a perfect sewing result, thread and fabric quality play an important role. It is recommended to use quality brands. cotton threads ̶... -
Page 17: Needles, Threads
Important sewing information needles, threads correct needle/thread combination When sewing, the thread should travel smoothly down the long groove on the front of the needle. too thin thread or too thick needle The thread has too much clearance in the long groove. Skipped stitches and damage to the thread can occur. -
Page 18: Overview Needles
Important sewing information overview needles universal metafil 130/705 H/60-100 130/705 H-MET/75-80 or H-SUK/90-100 Normal point, slightly rounded Large eye For nearly all natural and synthetic Sewing with metallic threads fabrics (woven and knitted) Jersey/Stretch cordonnet (topstitching) 130/705 H-S, H-SES, H-SUK/70-90 130/705 H-N/80-100 Ball point Small ball point, long eye... - Page 19 Notes notes 033805.51.04_2014-02_Manual_B710_EN...
-
Page 20: Sewing Preparation
⦁ wind the cable around the reel ⦁ plug cable into 6 uSa/canada only: use only foot controller type LV-1 with sewing computer B 710. Slide-on table The slide-on table increases sewing surface. attaching the slide-on table ⦁ turn the handwheel (see page 13) ►... -
Page 21: Presser Foot Lifter
Sewing preparation presser foot lifter Raising or lowering presser foot via FHS. attaching the free Hand System ⦁ insert into the opening 1 raising and lowering the presser foot ⦁ with your knee push lever to the right ⦁ you should be able to operate the FHS with your knee in your normal sitting position ►... -
Page 22: Winding A Bobbin
Sewing preparation Winding a bobbin ⦁ turn power switch to «I» (on) ⦁ place empty bobbin on spindle 1 ⦁ place foam pad on the spool pin ⦁ place thread on the spool pin ⦁ attach appropriate spool disc 2 ⦁... -
Page 23: Inserting A Bobbin/Threading Lower Thread
Sewing preparation Inserting a bobbin/threading lower thread removing the bobbin from the bobbin case ⦁ press the release lever at the bobbin case (see illustration «Changing bobbin case» on this page) ⦁ remove the bobbin case according to following description ⦁... -
Page 24: Threading The Upper Thread
Sewing preparation threading the upper thread ⦁ raise the needle and presser foot ⦁ turn power switch to «0» (off) ⦁ place foam pad on the spool pin ⦁ place spool on pin so that the thread unwinds clockwise ⦁ attach appropriate spool disc ⦁... -
Page 25: Threading The Double Needle
Sewing preparation threading the double needle threading the first thread ⦁ raise the needle and the presser foot, remove the presser foot if necessary ⦁ turn power switch to «0» (off) ⦁ insert double needle ⦁ place foam pad on the spool pin ⦁... -
Page 26: Thread Needle
Sewing preparation thread needle Position the needle by pressing the foot control once (1 stitch). ⦁ raise the needle ⦁ lower the presser foot ⦁ turn power switch to «0» (off) ⦁ hold thread to the left and back ⦁ press lever 1 down and hold it ⦁... -
Page 27: Stitch Plate
Sewing preparation Stitch plate markings on the stitch plate ̶ the stitch plate is marked with vertical, horizontal and diagonal lines in mm and inches ̶ the lines help to guide the fabric for sewing seams and precise topstitching, etc. ̶... -
Page 28: Thread Tension
Basic settings are applied automatically when a stitch pattern or program is selected. the upper thread tension is set optimally at the BernIna factory and the sewing computer has been tested. metrosene-/Seralon thread size 100/2 (company mettler, Switzerland) is used for upper and lower thread. -
Page 29: Altering Presser Foot Pressure
Sewing preparation altering presser foot pressure ⦁ touch «i»-icon ⦁ touch «presser foot pressure»-icon ► presser foot pressure scale is displayed ⦁ turn stitch width or stitch length knob to the left or to the right ► presser foot pressure is increased or decreased ►... -
Page 30: Feed Dog And Fabric Feed
Sewing preparation feed Dog and fabric feed With each stitch the feed dog moves forward by one step. The length of this step is determined by the stitch length selected. With an extremely short stitch length, the steps are also very short. The fabric moves away from the foot quite slowly, even at full sewing speed. - Page 31 Notes notes 033805.51.04_2014-02_Manual_B710_EN...
-
Page 32: Functions
Functions functions overview «function»-buttons sewing «Start/Stop»-button «needle stop»-button ⦁ ̶ starts and stops the sewing computer when touch button ► operating it with or without foot control the needle is raised or lowered in the same ̶ starts and stops the BSR-Function if the BSR way as by sinking the heel back on the foot foot is attached and activated control... -
Page 33: Stitch Width And Stitch Length Knobs (Multifunction)
Functions Stitch width and Stitch length Knobs (multifunction) ̶ to adjust stitch width or stitch length ̶ to alter thread tension ̶ to set the buttonhole slit width or the button size ̶ to adjust the balance ̶ various alterations in the setup program «needle position»-buttons ⦁... -
Page 34: Display
Display Display overview main Display System settings 1 Home 2 Setup Program 3 Tutorial 4 Creative consultant 5 Help 6 ECO 7 Clear settings menu Selection 8 Practical stitches 9 Decorative stitches 10 Alphabets 11 Buttonholes 12 Personal program/Memory 13 Stitch selection by number 033805.51.04_2014-02_Manual_B710_EN... -
Page 35: Selection
Display Selection 14 Single and combi mode 15 Scroll up/down Stitch pattern selection 16 Stitch pattern selections Stitch pattern Display 17 Display of the stitch pattern selected 18 Information 033805.51.04_2014-02_Manual_B710_EN... -
Page 36: Functions - Display
Functions - Display functions - Display overview Sewing functions ⦁ touch «i»-icon ► «Function»-display appears functions 1 Needle stop up/down 2 Pattern begin 3 Securing 4 Pattern repeat 5 To alter pattern length 6 Upper thread tension 7 Needle position 8 Mirror Image (Left/Right) 9 Personal memory permanent 10 Security program... - Page 37 Functions - Display pattern repeat Security program ⦁ touch icon 1x ⦁ touch icon ► number 1 appears: the sewing computer stops at ⦁ touch «Needle»- or «Stitch plate»-icon the end of a single stitch or a stitch combination Overview Needle: ⦁...
-
Page 38: Overview Functions Buttonholes
Functions - Display overview functions buttonholes ⦁ touch «Buttonhole»-button ⦁ select the buttonhole ⦁ touch «i»-icon altering the buttonhole 1 Programs the buttonhole length 2 Buttonhole length direct entry 3 Manual buttonhole 4 Stitch counter buttonhole 5 Securing 6 Buttonhole slit width 7 Balance 8 Upper thread tension 9 Security program... - Page 39 Functions - Display Buttonhole slit width presser foot indicator ⦁ set the buttonhole slit width to between 0.1mm and ⦁ touch icon ► 2.0mm using the stitch width or the stitch length the recommended presser foot is displayed ► knob or the arrow icons the active Display shows the optional presser feet for the selected stitch pattern Balance...
-
Page 40: Overview Functions Alphabets
Functions - Display overview functions alphabets ⦁ touch «Alphabet»-button ⦁ select Alphabet ⦁ touch «i»-icon altering alphabet 1 Securing 2 Pattern repeat 3 To alter pattern length 4 Thread tension 5 Needle position 6 Mirror image (Left/Right) 7 Personal memory permanent 8 Security program 9 Mirror image down/up 10 Clear saved setting to default... - Page 41 Functions - Display needle position mirror image (up/Down) ⦁ move the needle to the left or to the right using the The sewing computer sews the stitch pattern mirrored, arrow icons left/right or the finger up/down referring to the sewing direction. ⦁...
-
Page 42: Overview Functions Combi Mode
Functions - Display overview functions combi mode ⦁ touch «Combi mode»-icon ⦁ select stitch pattern ⦁ touch «i»-icon combi mode 1 Deleting 2 Editing combinations at cursor position 3 Altering the pattern length 4 Upper thread tension 5 Altering the needle position 6 Mirror image (Left/Right) 7 To edit the whole combination 8 Security program... - Page 43 Functions - Display editing the whole combination permanent reverse sewing ⦁ touch icon The sewing computer sews the selected stitch pattern ► Display appears in permanent reverse. Security program Balance ⦁ touch icon Balances forward and reverse stitches. ⦁ touch «Needle»- or «Stitch plate»-icon Overview Needles: ⦁...
- Page 44 Functions - Display ⦁ touch «Combi mode»-icon ⦁ select the stitch pattern ⦁ touch «i»-icon ⦁ touch «Cursor position»-icon functions 1 Combination subdivider (1) 2 Combination subdivider (2) 3 Securing combination subdivider (1) ̶ each combination or memory folder can be subdivided into several parts ̶...
- Page 45 Functions - Display ⦁ touch «Combi mode»-icon ⦁ select stitch pattern ⦁ touch «i»-icon ⦁ touch «Edit whole combination»-icon functions 1 Deleting 2 Mirror Image (Left/Right) 3 Combination repeat Deleting Deletes the whole combination. mirror image (Left/right) The sewing computer sews the whole combination mirrored, left/right referring to the sewing direction.
-
Page 46: Setup Program
Setup Program Setup program overview «Setup»-display The Setup Program enables an individual adjustment of the Display surface and the settings according to your personal requirements. After setting the sewing computer to your personal requirements, all changes made in the Setup Program are saved, even when the sewing computer is switched off. -
Page 47: Changing Display Settings
Setup Program Touch the yellow-framed icon to reset to basic setting. changing Display settings ⦁ touch «Display setting»-icon Brightness ⦁ move the round knob in the Display to the left/right using the finger or ⦁ turn the stitch width knob ►... -
Page 48: Selecting The Display Color
Setup Program Selecting the Display color ⦁ touch «Display color»-icon ⦁ select the desired display color Sewing settings ⦁ touch «Sewing setting»-icon Sewing speed ⦁ move the round knob in the Display to the left/right using the finger or ⦁ turn the stitch width knob ►... -
Page 49: Automatic Securing Program At Pattern End
Setup Program automatic securing program at pattern end ̶ the number and type of the securing stitches of the external «Pattern end/ Securing»-button can be programmed ̶ standard = four securing stitches in the same place ⦁ select function 4 for forward securing stitches ⦁... -
Page 50: Display Calibration
Setup Program altering the winding speed ⦁ touch «Winding speed»-icon ⦁ move round knob in the Display to the left/right using the finger or ⦁ turn the stitch width knob ► the winding speed is changed Display calibration The Display calibration can be opened as follows: ⦁... -
Page 51: Altering The Acoustic Signals
Setup Program altering the acoustic signals ⦁ touch «Acoustic signal»-icon By touching 1 the signals are activated or deactivated. Selecting Stitch pattern/function/BSr Stitch patterns and function selection 2 can be confirmed acoustically. ⦁ touch the icon 3 with the loudpseakers for the stitch patterns until you hear the desired sound There are six different sounds to choose from. -
Page 52: Information
⦁ touch icon Dealer details ⦁ touch respective icon Following details of the BERNINA-dealer can be registered: ⦁ store name ⦁ address ⦁ telephone number ⦁... -
Page 53: Service Data
⦁ remove memory stick update Do not remove the BernIna uSB stick until there is a message which indicates the end of the update. ⦁ insert BERNINA USB stick with the new software version ⦁... -
Page 54: Calibrating Buttonhole Foot No. 3A/Cleaning
Setup Program calibrating buttonhole foot no. 3a/cleaning ⦁ touch «Cleaning/Calibrating»-icon 1 Calibrating Buttonhole foot No. 3A 2 Cleaning the thread catcher ⦁ touch «Calibration»-icon ⦁ attach buttonhole foot No. 3A ⦁ touch «Start/Stop»-button ► the buttonhole foot No. 3A moves forward and backwards ►... -
Page 55: Reset/Delete User Data
Setup Program reset/Delete user data ⦁ touch «Basic settings»-icon Choose from following options: 1 Reset Settings 2 Delete user data reset settings ⦁ touch icon 1 ⦁ touch icon 3 ⦁ confirm with ► the sewing settings are in basic state ►... -
Page 56: Tutorial
Tutorial tutorial overview tutorial The tutorial provides information and explanations about the different areas of sewing. ⦁ touch «Tutorial»-button ► «Tutorial»-display appears 1 Threading 2 Needles 3 Presser foot 4 BSR 5 Sewing techniques 6 Quilting 7 Buttonholes 8 Free Hand System (FHS) 9 Miscellaneous 10 Troubleshooting ⦁... - Page 57 Tutorial ► information on the desired topic is shown ⦁ scroll through the topics using the knobs or the finger ⦁ touch «Next» ► the next page appears ⦁ touch «Back» ► the previous page appears ⦁ touch ► the «Tutorial»-display closes ►...
-
Page 58: Creative Consultant
Creative consultant creative consultant overview creative consultant The creative consultant provides information and help with various sewing techniques. After selecting the fabric and the desired sewing technique suggestions for suitable needles, presser feet etc. are displayed. ► presser foot pressure and upper thread tension are set automatically ⦁... -
Page 59: Help Program
Help program Help program The Help program provides information about individual stitch patterns and function icons in the Display. ⦁ touch «Help program»-button ⦁ select the desired stitch pattern or the desired function Stitch patterns The Display shows the following information: ►... -
Page 60: Balance
Balance practical and decorative stitches The sewing computer is tested and optimally set before it leaves the BERNINA factory. Different fabrics, threads and stabilizers can affect programmed stitches so that they are not sewn out properly. These effects can be corrected with the electronic Balance so that the stitch formation can be adjusted where necessary to suit the material. -
Page 61: Eco Description
eco description When work is interrupted for longer periods, the sewing computer can be put into energy-saving mode. activating eco ⦁ touch «eco»-button ► the Display gets dark ► power consumption is reduced and the sewing light turned off The energy-saving mode also acts as a child safety feature. The Display is inactive and the sewing computer cannot be started. -
Page 62: Practical Stitches
Practical stitches practical stitches overview practical stitches ⦁ touch «Practical stitch»-button ► the practical stitches are visible in the Display ⦁ further practical stitches are visible by scrolling Straight stitch Honeycomb stitch For non-elastic materials; all straight stitch work, For all types of jersey and smooth materials; visible such as seams, topstitching, sewing zippers seams in lingerie, clothing, linen, mending etc. - Page 63 Practical stitches universal stitch Bartack program For firm fabrics such as felt and leather; flat joining Reinforcing pocket openings, sewing belt loops etc. seams, visible seams, attaching elastic, decorative seams Sewn out zig-zag Bartack program Edge finishing and reinforcing, attaching elastic, Reinforcing pocket openings, sewing on belt loops, decorative seam securing zippers and seam ends...
-
Page 64: Stitch Pattern Selection
Practical stitches Stitch pattern selection Selecting stitch pattern ⦁ select the desired main category 1-5 1 Practical stitches 2 Decorative stitches 3 Alphabets 4 Buttonholes 5 Personal program/Memory ► the available stitch patterns are visible in the Display portion 6 ⦁... -
Page 65: Customizing Stitch Pattern Individually
Practical stitches customizing stitch pattern individually According to material and purpose a stitch pattern can be altered individually. The alterations described here are applicable for all practical and many decorative stitches. The personal memory is unlimited; it can hold as many stitch alterations as needed: ̶... -
Page 66: Personal Memory Permanent
Practical stitches personal memory permanent The basic settings programmed by BERNINA can be altered and saved and remain active even when the sewing computer is switched off. altering basic settings ⦁ select stitch pattern, e.g. zig-zag ⦁ alter stitch width and stitch length via the knobs Saving alterations ⦁... -
Page 67: Altering Stitch Width And Stitch Length
Practical stitches altering stitch width and stitch length ⦁ turn the knobs or ⦁ touch stitch width or stitch length Display ⦁ touch the arrow icons in the respective Display or ⦁ move the round knob in the Display using the finger Can be altered while sewing. -
Page 68: Examples Of Application Practical Stitches
Practical stitches examples of application practical stitches Straight stitch reverse pattern foot no. 1c/1D Straight stitch no. 1 After turning on the sewing computer the straight stitch will appear. ► the needle is up application Suitable for all fabrics. adjust the stitch length to suit the fabric E. -
Page 69: Triple Zig-Zag
Practical stitches triple Zig-Zag reverse pattern foot no. 1c/1D triple zig-zag no. 7 In firm materials, particularly for denim, deckchair covers, awnings. Seams on often washed items. Finish raw edges first. Use Jeans needle for very firm materials. 033805.51.04_2014-02_Manual_B710_EN... -
Page 70: Zipper
Practical stitches Zipper Zipper foot no. 4D Straight stitch no. 1 preparation ⦁ close seam to the zipper beginning ⦁ sew securing stitches ⦁ baste seam closed and clean ⦁ finish the seam allowance ⦁ iron the seam ⦁ open the zipper ⦁... -
Page 71: Manual Darning
Practical stitches manual darning Darning foot no. 9 (optional accessory) Straight stitch no. 1 Holes or worn areas «Replacing» threads along the lengthside and crosswise in every material. preparation ⦁ lower the feed dog ⦁ attach the Slide-on table ⦁ hoop the fabric in a round embroidery hoop (optional accessory) ►... -
Page 72: Automatic Darning
Practical stitches automatic darning reverse pattern foot no. 1c Buttonhole foot no. 3a Simple darning program no. 22 Quick darning of holes or worn areas Replaces threads along the lengthwise grain in all materials. preparation ⦁ hoop light weight materials in a round embroidery hoop (optional accessory) ►... -
Page 73: Reinforced Darning, Automatic
Practical stitches reinforced darning, automatic Buttonhole foot no. 3a reinforced darning program no. 23 Quick darning of holes or worn areas Replaces threads along the lengthwise grain in all materials. preparation ⦁ hoop light weight materials in a round embroidery hoop (optional accessory) ►... -
Page 74: Double Overlock
Practical stitches Double overlock reverse pattern foot no. 1c overlock foot no. 2a (optional accessory) Double overlock no. 10 closed seam Double overlock seam in loose knits and cross seams in knits and jerseys. Knits and jersey ̶ use a new Jersey needle to prevent damaging the loops ̶... -
Page 75: Top Stitching Edges
Practical stitches top stitching edges Blindstitch foot no. 5 reverse pattern foot no. 1c edge stitch foot no. 10/10c/10D (optional accessory) Straight stitch no. 1 narrow edgestitching outer edges ⦁ place edge of fold left against the guide on the blindstitch foot ⦁... -
Page 76: Blind Hem
Practical stitches Blind hem Blindstitch foot no. 5 Blindstitch no. 9 For invisible hems in medium to heavy weight cotton, wool and blended materials. preparation ⦁ finish the raw edges ⦁ fold the hem and baste or pin in place ⦁... -
Page 77: Securing Program
Practical stitches Securing program reverse pattern foot no. 1c Securing program no. 5 ̶ for all fabrics ̶ secures beginning and end of seam Sewing long seams with straight stitch Even securing by defined stitch count. Beginning to sew ⦁ press the foot control ►... -
Page 78: Flat Joining Seam
Practical stitches flat joining seam reverse pattern foot no. 1c Stretch overlock no. 13 Ideal for fluffy or thick materials such as terry cloth, felt and leather etc. Sewing ⦁ overlap fabric edges ⦁ sew along the fabric edge ⦁ the needle should sew over the edge of the top layer on the right side ►... -
Page 79: Height Compensation Of Uneven Layers
Practical stitches Height compensation of uneven layers The feed dog works accurately when the foot is level. If the foot is at an angle, e.g. when sewing over thick to thin or vice-versa, the feed dog cannot grip and feed the fabric. The fabric might jam. To solve this problem, place one, two or three compensating plates as required behind the needle under the presser foot to level it. -
Page 80: Buttonholes
Buttonholes Buttonholes overview Buttonholes Buttonholes are not only practical closures, they can also be used as a decorative effect. All buttonholes can be programmed and sewn in different ways. ⦁ touch «Buttonhole»-button ⦁ scroll to see more buttonholes Standard buttonhole Straight-stitch buttonhole For light to medium weight fabrics;... -
Page 81: Important Information
Buttonholes Important information marking the length of manual buttonholes ⦁ mark the buttonhole length in the desired position ⦁ use buttonhole foot No. 3C (optional accessory) marking the length of automatic buttonholes ⦁ mark the length of just one buttonhole ►... -
Page 82: Stabilizer
Buttonholes Stabilizer ̶ interfacing provides durability and stability to the buttonhole ̶ choose the interfacing according to the material being used ̶ when using thick or fluffy materials an embroidery stabilizer can be used ► therefore the fabric feeds better 033805.51.04_2014-02_Manual_B710_EN... -
Page 83: Cords
Buttonholes cords Generally ̶ cords reinforce buttonholes and enhance their appearance ̶ mainly suitable for buttonhole No. 51 ⦁ position the work accordingly Ideal cords ̶ Perle cotton No. 8 ̶ strong hand-sewing thread ̶ fine crochet yarn cord with the automatic buttonhole foot no. 3a ⦁... -
Page 84: Altering The Balance
Buttonholes altering the balance ⦁ touch «i»-icon ⦁ touch «Balance»-icon Balance with direct entry length buttonholes The balance alterations have the same effect on both beads. Balance with direct entry length keyhole or round buttonholes The balance alterations have the same effect on both beads. The keyhole or eye is balanced as follows: ⦁... -
Page 85: Programming Buttonholes
Buttonholes programming Buttonholes Standard and stretch buttonhole with auto-length, automatically Buttonhole foot no. 3a The lens on the automatic buttonhole foot No. 3A automatically registers the length of the buttonhole for exact duplication. For buttonholes of 4-31mm, depending on the buttonhole type. The slide foot must lie perfectly flat on the fabric! If the slide foot rests on a seam allowance, the length cannot be measured accurately. -
Page 86: Automatic With Direct Legth Entry
Buttonholes automatic with direct legth entry Buttonhole foot no. 3a programming the buttonhole length Buttonholes can be sewn to a specific length with the buttonhole foot No. 3A. Buttonhole length = cutting length in mm. ⦁ select the desired buttonhole ⦁... -
Page 87: Automatic Round And Keyhole Buttonhole
Buttonholes automatic round and keyhole buttonhole Buttonhole foot no. 3a The slide foot must lie perfectly flat on the fabric! If the slide foot rests on a seam allowance, the length cannot be measured accurately. automatic round and keyhole buttonhole no. 54, 56, 57 programming buttonholes ⦁... -
Page 88: Decorative Buttonhole With Double
Buttonholes Decorative buttonhole with double pointed bartack no. 69 programming the buttonhole ⦁ sew the first bead forward ⦁ stop the sewing computer ⦁ press «Quick reverse»-button ► «auto» and the programmed length (in mm) appears in the Display ► the buttonhole length is programmed the sewing computer sews autmatically: 2 straight stitches in reverse... -
Page 89: Heirloom Buttonhole
Buttonholes Heirloom Buttonhole Buttonhole foot no. 3a Heirloom buttonhole no. 63 programming the buttonhole ⦁ sew first bead forward ⦁ stop the sewing computer ⦁ press «Quick reverse»-button ► «auto» and the programmed length (in mm) appears in the Display ►... -
Page 90: Buttonhole In Long Term Memory
Buttonholes Buttonhole in long term memory ⦁ touch «Memory»-button programming the buttonhole ⦁ touch «Save»-icon 1 ► the «Save»-display appears ⦁ touch «Save»-icon ► the buttonhole is now saved in long term memory ⦁ touch «Memory»-button Selecting a saved buttonhole ⦁... - Page 91 Buttonholes altering saved buttonhole ⦁ touch «i»-icon ⦁ touch «Direct entry length»-icon ⦁ alter the length of the saved buttonhole ⦁ touch «Back»-icon twice ⦁ reprogram the buttonhole as described ⦁ touch «Memory»-button Deleting a saved buttonhole ⦁ touch «Delete»-icon 1 ►...
-
Page 92: 7- Or 5-Step-Buttonhole, Manually
Buttonholes 7- or 5-step-buttonhole, manually Buttonhole foot no. 3c (optional accessory) ⦁ select the desired buttonhole ⦁ touch «i»-icon ⦁ touch «man»-icon The length of the beads is manually determinded when sewing. Bartack, eye and securing stitches are pre-programmed. The individual steps can also be selected by scrolling, by using the arrow icons or by touching the «Quick reverse»-button. -
Page 93: Button Sew-On Program
Button sew-on program Button sew-on program ⦁ touch «Buttonhole«-button ⦁ touch «Button sew-on program»-icon Darning foot no. 9 (optional accessory) Button sew-on foot no. 18 (optional accessory) Button sew-on program no. 60 For buttons with 2 and 4 holes. preparation ⦁... -
Page 94: Eyelet Program
Eyelet program eyelet program ⦁ touch «Buttonhole»-button ⦁ touch «Eyelet program»-icon reverse pattern foot no. 1c open embroidery foot no. 20c eyelet with small zig-zag no. 61 Straight stitch eyelet no. 62 Sewing eyelets ⦁ select eyelet ⦁ position fabric under the presser foot and sew eyelet program ►... - Page 95 Notes notes 033805.51.04_2014-02_Manual_B710_EN...
-
Page 96: Decorative Stitches
Decorative stitches Decorative stitches overview Decorative stitches ⦁ touch «Decorative stitches»-button ► display shows an overview of the categories ⦁ select the desired category ► the desired category is activated ⦁ select the desired stitch pattern application Depending on the type of material, simple or more complex decorative stitches should be selected to best suit the material. -
Page 97: Examples Of Application Decorative Stitches
Decorative stitches examples of application Decorative stitches cross Stitches reverse pattern foot no. 1c/1D or open embroidery foot no. 20c/20D (optional accessory) cross stitch ̶ cross stitching is a traditional technique, and extends the range of decorative stitches ̶ if the cross stitches are sewn on fabric with a linen texture, they look like hand-stitched cross stitching application ̶... -
Page 98: Pintucks
Decorative stitches pintucks pintuck feet (optional accessory) ̶ No. 30 (3 grooves) = 4mm double needle: for heavy weight materials ̶ No. 31 (5 grooves) = 3mm double needle: for heavy to medium weight materials ̶ No. 32 (7 grooves) = 2mm double needle: for light to medium weight materials ̶... -
Page 99: Bobbin-Play Sewing
Decorative stitches Bobbin-play sewing attentIon! for this application an accessory bobbin case is required. free motion sewing The bobbin can be filled different thread material. For free-motion stitching to add texture. This method is similar to «normal» free-motion sewing, but is done on the wrong side of the fabric. -
Page 100: Quilt Stitches
Quilt stitches Quilt stitches overview Quilt stitches Various stitch patterns are available which are used especially in quilting, for patchwork or for appliqué. ⦁ touch «Decorative stitch»-button ► display shows an overview of the categories Cat. 1300 = Quilt stitches ⦁... -
Page 101: Examples Of Application Quilt Stitches
Quilt stitches examples of application Quilt stitches Handlook quilt stitch 1346/1350 reverse pattern foot no. 1c Handlook quilt stitch no. 1328, 1346, 1347, 1348 Suitable for all fabrics and work which should look «hand sewn». thread ̶ Upper thread = Monofilament ̶... -
Page 102: For Free-Motion Quilting
Quilt stitches for free-motion quilting Darning foot no. 9 (optional accessory) Straight stitch no. 1 for free-motion quilting For all types of free motion quilting work. preparation ⦁ pin top layer, batting and backing together, or baste if necessary ⦁ attach slide-on table ⦁... -
Page 103: Bsr (Bernina Stitch Regulator)
BSr (BernIna Stitch regulator) (optional accessory) Quilting with BSr BSr-function The BSR presser foot reacts to the movement of the fabric under the foot and controls the speed of the sewing computer up to the maximum speed possible. The following applies: the faster the fabric is moved, the higher the speed of the sewing computer. -
Page 104: Preparation
For an even sewing start (the first stitch) the foot control must be pressed and the fabric moved simultaneously. This also applies for sewing points and straight stitching within a round form. If the BSR function is deactivated and later re-activated without the sewing computer being switched off in between, the last selected BSR mode is active. -
Page 105: Functions In The Bsr Mode
functions in the BSr mode needle stop down (standard) ► the arrow points down on the «BSR»-display ► the sewing computer stops with needle down, when taking foot off foot control or when the «Start/Stop»-button is pressed needle stop up ⦁... -
Page 106: Beeper (Audio Signal) Activation/Deactivation
Beeper (audio signal) activation/deactivation ⦁ touch «Setup»-button ⦁ touch «Audio setting»-icon Selecting sound for BSr in the Setup program ► one sound is set as default (active) ⦁ touch the icon 1 showing the loudspeaker for BSR ► the loudpseaker is highlighted in red ►... -
Page 107: Activating The Bsr Sewing Function
activating the BSr Sewing function 1. option: BSR-Function via the foot control. ⦁ plug in the foot control ⦁ press the foot control ► presser foot is lowered ⦁ press the foot control again ► BSR mode starts ► a red light appears on the presser foot ⦁... -
Page 108: Bernina Dual Feed
If an incorrect presser foot is attached, the sewing computer will not start with the dual feed engaged. an error message will appear. With the BERNINA Dual Feed the top and bottom layer of fabric are fed simultaneously, the even feeding enables perfect matching of striped and checkered patterns. -
Page 109: Fabrics
BERNINA Dual Feed fabrics Difficult-to-work-with fabrics (with a nap, slippery, sticky etc.): ̶ velvet, normally sewn with the grain ̶ towelling ̶ Jersey, especially when sewing it crosswise to knit ̶ fake fur or coated fake fur ̶ fleece-types of fabrics ̶... -
Page 110: Alphabets
Alphabets alphabets overview alphabet Block-, Double Block-, Script and Cyrillic can be sewn in two different sizes. Block-, Double Block-, Script- and Cyrillic can also be sewn in lower case. Numbers and special characters are located at the end of the upper case. -
Page 111: Combining Lettering
Alphabets combining lettering Individual letters and rows of the same letter of the same alphabet are sewn in single mode. Letters for names, addresses, words, etc. are combined and sewn in combi mode. ⦁ touch «Combi mode»-icon ⦁ touch the icon with the desired letter ►... -
Page 112: Alphabet In Combination With Functions
Alphabets alphabet in combination with functions Select lower case ⦁ touch the «Upper/Lower case»-icon ► the lower case «a» is highlighted in black and jumps to the upper left corner of the icon ► the lower case is activated ⦁ touch the «Upper/Lower case»-icon again ►... -
Page 113: Personal Program
Personal program personal program creating a personal Display Use the Personal program to create a file with stitches you use most for a special project. Stitch patterns as well as their alterations are saved in the Personal program. The following alterations can be saved: ̶... -
Page 114: Programming/Saving Second Stitch Pattern
Personal program ⦁ touch «Save»-icon 3 ► the altered zig-zag is saved ► the Display closes programming/Saving second stitch pattern ⦁ touch «Buttonhole»-button ⦁ select standard buttonhole No. 51 ⦁ save the stitch pattern as desribed above ⦁ save any other stitch pattern in the same way Stitch pattern selection in the personal program ⦁... -
Page 115: Alterting/Overwriting Stitch Patterns
Personal program alterting/overwriting stitch patterns Selecting stitch pattern ⦁ touch «Personal program»-button 1 ⦁ select zig-zag ⦁ make alterations ► stitch width and stitch length are altered (yellow numbers) ⦁ touch «Personal program»-button ⦁ touch «Save»-icon ⦁ select zig-zag 2 ⦁... -
Page 116: Deleting Stitch Patterns
Personal program Deleting stitch patterns Selecting stitch pattern ⦁ touch «Personal program»-button ⦁ touch «Delete»-icon 1 ⦁ select the stitch pattern to be deleted ⦁ confirm with ► stitch pattern is deleted ► the remaining stitch patterns are moved by one position 033805.51.04_2014-02_Manual_B710_EN... -
Page 117: Combi Mode
Combi mode combi mode In the memory stitch patterns, lettering and numbers can be combined and saved. In each memory «Drawer» a maximum of 70 stitch patterns can be stored as long as there is sufficient free space (capacity) available. The memory is long-term, i.e. -
Page 118: Deleting Stitch Patterns
Combi mode Deleting Stitch patterns Deleting individual stitches ⦁ touch the «Delete»-icon ► stitch pattern above the cursor are deleted ⦁ touch the «Delete»-icon as many times until the stitch altering area is empty Deleting entire combination ⦁ touch «i»-icon ⦁... -
Page 119: Correcting A Stitch Pattern Combination
Combi mode correcting a stitch pattern combination Inserting a stitch pattern ⦁ select the desired position in the combination ⦁ select the new stitch pattern ► the new stitch pattern is inserted below the selected stitch pattern To insert a stitch pattern at the beginning of a combination the cursor must be positioned above the first stitch pattern. -
Page 120: Mirroring Complete Combinations
Combi mode mirroring complete combinations ⦁ touch «i»-icon ⦁ touch «Edit complete combination»-icon ⦁ touch «Mirror image»-icon ► the complete combination is mirrored ⦁ touch «Back»-icon twice combination subdivider 1 ⦁ touch «i»-icon ⦁ touch «Edit combination at cursor position»-icon ⦁... -
Page 121: Stitch Pattern Combination
Combi mode Stitch pattern combination overwriting ⦁ program a new stitch combination ⦁ touch «Memory»-button ⦁ touch «Save»-icon ⦁ select the drawer to be overwritten (e.g. 3) ⦁ confirm with Touch to cancel the overwriting procedure. Deleting ⦁ touch «Memory»-button ⦁... -
Page 122: Cleaning
Cleaning cleaning attentIon! Disconnect plug from the socket before cleaning or lubricating! never use alcohol, petrol, white spirit or any type of solvent to clean the sewing computer! cleaning the Display and the sewing computer Wipe with a soft, damp cloth. feed dog area Clean the sewing computer after every use - remove any lint from under the stitch plate and in the hook area. - Page 123 ⦁ remove the hook ⦁ fill as much BERNINA-oil into both oil depots so that the felts are damp ⦁ insert the hook ⦁ close hook race cover and fastening bracket, release bracket must engage ⦁...
-
Page 124: Troubleshooting
⦁ ̶ Upper thread too tight/too slack reduce/increase upper thread tension formation ⦁ ̶ Needle blunt or bent use new BERNINA quality needle ̶ Poor quality needle ⦁ use new BERNINA quality needle ̶ Poor quality thread ⦁ use quality thread (Isacord, Mettler, Gütermann etc.) ̶... - Page 125 ⦁ update error ̶ USB stick is not recognized use a BERNINA USB stick ⦁ ̶ Update process is blocked (hourglass remove the stick and turn the sewing computer off and on stays on Display) again. Proceed with the update as indicated by the message ⦁...
- Page 126 BERNINA USB stick and do not remove during the update process ⦁ ̶ New SW Version is not available on save the new SW Version on the BERNINA USB stick and the stick start the update again ⦁ ̶ Update successful...
- Page 127 ̶ It is time for the regular maintenance. the sewing computer must be taken to an authorised Please contact your BERNINA dealer BERNINA dealer/servicing shop. The announcement appears or your BERNINA service address after completing the programmed service interval. The message can be deleted temporarily by touching the field «ESC»...
-
Page 128: Overview Stitch Patterns
Stitch patterns overview Stitch patterns practical stitches Buttonholes Decorative stitches florals 033805.51.04_2014-02_Manual_B710_EN... - Page 129 Stitch patterns cross stitches Satin stitches ornamental stitches 033805.51.04_2014-02_Manual_B710_EN...
-
Page 130: Quilt Stitches
Stitch patterns Heirloom stitches novelty Stitches Quilt stitches 033805.51.04_2014-02_Manual_B710_EN... -
Page 131: Alphabets
Stitch patterns alphabets Block Double-Block 033805.51.04_2014-02_Manual_B710_EN... - Page 132 Stitch patterns Script cyrillic 033805.51.04_2014-02_Manual_B710_EN...
- Page 133 Stitch patterns Hiragana 033805.51.04_2014-02_Manual_B710_EN...
-
Page 134: Index
Thread tension ⦁ Functions 38-39, 110 ⦁ Kinds of alphabets Basting stitch 61, 75 ⦁ Lettering ⦁ Main display/Menu selection BernIna Dual transport 106-107 ⦁ Overview ⦁ Perfect Stitch Formation Bobbin case ⦁ ⦁ Selecting Inserting/removing ⦁ Upper-/lower case lettering ⦁... - Page 135 Index ⦁ Decorative buttonhole with double pointed bartack connection ⦁ Duplicating ⦁ 13, 102 ⦁ Eyelets 78, 92 ⦁ Foot control 13, 18 ⦁ Feed support ⦁ Optional accessory ⦁ Heirloom buttonhole 78, 87 ⦁ PC-connection 13, 18 ⦁ Important Information ⦁...
- Page 136 Presser foot indicator ⦁ Presser foot pressure ⦁ Programming buttonhole length ⦁ Securing fabric ⦁ Security program ⦁ ⦁ BERNINA Dual Transport 106-107 Stitch counter buttonhole ⦁ ⦁ Needle and thread 14-16 Upper thread tension ⦁ Transport functions combi-mode 40-43 fabric feed ⦁...
- Page 137 Index ⦁ Basic setting stitch pattern ⦁ Combining ⦁ Mirror image left/right/down/up ⦁ Correcting the combination ⦁ Needle position ⦁ Overview ⦁ Needle stop down/up ⦁ Types ⦁ Pattern begin ⦁ Pattern repeat Long term memory ⦁ Permanent sewing in reverse ⦁...
- Page 138 Index needle threader 13, 24 ⦁ Blind stitch 60, 74 ⦁ Blind stitch narrow needle, thread and material ⦁ Darning manual/automatic/reinforced 69-71 ⦁ Darning program 70, 71 needle-thread-combination ⦁ Double overlock 60, 72 ⦁ Gathering stitch ⦁ Honeycomb stitch ⦁ Jersey stitch opening for darning hoop connection ⦁...
- Page 139 Index ⦁ Quilt stitch/Straight stitch Service data ⦁ Quilters' securing program ⦁ Quiltstich/Hand look stitch Setting ⦁ Satin stitch ⦁ Confirming ⦁ Stippling stitch ⦁ Deleting Quilting Setup program 44-53 ⦁ ⦁ Free-motion quilting Audio System ⦁ ⦁ Handlook quilt stitch Basic setting 44, 53 ⦁...
- Page 140 Index ⦁ Automatic thread cutter ⦁ Automatic thread cutter and securing stitches ⦁ Presser foot in hover position tension ⦁ Presser foot position when needle stop position down 47 ⦁ Securing stitches on/off thread ⦁ Sewing speed control ⦁ Breakage ⦁...
- Page 141 Index ⦁ Needle ⦁ Presser foot ⦁ Presser foot lifter (FHS) ⦁ Quilting ⦁ Sewing techniques ⦁ Thread/Threading ⦁ Troubleshooting types of fabric update upper thread ⦁ Indicator ⦁ Tension 26, 35, 37, 38, 40, 46 ⦁ Threading Vertical spool pin 13, 19 Welcome text ⦁...
- Page 142 Imprint Text Herbert Stolz/Susanne Ribi Graphics www.sculpt.ch Pictures Patrice Heilmann, CH-Winterthur Typesetting, Layout Susanne Ribi Copyright 2012 BERNINA International AG, CH-Steckborn 2014/02 en 033805.51.04 033805.51.04_2014-02_Manual_B710_EN...
- Page 143 In partnership with...