
Related Manuals for Sony MHC-GNX660


Summary of Contents for Sony MHC-GNX660
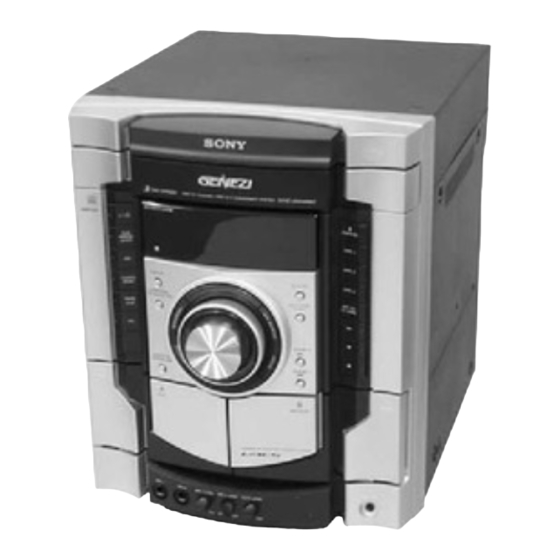
- Page 1 2-670-331-12(3) Mini Hi-Fi Component System Operating Instructions MHC-GNX660/ MHC-GNX600 ©2006 Sony Corporation...
- Page 2 WARNING To reduce the risk of fire or electric shock, do not expose this apparatus to rain or moisture. To avoid electrical shock, do not open the cabinet. Refer servicing to qualified personnel only. To prevent fire, do not cover the ventilation of the apparatus with newspapers, table-cloths, curtains, etc.
-
Page 3: Table Of Contents
Using the sub woofer......19 Singing karaoke by reducing the vocal Disc – Playback or selecting the audio channel ..19 Loading a disc ......... 9 (MHC-GNX660 only) Playing a disc .......... 9 Singing along........20 — Normal Play/Shuffle Play Playing repeatedly......... 11 Timer —... -
Page 4: About This Manual
• CD-ROMs other than those has MP3 audio models MHC-GNX660 and MHC-GNX600. tracks in the format of MPEG 1 Audio Layer In this manual, the MHC-GNX660 is used for 3, MPEG 2 Audio Layer 3 and MPEG 2.5 illustration purposes unless stated otherwise. - Page 5 Notes on CD-R and CD-RW Music discs encoded with copyright protection • This system can play back CD-R/CD-RW technologies discs edited by the user. However, note that playback of some discs may not be possible This product is designed to play back discs that depending on the recording device used for conform to the Compact Disc (CD) standard.
-
Page 6: Getting Started
Hooking up the system Do the following procedures 1 to 6 to hook up your system using the supplied cords and accessories (page 35). AM loop antenna FM lead antenna Sub woofer Front speaker (Left) Unit Front speaker (Right) * MHC-GNX660 only... - Page 7 VIDEO OUT jack with the and the demonstration automatically ends. supplied video cord. If the supplied adaptor on the plug does not (MHC-GNX660 only) fit your wall outlet, detach it from the plug VIDEO OUT (only for models equipped with an adaptor).
-
Page 8: Positioning The Speakers
Notes When carrying this unit • Keep the speaker cords away from the antennas to prevent noise. Do the following procedure to protect the disc • Be sure to match the color of the speaker terminals on mechanism. the unit and the connectors. Use buttons on the unit for the operation. -
Page 9: Setting The Clock
• You cannot set the clock in Power Saving Mode This system lets you play back CDGs*, AUDIO (page 23). CDs and discs with MP3 audio tracks in different play modes. Before playing a CDG*, turn on your TV and select the video input. * MHC-GNX660 only continued... - Page 10 “ALBM SHUF” play mode Disc playing Disc presence indicator indicator performs the same operation as “1 DISC When playing a CDG (MHC-GNX660 only) SHUF” play mode. Elapsed Disc tray The tracks on all discs in the playing time number Track number...
-
Page 11: Playing Repeatedly
CHANGE. repeatedly to select “CD”. Remove a disc Press Z OPEN/CLOSE. • (MHC-GNX660 only) When you play back a CDG, some operation may The elapsed playing time may not be displayed cause image distortion on the video output. correctly depending on the MP3 audio tracks. -
Page 12: Creating Your Own Program
Press ENTER. Creating your own The track(s) is(are) programmed. The program step number appears in the program display. — Program Play To program additional discs or tracks. To program Repeat steps You can make a program of up to 25 steps from Other discs 3 and 5 all the discs in the order you want to play back. -
Page 13: Tuner
Press TUNER MEMORY. A preset number flashes in the display. Tuner The stations are stored from preset number 1. Presetting radio stations Preset number You can preset up to 20 FM stations and 10 AM AUTO TUNED STEREO stations. You can then tune in any of those stations simply by selecting the corresponding GROOVE preset number. -
Page 14: Listening To The Radio
Other operations To change the AM tuning interval Use buttons on the unit for the operation. Do this The factory settings for AM tuning interval is Tune in a station Follow the procedure described 9 kHz (or 10 kHz for some areas). To change the with a weak signal in “Manual tuning preset”... -
Page 15: Manual Tuning
Turn and hold . OPERATION DIAL > clockwise or counterclockwise Tape – Playback and release it when you reach the preset station you want (or press –. Loading a tape or >+ on the remote repeatedly to select the preset station you want). Press Z PUSH (Deck A) or Z PUSH Preset number Frequency... -
Page 16: Tape - Recording
Other operations Do this Tape – Recording Stop playback Press x. Recording your favorite Pause playback Press X. Press X again to resume playback. tracks on a disc into a Fast-forward or Press m or M. To back to rewind normal playback, press N. -
Page 17: Recording On A Tape Manually
Tips Recording on a tape • For recording from the radio: If noise is heard while recording from the radio, manually move the respective antenna to reduce the noise. • For recording from a disc to a tape manually: — Manual Recording You can turn and hold . -
Page 18: Sound Adjustment
Adjusting the graphic Sound Adjustment equalizer or selecting the Adjusting the sound surround effect You can reinforce the bass and create a more You can adjust the sound by raising or lowering powerful sound. the level of specific frequency band, then store Press GROOVE repeatedly. -
Page 19: Selecting The Mp3 Booster Effect
Using the sub woofer channel You can use the sound of the sub woofer to enhance the bass. (MHC-GNX660 only) Press SUB WOOFER ON/OFF When playing a multiplex AUDIO CD or repeatedly until the indicator lights up. multiplex CDG (disc with the vocals on one The sub woofer is turned on. -
Page 20: (Mhc-Gnx660 Only) Singing Along
– a duet is being played back. channel” on page 19). – the source has strong echoes or chorus. – the singer voices deviates from the center. * MHC-GNX660 only – the voice on the source is singing in high soprano Tips or tenor. -
Page 21: Timer
Waking up to music Timer — Play Timer Falling asleep to music You can wake up to music at a preset time. Make — Sleep Timer sure you have set the clock (see “Setting the clock” on page 9). You can set the system to turn off at a preset Use buttons on the remote for the operation. -
Page 22: Timer Recording Radio Programs
Press ENTER. Timer recording radio The type of timer (“PLAY TIMER”), followed by the start time, the stop time and programs the music source appears in the display. — Record Timer Press ?/1 to turn off the system. Other operations You can record a preset radio station from a specified time. -
Page 23: Display
Other operations Do this Display Check the setting Press CLOCK/TIMER SELECT. Turning off the display “SELECT” appears in the display. — Power Saving Mode Press –. or >+ repeatedly to select “REC The demonstration display and the clock display SELECT”, then press can be turned off to minimize the amount of ENTER. -
Page 24: Changing The Pattern Of Power
When the CD-TEXT disc contains more than 20 tracks, the title of current track is not displayed from track 21 onwards. Only for discs with MP3 audio tracks. “--.--” appears in the display if you have not set the clock. When karaoke mode is activated (MHC-GNX660 only). - Page 25 For AUDIO CDs and CDGs*. “--.--” appears in the display if you have not set the clock. * MHC-GNX660 only When karaoke mode is activated (MHC-GNX660 For CD-TEXT disc and discs with MP3 audio tracks only). in play modes other than “ALBM” and “ALBM SHUF”.
-
Page 26: Optional Components
Optional Components Hooking up optional components To enhance your system, you can connect optional components. Refer to the operating instructions provided with each component. * MHC-GNX660 only To the video input jack of the TV From the audio output jack of the TV... -
Page 27: Listening To Audio From A Connected Component
Listening to audio from a connected component Listening to a connected TV Connect the audio cords. See “Hooking up optional components” on page 26. Press TV. You can press FUNCTION on the remote repeatedly to select “TV”. -
Page 28: Troubleshooting
The radio presetting is canceled. If the problem persists after doing all of the • The power cord is disconnected or a power failure above, consult your nearest Sony dealer. occured for longer than half a day. Redo “Presetting radio stations” (page 13). - Page 29 The disc tray does not open and “LOCKED” (pages 21 to 23). appears in the display. • Cancel the Sleep Timer function (page 21). • Contact your nearest Sony dealer or local • You cannot select the Play Timer and Timer authorized Sony service facility. Recording simultaneously.
- Page 30 • The capstans or pinch rollers are dirty (see malfunction. “Cleaning the tape heads” on page 33). Noise increases or the high frequencies are * MHC-GNX660 only erased. • The record/playback heads are magnetized (see “Demagnetizing the tape heads” on page 33).
-
Page 31: Messages
The tape does not record. PUSH STOP • No tape is loaded. Load a tape. You have pressed PLAY MODE on the remote during playback. • The tab has been removed from the tape. Cover the broken tab with adhesive tape (page 33). STEP FULL •... -
Page 32: Additional Information
If you have any questions or problems concerning your system, please consult your nearest Sony dealer. On safety • The system is not disconnected from the AC power... -
Page 33: Specifications
To prevent a tape from being accidentally recorded over, break off the tape tab from side A or B as illustrated. Amplifier section Break off the MHC-GNX660 (HCD-GNX660)/ tape tab MHC-GNX600 (HCD-GNX600) The following are measured at Mexican model: 127 V AC, 60 Hz... - Page 34 Sub woofer: 20 cm, cone type Frequency response 50 – 13,000 Hz (±3 dB), Nominal impedance 4 ohms using Sony TYPE I tape Dimensions (w/h/d) (Approx.) Wow and flutter ±0.15% W.Peak (IEC) 320 × 420 × 345 mm 0.1% W.RMS (NAB) Mass (Approx.)
- Page 35 Other models: 120 V or 220 – 240 V AC, 50/60 Hz Adjustable with voltage selector Power consumption MHC-GNX660/GNX600 110 watts Dimensions (w/h/d) (Approx.) HCD-GNX660/GNX600 280 × 326 × 385.5 mm Mass (Approx.) HCD-GNX660/GNX600 6.3 kg Supplied accessories: Remote Commander (1)
-
Page 36: List Of Button Locations And Reference Pages
PUSH Z (Eject B) qh (15, 16) DISPLAY 3 (23, 24, 25) TAPE A/B e; (15, 16, 17, 23) Display 5 * MHC-GNX660 only Tape lid qh, wh (15) TUNER/BAND ea (14, 15, 17, E – L ECHO LEVEL wa (20) - Page 37 Top Panel Front Panel 6 789 continued...
- Page 38 Remote control TAPE wd (15, 16) ALPHABETICAL ORDER TUNER/BAND 7 (13, 14) TUNER MEMORY wg (13, 14) A – E TUNING MODE 5 (13, 14, 15) ALBUM + qf (10, 12, 16, 17) VOLUME +/– qg (19, 21, 24, 28) ALBUM –...
- Page 40 Sony Corporation Printed in China...