
Related Manuals for Sony 2-661-374-11(4)


Summary of Contents for Sony 2-661-374-11(4)
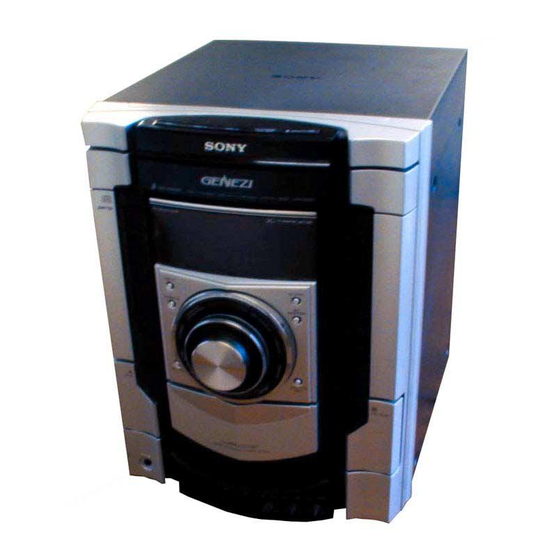
- Page 1 2-661-374-11(4) Mini Hi-Fi Component System Operating Instructions MHC-GNX900/GNX780 MHC-GNX880/GNX800 MHC-GNX700 ©2006 Sony Corporation...
- Page 2 WARNING To reduce the risk of fire or electric shock, do not expose this apparatus to rain or moisture. To avoid electrical shock, do not open the cabinet. Refer servicing to qualified personnel only. To prevent fire, do not cover the ventilation of the apparatus with newspapers, table-cloths, curtains, etc.
-
Page 3: Table Of Contents
Table of Contents About this manual ... 4 Playable discs... 4 Getting Started Hooking up the system... 6 Positioning the speakers... 9 Setting the clock... 9 Disc – Playback Loading a disc ... 10 Playing a disc ... 10 — Normal Play/Shuffle Play Playing repeatedly... -
Page 4: About This Manual
About this manual • The instructions in this manual are for models MHC-GNX900, MHC-GNX780, MHC-GNX880, MHC-GNX800 and MHC-GNX700. In this manual, the MHC-GNX880 is used for illustration purposes unless stated otherwise. • This manual mainly explains operations using the buttons on the unit, but the same operations can also be performed using the buttons on the remote having the same or similar names or symbols. - Page 5 Notes on CD-R and CD-RW • This system can play back CD-R/CD-RW discs edited by the user. However, note that playback of some discs may not be possible depending on the recording device used for recording or the disc condition. •...
-
Page 6: Getting Started
Getting Started Hooking up the system Do the following procedures 1 to 7 to hook up your system using the supplied cords and accessories (page 36). AM loop antenna FM lead antenna Surround speaker (Right) Front speaker (Right) MHC-GNX880/GNX800/GNX700 only MHC-GNX880/GNX800 only MHC-GNX880/GNX780 only Subwoofer B... - Page 7 1 Connect the front speakers. Connect the speaker cords of the front speakers to the FRONT SPEAKER terminals as shown below. White (MHC-GNX900/GNX780 (SS-GNX900/ GNX780) only) Connect the speaker cords to the terminals on the speakers. Black (#) Black (#) 2 Connect the surround speakers.
-
Page 8: Attaching The Speaker Pads
5 Connect the FM and AM antennas. Set up the AM loop antenna, then connect Extend the FM lead antenna horizontally 6 For models equipped with a voltage selector, set VOLTAGE SELECTOR to the position of your local power line voltage. -
Page 9: Positioning The Speakers
Positioning the speakers Place the front speakers at an angle of 45 degrees from your listening position. Place the surround speakers beside the front speakers as shown below. MHC-GNX880/GNX800 only Front speaker (L) Subwoofer B Subwoofer A Unit 0.3m 0.3m Surround speaker (L) Listener... -
Page 10: Disc - Playback
Disc – Playback Loading a disc Press Z OPEN/CLOSE. The disc tray slides out. Load a disc with the label side facing up on the disc tray. When you play back a 8 cm disc such as CD single, place it on the inner circle of the tray To load additional discs, press... -
Page 11: Other Operations
Select To play back ALBM The MP3 audio tracks in the (Normal Play) album on the disc you have selected in original order. For discs other than discs with MP3 audio tracks, “ALBM” play mode performs the same operation as “1DISC” play mode. -
Page 12: Playing Repeatedly
Tips • When you press CD or one of the DISC 1 ~ 3 buttons to switch to “CD” function from “TUNER” function, you may require a longer time to access the disc. In the case, set the CD power manage function to “CD POWER ON”... -
Page 13: Tuner
Press ENTER. The track(s) is(are) programmed. The program step number appears in the display. To program additional discs or tracks. To program Repeat steps Other discs 3 and 5 Other tracks on the 4 and 5 same disc Other tracks on 3 to 5 other discs Press N. - Page 14 Press TUNING +/– (or press –. or >+ on the remote) repeatedly to select the preset number you want. Press ENTER. “Complete!” appears in the display. The station is stored. Repeat steps 1 to 6 to store other stations. Manual tuning preset You can manually tune in and store the frequency of your favourite stations.
-
Page 15: Listening To The Radio
Listening to the radio You can listen to a radio station either by selecting a preset station, or by manually tuning in the station. Listening to a preset station — Preset Tuning Before tuning to preset stations, be sure to preset them, see “Presetting radio stations”... -
Page 16: Tape - Recording
Press N. The tape starts playing. Tape presence indicator Front side indicator “RELAY” appears in the display Relay Play follows this sequence, then stops: Deck A (front side) t Deck B (front side) Other operations Do this Stop playback Press x. Pause playback Press X. -
Page 17: Recording On A Tape Manually
Recording on a tape manually — Manual Recording You can record just the portions you like from a disc, tape or radio program on a tape. You can also record from connected components (see “Hooking up optional components” on page 27). Load a recordable tape into Deck B. -
Page 18: Sound Adjustment
Sound Adjustment Adjusting the sound You can reinforce the bass and create a more powerful sound. Press GROOVE repeatedly. Each time you press the button, the display changes cyclically as follows: GROOVE ON* t GROOVE OFF * The volume switches to power mode and the equalizer curve changes. -
Page 19: Selecting The Mp3 Booster Effect
MHC-GNX900/GNX780/GNX700 only Press SURROUND repeatedly. Each time you press the button, the display changes cyclically as follows: SURROUND ON t SURROUND OFF Notes • When you select certain preset effects, the surround effect may be canceled. • When the surround effect is selected, “SURROUND”... -
Page 20: Creating A Party Environment
Creating a party environment — X-TRANCE You can create party environment by using SOUND FLASH for flashing effect, FLANGER for deep sound flanging effect or/and DELAY for creating a live sound effect. Flashing sound effect — SOUND FLASH With the sound flash function, you can flash the sound output. -
Page 21: Singing Karaoke By Reducing The Vocal Or Selecting The Audio Channel
Singing karaoke by reducing the vocal or selecting the audio channel (MHC-GNX880/GNX780 only) When playing a multiplex audio CD or multiplex CDG (disc with the vocals on one channel and the instruments on the other channel), you can switch the sound to cancel the vocals and listen only to the instruments from both speakers. -
Page 22: Timer
Timer Falling asleep to music — Sleep Timer You can set the system to turn off at a preset time, so that you can fall asleep to music. Use buttons on the remote for the operation. Press SLEEP repeatedly. Each time you press the button, the minute display (the turn-off time) changes cyclically as follows: AUTO* t 90min t 80min t 70min... -
Page 23: Timer Recording Radio Programs
> Press – + (or press > on the unit) repeatedly until the music source you want appears in the display. Each time you press the button, the display changes cyclically as follows: TUNER y CD PLAY y TAPE PLAY Press ENTER. -
Page 24: Display
Other operations Do this Check the setting Press CLOCK/TIMER SELECT. “SELECT” appears in the display. Press –. or >+ (or press . or > on the unit) repeatedly to select “REC SELECT?”, then press ENTER. Change the setting Start from step 1. Cancel the timer Press CLOCK/TIMER SELECT. -
Page 25: Changing The Spectrum Analyzer
Changing the spectrum analyzer display Press AMP MENU repeatedly to select “SPECTRUM”. The last selected spectrum setting appears in the display. Turn OPERATION DIAL clockwise or counterclockwise to select the setting you want. The display changes cyclically as follows: SPECTRUM 1 y SPECTRUM 2 y SPECTRUM 3 y SPECTRUM 4 y SPECTRUM 5 y SPECTRUM OFF Press ENTER. - Page 26 Checking the elapsed playing time, remaining time and titles Press DISPLAY repeatedly during playback. Each time you press the button, the display changes cyclically as follows: Elapsed playing time of the current track t Remaining time of the current track Remaining time of the current disc the current track t Title of the current...
-
Page 27: Optional Components
Optional Components Hooking up optional components To enhance your system, you can connect optional components. Refer to the operating instructions provided with each component. To the digital input jack of the MD deck MD deck D-LIGHT SYNC controller (DLS-1) A CD DIGITAL OUT jack Use a digital optical cord (square, not supplied) to connect the digital input jack of the optional MD deck to this jack. -
Page 28: Listening To Audio From A Connected Component
E D-LIGHT SYNC OUT jack Use the D-LIGHT SYNC controller to connect to this jack. You need to connect the D-LIGHT SYNC controller to the lighting device* (not supplied). The lighting device will react according to control signals transmitted by the D-LIGHT SYNC controller upon receiving music source from the system. -
Page 29: Troubleshooting
If the problem persists after doing all of the above, consult your nearest Sony dealer. Note that if service personnel changes some parts during repair, these parts may be retained. When the ?/1 indicator flashes Immediately unplug the power cord and check the following items. - Page 30 * MHC-GNX880/GNX780 only Disc player The disc tray does not open and “LOCKED” appears in the display. • Contact your nearest Sony dealer or local authorized Sony service facility. The disc tray does not close. • Load the disc correctly.
-
Page 31: Tape Deck
MP3 audio track cannot be played back. • Recording was not performed according to the ISO 9660 level 1, level 2 or Joliet in the expansion format. • The MP3 audio track does not have the extension “.MP3”. • The data is not stored in MP3 format even though it has extension “.MP3”. -
Page 32: Messages
The tape does not record. • No tape is loaded. Load a tape. • The tab has been removed from the tape. Cover the broken tab with adhesive tape (page 34). • The tape has reeled to the end. The system cannot play back the reverse side of the tape in Deck A or Deck B. -
Page 33: Additional Information
• When you move the system, take out any disc. If you have any questions or problems concerning your system, please consult your nearest Sony dealer. Notes on discs • Before playing, clean the disc with a cleaning cloth. -
Page 34: Specifications
To save a tape permanently To prevent a tape from being accidentally recorded over, break off the tape tab from side A or B as illustrated. Break off the tape tab If you later want to reuse the tape for recording, cover the broken tab with adhesive tape. - Page 35 –18 dBm Tape deck section Recording system 4-track 2-channel stereo Frequency response 50 – 13,000 Hz (±3 dB), using Sony TYPE I tape Wow and flutter ±0.15% W.Peak (IEC) 0.1% W.RMS (NAB) ±0.2% W.Peak (DIN) Tuner section FM stereo, FM/AM superheterodyne tuner...
- Page 36 SS-GNX880 (MHC-GNX880)/ SS-GNX800 (MHC-GNX800)/ SS-GNX700 (MHC-GNX700) Speaker system 2-way, 2-unit, bass-reflex type Speaker units Woofer: 20 cm, cone type Tweeter: 2.5 cm, horn type Nominal impedance 6 ohms Dimensions (w/h/d) (Approx.) 281 × 417 × 310.5 mm Mass (Approx.) 7.0 kg net per speaker Surround speakers SS-RSX800 (MHC-GNX880/GNX800) Speaker system...
-
Page 37: List Of Button Locations And Reference Pages
List of button locations and reference pages How to use page 37 to 39 Use this page to find the location of buttons and other parts of the unit, subwoofer and remote that are mentioned in the text. Main unit ALPHABETICAL ORDER A –... - Page 38 Top Panel Front Panel 5 6 7 8 9 q; qa qs...
-
Page 39: Remote Control
Subwoofer (MHC-GNX880/GNX800/GNX700 only) ALPHABETICAL ORDER A – Z SUBWOOFER ON/OFF 1 (19) SUBWOOFER VOLUME 2 (19) Remote control ALPHABETICAL ORDER A – E ALBUM + qf (11, 12, 16, 17) ALBUM – qh (11, 12, 16, 17) CD wf (10, 12, 16, 17, 20) CLEAR qk (13) CLOCK/TIMER SELECT 2 (23, 24, 32) - Page 40 Sony Corporation Printed in Malaysia...