
Related Manuals for Canon iRC5185 Series


Summary of Contents for Canon iRC5185 Series
- Page 1 Series Job Hold Guide Job Hold Guide Please read this guide before operating this product. After you finish reading this guide, store it in a safe place for future reference.
- Page 3 iR C5185/iR C4580/ iR C4080 Series Job Hold Guide...
- Page 4 Printing and Arranging Jobs in the Hold Queue Chapter 3 Appendix Considerable effort has been made to ensure that this manual is free of inaccuracies and omissions. However, as we are constantly improving our products, if you need an exact specification, please contact Canon.
-
Page 5: Table Of Contents
Contents Preface ............v How To Use This Manual . - Page 6 Page and Copy Set Numbering ........2-35 Inserting Page Numbers (Page Numbering) .
-
Page 7: Preface
Preface Thank you for purchasing this Canon product. Please read this manual thoroughly before operating the machine in order to familiarise yourself with its capabilities, and to make the most of its many functions. After reading this manual, store it in a safe place for future reference. -
Page 8: Displays Used In This Manual
Displays Used in This Manual Screen shots of the touch panel display used in this manual may differ from the ones you actually see, depending on the options that come with your machine. Note that functions that cannot be used depending on the model or options, are not displayed on the touch panel display. -
Page 9: Illustrations Used In This Manual
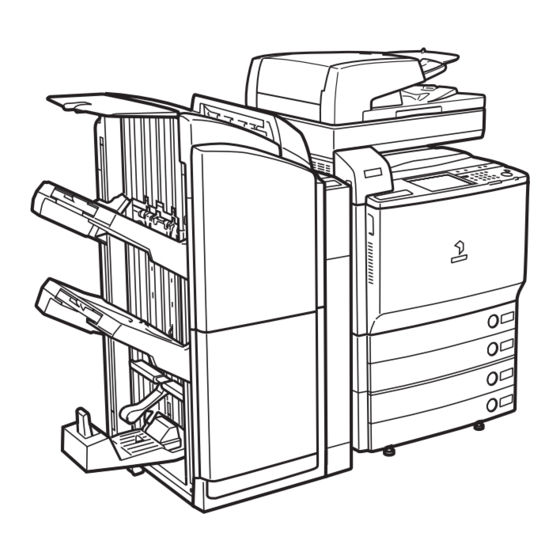
Illustrations Used in This Manual Illustrations used in this manual are those displayed when the iR C5185 has the following optional equipment attached to it: the Color UFR II/PCL/PS Printer Kit, Saddle Finisher-W2 and Puncher Unit-AG1. Abbreviations Used in This Manual In this manual, product names and model names are abbreviated as follows: PostScript 3 emulation: Apple Macintosh:... -
Page 10: Trademarks
Trademarks Canon, the Canon logo, and iR are registered trademarks of Canon Inc. in the United States and may also be trademarks or registered trademarks in other countries. Adobe and PostScript are trademarks of Adobe Systems Incorporated. Macintosh and Mac OS are trademarks of Apple Inc., registered in the U.S. and other countries. -
Page 11: Introduction To The Job Hold Function
Introduction to the Job Hold Function CHAPTER This chapter is an introduction to the Job Hold function. Job Hold Function............1-2 Hold Screen . -
Page 12: Job Hold Function
Job Hold Function This mode enables you to temporarily store the data of print and copy jobs in a queue in the Hold Inbox (Hold Queue) specialised for the Hold function. You can change the order of the jobs stored in the Hold Queue and specify the paper type and finishing settings for each job. - Page 13 Hold Queue A submitted job is stored in the Hold Queue. Jobs in the Hold Queue have already completed the RIP (Raster Image Processor) process. You can output any job that is stored in the Hold Queue. There are two main ways to place jobs in the Hold Queue. One way is to send jobs (with print settings) from editing applications or the imageWARE Prepress Manager, via the printer driver.
- Page 14 Workflow Using the Job Ticket A job ticket is the electronic record of selected printing and finishing characteristics of a hold job. Using a job ticket in the JDF (Job Definition Format) standard, you can make sure that every setting is desired before a print job is output. You can check the paper sizes and types that are registered in the machine, make sample prints, and change the finishing settings, etc.
- Page 15 imageWARE Prepress Manager Prepress Manager is an integrated workflow solution that enables you to manage the complete print job workflow. Prepress Manager supports JDF , and its wide range of imposition features facilitates the creation, editing, and printing of various types of documents.
-
Page 16: Hold Screen
Hold Screen If you select [Hold], the Hold screen is displayed. The Hold Job List screen is displayed on the upper part, and the Print Job List screen is displayed on the lower part of the Hold screen. All hold jobs stored in the Hold Queue are displayed on the Hold Job List screen. The job that is currently printing and jobs that are waiting to print are displayed on the Print Job List screen. - Page 17 Hold Job List Screen a Hold Job List Jobs stored in the Hold Queue are displayed. b Print Job List Displays the Print Job List. c Hold Screen Selection Drop-Down List Switches between the Single List Display and Double List Display. d Display All Users/Show Only Sel.
- Page 18 m Start Print Press to start printing a selected job. Print Job List Screen a Print Job List The job that is currently printing and jobs that are waiting to print are displayed. b Print Next Press to select a job from the list for priority printing. (See "Priority Printing," on p. 2-19.) c Details Press to display the detailed information of a selected job.
- Page 19 Double List Display a Hold Job List Jobs stored in the Hold Queue are displayed. b Print Job List The job that is currently printing and jobs that are waiting to print are displayed. c Details/Edit (Hold Job List) Press to display the [Edit Job Ticket], [Sample Print], [Details], [Preview], [Move/Dup. to User Inbox], and [Erase].
- Page 20 1-10 Hold Screen...
-
Page 21: Printing And Arranging Jobs In The Hold Queue
Printing and Arranging Jobs in the Hold Queue CHAPTER This chapter describes how to print and arrange jobs in the Hold Queue. Storing Documents in the Hold Queue ........2-2 Moving/Duplicating a Document from a User Inbox . -
Page 22: Storing Documents In The Hold Queue
Storing Documents in the Hold Queue This section describes how to store documents in the Hold Queue. NOTE For more information on storing documents from related applications, see the instruction manuals of each application. For more information on storing documents from the printer driver, see the instruction manual of the printer driver that you use. - Page 23 Select the inbox containing the document that you want to move or duplicate to the Hold Queue press [Move/Dup. to Hold]. To select the first 100 documents in the User Inbox, press [Select All (Max 100 doc.)]. [Select All (Max 100 doc)] changes to [Clear Selection] once a document has been selected.
- Page 24 If the document cannot be moved or duplicated to the Hold Queue, a message appears telling you that the move or duplication cannot be performed. If the document cannot be moved or duplicated to the Hold Queue, it remains in the original User Inbox.
-
Page 25: Printing Documents Stored In The Hold Queue
Printing Documents Stored in the Hold Queue This section describes the procedure for printing documents stored in the Hold Queue. You can specify the order in which to print the documents. Press [Hold]. Select the job that you want to print from the Hold Job List press [Start Print]. - Page 26 To select the first 100 jobs in the Hold Queue, press [Select All (Max 100)]. [Select All (Max 100)] changes to [Clear Selection] once a job has been selected. However, only 32 jobs can be printed at a time. An alarm will be displayed if you try to print more than 32 jobs at a time.
-
Page 27: Cancelling A Job
Cancelling a Job Jobs currently being stored in or printed from the Hold Queue are displayed in the Print Job List or the System Monitor Screen. This section describes how to cancel these types of jobs. Using the Print Job List Screen Press [Print Job List]. -
Page 28: Using The System Monitor Screen
Using the System Monitor Screen Press [System Monitor] [Print]. Press [Status] select the print job that you want to cancel press [Cancel]. You cannot select multiple jobs and cancel them all at once. Select and cancel one job at a time. Press [Yes]. -
Page 29: Sample Print
Sample Print This feature enables you to change the number of copies and print range of a document stored in the Hold Queue. You can also make sample prints and change the settings of a job as necessary. Select the desired job from the Hold Job List press [Sample Print]. - Page 30 If you select [Specified Pages]: Press [First Page] or [Last Page] press [-] or [+] to set their respective page numbers. NOTE If you select [Specified Pages], specify the page numbers of the output. Note that the page numbers of the output may be different from those of the stored document.
-
Page 31: Arranging Documents Stored In The Hold Queue
Arranging Documents Stored in the Hold Queue From the Hold Queue, you can change a job's name, check a job's detailed information, move and duplicate a job, and view the contents of a job. Changing the Name of a Job Select the desired job from the Hold Job List or the Print Job List press [Details]. - Page 32 Press [Change Job Name]. Enter a new name for the job press [OK]. IMPORTANT You cannot press [OK] without entering a name for the job. Press [Done]. 2-12 Arranging Documents Stored in the Hold Queue...
-
Page 33: Checking A Job's Detailed Information
Checking a Job's Detailed Information Select the desired job from the Hold Job List or the Print Job List press [Details]. NOTE If you select multiple jobs and press [Details], only the details of the selected (highlighted) job are displayed. Check the detailed information press [Done]. - Page 34 Icon Document Type Color/Black 'Black' or With Print Settings 'Black and White' 'Color' or With Print Settings 'Mixed' RGB 'Black' With Print Settings *1*2 CMYK 'Color' or With Print Settings *1*2 'Mixed' CMYK 'Black' or With Job Ticket 'Black and White' 'Color' or With Job Ticket 'Mixed' RGB...
-
Page 35: Erasing A Job
Erasing a Job Select the desired job from the Hold Job List press [Erase]. To select the first 100 jobs in the Hold Queue, press [Select All (Max 100)]. [Select All (Max 100)] changes to [Clear Selection] once a job has been selected. -
Page 36: Moving/Duplicating A Job Into A User Inbox
Moving/Duplicating a Job into a User Inbox Select the job that you want to move or duplicate from the Hold Job List press [Move/Dup. to User Inbox]. To select the first 100 jobs in the Hold Queue, press [Select All (Max 100)]. [Select All (Max 100)] changes to [Clear Selection] once a job has been selected. - Page 37 If you select [Duplicate], you can copy the selected jobs to a User Inbox without deleting them from the Hold Queue. If the job cannot be moved or duplicated to the selected inbox, a message appears telling you that the move or duplication cannot be performed. If the job cannot be moved or duplicated to the selected inbox, it remains in the original Hold Queue.
-
Page 38: Job Preview
Job Preview Select the desired job from the Hold Job List press [Preview]. NOTE If you select multiple jobs and press [Preview], only the preview of the selected (highlighted) job is displayed. Press [ ] or [ ] to display the page that you want to check. Check the contents of the page press [Done]. -
Page 39: Priority Printing
Priority Printing You can change the printing priority of a job, so that it is printed immediately after the current job is complete. Select the desired job from the Print Job List press [Print Next]. 2-19 Priority Printing... -
Page 40: Printing With Edit Job Ticket
Printing with Edit Job Ticket This section explains how to print after editing jobs that have job tickets. IMPORTANT You cannot edit the job ticket settings of a job that is submitted from the printer driver. If you select a job without a job ticket, [Edit Job Ticket] will not be displayed. The following two types of job ticket are available: - Job ticket that applies to the whole job - Job ticket that only applies to certain pages of a job... -
Page 41: Changing The Number Of Copies Of The Job (Copy Sets)
Changing the Number of Copies of the Job (Copy Sets) Select the desired job from the Hold Job List press [Edit Job Ticket]. Press [Edit] under <Overall Settings>. 2-21 Printing with Edit Job Ticket... - Page 42 Press [Change the Copies]. Enter the number of copies press [OK]. Press [Done]. 2-22 Printing with Edit Job Ticket...
-
Page 43: Collating Prints (Finishing)
Collating Prints (Finishing) The Finishing modes can be selected to collate the outputs in various ways, either by pages or print sets. IMPORTANT For information on modes which cannot be set in combination with this mode, see Chapter 9, "Combination of Functions Chart," in the Copying and Mail Box Guide. The Finishing modes cannot be set if envelopes, transparencies, tracing paper, labels, tab paper, or washi (Japanese paper) is selected. - Page 44 The table below shows all the finishing features that are available with each different optional unit, and the paper sizes that can be used. : Available : Unavailable Staple Optional Unit Offset Corner Double Saddle Stitch Finisher-X1 (15 sheets), A3, A4, A4R A4, A4R (30 sheets) A3, A4R...
- Page 45 If the Collate Mode Is Set: The prints are automatically collated into sets arranged in page order. The output is as follows: Originals Set 1 Set 2 Set 3 Three Copies of Each Page Collated in Page Order If the Group Mode Is Set: All copies of the same original page are grouped together.
- Page 46 If you select [Saddle Stitch]: Originals Set 1 Set 2 Set 3 Three Copies of Each Page Collated in Page Order IMPORTANT You cannot select the stapling position when the optional Finisher-X1 is attached. For more information on stapling positions, see Chapter 3, "Optional Equipment," in the Reference Guide.
-
Page 47: Page Order (Collate)
Page Order (Collate) Select the desired job from the Hold Job List or the Print Job List press [Edit Job Ticket] Press [Edit] under <Overall Settings>. 2-27 Printing with Edit Job Ticket... - Page 48 Press [Finishing]. Press [Collate (Page order)]. If you press [Offset], you can set [Specify No. of Copies for Offset]. Press [OK]. The selected mode is set, and the display returns to the Overall Settings screen. Press [Done]. 2-28 Printing with Edit Job Ticket...
-
Page 49: Same Page (Collate)
Same Page (Collate) Select the desired job from the Hold Job List or the Print Job List press [Edit Job Ticket] [Edit] under <Overall Settings>. Press [Finishing]. Press [Group (Same pages)]. You cannot set [Specify No. of Copies for Offset] if Group Mode is set. Press [OK]. -
Page 50: Page Order (Staple)
Page Order (Staple) IMPORTANT The Staple mode can be set only if an optional finisher is attached. When printing on special types of paper, such as heavy paper or transparencies, be sure to correctly set the paper type, especially if you are using heavy paper. If the type of paper is not set correctly, it could adversely affect the quality of the image. - Page 51 If the optional Finisher-W1 is attached: Press [Staple] [Next]. You cannot set [Offset] if Staple Mode is set. Select [Corner] or [Double] for the stapling type select the stapling position press [OK]. The selected mode is set, and the display returns to the Overall Settings screen.
- Page 52 If the optional Saddle Finisher-W2 is attached: Press [Staple] [Next]. You cannot set [Offset] if Staple Mode is set. Select [Corner], [Double], or [Saddle Stitch] for the stapling type. If you want to select [Corner] or [Double]: Press [Corner] or [Double] select the stapling position press [OK].
- Page 53 If you want to select [Saddle Stitch]: Press [Saddle Stitch] [Next]. Select the paper source to use for the main document press [OK]. If you selected the paper to use for the main document from [Stack Bypass Settings], select the paper size and press [Next] select the paper type and press [OK].
- Page 54 If you pressed [Add cover], press [Next] select whether to print on the cover. Press [Next] select the paper source to use for the cover page press [OK]. If you selected the paper to use for the cover from [Stack Bypass Settings], select the paper type press [OK].
-
Page 55: Page And Copy Set Numbering
Page and Copy Set Numbering This mode enables you to print page numbers, copy set numbers, and user-defined text onto the output. IMPORTANT For information on the modes which cannot be set in combination with this mode, see Chapter 9, "Combination of Functions Chart," in the Copying and Mail Box Guide. The Page or Copy Set Numbering mode cannot be used with documents with resolution of less than 600 x 600 dpi. -
Page 56: Inserting Page Numbers
Copy Set Numbering This mode enables you to print a document with a different five digit number per copy set in the background of each page to differentinate the copy sets. Originals Output 00001 00001 Inserting Page Numbers (Page Numbering) Select the desired job from the Hold Job List press [Edit Job Ticket]. - Page 57 Press [Edit] under <Overall Settings>. Press [Page Numbering]. Select the type of numbering ([Numbers Only], [Numbers with Hyphens], [Numbered Chapters], or [Total Page Numbering]). 2-37 Printing with Edit Job Ticket...
- Page 58 Select the orientation and the position of the page numbers press [Next]. Orientation: [Vertical]: Prints the page number vertically. [Horizontal]: Prints the page number horizontally. NOTE If you set any two of the Page Numbering, Copy Set Numbering, Watermark, or Print Date modes to print in the same position, a message asking for your confirmation is displayed when you press (Start).
- Page 59 If you press [Inserted Sheets]: Select whether to count the inserted sheets press [Done]. [Number]: Counts the sheet insertions or back cover that you inserted after the first page, but only prints chapter numbers and page numbers onto the main document pages. [Do not number]: Does not count the sheet insertions or back cover that you inserted after the first page, and only prints chapter numbers and page numbers onto the main document pages.
-
Page 60: Inserting Serial Numbers (Copy Set Numbering)
Inserting Serial Numbers (Copy Set Numbering) Select the desired job from the Hold Job List or the Print Job List press [Edit Job Ticket] [Edit] under <Overall Settings>. Press [Copy Set Numbering]. Select the orientation and the position of the copy set numbers press [Next]. - Page 61 NOTE If Copy Set Numbering Option Settings in System Settings (from the Additional Functions screen) is set to 'On', [Full Surface] and [Numbers in 5 Locations] are grayed out and cannot be selected. (See Chapter 6, "System Manager Settings," in the Reference Guide.) If you set any two of the Page Numbering, Copy Set Numbering, Watermark, or Print Date modes to print in the same position, a message asking for your...
-
Page 62: Cover/Sheet Insertion
Cover/Sheet Insertion This mode enables you to set the machine to automatically add front and back covers, sheet insertions, chapter pages, or tab paper using a different type of paper from that used for the main documents. In addition, you can decide whether the front and back covers, and sheet insertions are copied or printed on as well. - Page 63 Sheet Insertion This setting inserts a sheet of paper between prints. The Sheet Insertion mode is useful when you want to use a blank sheet to sort out prints. You may also print on the sheet insertions. Since the chapter page is always printed on one side, the Chapter Page mode is useful when you want to insert chapter headings.
- Page 64 Press [Edit] under <Overall Settings>. Press [Cover/Sheet Insertion]. Select the desired Cover/Sheet Insertion feature press [Paper Select] for each selected feature. 2-44 Printing with Edit Job Ticket...
- Page 65 NOTE To cancel a selected feature, press that key again. Select the paper source press [Done]. IMPORTANT Select the same size paper for [Front Cover], [Back Cover], [Sheet Insertion]. If you try to set a different paper size for one feature, the paper sizes for the other features are automatically changed to the new paper size.
- Page 66 NOTE If you select [Leave Blank] for the front cover, back cover or sheet insertion, the machine inserts a sheet of paper from the paper source that you selected in step 5, to be used as the copy's front cover, back cover or sheet insertion. You can also select the paper source for the sheet insertion in step 9.
-
Page 67: Booklet Scanning Mode (Booklet)
Booklet Scanning Mode (Booklet) This mode enables you to print one-sided or two-sided originals in such a way that the prints are made into a booklet. For more information about the Booklet Scanning mode of the Mail Box function, see Chapter 4, "Booklet Mode," in the Copying and Mail Box Guide. Booklet This mode enables you to print one-sided or two-sided originals in such a way that prints are made into a booklet. - Page 68 Divided Booklet This mode enables you to make a multiple page document with a large number of pages into a divided booklet. Originals Prints Number of Sheets to Divide* In the above example illustration, the number of sheets is two. Creep (Displacement) Correction This mode enables you to adjust the position of the images in a booklet by calculating the width of the displacement between the outermost page and centre page of the booklet.
- Page 69 IMPORTANT For information on the modes that cannot be set in combination with this mode, see Chapter 9, "Combination of Functions Chart," in the Copying and Mail Box Guide. Saddle stitching is not performed if there is only one output sheet. Saddle stitching can be performed only if the optional Saddle Finisher-W2 is attached.
- Page 70 Select the desired job from the Hold Job List press [Edit Job Ticket]. Press [Edit] under <Overall Settings>. 2-50 Printing with Edit Job Ticket...
- Page 71 Press [Booklet]. Select the desired paper size press [Next]. Select the paper source to use for the main document press [Next]. If the optional Saddle Finisher-W2 is not attached, press [OK]. Only A3, JIS-B4, A4R, or 305 x 457 mm paper can be used for the Booklet mode. If you selected the paper to use for the main document from [Stack Bypass Settings], select the paper size and press [Next] select the paper type and...
- Page 72 If you want to add a cover: Press [Add Cover] [Next]. Select whether to copy on the cover page press [Next]. Select the paper source to use for the cover page press [Next]. If the optional Saddle Finisher-W2 is not attached, press [OK]. If you selected the paper to use for the cover from [Stack Bypass Settings], select the paper type press [OK].
- Page 73 Select whether to saddle stitch the booklet press [OK]. If [Divided Booklet] is selected: Specify the number of sheets that you want to divide by using [-] and [+] press [OK]. If the printing position of the image is out of place, and you want to set the creep (displacement) correction: Press [Creep Correction] select [Auto] or [Manual]...
-
Page 74: Editing The Settings Of Each Partition
Set the Booklet Tray guide to match the paper size. A3, B4, or 305x457mm IMPORTANT Make sure to set the Booklet Tray guide correctly to match the paper size. Setting the Booklet Tray guide incorrectly may result in a paper jam. Press [Done]. - Page 75 Select the desired page range press [Edit]. If there are five or more stored page ranges, you can scroll through the list by pressing [ ] or [ You can select up to 100 page ranges. NOTE You can cancel a selection by selecting the page range again. To cancel all page ranges, press [Clear Selection].
- Page 76 To specify the output paper size: Press [Output Paper Size]. Select the desired paper size press [OK]. NOTE To select an A or B series paper size, press [Inch-size]. If you print on nonstandard size paper loaded in the stack bypass, press [Irreg. Size], enter a value by pressing [X] or [Y], press [OK] [OK].
- Page 77 If you specify the paper from the paper type, press [Specify by Paper Type] select the paper from the list press [OK]. NOTE You can select a paper type to display from the paper type selection drop-down list. [All]: Displays all paper types. [Standard]: Displays only paper types under the Standard category.
- Page 78 If you want to set the toner density: Press [Toner Density Adjustment]. Press [-] or [+] to adjust the toner density for yellow, magenta, cyan, and black press [OK]. NOTE This setting will be ignored if the [Toner Save] setting in Common Settings is set to [On], as the [Toner Save] setting has priority.
- Page 79 If you select [Smooth 1] or [Smooth 2], select [Apply] or [Do Not Apply] from <Graphics> and <Image>. [Apply]: Applies a smoothing process for producing smooth gradation of colours and removing jagged portions of an image. [Do Not Apply]: Prints without gradation smoothing. Press [OK].
- Page 80 IMPORTANT If you are using the Margin and 2-Sided modes together and printing a document that already has a margin, follow the instructions below: 2-Sided: Set the Margin mode for the back only. 2-Sided: You do not need to set the Margin mode. Proceed to make prints in the usual way.
- Page 81 If you want to set the colour mode: Press the Color Mode drop-down list select [Full Color] or [Black]. If you want to set the 2-Sided printing mode: Press the 2-Sided Print drop-down list select [On] or [Off]. NOTE If you set the margin along the Long Edge, the output will be a Long Edge two-sided page.
- Page 82 If you want to set the punch mode: Press the punch selection drop-down list select [On] or [Off]. IMPORTANT Punch can be set only if Puncher Unit-AG1 is attached. If you select to change the Punch settings for a single page, the punch hole positions are aligned with the margin.
-
Page 83: Chapter 3 Appendix
Appendix CHAPTER Index ..............3-2... - Page 84 Index Numerics 2-Sided Printing Mode, 2-61 Details, 1-7, 1-8, 2-11, 2-13 Details/Edit Hold Job List, 1-9 Print Job List, 1-9 Display All Users/Show Only Sel. Users, 1-7 Divided Booklet, 2-48, 2-53 Add Cover Double, 2-25 Booklet, 2-52 Double List Display, 1-6, 1-9 Finishing, 2-34 Arranging Documents, 2-11 Edit Job Ticket, 1-7, 2-20...
-
Page 85: Index
Hold Job List Screen, 1-6, 1-7 Hold Queue, 1-3 Hold Screen, 1-6 Page Numbering, 2-35, 2-36 Hold Screen Selection Drop-Down List, 1-7 Page Order (Staple), 2-30 Paper Select, 2-56 PM Hot Folder Manager, 1-5 Preview, 1-7, 2-18 Print and Hold, 1-2 Icon, 2-14 Print Job List, 1-7, 1-8, 1-9 imageWARE Prepress Manager, 1-5... - Page 86 Index...
- Page 88 CANON INC. 30-2, Shimomaruko 3-chome, Ohta-ku, Tokyo 146-8501, Japan CANON U.S.A., INC. One Canon Plaza, Lake Success, NY 11042, U.S.A. CANON CANADA INC. 6390 Dixie Road Mississauga, Ontario L5T 1P7, Canada CANON EUROPA N.V. Bovenkerkerweg 59-61 1185 XB Amstelveen, The Netherlands (See http://www.canon-europe.com/ for details on your regional dealer)