Table of Contents
Advertisement
Quick Links
Advertisement
Table of Contents

Related Manuals for Doro 731X


Summary of Contents for Doro 731X
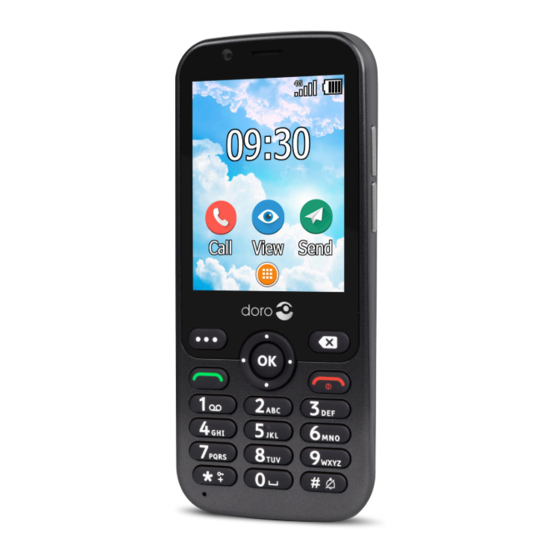
- Page 1 Doro 731X English...
- Page 2 You can obtain addition- al accessories from your local Doro dealer. The supplied accessories pro- vide the best performance with your phone.
- Page 3 Front camera 12. Clear button Speaker 13. End call / Back / Power on/ Menu button 14. OK-button Four-way navigation keys 15. Input method/ Silent mode Call button 16. Second microphone Voicemail 17. Assistance button International prefix/ Symbols 18. Main camera Microphone 19.
-
Page 4: Table Of Contents
English Contents Congratulations on your purchase ..............1 Getting started ....................1 Unbox your new phone ................. 1 Insert SIM card, memory card and battery ........... 2 Charge the phone................... 4 Save energy .................... 5 Turn the phone on and off..............5 Get to know your phone................ - Page 5 English Activate text messages (SMS) .............. 25 Position SMS..................25 Signal type .................... 26 Response by Doro ..................26 For the Responder ................27 For the senior ................. 28 Response Premium by Doro ..............29 Messaging..................... 29 Create and send text message (SMS)/picture message (MMS) ..29 Read and handle messages..............
- Page 6 English Security & location................60 Start-up Wizard ..................62 Tutorials....................62 SIM Toolkit ................... 63 System ....................63 Additional functions ..................66 Display status symbols ................. 66 Display main symbols................66 Safety instructions..................66 Network services and costs ..............67 Operating environment ...............
-
Page 7: Congratulations On Your Purchase
™ tures such as support for Response by Doro with GPS positioning. For more information about accessories or other Doro products please visit www.doro.com or contact our Helpline. Getting started When you get your phone, you will need to set it up before use. -
Page 8: Insert Sim Card, Memory Card And Battery
English Insert SIM card, memory card and battery The SIM and memory card holder’s are located inside the battery compartment. Tip: Take care not to scratch the metallic contacts on the cards when inserting them into the card holders. Remove the battery cover IMPORTANT! Turn off the phone and disconnect the charger before removing the... - Page 9 English Insert the SIM and memory cards Insert the micro-SIM (3FF) card by gen- tly sliding it into the SIM card slot. Make sure that the SIM card’s contacts are facing inwards and that the cut off cor- ner is as shown. You can insert a second SIM card so you can have two phone numbers or service providers on a single device.
-
Page 10: Charge The Phone
English Insert the battery Insert the battery by sliding it into the battery compartment. Replace the back cover. Charge the phone While it’s possible that your phone will already come with enough power to be turned on right out of the box, we recommend charging the device fully before using it. -
Page 11: Save Energy
English Save energy When the battery is fully charged, disconnect the charger from the device and unplug the charger from the wall outlet. To save power, the screen turns off after a while. Press any button to wake the screen up. Full battery capacity will not be reached until the battery has been charged 3–4 times. -
Page 12: Start-Up Wizard
English Seeing Handling Hearing Safety Start-up Wizard When starting the device for the first time, a Start-up Wizard will be initi- ated to set some basic settings. Select the wanted language, the standard language is selected by the origin of the SIM card, and press You will be provided a tutorial about the navigation of the phone. -
Page 13: Descriptions In This Document
English IMPORTANT! When a new system software is available, a notification message is sent. Select to start downloading. The download time may vary depending on Internet connection. We recommend that you always update your device to the latest software version to get optimal performance and the latest enhancements. - Page 14 English Clear Press to clear the previous character. Options The options button have multiple functions. In idle mode it will display eventual notifications. In different menus and features it will display avail- able options for that feature. Try to always press this button to explore more options.
-
Page 15: Navigate Your Phone
Meet “EVA” – ”Enkel, Vänlig och för Alla” (Swedish) (Easy, friendly and for everyone) Doro aim to take simplicity even further thanks to our intuitive, action- based interface, EVA. EVA makes using a phone even easier. It’s like having someone who understands your needs always by your side. Users never need to look around for things they can’t find. - Page 16 English Press to access more options. When done, select and press Call To call someone. A number to enter a phone number, see Calls, p.15. A contact to make a call from your contact book. For more info see Contacts, p.20. A WhatsApp contact to make a call to a WhatsApp contact .
-
Page 17: Sharing Content
English My organiser Calculator to make some calculations, see Calculator, p.43. Calendar to view the calendar and your events, see Calendar, p.43. File manager to view stored videos, see File manager, p.44. Notes to view your notes, see Notes, p.44. My e-mails to view emails, create or add an email account, see Email, p.40 Send... -
Page 18: Enter Text
English • Messaging to send via a message. See Create and send text message (SMS)/picture message (MMS), p.29. ® • Bluetooth to send to a Bluetooth device, see Bluetooth , p.54. • Email to send via e-mail, see Create and send e-mail, p.40. •... -
Page 19: Hearing Aid Compatible
English • Press each key once, even if the displayed character is not the one you want. The dictionary will suggest words based on the keys you have pressed. Example Press 3 , 7 , 3 , 3 to write the word “Fred”. Complete the word be- fore looking at the suggestions. -
Page 20: Connect The Phone To A Computer
English hearing aid—for example, placing the receiver slightly above the ear may result in better performance for hearing aids with microphones positioned behind the ear. T: To use your hearing aid in this mode, make sure that your hearing • aid is set to "T-mode"... -
Page 21: Calls
English Calls Make a call Enter the phone number including the area code. Delete with Press to make a call. Note! If you have more than one SIM card installed, you will be asked what SIM card to use. To set the preferred SIM card, see Dual SIM settings, p.54. -
Page 22: Sos Calls
English Loudspeaker Select and press to activate loudspeaker mode. Speak clearly into the phone microphone at a maximum distance of 1 m. Press to deactivate loudspeaker mode. Options During a call the options button ( ) give access to additional functions. Add call to call another number. -
Page 23: Call Settings
English • Block number/Unblock number to block/unblock the number. You will not receive calls or messages from a blocked number. See Call blocking, p.20. Call details to show details for the selected call. • Delete log to delete the selected entry in the call log. •... - Page 24 English Press select Menu Phone Settings Calls SIM card Fixed dialling numbers: enter PIN2 to enable the feature. • Enable FDN Change PIN2 to change the PIN2 code. • to add and enter the first allowed number. • FDN list You can add more numbers or edit or delete existing.
- Page 25 English • International outgoing calls to block calls to international numbers. • International outgoing calls except to home PLMN to block in- ternational calls except to the country associated with the SIM card. • All incoming calls to call but not to receive incoming calls. Incoming calls while roaming to block incoming calls while •...
-
Page 26: Contacts
English Call blocking You can compile a blacklist of phone numbers so that any phone number on your blacklist is blocked when calling or texting you. Activate the function and add blacklist numbers Press Menu Phone Settings Call blocking. Press Add a number to add a number to list of blocked numbers. Press Block to confirm. -
Page 27: Manage Phonebook Contacts
English Manage phonebook contacts Press Menu Contacts. Select a contact and press , then press • Add to favourites to set the entry as one of the first listed con- tacts in the phonebook. • Call to call the contact. •... -
Page 28: Phonebook Settings
English • Condition: enter any medical conditions or medical devices (e.g. diabetic, pacemaker). • Allergies: enter any known allergies (e.g. penicillin, bee stings). • Blood type: enter your blood type. • Vaccination: enter any relevant vaccination. • Medication: enter any medication that you are treated with. •... -
Page 29: Assistance Button
Response by Doro handle it. With Re- sponse by Doro setup, relatives/helpers (Responder) can receive assis- tance alarm as well as check the status of the Doro phone and quickly assist with some basic phone settings via the smartphone app Response by Doro. -
Page 30: Assistance Settings (Basic Mode)
English Assistance settings (basic mode) Make an assistance call CAUTION When an emergency call is activated the phone is pre-set to handsfree mode. Do not hold the device near your ear when the handsfree mode is in use, because the volume may be extremely loud. When help is needed, press and hold the assistance button for 3 sec- onds, or press it twice within 1 second. -
Page 31: Activate Text Messages (Sms)
This function sends a text message with the users position to the recipients in numbers list when an assistance call occurs. The message contains date, time, and the positioning information of the Doro 731X user. If no position can be found the message contains the latest known position. The position- ing message is sent after the editable assistance message, but before the assistance call sequence starts. -
Page 32: Signal Type
You need an Internet connection to use this service. Contact your service provider for detailed data subscription costs before activating. Before the assistance button can be used, the user of the Doro 731X (called Senior) need at least one relative/helper (called Responder) that has created an account and connected with you. -
Page 33: For The Responder
Admin for the Group of Responders. Start the app and grant the required privileges. Note! If needed, you should also grant Response by Doro access when your phone is set to “Do Not Disturb”. Press back to return. -
Page 34: For The Senior
The Senior will receive an invitation text message/SMS explaning the service Response by Doro and how to set it up and accept your invitation. Always inform the Senior user that you will start the serv- ice as it will require actions from the Senior user also. -
Page 35: Response Premium By Doro
English Senior and Responder are now connected and the Senior can make an alarm with the assistance button on the back of the Doro phone to test the service. The Responder can now also use the app Response to check the status of the Doro phone and quickly assist with some basic phone settings, like sound and display settings. -
Page 36: Read And Handle Messages
English Alternatively, enter number to add recipient manually. Note! If you choose to add multiple recipients, you will be charged for each recipient. Go to the message field and write your message, see Enter text p.12. Press for more options: •... -
Page 37: Messaging Options
English • Detail to view the message details. Copy to copy the message. • Forward to forward the message. Edit the message (if desired) • and enter the recipient, then press to send. Delete to delete that individual message. • Save attachment to save any attachment. - Page 38 English Press Menu Messaging Settings Text mes- select SIM card (if applicable) sage (SMS) SMS Service centre. Enter the service center number. Press OK to confirm. SMS storage location Text messages requires a message center number, this is normally auto- matically set on your phone.
- Page 39 English Multimedia message (MMS) Check/unmark the functions as wanted. Press Menu Messaging Settings Multimedia message (MMS): Group messaging mark to allow to send multimedia messages • (MMS) to multiple recipients. Note! If you choose to add multiple recipients, you will be charged for each recipient.
-
Page 40: Whatsapp
English • Add Channel to add a new channel to receive broadcast mes- sages on. Set name, channel number and mark Enable the chan- nel to activate it. Channel list to review your current list of channels. • Note! Not all operators have the cell broadcast messaging function activated in their network. -
Page 41: Camera
English Camera You can take photos, record videos and view your photos and videos using camera menu. To get sharp photos and videos, wipe the lens clean with a dry cloth. Press Menu Camera. Use / to switch between Photo and Video Mode to zoom in and out. -
Page 42: Alarm
English Note! Higher quality will consume more memory capacity. Storage Phone to save pictures or videos on the phone memory. • Memory Card to save pictures or videos on the memory card. • Note! This option is only available when a compatible external memory is inserted in the device. - Page 43 English • Switch to camera to open the camera to take more photos/ videos. • Select album to select one or more folders/albums. Then press for more options: Share to share a folder/album. See more at Sharing content, • p.11. Delete to delete the selected folders/albums.
-
Page 44: Music
English Music Use Music to play to different audio files, such as music or voice recordings. Press Menu Media Music. Select an audio file and press to play it or press for options. Now playing to open and show the audio file playing currently. •... -
Page 45: Recorder
English To turn off the speaker, press Headset. Favourites Press Menu Media FM Radio. Select a station and press Add to favourite. Press Favourites to see your favourites. Recorder Use the sound recorder to record notes and messages. Press Menu Media Recorder. -
Page 46: Email
English • Details to view detailed information about the file, e.g. date, size, type. Email Create and send e-mail IMPORTANT! Using data services can be costly. We recommend that you check your data rates with your service provider. You can send or receive e-mail messages using your an e-mail account. Your phone supports several types of e-mail accounts and allows you to have multiple e-mail accounts set up at one time. -
Page 47: E-Mail Settings
English • Insert quick response to insert one of the predefined message texts. Manage your emails Press Menu Email. Select an email and press Press for the following: Delete to delete the message. • • Mark read/Mark unread to change the message reading status. •... - Page 48 English Add and set up an email account Press Menu Email Settings. Press Add account and enter the Email address and press Next. Enter your Password and press Next for the following options:. • Sync frequency: to set how often your phone should check for new e-mails.
-
Page 49: Organiser
English Note! Some e-mail accounts require you to change security settings before you are able to access the account from your new Doro phone. To avoid problems signing in, you may need to log-into your account with a computer and enable a security setting similar to “Allow less secure apps”. -
Page 50: File Manager
English • Show week number to display week numbers. Week starts on to set the day when the week should start. • Default reminder time to set how long time in advance of an event • that you should be reminded. File manager Manage the contents and properties of files. -
Page 51: Torch
English Torch From idle screen, press Torch to turn it on. Menu Press Off/On to turn it off/on. Settings Assistance settings See Assistance button, p.23. Network & Internet Aeroplane mode In Aeroplane mode you can’t make or receive calls, surf the web or down- load emails, or do anything that requires an Internet connection, this is to prevent disturbance to sensitive equipment. - Page 52 English an access point to connect your phone to the wireless network, enter pass- word if applicable. Activate Wi-Fi Press Menu Settings Network & Internet Wi-Fi. Set the switch to to activate it. Set the switch to deactivate. Connect to available networks Press Menu Settings...
- Page 53 English • WPS Push Button: First press the Wi-Fi Protected Setup button on your router. It may be called WPS or marked with this symbol • WPS Pin Entry: Enter the given PIN code on the router/access point. The setup can take up to two minutes to complete. Saved networks View your saved networks.
- Page 54 English • 3G: to automatically switch for best service between 2G and 3G. 2G: for 2G service only. • IMPORTANT! If you set your phone to use 2G or 3G, you will not be able to make any calls, including emergency calls, or use other features requiring a network connection, if the selected network type is unavailable.
- Page 55 English Press Menu Settings Network & Internet Mobile net- select SIM card (if applicable) work Access Point Names. To change and existing APN profile, select a profile and press If your service provider’s profile is not in the list, press APN to enter settings for your service provider: •...
- Page 56 English Network operators Your phone automatically selects the network operator that you have a subscription with. When roaming or if you otherwise have no signal you can try to manually select a network. Press Menu Settings Network & Internet Mobile net- work Network operators.
- Page 57 English Enable/disable mobile data for services like software update. Select off to avoid data charges. Press Menu Settings Network & Internet Data usage select SIM card (if applicable) Mobile data. Set the switch to on to activate it or off to deactivate.
- Page 58 English Hotspot & tethering IMPORTANT! Using mobile data services can be costly. We recommend that you check your data rates with your service provider. Allow other devices to share your phone’s Internet connection by connect- ing via USB, Bluetooth or Wi-Fi. Internet sharing only works if you phone is connected to the Internet over the mobile data network and it will disable any existing Wi-Fi connection on the phone while active.
- Page 59 English IMPORTANT! Always have the security turned on when your Wi-Fi hotspot is active to prevent unauthorized use of your internet connection. Turn off the Wi-Fi hotspot feature when you no longer need to share Internet access for other devices. When the feature is activated it will drain your phone's battery significantly.
- Page 60 English Dual SIM settings If you have more than one SIM card installed, you will be asked what SIM card to use. Here you can set the preferred SIM card for different types of mobile traffic. Press Menu Settings Network & Internet Dual SIM settings.
- Page 61 English Press Menu Settings Connected devices Bluetooth. Keep the menu open and the display lit to make your device visible to other devices. Device name Press Menu Settings Connected devices Bluetooth Device name. DFB-0320 is displayed. Edit the new name. Press Rename to save and your new name should appear for other Bluetooth devices.
- Page 62 English Press Menu Settings Connected devices Bluetooth Pair new device. Make sure that the device you want to connect with is visible and in pairing mode. Wait for the search to display the wanted device to select it and press to connect.
-
Page 63: Display
English Standby intelligent power saving Standby intelligent power saving helps to increase battery life by intelli- gently slow down processes to a minimum in idle mode. Press Menu Settings Battery. Set the switch Standby intelligent power saving to on to enable. Note! This feature is by default turned on. - Page 64 English Set the switch Navigation guides to off to disable. Brightness level You can adjust the brightness of the display. Press Menu Settings Display Brightness level. Set the brightness to comfortable level and press when done. Note! The brighter the display is, the more batter power it will consume. Wallpaper Press Menu...
-
Page 65: Sound
English Select each app/function you want to disable and activate blocking with Sound Volume Adjust the volume settings for various sounds on your device. Press Menu Settings Sound: Select type of sound and use / to adjust the volume. • Media volume. -
Page 66: Storage
English Vibrate for calls Set to vibrate for incoming calls. Press Menu Settings Sound Also vibrate for calls. Set the switch to on to enable this feature. Ringtones and alerts Select various ringtones and alerts on your device. Press Menu Settings Sound. - Page 67 English Screen lock The phone lock protects your phone from unwanted usage. When the phone is locked, the selected unlock method is needed. If PIN is selected, you also need to enter the PIN after restart of the phone. Press Menu Settings Security &...
-
Page 68: Start-Up Wizard
English Select mode: High accuracy: for best location accuracy. This uses every service • available: GPS, Wi-Fi, Bluetooth, and/or mobile networks in what- ever combination available. This is quite battery consuming. Battery saving: to reduce battery consumption by disabling GPS. •... -
Page 69: Sim Toolkit
English SIM Toolkit Your service provider can provide some various value-added services. Press select SIM card (if applica- Menu Settings SIM Toolkit ble) for the provided services. System Languages & input The default language for the phone menus, messages, etc. is determined by the SIM card. - Page 70 English • Select time zone to select your current time zone. Use 24-hour format set to off for 12-hour or on • 24-hour time format. Software update When a new system software is available, a notification message is shown. Press Software update Check for updates to manually check if there’s a software update available and perform it.
- Page 71 English Reset app preferences Press Menu Settings System Reset options Reset app preferences. Press Reset apps to reset all preferences for: disabled apps, disabled app notifications, default applications for actions, background data re- strictions for apps and any permission restrictions. You will not lose any app data.
-
Page 72: Additional Functions
English • Build number: to see the build number. Custom build version: to see the custom build version. • Additional functions Display status symbols Signal strength No network coverage Alarm active Data saver activated. Vibration only Battery level Silent Call divert activated Voicemail message received Bluetooth on Notification (missed call, new... -
Page 73: Network Services And Costs
English Network services and costs Your device is approved for use on the 4G LTE FDD 1 (2100), 3 (1800), 7 (2600), 8 (900 MHz), 20 (800) MHz , WCDMA 1 (2100), 8 (900), 2 (1900) MHz, GSM 900/1800/1900 MHz networks. -
Page 74: Li-Ion Battery
English Follow the restrictions that apply to the use of radio equipment near places where fuel is stored and sold, chemical factories and places where blasting is in progress. Areas with risk for explosion are often – but not always – clearly marked. This also applies to below decks on ships;... -
Page 75: Vehicles
English CAUTION Do not use GPS functionality in a manner which causes distraction from driving. Vehicles Radio signals can affect electronic systems in motor vehicles (for example, electronic fuel injection, ABS brakes, automatic cruise control, air bag systems) that have been incorrectly installed or are inadequately protected. -
Page 76: Care And Maintenance
English If the device behaves abnormally, run an antivirus program to check for infection. • Run an antivirus program on your device before you launch newly-downloaded appli- • cations and files. Do not edit registry settings or modify the device’s operating system. •... -
Page 77: Warranty
Please note that this is a voluntary manufacturer’s warranty and provides rights in addi- tion to, and does not affect statutory rights of end-users. This guarantee does not apply if batteries other than DORO original batteries are used. Specifications Network bands (MHz):... - Page 78 Doro reserves the right to revise this document or withdraw it at any time without prior notice.
-
Page 79: Hearing Aid Compatibility
Malmö, Sweden. To be valid, such a request must be made within three (3) years from the date of the distribution of this product by Doro AB, or in the case of code licensed under the GPL v3 for as long as Doro AB offers spare parts or customer support for this product model. -
Page 80: Correct Disposal Of This Product
Declaration of Conformity Hereby, Doro declares that the radio equipment type DFC-0320 (Doro 731X) is in compli- ance with Directives: 2014/53/EU and 2011/65/EU including delegated Directive (EU) 2015/863 amending Annex II. - Page 81 English The full information regarding the ecodesign requirements is available at the following in- ternet address: www.doro.com/ecodesign...
- Page 82 DFC-0320 (Doro 731X) (1011, 1021, 1031, 1041) English Version 2.0 ©2019 Doro AB. All rights reserved. www.doro.com REV 19599 — STR 20191025...