Table of Contents
Advertisement
Quick Links
Advertisement
Table of Contents

Related Manuals for Doro 7081


Summary of Contents for Doro 7081
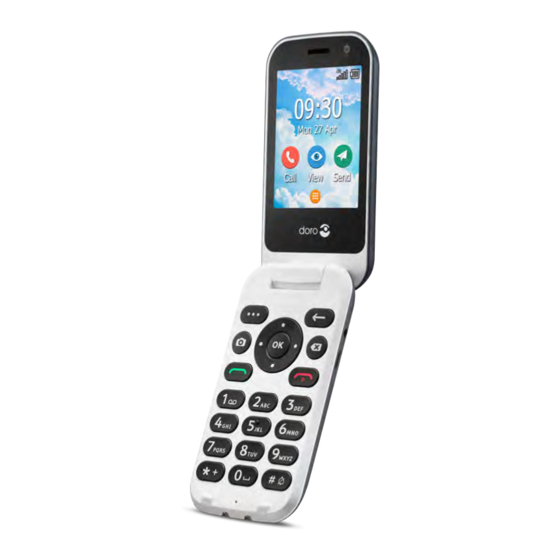
- Page 1 Doro 7081 English...
- Page 3 You can obtain addition- al accessories from your local Doro dealer. The supplied accessories pro- vide the best performance with your phone.
-
Page 4: Table Of Contents
English Contents Congratulations on your purchase ..............1 Getting started ....................1 Unbox your new phone ................. 1 Insert SIM card, memory card and battery ........... 2 Charge the phone................... 4 Save energy .................... 5 Turn the phone on and off..............5 Get to know your phone................ - Page 5 Assistance settings (basic mode) ............24 Activation ..................... 24 Number list................... 25 Activate text messages (SMS) .............. 25 Position SMS..................26 Signal type .................... 26 Response by Doro ..................26 For the Responder ................27 For the senior ................. 28 Messaging..................... 29 Create and send text message (SMS)/picture message (MMS) ..
- Page 6 English Sound....................58 Storage ....................59 Calls ...................... 60 Security & location................60 Start-up Wizard ..................62 Tutorials....................62 SIM Toolkit ................... 62 System ....................62 Additional functions ..................65 Display status symbols ................. 65 Display main symbols................66 Safety instructions..................66 Network services and costs ..............
-
Page 7: Congratulations On Your Purchase
™ tures such as support for Response by Doro with GPS positioning. For more information about accessories or other Doro products please visit www.doro.com or contact our Helpline. Getting started When you get your phone, you will need to set it up before use. -
Page 8: Insert Sim Card, Memory Card And Battery
English Insert SIM card, memory card and battery The SIM and memory card holder’s are located inside the battery compartment. Tip: Take care not to scratch the metallic contacts on the cards when inserting them into the card holders. Remove the battery cover IMPORTANT! Turn off the phone and disconnect the charger before removing the... - Page 9 English Insert the SIM and memory cards Insert the nano-SIM () card by gently sliding it into the SIM card slot. Make sure that the SIM card’s contacts are facing inwards and that the cut off cor- ner is as shown. You can insert a second SIM card so you can have two phone numbers or service providers on a single device.
-
Page 10: Charge The Phone
English Insert the battery Insert the battery by sliding it into the battery compartment. Replace the back cover. Charge the phone While it’s possible that your phone will already come with enough power to be turned on right out of the box, we recommend charging the device fully before using it. -
Page 11: Save Energy
English Use a charging cradle to charge (optional) Connect the small head of the charging cable to the cradle. Place the phone in the cradle. Plug the power adapter to a wall power outlet. Save energy When the battery is fully charged, disconnect the charger from the device and unplug the charger from the wall outlet. -
Page 12: Get To Know Your Phone
English Get to know your phone Assistive functions Use the symbols below to guide you through supporting sections in the manual. Seeing Handling Hearing Safety Start-up Wizard When starting the device for the first time, a Start-up Wizard will be initi- ated to set some basic settings. -
Page 13: Notification Panel And Status Bar
English • Green light when you have a new notification for a message, missed call, etc. • Red light when the battery is running low and during charging. Notification panel and status bar At the top of the main screen to the left you can see if there are any notifi- cations. - Page 14 English End call/Power on and off End calls or return to the start screen. • • Long press to power on or off. Back : Return to the previous screen. Assistance Press to make an assistance call. Clear Press to clear the previous character. Camera Press to initiate the camera app and take a picture or a video.
-
Page 15: Navigate Your Phone
Meet “EVA” – ”Enkel, Vänlig och för Alla” (Swedish) (Easy, friendly and for everyone) Doro aim to take simplicity even further thanks to our intuitive, action- based interface, EVA. EVA makes using a phone even easier. It’s like having someone who understands your needs always by your side. Users never need to look around for things they can’t find. - Page 16 English Doro's unique telephone menu is action-based, that makes navigating the phone brilliantly simple. It allows you to navigate your phone, by just ask- ing yourself, “What do I want to do?”. For example, if you want to send a message to a contact that is available in your contact book.
-
Page 17: Sharing Content
English My gallery to view your stored pictures and videos, see Gallery, p.36. My call history to view your call history, see Call history, p.16. My alarms to view your alarms or add a new one, see Alarm, p.36. My organiser Calculator to make some calculations, see Calculator, p.42. -
Page 18: Enter Text
English In many places of the phone menu you can press or for more options. Press Share to share a selected item: • Messaging to send via a message. See Create and send text message (SMS)/picture message (MMS), p.29. ® Bluetooth to send to a Bluetooth device, see Bluetooth , p.54. -
Page 19: Hearing Aid Compatible
English Enter text with predictive text In some languages you can use predictive text input method which uses a dictionary to suggest words. • Press each key once, even if the displayed character is not the one you want. The dictionary will suggest words based on the keys you have pressed. -
Page 20: Connect The Phone To A Computer
English • M: To use your hearing aid in this mode, make sure that your hearing aid is set to "M-mode" or acoustic coupling mode, and position the phones receiver near the hearing aid’s built-in microphone. For the best results, try using the phone in different positions relative to your hearing aid—for example, placing the receiver slightly above the ear may result in better performance for hearing aids with microphones positioned behind the ear. -
Page 21: Calls
English Note! Computer instructions may vary depending on your operating system. See the documentation of your computer's operating system for more information. Calls Make a call Enter the phone number including the area code. Delete with Press to make a call. Note! If you have more than one SIM card installed, you will be asked what SIM card to use. -
Page 22: Call Information
English Call information During a call, the outgoing or incoming phone number and the elapsed call time is displayed. If the identity of the caller is withheld or unknown, Pri- vate number or Unknown are displayed. Call options Mute Select and press to disable the microphone. -
Page 23: Call Settings
English Incoming call Outgoing call Missed call Select wanted entry and press to dial, or... Select an entry and press Create new contact to save the number for a new contact. • Add to a contact to add the number for an existing contact. •... - Page 24 English Select First name first or Surname first. Calls Note! You need to select the SIM card you want to handle. Fixed dialling numbers (FDN) You can limit calls to certain numbers saved on the SIM card. The list of al- lowed numbers is protected by your PIN2-code.
- Page 25 English Call barring Your phone can be restricted to disallow certain types of calls. Select a con- dition and select Note! A password is needed to apply call barring. Contact your service provider to get the password. Press select Menu Phone Settings Calls...
- Page 26 English Call waiting You can handle more than one call at a time, put the current call on hold and answer the incoming call. When activated, an alert tone is heard if there is an incoming call while talking. During a call, press to answer the second call.
-
Page 27: Contacts
English Call voicemail Press and hold shortcut button 1 . • Answer mode Press Menu Settings Calls Answer mode Open to answer: Enable the switch to answer incoming calls by opening the phone. Contacts Add contact Press Create new contact and select Menu Contacts where to save it. -
Page 28: Ice (In Case Of Emergency)
English ICE (In Case of Emergency) First responders can access additional information such as medical infor- mation from the victim's phone in case of emergency. In the event of a trauma, it is critical to have this information as early as possible to in- crease the chances of survival. -
Page 29: Assistance Button
Response by Doro handle it. With Re- sponse by Doro setup, relatives/helpers (Responder) can receive assis- tance alarm as well as check the status of the Doro phone and quickly assist with some basic phone settings via the smartphone app Response by Doro. -
Page 30: Setting The Mode For The Assistance Button
Assistance settings (basic mode), p.24. • Response to use the service Response by Doro mode for the as- sistance button. To set up the service, follow the descriptions in Response by Doro, p.26. -
Page 31: Number List
English • Off to disable the assistance button. Number list Add numbers to the list that is called when the assistance button is pressed. IMPORTANT! Always inform recipients in the numbers list that they are listed as your assistance contacts. Press Menu Settings... -
Page 32: Position Sms
This function sends a text message with the users position to the recipients in numbers list when an assistance call occurs. The message contains date, time, and the positioning information of the Doro 7081 user. If no position can be found the message contains the latest known position. The position- ing message is sent after the editable assistance message, but before the assistance call sequence starts. -
Page 33: For The Responder
Admin for the Group of Responders. Start the app and grant the required privileges. Note! If needed, you should also grant Response by Doro access when your phone is set to “Do Not Disturb”. Press back to return. -
Page 34: For The Senior
The Senior will receive an invitation text message/SMS explaning the service Response by Doro and how to set it up and accept your invitation. Always inform the Senior user that you will start the serv- ice as it will require actions from the Senior user also. -
Page 35: Messaging
Accept. Senior and Responder are now connected and the Senior can make an alarm with the assistance button on the back of the Doro phone to test the service. The Responder can now also use the app Response to check the status of the Doro phone and quickly assist with some basic phone settings, like sound and display settings. -
Page 36: Read And Handle Messages
English • Capture picture to use the camera to take a picture. Note! If you add more than one picture, the following pictures are increasingly compressed by the phone (scaled down). This to allow you to send more pictures in one message. -
Page 37: Messaging Options
English Messaging options Search Press Menu Messaging Search. Enter a search phrase and press . The search phrase can be a con- tact or a message text. Settings Text message (SMS) Request delivery report You can select if you want the phone to notify you when your text message has reached the recipient. - Page 38 English Press Menu Messaging Settings Text mes- select SIM card (if applicable) sage (SMS) SMS storage location. Select to save messages on Phone or SIM Card. Input mode With Input method you can select to write your text messages with special, distinguishing language specific characters (Unicode) or to write with more simple characters.
- Page 39 English Note! If you choose to add multiple recipients, you will be charged for each recipient. • Request delivery report mark to be notified when your multime- dia message has reached the recipient. Request read report mark to be notified when your multimedia •...
-
Page 40: Whatsapp
English WAP Push messages A WAP Push service is basically a specially encoded message which includes a link to a WAP address. On receiving a WAP Push, a WAP-enabled handset will automatically give the user the option to access the WAP content. When enabled, it directly opens the browser to display the WAP content, without user interaction. - Page 41 English to zoom in and out. Note! Zoom may reduce picture quality. Press or the OK to take photo or start/stop video recording. Press for more options: Note! Some options are only available in photo mode and some in video mode. Go to Gallery The gallery displays all your taken photos and recorded videos.
-
Page 42: Alarm
English The photo/video is automatically saved if you don’t decide to delete it. Alarm You can save up to 5 different alarms. Note! The alarm will not work if the phone is turned off. Press Menu Alarm. Press Add new for a new alarm. Select and set the different options: Set the time for the alarm. -
Page 43: Music
English Select a folder and press Press for picture/video options. Switch to camera to open the camera to take more photos/ • videos. Slideshow to let the photos/videos be displayed in a slideshow. • Select item to select one or more item. Then press for more •... -
Page 44: Fm Radio
English • Shuffle all to shuffle all audio files. FM Radio FM Radio has a frequency range from 87.5 to 108.0 MHz. To listen to the radio you need to connect a compatible headset that works as antenna. Turning the radio on/off Connect a headset to the headset socket Press . -
Page 45: Recorder
English Recorder Use the sound recorder to record notes and messages. Press Menu Media Recorder. Press to start and to pause recording. Press when done. Press Save to save the recording. Press Discard to discard the recording. Press for the list of recordings and press to play the recording. - Page 46 English You can send or receive e-mail messages using your an e-mail account. Your phone supports several types of e-mail accounts and allows you to have multiple e-mail accounts set up at one time. See Add and set up an email account, p.41 on how to setup your e-mail.
-
Page 47: E-Mail Settings
English • Forward to forward the message. Reply to reply to the recipient in the address field. • Reply all to reply to all recipients in the address field. This also • includes recipients in the Cc field. • You can also mark/unmark the star in the top right of the mes- sage to change status. -
Page 48: Organiser
Select Add account to add further email accounts. Note! Some e-mail accounts require you to change security settings before you are able to access the account from your new Doro phone. To avoid problems signing in, you may need to log-into your account with a computer and enable a security setting similar to “Allow less secure apps”. -
Page 49: Calendar
English Repeat steps 2–4 as necessary. Calendar Note! Calendar reminders will not work if the phone is turned off. Add event Press Menu Organiser Calendar. Select a date and press for the following options: • View to view events for day. •... -
Page 50: Notes
English Notes Press Menu Organiser Notes. Press Add for a new note. Enter your note using the keypad, see Enter text , p.12. Press Save to save. Tip: For more options select an existing note, and press Web browser IMPORTANT! This service requires an Internet connection. - Page 51 English watch videos and other content, as long as all this content is saved on your memory card or internal storage. When you take your phone abroad, you can keep it in flight mode. If you do that, there’s no chance of data roaming charges, and you can still ena- ble Wi-Fi.
- Page 52 English Note! Check Show password to see it in clear text. Press Advanced options if you need specific settings. Press Connect to connect. A connected Wi-Fi network is displayed in the top of the list. Select it and press for connection details. Press Forget if it’s an unwanted network, to disconnect from it and stop connecting to it automatically.
- Page 53 English your network operator has an agreement that allows you to do so. This is called roaming. Contact your service provider for more information. Press Menu Settings Network & Internet Mobile net- select SIM card (if applicable). work Set the switch Data roaming to to activate it or deactivate.
- Page 54 English Wi-Fi calling For improved voice communications over Wi-Fi. Press Menu Settings Network & Internet Mobile net- select SIM card (if applicable) work Wi-Fi calling. Set the switch to on to activate it or to deactivate. Note! Your network operator also needs to support this feature. Access Point Names An Access Point Name (APN) is the name of a gateway between a mobile network and another computer network, mostly the public Internet.
- Page 55 English • Authentication type to select the type of authentication to be used. • APN type to enter the APN type. • APN protocol to select the type of protocol to be used. • APN roaming protocol to select the type of protocol to be used when roaming.
- Page 56 English data, but may do so less frequently. This may mean, for example, that im- ages don’t display until you select them. Press Menu Settings Network & Internet Data usage Data Saver. Set the switch to on to activate it or to deactivate.
- Page 57 English Billing cycle Set the data notification limits and time periods. Press Menu Settings Network & Internet Data usage select SIM card (if applicable) Billing cycle. Set the Set data warning switch to on to get a warning when you reached the mobile data usage limit of Data warning. Set the Set data limit switch to on to turn off mobile data when limit of Data limit is reached.
- Page 58 English Bluetooth tethering Share your phone’s Internet connection by connecting via Bluetooth. You ® must first establish the Bluetooth connection. See Bluetooth , p.54. Press Menu Settings Network & Internet Hotspot & tethering. Set the Bluetooth tethering switch to on to enable Internet shar- ing via a Bluetooth connection.
- Page 59 English • Security to set the security type (always use WPA2 PSK if the connecting device supports it). • Password: a password is used to prevent unauthorized access to your mobile network. This option is available only when the se- curity type is WPA2(AES).
- Page 60 English Connected devices Here you can see and control your connected devices. ® Bluetooth IMPORTANT! If you are not using Bluetooth connectivity, switch it off to save power. Do not pair with an unknown device. Activate Bluetooth Press Menu Settings Connected devices Bluetooth.
- Page 61 English Paired devices View already paired devices. Press Menu Settings Connected devices Bluetooth Paired devices. See the list of paired devices. Select the device and press to con- nect/disconnect the device. When a device is connected the icon displayed in the status bar. Select the setting icon on a device from the list and press Name to edit the name of the paired Bluetooth device.
- Page 62 English • Transfer photos (PTP) to appears to the computer as a digital camera. In this mode, your phone will work with digital camera applications that support PTP but not MTP. Apple’s Mac OS X does support PTP, so you can use PTP mode to transfer photos to a Mac over a USB connection without any special software.
-
Page 63: Display
English Press Menu Settings Battery Battery saver Turn on automatically. Set at what remaining battery power level to automatically activate power saving mode. Display Main menu You can select different styles for the main menu. Press Menu Settings Display Main menu: Select Grid or Single. -
Page 64: Sound
English Font size You can adjust the text size for the menu and messages. Press Menu Settings Display Font size. Select Normal or Large. Colour inversion Colour inversion exchanges colour values. For example, black text on a white screen becomes white text on a black screen. Press Menu Settings... -
Page 65: Storage
English • HAC mode for use with hearing aid. Press to confirm. Note! Try different settings to find the one that suits your hearing the best. Keypad tone Select the sound you hear when you press the keys of the phone. Press Keypad tone . -
Page 66: Calls
English Calls Set Open to answer to on to answer incoming calls by opening the phone. Press Menu Settings Calls Answer mode Open to answer: Enable the switch to answer incoming calls by opening the phone. Security & location Passwords Change phone code Press Menu... - Page 67 English Press Menu Settings Security & location Automati- cally lock. Select after what time the phone automatically locks. Press to confirm. Location Global Positioning System (GPS) and additional supplemental information such as Wi-Fi and mobile networks are used to approximate your location. Location data may be used by apps and services, such as assistance calls.
-
Page 68: Start-Up Wizard
English Set the switch to activate the PIN code. You need to enter • the PIN code every time the phone is started. Set the switch to deactivate the PIN code. • IMPORTANT! If you deactivate the PIN code and the SIM card is lost or stolen, it is unprotected and must be blocked by your service provider. - Page 69 English Predictive text Press Menu Settings System Languages & input Predictive text. Set Predictive text on/off with Date & time Tip: The phone is set to automatically update time and date according to current time zone. To turn off, select Date & time Automatic date &...
- Page 70 English Press Check for updates to manually check if there’s a software up- date available. Press Settings for software update settings: • Automatically check for update to set how often the phone au- tomatically should check for new updates. • Updates via Wi-Fi only, to only allow update packages to be downloaded over Wi-Fi network.
-
Page 71: Additional Functions
English Enter the phone code and press OK. Tip: The default phone code is 1234. Scheduled power on & off Here you can set how to turn on and turn off your phone without pressing the power button. Press Menu Settings System Reset options... -
Page 72: Display Main Symbols
English Display main symbols Charger connected Charger removed Query Error Warning Done (confirmed) Processing, please wait Battery level low Assistance button call Safety instructions CAUTION The unit and the accessories can contain small parts. Keep all of the equipment out of the reach of small children. -
Page 73: Areas With Explosion Risk
English Implanted medical devices To avoid potential interference, manufacturers of implanted medical devices recommend a minimum separation of 15 cm between a wireless device and the medical device. Per- sons who have such devices should: Always keep the wireless device more than 15 cm from the medical device. •... -
Page 74: Emergency Calls
English WARNING Excessive exposure to loud sounds can cause hearing damage. Exposure to loud sounds while driving may distract your attention and cause an accident. Listen to a headset at a moderate level, and do not hold the device near your ear when the loudspeaker is in use. -
Page 75: Protect Your Personal Data
English It is prohibited to use the unit in flight. Turn off the unit before you board a plane. Using wireless telecom units inside a plane can pose risks to air safety and interfere with tele- communications. It may also be illegal. Protect your personal data Protect your personal data and prevent leakage or misuse of sensitive information While using your device, be sure to back up important data. -
Page 76: Warranty
English Do not use or keep the unit in dusty, dirty environments. The unit’s moving parts and • electronic components can be damaged. Do not keep the unit in warm places. High temperatures can reduce the lifespan for • electronic equipment, damage batteries and distort or melt certain plastics. •... -
Page 77: Device Os Software Warranty
This guarantee does not apply if batteries other than DORO original batteries are used. Device OS software warranty By using the device, you accept to install any OS software updates provided by Doro, at earliest possibility after notification. By updating your device, you help to maintain your device secure. -
Page 78: Copyright And Other Notices
Doro reserves the right to revise this document or withdraw it at any time without prior notice. -
Page 79: Hearing Aid Compatibility
Malmö, Sweden. To be valid, such a request must be made within three (3) years from the date of the distribution of this product by Doro AB, or in the case of code licensed under the GPL v3 for as long as Doro AB offers spare parts or customer support for this product model. -
Page 80: Specific Absorption Rate (Sar)
English Specific Absorption Rate (SAR) This device meets applicable international safety requirements for exposure to radio waves. Your mobile device is a radio transmitter and receiver. It is designed not to exceed the limits for exposure to radio waves (radio frequency electromagnetic fields) recommen- ded by international guidelines from the independent scientific organization ICNIRP (Inter- national Commission of Non-Ionizing Radiation Protection). -
Page 81: Eu Declaration Of Conformity
English EU Declaration of Conformity Hereby, Doro declares that the radio equipment type DFC-0310 (Doro 7081) is in compli- ance with Directives: 2014/53/EU and 2011/65/EU including delegated Directive (EU) 2015/863 amending Annex II. The full text of the EU declaration of conformity is available at the following internet address: www.doro.com/dofc. - Page 82 DFC-0310 (Doro 7081) (2011,2021,2031,2041,2051,2061,2071,2081 ) English Version 3.0 ©2019 Doro AB. All rights reserved. www.doro.com REV 20107 — STR 20191025...