Midea MAP12S1TBL User Manual
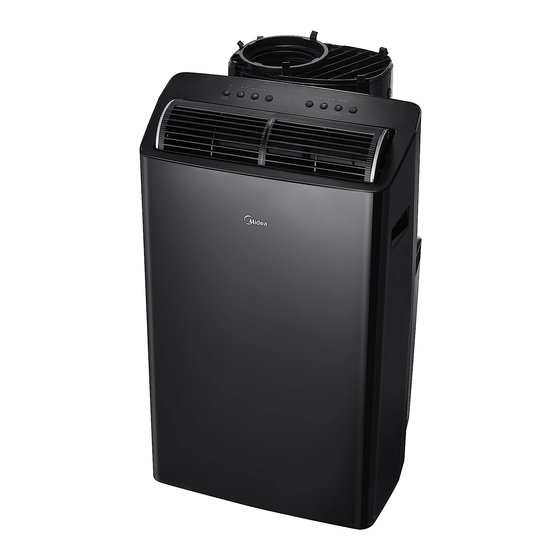
Duo portable air conditioner
Hide thumbs
Also See for MAP12S1TBL:
- User manual (33 pages) ,
- Owner's manual & installation manual (24 pages)
Advertisement
en
USER MANUAL
Duo Portable
Air Conditioner
Capacity: 12000 ~ 14000BTU/h
Warning:
Before using this product,
please read this manual carefully
and keep it for future reference.
The design and specifications
are subject to change without
M
AP12S1TBL
prior notice for product
improvement. Consult with your
MAP14S1TBL
dealer or the manufacturer for
MAP14HS1TBL
details.
MAP14HS1TWT
MAP14AHS1TWT
Midea.com
version F - 05 - 2022 (PREVIEW01)
version F - 05 - 2021
Advertisement

Related Manuals for Midea MAP12S1TBL


Summary of Contents for Midea MAP12S1TBL
- Page 1 The design and specifications are subject to change without AP12S1TBL prior notice for product improvement. Consult with your MAP14S1TBL dealer or the manufacturer for MAP14HS1TBL details. MAP14HS1TWT MAP14AHS1TWT Midea.com version F - 05 - 2022 (PREVIEW01) version F - 05 - 2021...
-
Page 2: Table Of Contents
Owner’s Manual SAFETY PRECAUTIONS ................3 OPERATING INSTRUCTIONS ..............8 INSTALLATION INSTRUCTIONS .............. 12 CARE AND CLEANING ................19 TROUBLESHOOTING TIPS ..............20 HEAT PUMP HOSE INSULATION FOAM ..........21 REMOTE CONTROL AND APP INSTRUCTIONS ......... 22 WARRANTY ....................33 Read This Manual Inside you’ll find many helpful hints on how to use and maintain your air conditioner properly. -
Page 3: Safety Precautions
SAFETY PRECAUTIONS To prevent injury to the user or other people and property damage, the instructions shown here must be followed. Incorrect operation due to ignoring of instructions may cause harm or damage. The level of risk is shown by the following indications. This symbol indicates a hazardous situation which, if not WARNING avoided, could result in death or serious injury. - Page 4 WARNING • Do not disassemble or modify unit. It may cause failure and electric shock. • Do not damage or use an alternate power cord. It may cause fire and electric shock. If the power cord is damaged, it must be replaced by the manufacturer or an authorized service center or a similarly qualified person in order to avoid a hazard.
- Page 5 CAUTION • Do not put a pet or house plant where it will be exposed to direct air flow. This could injure the pet or harm the plant. • Hold the plug by the head of the power plug when taking it out. Otherwise, it may cause electric shock and damage.
- Page 6 • Be aware that the refrigerants may not contain an odor. • Keep ventilation openings clear of obstruction. • Unit is only to be serviced by a Midea authorized servicer, please call Customer Service at 1-866-646-4332 for support. • Flammable refrigerant R32 is used within air conditioner. Please follow the instructions carefully to handle, install, clean, and service the air conditioner to avoid damage or hazard.
- Page 7 Operation of Current Device The power supply cord contains a current Plug in & measuring device that detects damage to the power cord. Test your power supply press RESET cord as follows: RESET Plug in the air conditioner. 2. The power supply cord will have TWO TEST buttons on the plug head.
-
Page 8: Operating Instructions
OPERATING INSTRUCTIONS Preparation Control panel Outlet louver (automatic swing) Upper air filter (behind the grille) Handle (both sides) Inlet and outlet air hose Panel Air inlet Drain Outlet (dry mode) Drain Outlet (heating mode) Power plug storage Power cord storage Caster Power cord outlet Drain Outlet... - Page 9 Control Panel Features LED Display Wireless Indicator(Optional) Swing (Connect) Power Button Button Timer Mode Up ( ) and Down ( Sleep Button Button Buttons Button Button Swing Button indicating the fan will run constantly. When the function is turned off, the Used to initiate the Auto Swing feature.
- Page 10 The LED Display will also show any errorcodes NOTICE when they occur. Error codes will appear in the following format: Where the xx represents 2 numbers. Ehxx, Ecxx, Elxx, PCxx, PHxx, PLxx. The display will alternate displaying the two letter combination and the two P1 - Bottom tray is full - Connect the drain hose number combination to identify the error.
- Page 11 SLEEP operation NOTICE Pressing this button will increase (during cooling operation) or decrease (during The SLEEP operation feature is heating operation, applicable models) unavailable in FAN or DRY mode. the temperature2°F/1°C after 30 minutes. The temperature will again increase (cooling) or decrease (heating) by another 2°F/1°C after an additional 30 minutes.
-
Page 12: Installation Instructions
• Service, maintenance or repair of this unit must be performed by a certified technician. • Product recycling must be done according to local regulations. Scan this QR code to watch an installation video for your Midea Duo Portable Air Conditioner: 25 cm 9.8 inch Page 12 ... - Page 13 Tools Needed • Phillips screwdriver • Saw (optional, to shorten window adaptor for narrow windows). • Tape measure or ruler • Knife or scissors Accessories Your Window Installation Kit fits windows 19.1” – 63.8” (48.4-162 cm). Please doublecheck all packaging materials to make sure accessories do not get accidentally thrown away. Quantity Air exhaust adapter 1 pc...
- Page 14 Window Installation Kit 1: For Hung Window types only Air Exhaust Insert the Air Exhaust Adapter into the Adapter exhaust of the hose (the circular opening) for optimal performance. Rotate the Exhaust adapter clockwise until the locking tabs click and it no longer rotates. Hose Skip this step if installing into a horizontal sliding window.
- Page 15 Type 1: Hung window installation Foam seal B (Adhesive type-shorter) Cut the adhesive foam seal A and B strips to the proper lengths, and attach them to the window sash and frame as shown. Foam seal A (Adhesive 2. Insert the window slider assembly into the window type) track.
- Page 16 Type 2: Sliding window Installation (Optional) Foam seal B (Adhesive Cut the adhesive foam seal A and B strips to the type-shorter) proper lengths, and attach them to the window sash and frame as shown. 2. Assembling the Sliding Window Adapter (Only needed for Sliding Window applications): Align Foam seal A both halves of the sliding window adapter and...
- Page 17 6. If desired, install the security bracket with 2 Security screws as shown. Bracket 2 Screws Attach the Sliding Window Adapter to the hose by lining up the circles on the adapter the hose. Insert the window slider adapter into the hole of the window slider.
- Page 18 Water Drainage • When the water level of the bottom tray reaches a predetermined level, the unit beeps 8 times. The digital display shows “P1.” At this time the air conditioning/ dehumidification process will immediately stop. However, the fan motor will continue to operate (this is normal). Carefully move the unit to a drain location, remove the bottom drain plug and let the water drain away.
-
Page 19: Care And Cleaning
CARE AND CLEANING Safety Precautions • Always unplug the unit before cleaning or servicing. • DO NOT use flammable liquids or chemicals to clean the unit. • DO NOT wash the unit under running water. Doing so causes electrical danger. •... -
Page 20: Troubleshooting Tips
TROUBLESHOOTING TIPS Before calling for service, review this list. It may save you time and expense. This list includes common occurrences that are not the result of defective workmanship or materials in this appliance. Problem Solution Unit does not turn on Displays P1 Error Code and means the water collection tray is full. -
Page 21: Heat Pump Hose Insulation Foam
HEAT PUMP HOSE INSULATION FOAM If you are experiencing condensation on the outer section of the hose during heating operation, apply the included heat pump insulation foam to the outside of the hose. Use the included zip ties to secure the foam around the hose. -
Page 22: Remote Control And App Instructions
REMOTE CONTROL AND APP INSTRUCTIONS Handling the Remote Control LOCATION OF THE REMOTE CONTROL Use the remote control within a distance of 26 ft. (8m) from the air conditioner, pointing it towards the unit. The unit will beep when it receives a signal. CAUTION •... - Page 23 BATTERY DISPOSAL Ensure used batteries are disposed of properly. TIPS FOR USING REMOTE CONTROL • In order to properly transmit a command, the ON/OFF indicator must be illuminated on the remote’s display. (See the Remote LED Screen Indicators section for more information.) Remote Control Specifications °...
- Page 24 Remote Screen Indicators Information is displayed when the remote controller is used. MShield feature display Sleep mode display C SENSE feature display Wireless control feature display Low battery detection display Transmission Indicator (If flashes) Lights up when remote sends signal to indoor MODE display unit Displays the current...
- Page 25 How to Use Basic Functions Basic operation COOL Mode ATTENTION! Before operation, please ensure the unit is plugged in and power is available. SETTING TEMPERATURE The operating temperature range for units is 60-86°F (16-30°C). You can increase or decrease the set temperature in 1°F (1°C) increments.
- Page 26 DRY Mode (dehumidifying) HEAT Mode 1. Press the MODE button to select DRY. 1. Press the MODE button to select HEAT mode. 2. Set your desired temperature using the TEMP 2. Set your desired temperature using the TEMP or TEMP button.
- Page 27 Setting the TIMER TIMER ON/OFF - Set the amount of time after which the unit will automatically turn on/off. TIMER ON setting Press TIMER ON button to Press up or down button for Point remote to unit and wait initiate the ON time multiple times to set the desired 1sec, the TIMER ON will be sequence.
- Page 28 SET function Press the SET button to enter the function setting, then press SET button or TEMP or TEMP button to select the desired function. The selected symbol will flash on the display area, press the OK button to confirm. To cancel the selected function, just perform the same procedures as above.
- Page 29 OS may or may not be supported until a new version is released. Your specific mobile phone or problems in your network may prevent the system from working and Midea will not be responsible for any problems that could be caused by incompatibility or network issues.
- Page 30 The information displayed on the actual product is always the most accurate available. Refresh the app to re-sync. NOTICE Midea will not be responsible for any problems that could be caused by incompatibility or network issues, your wireless router and mobile phone. SYSTEM OVERVIEW Devices required to use the Smart AC: 1.
- Page 31 CREATE YOUR ACCOUNT • Make sure your smartphone is connected to your wireless router and your wireless router has a working 2.4 GHz internet connection. • It is recommended to activate your account immediately to be able to recover your password by email.
- Page 32 ADDITIONAL APP AND SMART HOME FUNCTIONS For additional instructions regarding the features of the app and Smart Home skill capabilities, scan the QR code below. Declaration of conformity CONTAINS FCC ID: 2ADQOMDNA21 CONTAINS IC : 12575A-MDNA21 This device complies with Part 15 of the FCC Rules and it contains licence-exempt transmitter(s)/receiver(s) that comply with Innovation, Science and Economic Development Canada’s licence-exempt RSS(s).
-
Page 33: Warranty
• Diagnostics, removal, transportation and reinstallation cost required because of service. • Costs of service calls that are a result of items listed under NORMAL RESPONSABILITIES OF THE CONSUMER** Midea replacement parts shall be used and will be warranted only for the original warranty. NORMAL RESPONSABILITIES OF THE CONSUMER**... - Page 34 300 Kimball Dr Parsippany NJ 07054 Telephone number or internet contact information: Midea.com/us FCC Compliance Statement ( products subject to Part 15) This device complies with Part 15 of the FCC Rules. Operation is subject to the following two conditions: (1) This device may not cause harmful interference, and (2) this device must accept any interference received, including interference that may cause undesired operation.
- Page 35 Important Safety Instructions of Power Supply Cord WARNING To reduce the risk of the fire, electric shock, or injury to persons, read the Important Safety Instructions of Power Supply Cord before operating this appliance. The power supply cord with this air conditioner contains a current NOTE detection device designed to reduce the risk of fire.