JVC GR-SXM540 Instructions Manual
Compact vhs camcorder
Hide thumbs
Also See for GR-SXM540:
- Instructions manual (33 pages) ,
- Instructions manual (32 pages) ,
- Instructions manual (32 pages)
Advertisement
Quick Links
INSTRUCTIONS
COMPACT VHS CAMCORDER
GR-SX M 7 4 5
GR-SX M 5 4 0
For Customer Use:
Enter below the Model No. and Serial No. which is
located on the bottom of the camcorder. Retain this
information for future reference.
Model No.
Serial No.
Dear Customer,
Thank you for purchasing the JVC Compact VHS camcorder. Before use, please read
"PRECAUTIONS" (
Aut om a t ic De m onst ra t ion t a k e s pla c e w he n "DEM O M ODE" is se t t o "ON "
(fa c t ory-pre se t ).
• Available when the Power Switch
• Performing any operation during the demonstration stops the demonstration temporarily. If no operation
is performed for more than 1 minute after that, the demonstration will resume.
• "DEMO MODE" remains "ON" even if the camcorder power is turned off.
• To cancel Automatic Demonstration, set the Power Switch
while the demo is in progress. This takes you directly to the demo mode's Setting Menu (so you will not
have to go through the main Menu Screen). Rotate the MENU Wheel
NOTES:
• When a tape whose Erase Protection tab is in the position that allows recording is loaded in the
camcorder, demonstration is not available.
• If you do not detach the Lens Cap, you cannot see the actual changes of the Automatic Demonstration
activated on the LCD monitor or viewfinder.
Downloaded from:
pg. 3, 4) to ensure safe use of this product.
AUTOMATIC DEMONSTRATION
@
is set to "
https://www.usersmanualguide.com/
ENGLISH
COPYRIGHT© 2001 VICTOR COMPANY OF JAPAN, LTD
" or "
".
@
to "
" and press the MENU Wheel
1
1
LYT0902-002A
Printed in Malaysia
U
1201MKV
to select "OFF" and press it.
*
UN
*
PJ
1
in
Advertisement

Related Manuals for JVC GR-SXM540


Summary of Contents for JVC GR-SXM540
- Page 1 1201MKV Serial No. COPYRIGHT© 2001 VICTOR COMPANY OF JAPAN, LTD Dear Customer, Thank you for purchasing the JVC Compact VHS camcorder. Before use, please read “PRECAUTIONS” ( pg. 3, 4) to ensure safe use of this product. AUTOMATIC DEMONSTRATION Aut om a t ic De m onst ra t ion t a k e s pla c e w he n “DEM O M ODE” is se t t o “ON ”...
- Page 2 PROVIDED ACCESSORIES • AC Adapter • Cassette Adapter C-P7U AP-V12U, AP-V11U or AP-V10U • Remote Control Unit • CD-ROM • Battery Pack RM-V715U BN-V11U (GR-SXM745 only) • Lens Cap • AAA (R03) Battery x 2 • AA (R6) Battery (for Remote Control Unit, (for Cassette Adapter) GR-SXM745 only) •...
- Page 3 NO USER-SERVICEABLE PARTS INSIDE. REFER SERVICING TO QUALIFIED SERVICE PERSONNEL. anywhere. • Use the JVC BN-V11U/V12U/V20U/V400U The lightning flash with arrowhead symbol, within an battery packs and, to recharge them or to supply equilateral triangle, is intended to alert the user to the power to the camcorder from an AC outlet, use presence of uninsulated "dangerous voltage"...
- Page 4 Please call 1-800-8-BATTERY™ for information on Ni-Cd battery recycling and disposal bans/restrictions in your area. JVC’s involvement in this program is part of our commitment to preserving our environment and conserving our natural resources.
- Page 5 INDEX AC Adapter ..............pg. 6 Picture Stabilizer ............pg. 12 Animation Recording .......... pg. 21, 24 Playback ..............pg. 11 Audio Dubbing ............pg. 24 Playback Special Effects .......... pg. 14 Auto Date Record ............ pg. 19 Playback Zoom ............pg. 24 Auto Focus ...............
- Page 6 U SI N G T H E BAT T ERY PACK GETTING STARTED Perform step 1) of “CHARGING THE BATTERY Hook on. PACK”. Approximate recording time (unit: min.) Battery pack Viewfinder on LCD monitor on BN-V11U Push in. (50) (45) BN-V12U (optional) (50)
- Page 7 Consult an However, it cannot be used as an AC adapter. authorized JVC dealer for replacement, or set the • To avoid interference with reception, do not use date/time as necessary before you start shooting.
- Page 8 Grip Adjust m e nt Tripod M ount ing 1) Separate the Velcro strip. Align the screw and camera direction stud on the 2) Pass your right hand through the loop and grasp tripod with the tripod mounting socket . Then the grip.
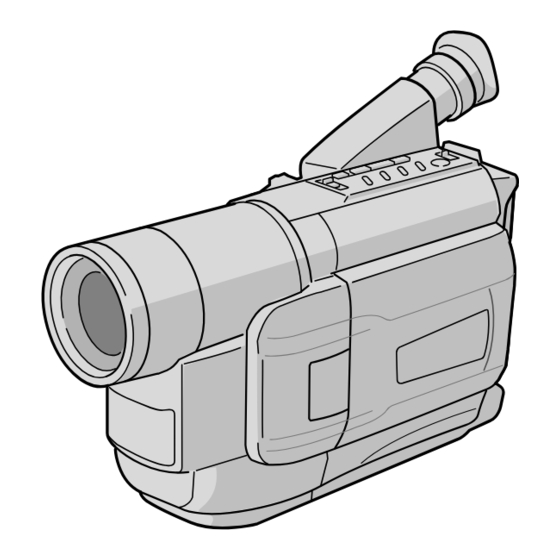
- Page 9 CONTROLS, CONNECTORS AND INDICATORS Eyepiece Refer to this diagram while reading the instructions. During shooting & Keep the lens cap attached to Cassette ) q w e the camcorder. holder LCD monitor Viewfinder 90° 90° 180° Turn the gear to Speaker take up slack.
- Page 10 • MENU Wheel [–, +] ........pg. 18 • REC TIME Button ........pg. 24 • BRIGHT Wheel [–, +] ........pg. 11 • ANIM. Button ..........pg. 24 • TRACKING Wheel [–, +] ......pg. 14 START/STOP Button (Functions the same as Snapshot Button [SNAPSHOT] .....
- Page 11 RECORDING PLAYBACK Set REC MODE, S-VHS (S-VHS ET), TAPE Load a tape ( pg. 8, “Loading/Unloading A LENGTH and DATE/TIME in SYSTEM MENU. Cassette”). pg. 18 – 21, “MENU SETTINGS”) Set the Power Switch to “ ”. To start playback, press 4/6 Remove the lens cap.
- Page 12 Pic t ure St a bilize r BASIC FEATURES To compensate for unstable images caused by Sna pshot camera-shake, particularly at high magnification. You can record still images that look like photo- 1) Press P. STABILIZER appears. graphs onto a tape. 2) To switch off the Picture Stabilizer, press 1) Perform step 1 of “RECORDING”...
- Page 13 Once the zoom level indiator • It is recommended that you consult your nearest reaches the top, all magnification from that point JVC dealer for replacing the video light. is through digital processing. Quic k Re vie w • When using Digital Zoom, the quality of image may suffer.
- Page 14 Tra c k ing Count e r M e m ory Eliminates noise bars that appear on-screen during Makes it easier to locate a specific tape segment. playback. To activate Manual Tracking: 1) Press COUNTER R/M and hold for more than 1) Press the TRACKING Wheel for approx.
- Page 15 4) Engage the VCR’s Record-Pause mode and YTU94146A S-Video cable. press 4/6 Consult the JVC Service Center described on • Repeat steps 2) through 4) for additional editing, the sheet included in the package for details then stop the VCR and camcorder when finished.
- Page 16 U sing T he Ca sse t t e Ada pt e r Conne c t ion To A Pe rsona l Com put e r Use this to play back an S-VHS-C/VHS-C video You can transfer image data from the camcorder to cassette recorded with this camcorder on a S-VHS/ a PC using Digital Photo Navigator.
- Page 17 INSTRUCTIONS Eyepiece Refer to this diagram while reading the instructions. During shooting & Keep the lens cap attached to ) q w e Cassette the camcorder. holder LCD monitor Viewfinder 90° 90° 180° Turn the gear to Speaker take up slack. Transmitted beam 180°...
- Page 18 CAM ERA M EN U MENU SETTINGS FOCUS Set the Power Switch to “ ”. If correct focus cannot be obtained with AUTO Press the MENU Wheel in. The Menu FOCUS, set to MANU to use manual focusing. Screen appears. Rotate the MENU Wheel “...
- Page 19 M.W.B. TITLE If the white balance is correct, all other colors will Allows you to superimpose one of eight preset be accurately reproduced. titles in 2 different languages. Change the language in TITLE LANG. ( pg. 21) in SYSTEM AUTO : White balance is adjusted MENU.
- Page 20 Technology). S-VHS REC appears during recording. OFF: Records in VHS on a VHS or S-VHS cassette. • JVC EHG (Extra High Grade) tapes are recommended for superior results. Use S-VHS tape for storing recordings for an extended period or for recording important scenes, as it enables higher-quality recording and playback.
- Page 21 TAPE LENGTH TELE MACRO Allows you to set the tape length depending on the When set to “ON”, you can shoot a subject as large tape used: T20=20 minutes, T30=30 minutes, as possible at a distance of approx. 60 cm T35=35 minutes, T40=40 minutes.
- Page 22 Fa de /Wipe Effe c t s ADVANCED FEATURES Fade- or wipe-in works at recording start, and fade- N ight -Alive or wipe-out works at recording end. Makes dark subjects or areas even brighter than 1) Set the Power Switch to “...
- Page 23 Progra m AE Wit h Spe c ia l Effe c t s Digit a l Effe c t s 1) Set the Power Switch to “ ”. 1) Set the Power Switch to “ ”. 2) Press P.AE repeatedly until the desired mode 2) Press DIGIFECT repeatedly until the desired appears.
- Page 24 USING THE REMOTE CONTROL UNIT (GR-SXM745 only) Make sure the remote control is pointed at the remote sensor Pla yba c k Z oom 5) To begin Insert Editing, press START/STOP When the counter reaches “0:00:00”, editing To magnify the recorded image up to 10X at any stops automatically and the camcorder enters time during playback.
- Page 25 TROUBLESHOOTING Before consulting your JVC dealer, please check the following to see if you can correct the problem yourself. Vertical white lines appear when shooting a very Playback picture is blurred or interrupted. bright object. • The video heads are dirty or worn out. Consult your •...
- Page 26 • Do not use near flammable or explosive materials. 2. Store cassettes . . . • It is recommended that you consult your nearest JVC dealer for ..away from heaters or other heat sources..out of direct sunlight.
- Page 27 If malfunctioning occurs, stop using the unit immediately and Reorient or relocate the receiving antenna. consult your local JVC dealer. Increase the separation between the equipment and receiver. Connect the equipment into an outlet on a circuit different For Your M a int e na nc e from that to which the receiver is connected.
- Page 28 Some accessories are not available in some areas. Lens : F1.6, f = 3.9 mm to 62.4 mm, Please consult your nearest JVC dealer for details 16:1 power zoom lens with auto on accessories and their availability. iris and macro control, filter diameter 40.5 mm...
- Page 29 This file has been downloaded from: www.UsersManualGuide.com User Manual and User Guide for many equipments like mobile phones, photo cameras, monther board, monitors, software, tv, dvd, and othes.. Manual users, user manuals, user guide manual, owners manual, instruction manual, manual owner, manual owner's, manual guide, manual operation, operating manual, user's manual, operating instructions, manual operators, manual operator, manual product, documentation manual, user maintenance, brochure, user reference, pdf manual Downloaded from:...