Table of Contents
Advertisement
COMPACT
VHS CAMCORDER
GR-SXM536
INSTRUCTIONS
CONTENTS
SAFETY PRECAUTIONS
PROVIDED ACCESSORIES
AUTOMATIC
DEMONSTRATION
GETTING STARTED
VIDEO RECORDING &
PLAYBACK
VIDEO RECORDING ............ 18 – 21
VIDEO PLAYBACK .............. 22 – 26
DIGITAL STILL CAMERA (D.S.C.)
RECORDING &
PLAYBACK
D.S.C. RECORDING ............ 28 – 29
D.S.C. PLAYBACK .............. 30 – 34
ADVANCED
FEATURES
REFERENCES
TROUBLESHOOTING ............ 55 – 57
DETAILS ........................... 58 – 59
INDEX ............................. 60 – 63
TERMS ............................ 64 – 65
CAUTIONS ........................ 66 – 68
SPECIFICATIONS ......................... 69
LYT0753-001A
ENGLISH
2 – 3
4
6
7 – 16
17 – 26
27 – 34
35 – 53
54 – 69
EN
Advertisement
Chapters
Table of Contents
Troubleshooting

Related Manuals for JVC GR-SXM536


Summary of Contents for JVC GR-SXM536
- Page 1 COMPACT VHS CAMCORDER GR-SXM536 INSTRUCTIONS CONTENTS SAFETY PRECAUTIONS PROVIDED ACCESSORIES AUTOMATIC DEMONSTRATION GETTING STARTED VIDEO RECORDING & PLAYBACK 17 – 26 VIDEO RECORDING ... 18 – 21 VIDEO PLAYBACK ... 22 – 26 DIGITAL STILL CAMERA (D.S.C.) RECORDING & PLAYBACK 27 –...
-
Page 2: Safety Precautions
Dear Customer, Thank you for purchasing the JVC Compact VHS camcorder. Before use, please read the safety information and precautions contained in the following pages to ensure safe use of this product. Using This Instruction Manual •All major sections and subsections are listed in the Table Of Contents on the cover. -
Page 3: Important Safety Instructions
When the equipment is installed in a cabinet or on a shelf, make sure that it has sufficient space on all sides to allow for ventilation (10 cm (3-15/16") or more on both sides, on top and at the rear). Do not block the ventilation holes. -
Page 4: Provided Accessories
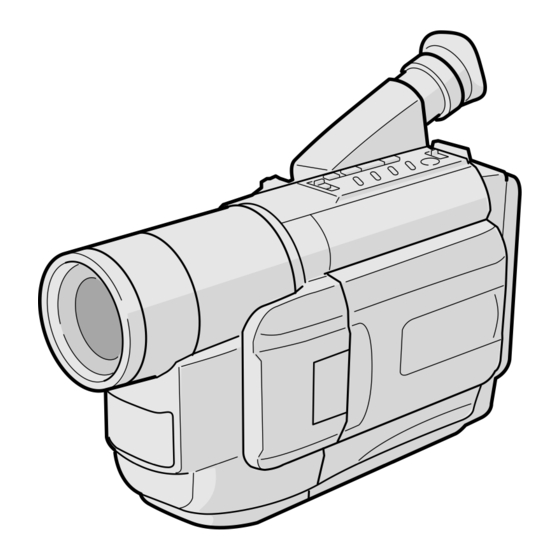
•AC Adapter AP-V10U •Remote Control Unit RM-V715U •CD-ROM The CD-ROM contains the following 4 software programs: Picture Navigator Presto! Mr. Photo PhotoAlbum ImageFolio PROVIDED ACCESSORIES •Cassette Adapter (VHS Playpak) C-P7U •Shoulder Strap •AAA (R03) Battery x 2 (for Remote Control Unit) (for Windows •PC Connection Cable •Battery Pack... - Page 5 How To Attach The Lens Cap To protect the lens, attach the provided lens cap to the camcorder as shown in the illustration.
- Page 6 If the Power Zoom Lever is not moved for more than 1 minute after that, the demonstration will resume. “DEMO MODE” remains “ON” even if the camcorder power is turned off. To cancel Automatic Demonstration, set the Power Switch to “...
-
Page 7: Table Of Contents
GETTING STARTED GETTING STARTED CONTENTS Power ... 8 – 9 Grip Adjustment ... 10 Viewfinder Adjustment ... 10 Shoulder Strap Attachment ... 10 Tripod Mounting ... 10 Date/Time Settings... 11 Recording Format Setting ... 12 – 13 Recording Mode Setting ... 14 Tape Length Setting ... -
Page 8: Power
1. Perform steps 1 through 3 of “CHARGING THE BATTERY PACK”. 2. Press REFRESH on the camcorder for over 2 seconds. The REFRESH lamp on the camcorder blinks to indicate discharging has started. -
Page 9: Power
ATTENTION: Before detaching the power source, make sure that the camcorder’s power is turned off. Failure to do so can result in a camcorder malfunction. Charge marker A charge marker is provided on the battery pack to help you remember whether it has b een charged or not. -
Page 10: Grip Adjustment
Then tighten the screw. CAUTION: When using a tripod, be sure to open and extend its legs fully to Stabilize the camcorder. To prevent damage to the unit caused by falling over, do not use a small-sized tripod. (cont.) ”... -
Page 11: Date/Time Settings
“ RETURN”. Press the MENU Wheel in to close the Menu Screen. NOTE: To display the date and time in the camcorder’s display and on a connected TV, see “Date/Time Insert” ( For other notes, ”. -
Page 12: Recording Format Setting
VIDEO Lamp Power Switch Display: when a VHS cassette is loaded. Menu Screen – S – VHS ET Setting Menu – Normal Screen GETTING STARTED Recording Format Setting Set the recording format according to the format of the tape used or type of recording you wish to perform. Set the Power Switch to “... -
Page 13: Recording Playback
— When tapes recorded in S-VHS or S-VHS ET mode are played back on a VCR equipped with the SQPB (S-VHS QUASI PLAYBACK) function, S-VHS picture quality is not available. — Tapes recorded in S-VHS ET mode cannot be played back on some VCRs, including some JVC VCRs (eg: HR-S6600U, HR-SC1000U, etc.). -
Page 14: Recording Mode Setting
VIDEO Lamp Display REC MODE REC MODE Menu X I T Recording mode indicator Display TAPE LENGTH TAPE LENGTH Menu Tape length T 3 0 indicator GETTING STARTED Recording Mode Setting Set the tape recording mode depending on your preference. Set the Power Switch to “... -
Page 15: Loading/Unloading A Cassette
Make sure the Erase Protection tab is in the position that allows recording. If not, slide the tab. Some cassettes have removable tabs. If the tab has been removed, cover the hole with adhesive tape. The cassette holder cannot be opened while the camcorder is in the record mode. -
Page 16: Picture Mode Setting
The number of storable images depends on the selected Picture mode as well as the composition of the subjects in the images. The numbers listed above are applicable when the camcorder’s memory is empty (when there are no sample images stored). (cont.) ”. The VIDEO Lamp... - Page 17 VIDEO RECORDING & PLAYBACK VIDEO RECORDING & PLAYBACK CONTENTS VIDEO RECORDING ... 18 – 21 Shooting While Watching The Viewfinder ... 18 Shooting While Watching The LCD Monitor ... 18 LCD Monitor Brightness Adjustment ... 18 Power Switch Position ... 18 Journalistic Shooting ...
-
Page 18: Video Recording
Set the Power Switch to “ REFRESH for approx. 1 second to select “VIDEO”. The VIDEO Lamp lights and the camcorder enters the Record-Standby mode. “PAUSE” is displayed in the LCD monitor. -
Page 19: Journalistic Shooting
NOTES: If the Record-Standby mode continues for 5 minutes without performing Zoom or any other operations, the camcorder’s power shuts off automatically. Set the Power Switch to “OFF”, and then back to “ turn the camcorder on again. If you are recording on a cassette from the middle (such as when a tape is removed and re-inserted during recording), use the Retake function ( of it. -
Page 20: Zooming
Approximate • When shooting scenes with low-contrast backgrounds. zoom ratio Switch off the Picture Stabilizer when recording with the camcorder on a tripod. The “ cannot be used. This function cannot be activated during the “Night- Alive” ( “VIDEO ECHO” mode ( To produce the zoom in/out effect, or an pg. -
Page 21: Quick Review (For Scenes Recorded Onto A Tape)
Do not use near flammable or explosive materials. It is recommended that you consult your nearest JVC dealer for replacing the video light. : To brighten the scene when when you use the video light. ) does not blink pg. -
Page 22: Video Playback
•Press 2 to rewind, or 3 to fast-forward the tape during Stop mode. NOTES: The camcorder shuts off automatically after about 5 minutes in Stop mode. To turn on again, set the Power Switch to “OFF”, then to “ When the Power Switch is set to “... -
Page 23: Tracking
” again. “AT” blinks. When Auto Tracking finishes, the indication disappears. When noise bars appear during playback, the camcorder enters the Auto Tracking mode and “AT” is displayed. Manual Tracking may not work with tapes recorded on other VCRs or camcorders. -
Page 24: Basic Connections
Basic Connections These are some basic types of connections. When making the connections, refer also to your VCR and TV instruction manuals. A. Connection to a TV or VCR equipped with an S-VIDEO IN and A/V input connectors Use optional S-Video and Audio cables. * When connecting the cables, open this cover. -
Page 25: Tape Dubbing
Basic Connections Make sure all units are turned off. Connect the camcorder to a TV or VCR as shown in the illustration ( If using a VCR . . . go to step 3. If not . . . go to step 4. -
Page 26: Video Playback
Using The Cassette Adapter (VHS Playpak) Use this to play back an S-VHS-C/VHS-C video cassette recorded with this camcorder on a VHS VCR. It is fully compatible with any S-VHS/VHS video cassette recorder. The cassette adapter is battery powered and automatically performs tape loading and unloading. -
Page 27: Recording Playback
DIGITAL STILL CAMERA (D.S.C.) RECORDING & PLAYBACK DIGITAL STILL CAMERA (D.S.C.) RECORDING & PLAYBACK CONTENTS D.S.C. RECORDING ... 28 – 29 Quick Review (for still images stored in the built-in memory) ... 29 D.S.C. PLAYBACK ... 30 – 34 Normal Playback ... 30 Slide Show ... -
Page 28: D.s.c. Recording
Normal Screen When shooting a still image, it is not recorded onto the tape, but it is stored in the camcorder's built-in memory in the selected Picture Mode. A stored still image data can be transferred to a PC, saved, and processed using a Paint Software program or Mr. -
Page 29: Quick Review
“Deleting Images” function (Blinking) pg. 33). If a Snapshot is taken while the camcorder is in the WIDE mode ( pg. 41), the Snapshot image is recorded without the black bars at the top and bottom of the screen. -
Page 30: D.s.c. Playback
REFRESH Button Makes the DSC lamp come on. Previous Page (2) Button Next Page (3) Button Display To move the page next Display Menu Screen Normal Playback Still images shot using this camcoder are automatically numbered, then stored in numerical order in the built-in memory. -
Page 31: Index Screen
Picture mode Index number Selected image < > EXIT INDEX Protect icon Display < > E X I T INDEX INDEX Menu Playback Screen INDEX Screen The images you shot can be displayed together with their index information. Convenient for checking images shot beforehand, the INDEX Screen also shows the Picture mode as well as which images are protected against accidental erasure. -
Page 32: Protecting Images
REFRESH Button Makes the DSC lamp come on. Power Switch Display < > E X I T P R O T E C T Normal playback If Protection is removed < > E X I T P R O T E C T Normal playback Protecting Images The Protect mode helps prevent the accidental erasure of... -
Page 33: Deleting Images
CAUTION: While “ENTER” is selected on the Delete Execute Menu and it is blinking, switching off the camcorder or removing the power supply unit (battery pack or AC Adapter) may cause the camcorder’s built-in memory to become corrupt. Never remove the power supply unit at this stage. -
Page 34: Connection To A Windows Pc
Open the cover. PC connection cable Connection To A Windows Image data stored in the camcorder’s built-in memory can be transferred to a Windows provided image transfer software, Picture Navigator. The image data transferred to a Windows further processed using Mr. Photo Gold, and the still image processed on the PC can be inserted onto a tape pg. -
Page 35: Features
ADVANCED FEATURES Night-Alive ... 36 Fade/Wipe Effects ... 37 Program AE With Special Effects ... 38 Digital Effects ... 39 Using Menus For Detailed Adjustment ... 40 – 42 Snapshot ... 43 Exposure Control ... 44 Focusing ... 45 White Balance Adjustment ... 46 Manual White Balance Operation ... -
Page 36: Night-Alive
Night-Alive does not work when LIGHT OFF/AUTO/ ON is set to “AUTO” or “ON” ( During Night-Alive, it may be difficult to bring the camcorder into focus. To prevent this, use of a tripod is recommended. ” or “ ”. Press ”. -
Page 37: Fade/Wipe Effects
REFRESH Button FADE/WIPE Button DSC Lamp Power Switch Recording Start/Stop Button NOTE: Pressing and holding the Recording Start/Stop Button allows you to vary the length for the image during fade in/out or wipe in/out. Fade/Wipe Effects These effects let you make pro-style scene transitions. Fade- or wipe-in works at recording start, and fade- or wipe-out works at recording end. -
Page 38: Program Ae With Special Effects
REFRESH Button P.AE Button DSC Lamp Power Switch NOTES: Only one mode can be engaged at a time. The screen becomes slightly dark in the High Speed Shutter mode. Use in well-lit situa- tions. In the “High Speed Shutter” or “Sports” modes, picture color may be adversely affected if the subject is lit by alternating discharge-type light sources such as... -
Page 39: Digital Effects
REFRESH Button DIGIFECT Button DSC Lamp Power Switch NOTES: Digital Effects can be changed during recording or during Record-Standby. Digital zoom ( pg. 20) cannot be used when the “VIDEO ECHO” mode is activated. This function cannot be activated during the Night-Alive ( pg. -
Page 40: Using Menus For Detailed Adjustment
– Normal Screen ADVANCED FEATURES Using Menus For Detailed Adjustment This camcorder is equipped with an easy-to-use, on-screen menu system that simplifies many of the more detailed camcorder settings. The operation system depends on the function you wish to select. -
Page 41: Camera Menu
46). S.LX NORMAL Allows you to superimpose one of eight preset titles ( TITLE* Makes the date/time settings appear in the camcorder or on a connected monitor DATE/TIME pg. 47). DISP.* SYSTEM MENU This Menu Screen cannot be accessed while recording. - Page 42 1 minute after that, the demonstration will resume. NOTE: When a tape whose Erase Protection tab is in the position that allows recording is loaded in the camcorder, demonstration is not available. Automatic demonstration will not take place. pg. 12).
-
Page 43: Snapshot
This interesting feature lets you record two types of digital still images that look like photographs onto a tape, as well as keeping them in the camcorder’s built-in memory. It is a great way to spice up footage of events such as parties, weddings and graduations. -
Page 44: Exposure Control
REFRESH Button DSC Lamp Power Switch To brighten the image – – ADVANCED FEATURES Exposure Control This feature automatically adjusts the iris for the best available picture quality, but you can override it and make the adjustment manually. Manual exposure adjustment is recommended in the following situations: •... -
Page 45: Focusing
When the focus level cannot be adjusted any farther or closer, “ ” or “ Focusing AUTO FOCUS The camcorder’s Full Range AF system offers continuous shooting ability from close-up to infinity. However, correct focus may not be obtainable in the situations listed below (in these cases use manual focusing): •When two subjects overlap in the same scene. -
Page 46: White Balance Adjustment
If the white balance is correct, all other colors will be accurately reproduced. The white balance is usually adjusted automatically. However, more advanced camcorder operators control this function manually to achieve a more professional color/tint reproduction. Set the Power Switch to “... -
Page 47: Date/Time Insert
Date/Time Insert Allows you to display the date and time in the camcorder or on a connected color monitor, as well as to record them manually or automatically. You should have already performed the Date/ Time Setting procedure ( pg. 11). -
Page 48: Animation
I NT . T I ME NOTES (for Animation and Time-Lapse): For best results, make sure the camcorder is secured when shooting in Animation or Time-Lapse mode. Fade- or wipe-in/out cannot be performed during Animation or Time-Lapse shooting. Before performing other operations following Animation or Time-Lapse recording, make sure the Animation or Time-Lapse mode is deactivated. -
Page 49: Using The Remote Control Unit
USING THE REMOTE CONTROL UNIT The Full-Function Remote Control Unit can operate this camcorder from a distance as well as the basic operations (Playback, Stop, Pause, Fast-Forward and Rewind) of your VCR. Buttons With the camcorder’s Power Switch set to “... -
Page 50: Installing The Batteries
USING THE REMOTE CONTROL UNIT Remote sensor Installing The Batteries The remote control uses two “AAA (R03)” size batteries. See “General Battery Precautions” pg. 66). Open the battery compartment cover as illustrated. Insert two “AAA (R03)” size batteries in the correct direction. -
Page 51: Playback Zoom
2) Press the ZOOM Buttons (T/W) on the remote control. Make sure the remote control is pointed at the camcorder’s remote sensor. Pressing T zooms in. To End Zoom ..press and hold W until magnification returns to normal. -
Page 52: Insert Editing (Video)
INSERT, press and release PAUSE on the Remote Control. The Insert Editing indicator appears and the Insert Editing mode is engaged. When the scene the camcorder is aimed at appears on the screen, go to Audio dubbing indicator the next step. -
Page 53: Insert Editing
Insert Editing (Insert A Still Image From The Built-in Memory Onto A Tape) You can insert a still image stored in the camcorder’s built-in memory into a previously recorded tape, replacing a section of the original recording with minimal picture distortion at the in- and out-points. -
Page 54: References
REFERENCES CONTENTS TROUBLESHOOTING ... 55 – 57 DETAILS ... 58 – 59 INDEX ... 60 – 63 Controls, Connectors And Indicators ... 60 – 61 Indications ... 62 – 63 TERMS ... 64 – 65 CAUTIONS ... 66 – 68 SPECIFICATIONS ... -
Page 55: Troubleshooting
TROUBLESHOOTING If, after following the steps in the chart below, the problem still exists, please consult your JVC dealer. The camcorder is a microcomputer-controlled device. External noise and interference (from a TV, a radio, etc.) might prevent it from functioning properly. In such cases, first disconnect its power supply unit (battery pack, AC Adapter, etc.);... - Page 56 18). Before recording in the Animation mode at the very beginning of a tape, set the camcorder to the Recording mode for about 5 seconds, so that the tape runs smoothly. Using the Fade-in function at this point is a good way to begin an animated program ( pg.
- Page 57 (including ones for which you performed the “Protect” function) stored in the camcorder’s memory. If you wish to keep any of the still images that are stored in memory, before initialization first transfer them to a PC and save them. If image data is corrupt, transfer is impossible.
-
Page 58: Details
Detach the battery from the camcorder. • The date/time cannot be stored in memory if the built-in clock battery runs out. Consult an authorized JVC dealer for replacement, or set the date/time as necessary before you start shooting. DETAILS ”, “ ” or “... - Page 59 Standby mode has continued for over 5 minutes, recording may not start immediately. While shooting, sound is not heard from the speaker. The “TBC” indicator turns green (gray with a camcorder equipped with a black/white viewfinder) while TBC is working. (Time Base Corrector) TBC does not work during still playback and shuttle search.
-
Page 60: Index
INDEX Controls, Connectors And Indicators & 6 7 8 9... -
Page 61: Other Parts
Controls Video Light Switch [LIGHT OFF/AUTO/ON] ... Stop Button [STOP] ... •Retake Rewind Button [RETAKE R] ... •Quick Review Button [ R] ... •Rewind Button [R] ... •Previous Page Button ... Play/Pause Button ... •Retake Forward Button [RETAKE F] ... •Fast-Forward Button [F] ... -
Page 62: Indications
Indications During Recording •Tape Remaining Time ... Blinks when a tape is about to reach its end. •D.S.C. Mode Indicator ... “DSC” appears when the D.S.C. mode is selected. Recording Mode Indicator (SP/EP) ... Digital Effect Indicator ... Displayed at for approx. -
Page 63: Indications During Playback
(battery, UNIT IN etc.) and wait a few minutes for them to clear. When it does, you can resume using the SAFEGUARD MODE camcorder. If the indication remains, consult your nearest JVC dealer. REMOVE AND REATTACH BATTERY •... -
Page 64: Terms
Cassette Adapter ... pg. 26 Charge Marker ... pg. 9 Charging The Battery Pack ... pg. 8 Classic Film Effect ... pg. 39 Clean The Camcorder ... pg. 68 COM Port (RS-232C) ... pg. 34 Connection To A VCR/TV ... pg. 24 ®... - Page 65 Padlock Mark ... pg. 32 Picture Mode Setting ... pg. 16 Picture Stabilizer ... pg. 20 Pin-Up Image ... pg. 29, 43 Playback (D.S.C.) ... pg. 30 Playback (VIDEO) ... pg. 22 Playback Special Effects ... pg. 23 Playback Zoom ... pg. 51 Power Switch Position ...
-
Page 66: Cautions
In case of connecting the unit’s AC Adapter to an AC wall outlet other than American National Standard C73 series type use an AC plug adapter, called a “Siemens Plug”, as shown. For this AC plug adapter, consult your nearest JVC dealer. Plug adapter Video Light DANGER: •The video light becomes extremely hot. -
Page 67: Main Unit
... vertically, in their original cases. Main Unit 1. For safety, DO NOT ..open the camcorder’s chassis..disassemble or modify the unit..short-circuit the terminals of the battery pack. Keep it away from metallic objects when not in use. -
Page 68: Lcd Monitor
Serious malfunctioning If malfunctioning occurs, stop using the unit immediately and consult your local JVC dealer. CAUTIONS For Your Maintenance 1. After Use Set the Power Switch to “OFF” to turn off the camcorder. -
Page 69: Specifications
•Compact S-VHS ( •Compact VHS ( •Active Carrying Bag CB-V7U Some accessories are not available in some areas. Please consult your nearest JVC dealer for details on accessories and their availability. : Electronic viewfinder with 0.5" black/white CRT : Auto/Manual adjustment : 2.5"... - Page 70 MEMO...
- Page 71 MEMO...
- Page 72 VICTOR COMPANY OF JAPAN, LIMITED Printed in Malaysia COPYRIGHT© 2000 VICTOR COMPANY OF JAPAN, LTD. 1100MKV...