Table of Contents
Advertisement
Quick Links
Advertisement
Table of Contents

Related Manuals for Elation ARTISTE DaVinci


Summary of Contents for Elation ARTISTE DaVinci
- Page 1 User Manual...
- Page 2 Product names used in this document may be trademarks or registered trademarks of their respective companies and are hereby acknowledged. All non-ELATION brands and product names are trademarks or registered trademarks of their respec- tive companies.
-
Page 3: Table Of Contents
TA B L E O F C O N T E N T S General Information Limited Warranty Safety Precautions Maintenance Guidelines Overview Installation Guidelines E-Fly Wireless DMX Set Up Remote Device Management (RDM) System Menu Record Controller Fan Control and Low Noise Operation DMX Traits Colors and Gobos Dimmer Curves... -
Page 4: General Information
BOX CONTENTS Power Cable (x1) Omega Brackets (x2) CUSTOMER SUPPORT Contact ELATION Service for any product related service and support needs. Also visit forums.elationlighting.com with questions, comments or suggestions. ELATION SERVICE USA - Monday - Friday 8:00am to 4:30pm PST 323-582-3322 | Fax 323-832-9142 | support@elationlighting.com... -
Page 5: Limited Warranty
It is the owner’s responsibility to establish the date and place of purchase by acceptable evidence, at the time service is sought. B. For warranty service, send the product only to the Elation Professional factory. All shipping charges must be pre-paid. If the requested repairs or service (including parts replacement) are within the terms of this warranty, Elation Professional will pay return shipping charges only to a designated point within the United States. -
Page 6: Safety Precautions
This fixture is a sophisticated piece of electronic equipment. To guarantee a smooth opera- tion, it is important to follow all instructions and guidelines in this manual. Elation Profes- sional is not responsible for injuries and/or damages resulting from the misuse of this fixture due to the disregard of the information printed in this manual. - Page 7 S A F E T Y P R E C A U T I O N S • DO NOT TOUCH the fixture housing during operation. Turn OFF the power and allow ap- proximately 15 minutes for the fixture to cool down before servicing. •...
-
Page 8: Maintenance Guidelines
Regular inspections are recommended to insure proper function and extended life. There are no user serviceable parts inside this fixture. Please refer all other service issues to an autho- rized Elation service technician. Should you need any spare parts, please order genuine parts from your local Elation dealer. -
Page 9: Overview
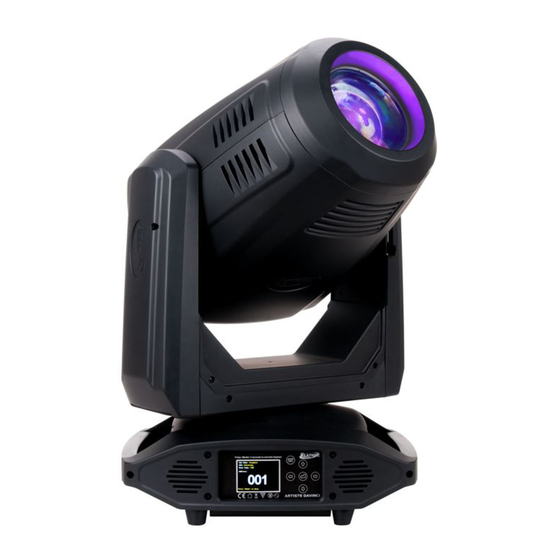
O V E R V I E W 1. LED Lens Array 2. Wireless Indicator 3. LCD Menu Function Display 4. MODE/ESC Button 5. LEFT Button 6. DOWN Button ENTER Button 8. UP Button 9. RIGHT Button 10. RJ45 Ethernet IN 11. -
Page 10: Installation Guidelines
I N S TA L L AT I O N G U I D E L I N E S FLAMMABLE MATERIAL WARNING Keep fixture minimum 5.0 feet (1.5m) away from flammable materials and/or pyro- technics. ELECTRICAL CONNECTIONS A qualified electrician should be used for all electrical connections and/or installa- tions. - Page 11 I N S TA L L AT I O N G U I D E L I N E S OMEGA BRACKET INSTALLATION Insert the Omega Brackets into the matching holes on the bottom of the fixture. Secure the Omega Brackets to the fixture by turning each quick-lock fastener ¼ turn clockwise; making sure the fastener is completely locked.
- Page 12 I N S TA L L AT I O N G U I D E L I N E S CAUTION: Falling fixtures can cause severe injury or serious equipment damage! For this reason, fixtures should be installed and inspected only by qualified personnel. Do not in- stall the unit if you lack the qualifications to do so, or if you have doubts about the safety and security of the installation setup or location! SAFETY CABLE:...
- Page 13 LEDs. This issue is not specific only to Elation lighting fixtures, but rather it is a common issue with lighting fixtures from all manufacturers. Although there is no true way to fully prevent this issue from happening, the guidelines below can reduce the risk of potential damage.
-
Page 14: E-Fly Wireless Dmx Set Up
DMX wireless signal from another E-FLY wireless DMX Transceiver when E-FLY is enabled. Make sure to confirm if any E-FLY wireless channels are being used in the area where the fixture is being installed. ELATION E-FLY WIRELESS TRANSCEIVER only has 0-14 wireless channels, NO CH 15. - Page 15 E - F LY W I R E L E S S D M X S E T U P WIRELESS E-FLY INSTALLATION LOCATION GUIDELINES Wireless DMX signal can penetrate walls, glass, metal, and most objects. However, there are many factors that can affect and/or interrupt the wireless DMX signal, one of which is the presence of people.
-
Page 16: Remote Device Management (Rdm)
R E M O T E D E V I C E M A N A G E M E N T ( R D M ) NOTE: In order for RDM to work properly, RDM enabled equipment must be used through- out the entire system, including DMX data splitters and wireless systems. -
Page 17: System Menu
S Y S T E M M E N U The fixture includes an easy to navigate system menu. The control panel (see image below) located on the front of the fixture, provides access to the main system menu and is where all necessary system adjustments are made to the fixture. - Page 18 S Y S T E M M E N U ELATION ARTISTE DAVINCI SYSTEM MENU Supports Software Versions: > 1.4.0 Features subject to change without notice. Rotation direction (clockwise/counter-clockwise) and control of effects depend on head orientation and pan/tilt settings.
- Page 19 S Y S T E M M E N U Supports Software Versions: > 1.4.0 MAIN MENU SUB MENU OPTIONS / VALUES DESCRIPTION Password = 050 Password for service settings Clear Err Info On / Off Clear error messages E-Fly on by default when fixture Service Setting DFLT Pow EFly On On / Off...
- Page 20 S Y S T E M M E N U Supports Software Versions: > 1.4.0 MAIN MENU SUB MENU OPTIONS / VALUES DESCRIPTION Reset All Reset all motors Reset Pan & Tilt Reset pan and tilt motors RESET Reset Colors Reset color wheel motors FUNCTION Reset Gobos...
- Page 21 S Y S T E M M E N U PERSONALITY - Status Settings - Address Via DMX When enabled, allows the user to define the desired DMX address via an external controller. NOTE: This explanation below assumes the fixture DMX address is set to 001. If fixture DMX address is not at 001, you must adjust the channel numbers accordingly in order for this feature to work.
- Page 22 S Y S T E M M E N U PERSONALITY - Reset Default (011) CAUTION! ONLY QUALIFIED TECHNICIANS SHOULD PERFORM THIS FUNCTION. SAVED WHITE BALANCE IS ERASED AFTER A RESET IS PERFORMED. This function restores all fixture settings to the factory default settings. The password is 011 and must be entered each time a reset is performed.
-
Page 23: Record Controller
R E C O R D C O N T R O L L E R The fixture features an integrated DMX recorder that can be used to transmit the pro- grammed scenes from your DMX controller to the moving head. Adjust the desired scene num- bers via the encoder (from –... - Page 24 R E C O R D C O N T R O L L E R EXAMPLE: WORKING WITH BUILT-IN PROGRAMS Program 2 includes scenes: 10, 11, 12, & 13 Program 4 includes scenes: 8, 9, & 10 Program 6 includes scenes: 12, 13, 14, & 15 Auto Pro Part 1 is Program 2 Auto Pro Part 2 is Program 3 Auto Pro Part 3 is Program 6...
-
Page 25: Fan Control And Low Noise Operation
F A N C O N T R O L A N D L O W N O I S E O P E R AT I O N The Artiste DaVinci is a high-performance fixture suited for multiple applications. For noise critical environments such as Theater, Opera, or Orchestral Halls, it offers various fan opera- tion modes which remove unwanted noise distractions for the audience and performers. -
Page 26: Dmx Traits
D M X T R A I T S ELATION ARTISTE DAVINCI DMX Channel Traits Supports Software Versions: 1.4.0 Features subject to change without notice. Rotation direction (clockwise/counter-clockwise) and control of effects depends on head orientation and pan/tilt settings. CHANNEL... - Page 27 D M X T R A I T S CHANNEL FUNCTION VALUES BASIC STANDARD EXTENDED Rotating Gobos, continuous rotation (continued) 150 - 169 Gobo 5 Shake, slow to fast 170 - 189 Gobo 6 Shake, slow to fast 190 - 221 Gobo wheel rotation forward, fast to slow 222 - 223 No rotation 224 - 255 Gobo wheel rotation reverse, slow to fast Rotating Gobo Index, rotating gobo rotation...
- Page 28 D M X T R A I T S CHANNEL FUNCTION VALUES BASIC STANDARD EXTENDED Rotating Prism, Prism/Gobo Macros 000 - 031 Open 032 - 079 3 Prism 080 - 127 Linear Prism 128 - 135 Macro 1 136 - 143 Macro 2 144 - 151 Macro 3 152 - 159 Macro 4 160 - 167 Macro 5...
- Page 29 D M X T R A I T S CHANNEL FUNCTION VALUES BASIC STANDARD EXTENDED Shutter/Strobe 000 - 031 Shutter closed 032 - 063 Shutter open 064 - 095 Strobe effect, slow to fast 096 - 127 Shutter open 128 - 159 Pulse effect in sequences 160 - 191 Shutter open 192 - 223 Random strobe effect, slow to fast 224 - 255 Shutter open...
- Page 30 D M X T R A I T S CHANNEL FUNCTION VALUES BASIC STANDARD EXTENDED Color Macros (continued) 104 - 111 Macro 10 112 - 119 Macro 11 120 - 127 Macro 12 128 - 135 Macro 13 136 - 143 Macro 14 144 - 151 Macro 15 152 - 159 Macro 16 160 - 167 Macro 17...
- Page 31 D M X T R A I T S CHANNEL FUNCTION VALUES BASIC STANDARD EXTENDED Lamp On/Off, Reset, & Internal Programs (continued) 100 - 119 Internal Program 1 120 - 139 Internal Program 2 140 - 159 Internal Program 3 160 - 179 Internal Program 4 180 - 199 Internal Program 5 200 - 219 Internal Program 6...
-
Page 32: Colors And Gobos
C O L O R S A N D G O B O S **IMPORTANT NOTICE REGARDING GOBO DIMENSIONS AND CUSTOM GOBOS • OD = Outside Diameter • ID = Image Diameter Due to varying manufacturing processes, it is highly recommended to provide a gobo and holder sample from the fixture to 3rd party custom gobo vendors for accurate sizing. -
Page 33: Dimmer Curves
D I M M E R C U R V E S DIMMER 100% Time (ms) 0 Sec Rise Time Down Time 0 sec Fade Time 1 sec Fade Time Dimming Curve Ramp Effect Rise Time (ms) Down Time (ms) Rise Time (ms) Down Time (ms) Standard (default) -
Page 34: Error Codes
E R R O R C O D E S When the unit is powered on, it will automatically enter a “Reset/Test” mode, which brings all the internal motors to a home position. If an internal problem with one or more of the motors is detected, an error code will flash in the display in the form of “XX Er”... - Page 35 E R R O R C O D E S ERROR CODES Error codes are subject to change without any prior written notice. ERROR CODE DESCRIPTION The pan movement is not located in the default position after the reset. TILT The tilt movement is not located in the default position after the reset.
-
Page 36: Software Updates
The Elation Ethernet Updater is an EXE file, which only works on a PC System. Once you’ve The Elation Ethernet Updater is an EXE file, which only works on a PC System. Once you’ve received The Elation Ethernet Updater is an EXE file, which only works on a PC System. Once you’ve received... - Page 37 Once you have installed the Elation Ethernet Updater, it will launch automatically (unless you unchecked “Launch Elation Ethernet Updater”), or you can open it any time by clicking on the icon. unchecked “Launch Elation Ethernet Updater”), or you can open it any time by clicking on the Once you have installed the Elation Ethernet Updater, it will launch automatically (unless you icon.
- Page 38 S O F T W A R E U P D AT E S S O F T W A R E U P D A T E S Once opened, your local IP will automatically be identified. Click “Scan fixture” and create a S O F T W A R E U P D A T E S Once opened, your local IP will automatically be identified.
- Page 39 Click Update, then wait for the download Progress to reach 100% before closing Updater. Click Update, then wait for the download Progress to reach 100% before closing Updater. The Elation The Elation Ethernet Updater can update up to 31 fixtures via connection to a PC.
-
Page 40: Specifications
8 / 16 Bit Resolution Adjustable Movement Power/Voltage, Usage Patterns (On-Off Cycling), Control, and DMX, RDM, Art-Net, sACN Protocol Support Dimming. Elation’s E-FLY™ Internal Wireless DMX Trans- ceiver PHOTOMETRIC DATA Locking 5pin XLR DMX, RJ45 Ethernet, and 12,000 Total Lumen Output... -
Page 41: Dimensional Drawings
D I M E N S I O N A L D R A W I N G S 385mm [15.2in] 124mm [4.9in] 417mm [16.4in] 285mm [11.2in] 523mm [20.6in] Drawings not shown to scale. -
Page 42: Fcc Statement
F C C S TAT E M E N T This device complies with Part 15 of the FCC rules. Operation is subject to the following two conditions: (1) this device may not cause harmful interference, and (2) this device must ac- cept any interference received, including interference that may cause undesired operation. - Page 43 This page intentionally left blank.