Pioneer AVIC-F500BT Operation Manual
Advanced multimedia navigation system
Hide thumbs
Also See for AVIC-F500BT:
- Hardware user manual (24 pages) ,
- Connection diagram (8 pages) ,
- Quick start (3 pages)
Advertisement
Quick Links
Operation Manual
ADVANCED MULTIMEDIA NAVIGATION SYSTEM
AVIC-F500BT
Notice to all users:
Be sure to read "Important Information for the user" first!
"Important Information for the user" includes the
important information that you must understand before
using this navigation system.
This software requires that the navigation system is
properly connected to your vehicle's parking brake and
depending on your vehicle, additional installation may
be required. For more information, please contact your
Authorized Pioneer Electronics retailer or call us at
(800) 421-1404.
English
Advertisement

Related Manuals for Pioneer AVIC-F500BT


Summary of Contents for Pioneer AVIC-F500BT
- Page 1 This software requires that the navigation system is properly connected to your vehicle’s parking brake and depending on your vehicle, additional installation may be required. For more information, please contact your Authorized Pioneer Electronics retailer or call us at (800) 421-1404. English...
- Page 2 Contents Thank you for buying this Pioneer product. Please read through these operating instructions so you will know how to operate your model properly. After you have finished reading the instructions, keep this man- ual in a safe place for future reference.
- Page 3 Contents – Subscribing to the MSN Direct After the location is decided (Map service 47 Confirmation Screen) – Activating the MSN Direct What you can do with the “Map Confirmation function 47 Screen” 36 Browsing gas prices 47 Route... 36 Browsing movie times 48 Save as...
- Page 4 Contents – Making a call home easily 58 – Browsing for a song 73 – Dialing GOOG-411 59 Starting the video playback 74 Announcing incoming short mails 59 Using the touch panel keys (Video) 75 – Browsing for a video 76 Transferring the phone book 59 Using the “Function”...
- Page 5 Contents – Setting the rear view camera 92 Appendix – Adjusting the response positions of the Troubleshooting 106 touch panels (touch panel Messages and how to react to them 109 calibration) 93 Messages for Audio Functions 110 – Adjusting the screen brightness 94 Positioning technology 111 –...
- Page 6 Chapter Introduction Manual overview Terminology Before moving on, take a few minutes to read Before using this product, be sure to read “Im- the following information about the conven- portant Information for the user” (a separate tions used in this manual. Familiarity with manual) which contains warnings, cautions, these conventions will help you greatly as you and other important information that you...
- Page 7 Chapter Introduction “External storage device (USB, SD)” Auto reroute function If you deviate from the set route, the system The SD memory card, SDHC memory card, will re-calculate the route from that point so USB memory device and USB portable audio that you remain on track to the destination.
- Page 8 When you use this navigation system with LCD screen when this product is not being used. Extended exposure to direct sunlight a Pioneer USB interface cable for iPod (CD- can result in LCD screen malfunction due IU200VM) (sold separately), you can control to the resulting high temperatures.
- Page 9 Chapter Introduction Notes for internal memory Before detaching the battery pack If the internal battery is detached or dis- charged, the memory will be erased and must be reprogrammed. p Some data remains. Read Returning the na- vigation system to the default or factory set- tings before you operate this function.
- Page 10 Chapter Basic operation Checking part names and functions Press and hold to display the “Screen Cali- This chapter gives information about the names of the parts and the main features bration” screen. using the buttons. = For details concerning operations, refer to Adjusting the response positions of the 1 MENU button touch panels (touch panel calibration) on...
- Page 11 Chapter Basic operation 2 MAP button you to answer an incoming call or end Press to view the map screen. the phone call. Press and hold to display the “Picture Ad- 6 Built-in microphone justment” screen. Microphone for hands-free operation. = For details concerning operations, refer Also this microphone can be used on the to Adjusting the screen brightness on...
- Page 12 Optimum performance of this unit may not rage device for any reason, it is usually not be obtained depending on the SD memory possible to recover the data. Pioneer accepts card. no liability for damages, costs or expenses p Do not insert anything other than SD mem- arising from data loss or corruption.
- Page 13 USB cable (supplied) ! If data loss or corruption occurs on the sto- rage device for any reason, it is usually not possible to recover the data. Pioneer accepts no liability for damages, costs or expenses arising from data loss or corruption.
- Page 14 ! If data loss or corruption occurs on the sto- rage device for any reason, it is usually not possible to recover the data. Pioneer accepts no liability for damages, costs or expenses arising from data loss or corruption.
- Page 15 Chapter Basic operation On first-time startup Read the disclaimer carefully, checking its details, and then touch [OK] if you agree to the conditions. CAUTION The rear view camera function is not available for safety reasons until the navigation system boots up completely.
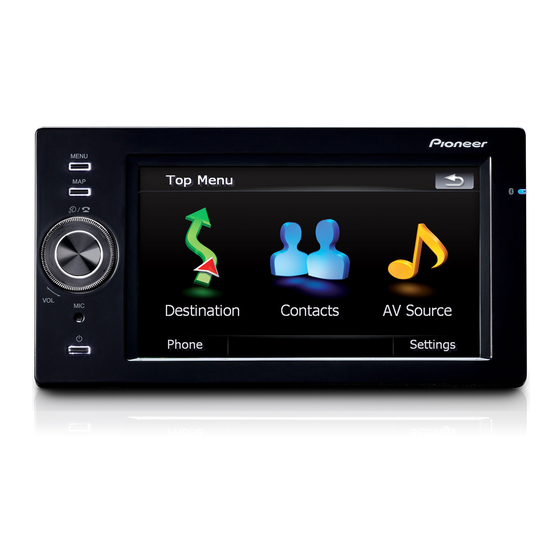
- Page 16 Chapter Basic operation How to use the navigation menu screens The “Top Menu” appears when you boot up the navigation system for the first time. Screen switching overview...
- Page 17 Chapter Basic operation What you can do on each menu Press MENU button to display the “Top 1 Top Menu Press MENU button to display the “Top Menu” and then touch [AV Source]. Menu”. Touch [RearView] on the “AV Source” This is the starting menu to access the desired menu.
- Page 18 Chapter Basic operation How to use the map Most of the information provided by your navigation system can be seen on the map. You need to be- come familiar with how the information appears on the map. How to read the map screen This example shows an example of a 2D map screen.
- Page 19 Chapter Basic operation = For details, refer to Map Settings on This key will be displayed while you activate the dummy run (“Fly over” or “Demo page 81. p The estimated time of arrival is an ideal Mode”). Touching the key to cancel the dummy run.
- Page 20 Chapter Basic operation When you drive on a multi-lane road 3D map screen Appears where multi-lane roads exist when you are driving on your route. The highlighted lane indicates the recommended lane. Press MAP button to display the navi- gation map screen. Touch to switch the map p This information is based on the map data-...