Pioneer AVIC-F500BT Connection Diagram
Hide thumbs
Also See for AVIC-F500BT:
- Hardware user manual (24 pages) ,
- Operation manual (20 pages) ,
- Quick start (3 pages)
Table of Contents
Advertisement
Quick Links
Connection diagram
Diagramme de connexion
Схема подключения
AVIC-F500BT
Published by Pioneer Corporation.
Copyright © 2008 by Pioneer Corporation.
All rights reserved.
Publié par Pioneer Corporation.
Copyright © 2008 par Pioneer Corporation.
Tous droits réservés.
Издано Pioneer Corporation.
Авторские права ©sw 2008 Pioneer
Corporation. Все права защищены.
<F500BT_CONNECTION>
<KKYZX> <08F00000>
AU,EW,RE,UC
English
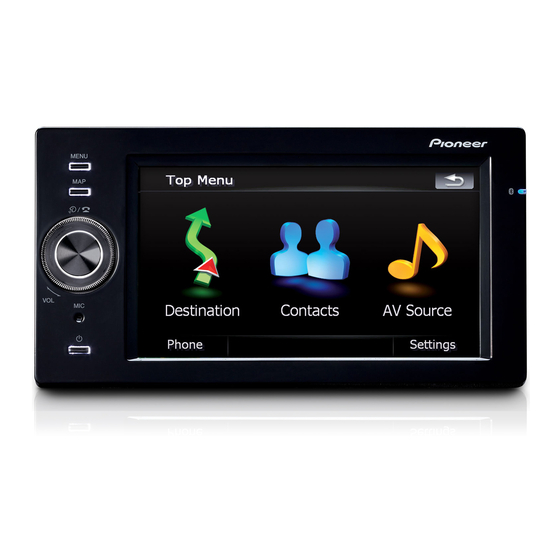
Connecting the car navigation system
1. Microphone
3. Cradle
(CD-VM1) (sold separately)
4. Cable (supplied)
2. This product
5. Vehicle power charger
To protect your product against sudden surges
2 m (6 ft. 7 in.)
in current, connect the vehicle power charger
only while the ignition switch is turned off.
6 . DC 5V (Black)
50 cm (1 ft. 8 in.)
7. Black
8. To in-vehicle power
port socket
9. PARKING BRAKE (Light green)
2 m (6 ft. 7 in.)
(Refer to Connecting the reverse signal and parking brake leads.)
10. REVERSE-GEAR SIGNAL INPUT (Violet/white)
(Refer to Connecting the reverse signal and parking brake leads.)
20 cm (7-7/8 in.)
11. AMP CONTROL (Blue/white)
50 cm (1 ft. 8 in.)
12. Not used.
13. Audio output (Left, Right) (Black)
1.5 m (4 ft. 11 in.)
Use the terminal when you want to output
the sound to external equipment.
14. Fuse holder
1.5 m
15. Battery cable (Yellow)
(Fuse: 1 A)
(4 ft. 11 in.)
This terminal is on the North American
model only.
Be sure to connect this lead to terminal
always supplied with power regardless
of ignition switch position.
20 cm (7-7/8 in.)
16. Rear view camera input (Brown)
(Refer to When connecting a rear view camera.)
Fig. 1
Abb. 1
Afb. 1
En
Connecting the iPod
Replacing a fuse of vehicle
power charger
1. This product
2. Mini-USB port
2. Rotate the cap in anticlockwise
®
3. iPod
direction to detach it.
4. AV IN
6. USB interface cable
for iPod (CD-IU200VM)
(sold separately)
3. Fuse (3 A)
5.
4.
Note
Note
For details concerning operations and
Be sure to not to misplace detached parts
compatibility, refer to "Operation Manual".
and keep the parts out of the reach of small
children to prevent accidental swallowing.
. 2
Fig. 2
Abb. 2
Afb. 2
Fig. 4
Connecting the USB
storage device
1. This product
2. Mini-USB port
3. USB storage device
(sold separately)
2 m (6 ft. 7 in.)
4. USB cable (supplied)
Connect an appropriate USB storage device.
Fig. 3
Abb. 3
Afb. 3
. 3
. 1
En
When connecting a rear view camera
1. This product
1. Vehicle power
charger
2. REVERSE-GEAR SIGNAL INPUT (Violet/white)
(Refer to Connecting the reverse signal and
2 m (6 ft. 7 in.)
parking brake leads.)
20 cm (7-7/8 in.)
3. Fuse resistor
4. Extension lead (for reverse signal)
6. RCA cable (sold separately)
20 cm (7-7/8 in.)
5. Rear view camera input (Brown)
Abb. 4
Afb. 4
. 4
Wiring the external antenna
2. Not over 10 cm (3–7/8 in.)
35 cm — 75 cm
(1 ft. 2 in. — 2 ft. 6 in.)
5 m (16 ft. 5 in.)
7. Rear view camera
(e.g. ND-BC2)
(sold separately)
. 5
Fig. 5
Abb. 5
Afb. 5
1.
Notes
This wiring is unnecessary for
the Russian model.
The antenna is supplied with
ND-TMC3 (sold separately) for
the Australian model.
1.5 m (4 ft. 11 in.)
3. External antenna
4. Cradle
. 6
Fig. 6
Abb. 6
Afb. 6
En
Advertisement
Table of Contents

Related Manuals for Pioneer AVIC-F500BT


Summary of Contents for Pioneer AVIC-F500BT
- Page 1 (Fuse: 1 A) Published by Pioneer Corporation. (4 ft. 11 in.) This terminal is on the North American 3. USB storage device Copyright © 2008 by Pioneer Corporation. 1.5 m (4 ft. 11 in.) model only. (sold separately) All rights reserved.
- Page 2 Español Deutsch ® Conexión del sistema de 3 iPod 1 Este producto Anschluss des Einzelheiten zu Bedienung und Kompatibilität 4 Verlängerungskabel siehe “Bedienungsanleitung”. 4 AV IN 2 REVERSE-GEAR SIGNAL INPUT (Violeta/blan- (für Rückwärtssignal) navegación para automóviles Navigationssystems 5 Nota 6 USB-Schnittstellenkabel für iPod (CD- 5 Heckkamera-Eingang (Braun) (Fig.
- Page 3 Français Italiano Connexion du système de 4 AV IN Branchement d’une caméra Connessione del sistema di Connessione dell’iPod Quando si collega con una 5 Remarque navigation automobile de rétrovisée navigazione per auto telecamera a vista posteriore (Fig. 2) Pour en savoir sur le fonctionnement et la 1 Questo prodotto (Fig.
- Page 4 Русский Nederlands Подключение автомобильной Подключение iPod При подключении камеры Het autonavigatiesysteem 4 AV IN 4 Verlengsnoer 5 Opmerking (voor achteruit-signaal) навигационной системы заднего вида aansluiten . 2) Zie “Bedieningshandleiding” voor details over 5 Achteruitkijkcamera-ingang (Bruin) . 1) . 5) (Afb. 1) de bediening en compatibiliteit.
- Page 5 English Connecting the reverse signal and parking brake leads Connecting to a separately sold amplifier 3. This product 4. Microphone 1. Cradle (CD-VM1) (sold separately) 1. This product 2. Cable (supplied) 2 m (6 ft. 7 in.) 6. ND-G500 (sold separately) 5.
- Page 6 Español Deutsch Conexión de los cables de hículo se desplaza hacia adelante o hacia (Consulte Conexión de los cables de señal de Anschließen der Zuleitungen kann die Position Ihres Fahrzeugs, die der (Siehe Anschließen der Zuleitungen für Rück- atrás. Por ello, es posible que la posición del marcha atrás y el freno de estacionamiento.) Sensor ermittelt, von der tatsächlichen Posi- wärtsgangsignal und Handbremse.)
- Page 7 Français Italiano Connexion des fils de frein capteur risque par conséquent de différer de 9 Noir Connessione dei fili del rilevata dal sensore può essere diversa rispet- (Vedere la sezione Connessione dei fili del se- la position réelle. 10 CC 5 V (Noir) to a quella effettiva.
- Page 8 Русский Nederlands Подключение сигнала De draden voor het aangesloten, kan deze wellicht niet goed waar- 9 Zwart nemen of uw voertuig voor- of achteruit rijdt. 10 DC 5 V (Zwart) заднего хода и провода achteruitsignaal en de De positie van uw voertuig zoals waargeno- 11 AMP CONTROL (Blauw/Wit) 6 ND-G500 ( ручного...