Table of Contents
Advertisement
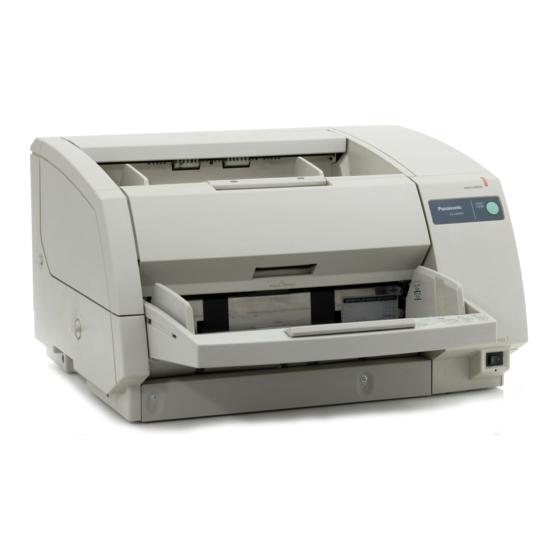
KV-S3065CL / KV-S3065CW
Model No.
These instructions contain information on operating the scanner. Before reading these
instructions, please read the installation manual enclosed with this unit.
Please carefully read these instructions, the enclosed installation manual and maintenance
manual. Keep all documentation in a safe place for future reference.
Keep the CD-ROM in the protective case. Do not expose the CD-ROM to direct sunlight or
extreme heat and do not scratch or smudge the surface of the CD-ROM.
Advertisement
Table of Contents

Related Manuals for Panasonic KV-S3065


Summary of Contents for Panasonic KV-S3065
- Page 1 KV-S3065CL / KV-S3065CW Model No. These instructions contain information on operating the scanner. Before reading these instructions, please read the installation manual enclosed with this unit. Please carefully read these instructions, the enclosed installation manual and maintenance manual. Keep all documentation in a safe place for future reference.
-
Page 2: System Requirements
Thank you for purchasing a Panasonic “High Speed Color Scanner.” ≥ Panasonic supports your imaging needs with a reliable and easy to use document scanner. ≥ Panasonic has developed Panasonic Image Enhancement Technology to improve the quality of your scanned images even beyond the quality of your original document. -
Page 3: Table Of Contents
Clearing Paper Jams ........≥ Removing paper jams from the scanner ...... -
Page 4: Notice
• If you need more information about the roller cleaning paper, please refer to the Material Safety Data Sheet (MSDS). • Please ask your Panasonic sales company about obtaining the Material Safety Data Sheet. KEEP AWAY FROM FIRE. Federal Communications Commission Requirements Note: This equipment has been tested and found to comply with the limits for a Class A digital device, pursuant to part 15 of the FCC Rules. - Page 5 A replacement fuse cover can be purchased from your local Panasonic Dealer. If the fitted moulded plug is unsuitable for the socket outlet in your home then the fuse should be removed and the plug cut off and disposed of safely.
- Page 6 Notice Caution Labels...
-
Page 7: Precautions
Do not place the unit on an uneven or unstable surface. Do not insert your fingers into the back opening in the scanner. ≥ Special care should be taken to protect the unit if it is used in a less than optimum environment, such as a dusty or sandy area. -
Page 8: Operating Environment
(located on the back side of the scanner). ≥ Do not use an extension cord. ≥ This scanner should be connected to a grounded outlet. ≥ Do not use a line conditioner, transient suppressor or surge protector. Do not operate or place the unit in a vertical position. - Page 9 ∫ CD-ROM To prevent the CD-ROMs from accidental damages: Do not touch or write on the surface of the disc. Do not place heavy objects on the disc case or drop the case. Do not leave the disc out of its protective case.
-
Page 10: Component Identification
Power cord Power cord shown on the figure is for 100–200 V. Fan exhaust vent USB connector Used to connect the scanner unit to the host computer. SCSI connector Used to connect the scanner unit to the host computer. Exit tray... -
Page 11: Power Turn-On Sequence
Refer to Maintenance Manual or Operating Instructions (CD-ROM) for the way of cleaning or replacing the rollers. *1, *2: Check the status of the scanner using the User Utility. The User Utility is included in the CD-ROM. ’s LED stays... -
Page 12: About The Scsi Setting (Not Required For Usb Connection)
∫ About the SCSI setting (Not required for USB connection) When connecting the scanner to a SCSI chain using a SCSI cable, perform the SCSI ID setting correctly. The scanner is provided with a DIP switch for the SCSI ID No. setting. -
Page 13: Loading Documents
Loading Documents Acceptable documents Document size: 48~297 mm (1.9~11.7 in.) Paper thickness: Continuous paper feeding Single paper feeding Document smaller than A7 size Maximum number of sheets loadable on the hopper tray: Width less than A4 short edge Max. number of sheets Width between A4–A3 short edge ≥... -
Page 14: When Scanning Multiple Sheets
Loading Documents ∫ When scanning multiple sheets Cautions: ≥ Please remove any staples from the document before scanning. ≥ Curled documents may cause a paper jam or damaging the unit, so please set the document flat before scanning. ≥ When scanning very important documents, confirm if the number of scanned images matches the number of actual pages. - Page 15 Place the documents on the hopper with the side to be scanned facing up. Then push them in the direction of the arrow until they stop. ≥ Be sure to place the documents on the hopper as shown in the diagram at the right.
- Page 16 Loading Documents When using long paper, pull out the hopper extension tray from the hopper and the exit stopper from the exit extension tray. You can also extend the exit extension tray, if required. (See fig. 1) ≥ When scanning narrow documents as shown below, pull up the exit substopper.
-
Page 17: Paper Feed Settings
Status scanning The ADF / manual feed selector is located on the left side of the scanner. ≥ If thin paper (with paper weight less than 50 g/m causes a paper jam frequently at the paper feed component, the optional roller exchange kit for thin paper (KV-SS018) should be used. -
Page 18: Others
Others ∫ How to use the control sheet and separation sheet If the control sheet is used, the documents under the control sheet are scanned in accordance with the code on the control sheet regardless of scanning condition that is selected previously. ≥... -
Page 19: Changing The Reference Plate Setting
Changing the Reference Plate Setting You can choose a background color to be scanned from white (black) to black (white). The scanner comes from fac- tory set to black. The reference plate (B) and reference plate (F) setting must be changed simultaneously. - Page 20 Changing the Reference Plate Setting Close the front door. ≥ Push both sides of the front door down slowly until it clicks into place.
-
Page 21: Clearing Paper Jams
Torn documents, thin documents or documents that are creased on the top edge may cause paper jams. If a paper jam occurs, remove the jammed sheet according to the following procedure. ∫ Removing paper jams from the scanner Use your hand to pull the front door release... -
Page 22: Cleaning The Unit
≥ Clean the image sensor covers when black or white lines appear on the scanned images. (Refer to ≥ If the documents you are scanning are dirty, then the scanner parts will become dirty as well. To maintain proper scanning, clean the scanner parts frequently. -
Page 23: Cleaning The Rollers
∫ Cleaning the rollers Turn the power off. Use your hand to pull the front door release towards you (1). Then open the front door completely (2). Cleaning the Unit Front door Front door release (Inside the front door.) - Page 24 (black) in the back of the unit. Set the paper path selector as shown below. The paper path selector is located on the left side of the scanner. Warning: When the tip of the pointer is raised, the tip may cause an injury.
-
Page 25: Cleaning The Sensors, Reflectors, Double Feed Detectors And Image Sensor Covers
Close the front door. ≥ Push both sides of the front door down slowly until it clicks into place. Clear the roller cleaning counter with User Utility. ≥ Click [Clear Counter] button for [After Clean Roller] with User Utility. ∫ Cleaning the sensors, reflectors, double feed detectors and image sensor covers Turn the power off. - Page 26 Cleaning the Unit Clean the image sensor cover with the roller cleaning paper. Then remove the dirt on the sensors, reflectors and double feed detectors with the included blower. ≥ When cleaning the bottom image sensor cover, do not touch the tip of the plastic pointer (black) in the back of the unit.
-
Page 27: Replacing Consumables
(1) Push down the green levers and remove the paper feed roller module from the scanner by holding the green levers. (2) ≥ The paper feed roller block is attached by a magnet. - Page 28 (1) Then push up the green levers on both ends until they click into place. (2) ≥ Match the paper feed roller module with the bearings and guide grooves, and then attach it.
-
Page 29: Replacing Retard Roller Module
∫ Replacing retard roller module Pull open the conveyor towards you by using the indent on the right side. ≥ When the conveyor is pulled towards you, click-stop mechanism released. Caution: When opening the conveyor, be careful not get your finger stuck in the indent. Pull the right side of the shaft in the direction of the arrow and hold it there. - Page 30 Replacing Consumables Take out the new retard roller module in the optional “Roller Exchange Kit (KV-SS017)”. Pull the right side of the shaft in the direction of the arrow and hold it there. Attach the new retard roller module as shown in the diagram on the right (2) and then return the right side of the shaft in the direction of the arrow.
- Page 31 Hold the conveyor using both hands, and close the conveyor by pushing it into the unit. ≥ When the conveyor is closed, the click- stop mechanism will operate. Caution: If the conveyor is not closed correctly and the front door is closed, the conveyor may break.
-
Page 32: Shading Adjustment
Proceed with the compensation when the colors in some parts of the scanned images differ in the extreme, or when the image quality fails to be improved even after the inside the scanner is cleaned. ¥ Before proceeding with the shading adjustment Before proceeding, be absolutely sure to thoroughly clean the image sensor cover (F). -
Page 33: Repacking Instructions
≥ Please use the original carton and all of the original packing materials. ≥ Improper repacking of the scanner may result in a service charge to repair the unit. ≥ The scanner should be handled in the correct (horizontal) position. -
Page 34: Specifications
“Weight in pounds” of paper represents the weight of 500 [17k22 inches (432k559 mm)] sheets. * The scanning size depends on the memory installed in the scanner. Refer to PIE Reference Manual for details. ** For scanning thin paper (with paper weight less than 50 g/m recommended. - Page 35 Item Operating Operating temperature and Environment humidity Storage Storage temperature and Environment humidity Option Roller exchange kit (KV-SS017) Roller exchange kit for thin paper (KV-SS018) Imprinter option (KV-SS014) Roller cleaning paper (KV-SS03) Ink cartridge (KV-SS021) Model No. KV-S3065CL 15 °C to 30 °C (59 °F to 86 °F), 20% to 80% RH 0 °C to 35 °C (32 °F to 95 °F), 10% to 80% RH Specifications KV-S3065CW...
-
Page 36: Troubleshooting
Troubleshooting If a problem occurs while the unit is being used, check the following items and check the scanner status with the User Utility. If the unit still malfunctions, turn it OFF, unplug the power cord and call for service. - Page 37 The rollers have reached their life expectancy. Double feeding problems The document is curled or folded. occurs frequently scanner stops loading while scanning. The irregular type document is to be scanned. The document has a length of less than 70 mm (2.75 in.). paper occurs The ADF/manual feed selector is not frequently.
-
Page 38: Index
Index AC inlet ......Acceptable documents ....ADF / manual feed selector . - Page 39 Operating environment ....Option ......OS.
- Page 40 A Unit of Matsushita Electric Corporation of America Two Panasonic Way, Secaucus, New Jersey 07094 Panasonic Canada Inc. 5770 Ambler Drive, Mississauga, Ontario, L4W 2T3 Matsushita Electric Industrial Co., Ltd. http://www.panasonic.co.jp/global/ © 2004 Panasonic Communications Co., Ltd. All Rights Reserved. E-04091007...