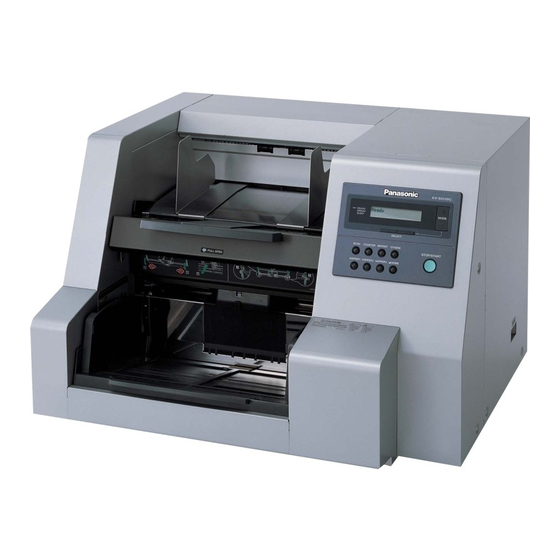
Panasonic KV-S3105C Operating Instructions Manual
High speed color scanner
Hide thumbs
Also See for KV-S3105C:
- Specifications (2 pages) ,
- Installation manual (23 pages) ,
- Manual (14 pages)
Table of Contents
Advertisement
Quick Links
KV-S3105C
Model No.
KV-S3085
Model No.
These instructions contain information on operating the scanner. Before reading these
instructions, please read the installation manual enclosed with this unit.
Please carefully read these instructions, the enclosed installation manual and maintenance
manual. Keep all documentation in a safe place for future reference.
Keep the CD-ROM in the protective case. Do not expose the CD-ROM to direct sunlight or
extreme heat and do not scratch or smudge the surface of the CD-ROM.
Advertisement
Table of Contents

Related Manuals for Panasonic KV-S3105C


Summary of Contents for Panasonic KV-S3105C
- Page 1 KV-S3105C Model No. KV-S3085 Model No. These instructions contain information on operating the scanner. Before reading these instructions, please read the installation manual enclosed with this unit. Please carefully read these instructions, the enclosed installation manual and maintenance manual. Keep all documentation in a safe place for future reference.
-
Page 2: System Requirements
Thank you for purchasing a Panasonic “High Speed Color Scanner” or “High Speed Scanner.” ≥ Panasonic supports your imaging needs with a reliable and easy to use document scanner. ≥ Panasonic has developed Panasonic Image Enhancement Technology to improve the quality of your scanned images even beyond the quality of your original document. -
Page 3: Table Of Contents
Table of Contents Page Notice ..........Precautions . -
Page 4: Notice
• If you need more information about the roller cleaning paper, please refer to the Material Safety Data Sheet (MSDS). • Please ask your Panasonic sales company about obtaining the Material Safety Data Sheet. KEEP AWAY FROM FIRE. Federal Communications Commission Requirements... - Page 5 A replacement fuse cover can be purchased from your local Panasonic Dealer. If the fitted moulded plug is unsuitable for the socket outlet in your home then the fuse should be removed and the plug cut off and disposed of safely.
- Page 6 Notice Caution Labels...
-
Page 7: Precautions
Precautions The following precautions are recommended to extend the life of the unit: Prior to scanning, remove all sta- Do not place any liquids near the Do not place books, paper, or other ples and paper clips from pages. unit. items on the unit. -
Page 8: Operating Environment
Precautions Operating Environment Do not place the unit in direct sunlight or in a cold draft. Do not operate or place the unit in a vertical position. Cold Do not place the unit near a heating appliance or an air Do not place the unit near other appliances which gen- conditioning vent. - Page 9 Precautions ∫ CD-ROM To prevent the CD-ROMs from accidental damages: Do not touch or write on the surface Do not leave the disc out of its Do not leave the disc in direct of the disc. protective case. sunlight or near heat sources. Do not place heavy objects on the To clean the disc, hold the disc by disc case or drop the case.
-
Page 10: Component Identification
Component Identification Exit tray stopper Exit tray Exit document guides Front door Display panel When performing each set- Document guide ting, used to display the scanning conditions, etc. Power switch [ : on position Hopper ≤ : off position Hopper extension tray Front door release Inside the front door. -
Page 11: Display Panel Instructions
Display Panel Instructions The required settings must be selected prior to scanning. Information and conditions are shown on the LCD (Liquid Crystal Display) and LED. R e a d y ∫ Display panel and keys READY / MODE ERROR / SLEEP SELECT SCAN... -
Page 12: Setting The Language
Display Panel Instructions ∫ Setting the language ≥ Select English, German or Japanese as the language which is to appear on the LCD display. ≥ The language setting mode is appeared automatically when the unit’s power is turned on for the first time after the unit was purchased. -
Page 13: Setting The Scanner
Display Panel Instructions ∫ Setting the scanner The following parameters can be customized using the scanner’s various setting modes. If the application software provides these features, it will be supported by the scanner. Scan menu Item LCD display Contents Page Front side dropout Color selection for dropout when scanning the front F. - Page 14 Display Panel Instructions Item LCD display Contents Page Setting the double Selects the sensitivity of the Double Feed Detector. Double Feed feed detector sensi- Sens. tivity Feeding Chooses the feed speed when a document is being Feed speed Speed scanned. Save scanning Selects the memory location where the conditions settings (Select...
- Page 15 Display Panel Instructions Imprinter menu Depending on the setting of the “Counter setting menu”, the page number of the scanned document will be printed. The post-imprinter option (KV-SS028) is required. If a host computer is connected, there may be settings required on the host computer as well.
- Page 16 Selects the product ID. The product ID setting Setting the product depends on the host computer scanner application Product ID you are using. Allows scanner to emulate other Panasonic scanners. Setting the sleep Sleep Mode Sets the time until sleep mode turns ON. mode...
- Page 17 Display Panel Instructions ¥ Operation READY / ERROR / MODE SLEEP SELECT SCAN COUNTER IMPRINT OTHERS STOP/START HOPPER 1 HOPPER 2 HOPPER 3 HOME Press one of the menu key until the (Ex. SCAN) desired menu is displayed. 0 1 . F . D r o p O u t ≥...
- Page 18 Display Panel Instructions ¥ Actual settings Scan setting menu (by pressing the SCAN key) Number, mode and default display Contents • Pressing the 3 key will change to the next • Pressing the 1 key or the 2 key will change to another mode.
- Page 19 Display Panel Instructions 06 Back side dropout color Color selection 0 6 . B . D r o p O u t Host Green Blue H o s t 07 Back side brightness Norm 0 7 . B . B r i g h t n e s s D –...
- Page 20 Display Panel Instructions 14 Double feed detection Host Not detect Detect 1 4 . D o u b l e F e e d H o s t If set to “Detect”, the scanner will detect double feeding. • When scanning very important documents, confirm if the number of scanned pages displayed on the LCD matches the number of actual pages.
- Page 21 Display Panel Instructions 17 Feed speed Host Slow Normal 1 7 . F e e d i n g S p e e d H o s t Slow: The scanner scans at the “Slow” speed. “Slow” speed is effective in the range of 400 dpi or less reso- lution.
- Page 22 Display Panel Instructions Counter setting menu (by pressing the COUNTER key) Number, mode and default display Contents • Pressing the 3 key will change to the next • Pressing the 1 key or the 2 key will change to another mode.
- Page 23 Display Panel Instructions Imprinter setting menu (by pressing the IMPRINT key) If a post-imprinter is installed, you can set the following conditions. Contents Number, item and default display • Pressing the 1 key or the 2 key will change to another •...
- Page 24 Display Panel Instructions 14 Setting the post-imprinter orientation Host 180o 270o 1 4 . P o s t O r i e n t a t i o n H o s t : Transfer direction Prints portrait orientation. • This setting can be done only when a post- imprinter is installed.
- Page 25 Display Panel Instructions Others setting menu (by pressing the OTHERS key) Number, mode and default display Contents • Pressing the 3 key will change to the next • Pressing the 1 key or the 2 key will change to another mode.
- Page 26 The applications for the scanner which have been set can be used. • An error results if an attempt is made to use a function which are not provided with the KV-S3105C/KV-S3085 series of scanners. • No guarantees are given for complete compatibility.
- Page 27 Display Panel Instructions ¥ Other display explanations Display Content This will be displayed when scanning is started until it is completed. S c a n n i n g . . . After completion, “Ready” will be displayed. 1 2 3 4 If the STOP key is pressed, scanning will stop.
-
Page 28: Loading Documents
Loading Documents Acceptable documents Document size: 48~297 mm (1.9~11.7 in.) 70~432 mm (2.75~17 in.) Paper thickness: Continuous paper feeding 50~157 g/m Single paper feeding 30~157 g/m Document smaller than A7 width Thicker than 127 g/m (34 lbs.) Straight path pass: The document with a thickness of 0.2 mm to 0.6 mm If you scan the other types of documents, paper jamming or multiple-sheet feeding may occur. -
Page 29: When Scanning Multiple Sheets
Loading Documents ∫ When scanning multiple sheets Cautions: ≥ Please remove any staples from the document before scanning. ≥ Curled documents may cause a paper jam or damaging the unit, so please set the document flat before scanning. ≥ When scanning very important documents, confirm if the number of scanned images matches the number of actual pages. - Page 30 Loading Documents Place the documents on the hopper Portrait with the side to be scanned facing up. Then push them in the direction of the arrow until they stop. ≥ Be sure to place the documents on the hopper as shown in the diagram at the right.
- Page 31 Loading Documents Adjust the document guides to the size Exit document guides of the document to be scanned. Adjust the exit document guides to the size of the document to be output, if required. Document guide When using paper longer than letter size, pull out the hopper extension tray Exit tray stopper from the hopper and the exit tray stop-...
-
Page 32: Paper Feed Settings
Paper Feed Settings ∫ Selecting the paper path for scanned document To select a U-turn path pass through to the front, set the paper path selector to the upper side. To select a straight path pass through to the back, set the paper path selector to the lower side. -
Page 33: Others
Others ∫ How to use the control sheet and separation sheet If the control sheet is used, the documents under the control sheet are scanned in Documents accordance with the code on the control sheet regardless of scanning condition that is selected previously. -
Page 34: Changing The Reference Plate Setting
Changing the Reference Plate Setting You can choose a background color to be scanned from white (black) to black (white). The scanner comes from fac- tory set to black. The refrence plate (B) and reference plate (F) setting must be changed simultaneously. Using your hand, pull the front door release towards you. - Page 35 Changing the Reference Plate Setting Using your finger, slide the upper reference plate to the right (1) and turn it over (2), then release it. The upper reference plate returns to the left (original position) automatically and will be locked. ≥...
-
Page 36: Clearing Paper Jams
Clearing Paper Jams Torn documents, thin documents or documents that are creased on the top edge may cause paper jams. If a paper jam occurs (“Uxx JAM” will be displayed on the LCD), remove the jammed sheet according to the following proce- dure. -
Page 37: Cleaning The Unit
Cleaning the Unit ∫ Outside of the scanner Clean the unit at least once a month. Turn the power off. Clean the cover with a soft cloth. ≥ The document insertion and exit slots get dirty easily. Make sure to clean them. Remove dirt and dust from the fan exhaust vents with a brush. -
Page 38: Roller Cleaning Paper
Cleaning the Unit ∫ Roller cleaning paper Open the bag on the dotted line and take out the roller cleaning paper. ≥ If the roller cleaning paper bag is left opened for a long period of time before using it, the alcohol will evaporate. - Page 39 Cleaning the Unit Open the retard roller cover. Retard roller cover Use the roller cleaning paper to clean the surface of the retard roller. ≥ Wipe the retard roller all the way around it proceeding from one end to the other in the direction of the arrow shown in the diagram to the right.
- Page 40 Cleaning the Unit Open the back door. Use the roller cleaning paper to clean the surfaces of the drive rollers and free rollers. ≥ Wipe the surfaces of the drive rollers and free rollers all the way around them proceeding from one end to the other in Back door the directions of the arrows shown in the Drive rollers...
-
Page 41: Cleaning The Scanning Section Glasses And Reference Plates
Cleaning the Unit ∫ Cleaning the scanning section glasses and reference plates Turn the power off. Using your hand, pull the front door release towards you. ≥ The front door now opens slowly. Front door Front door release (Inside the front door) Clean the scanning section glasses and reference plates using the roller cleaning paper. -
Page 42: Cleaning The Sensors
Cleaning the Unit ∫ Cleaning the sensors Turn the power off. Double feed detector Using your hand, pull the front door release towards you. ≥ The front door now opens slowly. Remove the dirt on the document sen- sors, double feed detector, paper sen- sor and reflectors with the included blower. -
Page 43: Replacing Consumables
Replacing Consumables ∫ Replacing the paper feed roller module, retard roller module and retard pad µ Paper feed roller module Turn the power off. Using your hand, pull the front door release towards you. ≥ The front door now opens slowly. Front door Front door release (Inside the front door) - Page 44 Replacing Consumables Remove the paper feed roller module by removing its bearing from the guide Paper feed roller module grooves of the chassis in the scanner. Open the optional “Roller Exchange Kit” (KV-SS026) or “Roller Exchange Kit for thin paper” (KV-SS027), and take out the new paper feed roller mod- ule.
- Page 45 Replacing Consumables Push up the green levers at both ends in the direction of the arrows until they click into place. ≥ After installing the paper feed roller mod- ule, confirm that the feed rollers can be moved lightly in vertical direction. Feed rollers Green levers µ...
- Page 46 Replacing Consumables Open the retard roller cover. Retard roller cover Remove the retard roller module in the direction of the arrow. Retard roller module Take out the new retard roller module in the optional “Roller Exchange Kit” (KV-SS026) or “Roller Exchange Kit for thin paper”...
- Page 47 Replacing Consumables µ Retard pad Pull and remove the retard pad in the direction of the arrow. Retard pad Open the optional “Roller Exchange Kit” (KV-SS026) or “Roller Exchange Kit for thin paper” (KV-SS027), and take out the new Retard pad. Install the new retard pad by pressing it down until it is locked.
- Page 48 Replacing Consumables Close the front door. Front door ≥ Push down the front door slowly until it clicks into place. Set the ADF selector to the original position. ADF selector MANUAL Clear the “Replace Roller Warning”. page...
-
Page 49: Shading Adjustment
Shading Adjustment ¥ What is the purpose of the shading adjustment? The process whereby the variations in the distribution of the lamp’s light quantity are transformed into a fixed output within the scanning range is known as shading adjustment. It can be carried out by using the special shading paper which is provided with this scanner. - Page 50 Shading Adjustment The shading paper will be fed into the D o n ’ t t u r n o f f scanner in a little while after the > > > > > > > > > > > >...
-
Page 51: Repacking Instructions
Repacking Instructions It is highly recommended that you keep the original carton and ALL packing materials. If you need to transport or ship your scanner, please follow these instructions. Please Note : ≥ Please use the original carton and all of the original packing materials. ≥... -
Page 52: Specifications
Specifications Model No. KV-S3105C KV-S3085 Item Scanning face Duplex scanning Front side : 3-line (RGB) color CCD Scanning method Back side : 3-line (RGB) color CCD Scanning width 302 mm (11.9 in.) 302 mm (11.9 in.) Simplex scanning Simplex scanning Letter 105 pages /min. - Page 53 Specifications Model No. KV-S3105C KV-S3085 Item External dimensions 627k546k415 mm (24.7k21.5k16.3 in.) (WidthkDepthkHeight) Mass (Weight) 52 kg (114.4 lbs.) AC100 – 120 V, 50/60 Hz Power requirement AC220 – 240 V, 50/60 Hz Unit Maximum 3 A (AC100 – 120 V) (Scanning) 1.5 A (AC220 –...
-
Page 54: Troubleshooting
Troubleshooting If a problem occurs while the unit is being used, check the following items. If the unit still malfunctions, turn it OFF, unplug the power cord and call for service. Symptom Possible Cause Remedy The power cord is not plugged in. Insert the power plug firmly. - Page 55 Troubleshooting Symptom Possible Cause Remedy The rollers are dirty. Clean all of the rollers. (See page 38.) Replace the paper feed roller module The rollers have reached their life and the retard roller module and the expectancy. retard pad module. (See page 43 page 48.)
- Page 56 Troubleshooting Possible Cause Remedy ✽ ✽ ✽ W a r n i n g ✽ ✽ ✽ The rollers are dirty. Clean the rollers. (See page 38.) C l e a n R o l l e r Replace the paper feed roller ✽...
- Page 57 Troubleshooting Possible Cause Remedy Open the back door and remove The document is jammed. the jammed paper. Then clean all of the rollers. (See page 38.) U 1 3 J A M t t t t t t t t When U13 JAM occurs fre- Clean the document sensors quently, the document sensor...
- Page 58 Troubleshooting Possible Cause Remedy Multiple sheets were fed into Open the front door and remove the unit. the jammed paper. When U23 Double Feed Clean all of the rollers. (See occurs frequently, the rollers U 2 3 D o u b l e F e e d page 38.)
-
Page 59: Index
Index Page Page Feed rollers ..... . . Free rollers..... 39, Front door . - Page 60 Index Page Page Paper feed roller ....USB cable ......Paper feed roller cover .
- Page 61 Unit of Panasonic Corporation of North America Two Panasonic Way, Secaucus, New Jersey 07094 Panasonic Canada Inc. 5770 Ambler Drive, Mississauga, Ontario, L4W 2T3 Matsushita Electric Industrial Co., Ltd. http://www.panasonic.co.jp/global/ © 2005 Panasonic Communications Co., Ltd. All Rights Reserved. E-050222...