
Related Manuals for Hunter 97316


Summary of Contents for Hunter 97316
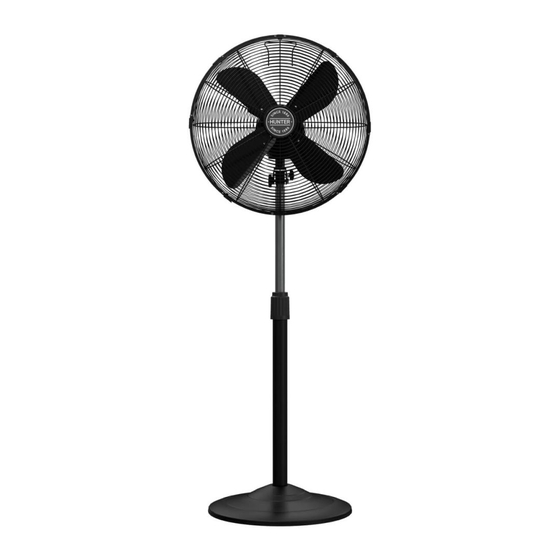
- Page 1 Standing Fan Owner’s Manual Model: 97317 Brushed Nickel 97316 Flat Matte Black Fan weight ±2 lbs: 13.4 lbs (6.1 kg) ©2022 Hunter Fan Co. M3985 r121222...
-
Page 2: User Servicing Instructions
Congratulations on purchasing your new Hunter stand fan! ® The standing fan you purchased will provide comfort and performance in your home or office for many years. This instruction manual contains complete instructions for assembling and operating your fan. We are proud of our work and appreciate the opportunity to supply you with the best stand fan available anywhere in the world. -
Page 3: Box Contents
Box Contents Parts Included Hardware Included Grille Mount to Motor Grille Housing Screw and Screw washer Blade Back Grille Screw Fan Blade Grille Front Grille Motor Tightening Screw Inner Pole Motor Adjustment Motor Housing Motor Knob Height Mount Screw Adjustment Knob Base Washer... -
Page 4: Base Assembly
Base Assembly Loosen and remove screw (HH) and washer (II) from outer pole (H). From above base (F), install outer pole (H). From below base (F), secure with washer (II) and screw (HH). Motor Tightening Screw Raise inner pole (E) to desired height. While holding outer pole (H), Remove motor tightening screw (JJ). - Page 5 Motor and Grille Assembly Note: Fan style may vary. Motor Tightening Screw Place motor housing (D) bottom bracket over end cap of inner pole Remove screw and washer (AA) from motor housing (D) . Place (E) and align holes. Install motor tightening screw (JJ). Install and back grill (C) against motor housing (D) aligning two upper stud nuts tighten motor mount screw (DD), motor mount nut (FF) and motor with hole slots.
-
Page 6: Operation
Motor and Grille Assembly (continued) Install grill screw (BB) and grille nut (CC) to bottom of grille assem- bly. Close clasps on front grille (A) securing it to back grille (C). Note: Fan style may vary. Operation Fan Speed Selection Fan Head Adjustment 0 –... - Page 7 One-Year Limited Warranty apply to you. If any part of your Hunter product fails at any time within one year of the date of purchase due to a defect in material or workmanship, as determined solely ANY IMPLIED WARRANTIES OF MERCHANTABILITY OR FITNESS FOR A by Hunter, Hunter will provide a replacement part or product free of charge.
- Page 9 Manual del propietario Manual de instalación Modelo: 97317 Niquel pulido Modelo: XXXXX Plata mate 97316 Negro mate plano 51675 Negro mate liso Peso del ventilador ±0,9 kg (2 lb): 13.4 lbs (6.1 kg) Peso del ventilador ±0,9 kg (2 lb): (X.X ©2022 Hunter Fan Co.
- Page 10 ¡Felicitaciones por comprar su nuevo ventilador de pedestal Hunter ® El ventilador de pedestal que compró le brindará confort y un buen desempeño en su hogar u oficina durante muchos años. Este manual de instrucciones contiene instrucciones completas para ensamblar y operar su ventilador. Estamos orgullosos de nuestro trabajo y apreciamos la oportunidad de suministrarle el mejor ventilador de techo disponible en cualquier lugar del mundo.
-
Page 11: Contenido De La Caja
Contenido de la caja Piezas incluidas Tornillería incluida Tornillo de Tornillo montaje de rejilla a rejilla la carcasa del motor y arandela Tornillo de Rejilla trasera paletas Paleta de ventilador Rejilla delantera Tuerca rejilla Tornillo de apriete del motor Poste trasera Perilla de ajuste Carcasa del motor Tornillo de montaje... - Page 12 Conjunto de la base Afloje y remueva el tornillo (HH) y la arandela (II) del poste exterior (H). Desde arriba de la base (F), instale el poste exterior (H). Desde debajo de la base (F), asegúrela con la arandela (II) y el tornillo (HH). Tornillo de apriete del motor...
- Page 13 Ensamblaje del motor y la rejilla Tornillo de apriete del motor Remueva el tornillo y la arandela (AA) fuera de la carcasa (D) del motor. Coloque el soporte inferior de la carcasa (D) del motor sobre la tapa de Coloque la rejilla trasera (C) contra la carcasa (D) del motor alineando las extremo del poste interior (E) y alinee los orificios.
-
Page 14: Operación
Ensamblaje del motor y la rejilla (continuación) Instale el tornillo (BB) de la rejilla y la tuerca (CC) de la rejilla a la parte inferior del conjunto de rejilla. Cierre las abrazaderas de la rejilla delantera (A) asegurándolas a la rejilla trasera (C). Nota: El tipo de ventilador puede variar. - Page 15 LOS REMEDIOS ÚNICOS Y EXCLUSIVOS DEL COMPRADOR ORIGINAL PARA RECLAMOS DE CUALQUIER CLASE CON RESPECTO A ESTE PRODUCTO DEBEN Por favor no envíe a Hunter su ventilador ni ninguna de sus partes. Le entrega SER LOS ESTABLECIDOS EN ESTE DOCUMENTO. HUNTER FAN COMPANY NO ES será...
- Page 16 © 2022 Hunter Fan Company 7130 Goodlett Farms Pkwy, Suite 400 | Memphis TN 38016...