Oki C530dn User Manual
Oki c530dn: user guide
Hide thumbs
Also See for C530dn:
- Installation manual (48 pages) ,
- Security manual (23 pages) ,
- Replacement manual (8 pages)
Table of Contents
Advertisement
Advertisement
Table of Contents
Troubleshooting

Related Manuals for Oki C530dn


Summary of Contents for Oki C530dn
- Page 1 C330/C530 User’s Guide...
-
Page 2: Copyright Information
The most up-to-date drivers and manuals are available from the web site: http://www.okiprintingsolutions.com. Trademark Information Oki and Oki Data are registered trademarks of Oki Electric Industry Company Ltd. Apple, Macintosh and Mac OS are registered trademarks of Apple Computers Inc. -
Page 3: Emergency First Aid
Emergency First Aid Take care with toner powder: If swallowed, give small amounts of cold water and seek medical attention. DO NOT attempt to induce vomiting. If inhaled, move the person to an open area for fresh air. Seek medical attention. If it gets into the eyes, flush with large amounts of water for at least 15 minutes keeping eyelids open. -
Page 4: Table Of Contents
Notes, Cautions and Warnings ......6 Introduction .........7 Overview . - Page 5 Network Menu ....... . 55 Memory Menu ....... . 58 Sys Adjust menu .
-
Page 6: Notes, Cautions And Warnings
Warnings Note: A note appears in this manual like this. A note provides additional information to supplement the main text which may help you to use and understand the product. A caution appears in this manual like this. A caution provides additional information which, if ignored, may result in equipment malfunction or damage. -
Page 7: Introduction
Your printer includes these features: • High Definition Color (HD Color), multi-level technology produces more subtle tones and smoother gradations of color to lend photographic quality to your documents; • 600 x 600, 1200 x 600 dpi (dots per inch) and High Definition Color (HD Color) print resolution for high quality image production showing the finest detail;... -
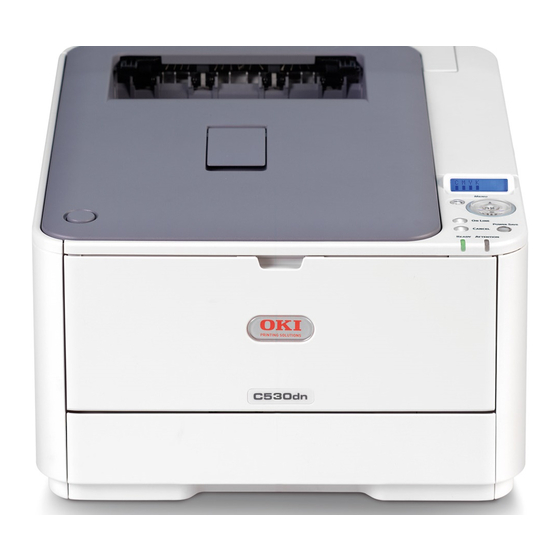
Page 8: Overview
Overview ______________________ Front View 1. Output stacker, face down Standard printed copy delivery point. Holds up to 150 sheets of 20 lb. US Bond or 80 g/m² paper. 2. Operator panel Menu driven operator controls and LCD* panel. 3. Paper tray Standard paper tray. -
Page 9: Multi-Purpose Tray (Mpt) View
Multi-Purpose Tray (MPT) View 1. MPT paper level indicator 1. Paper support 1. Paper platform 1. Paper Guides 1. Tray Latch Button – Introduction... -
Page 10: Interior View
Interior View 1. LED heads 2. Fuser release levers 3. Toner Cartridges ( 4. Black Toner Cartridge 5. Drum Unit – Introduction... -
Page 11: Rear View
* The Network Interface may have a protective “plug” which must be removed before connection can be made. When the rear paper stacker is open, paper exits the printer through the rear and is stacked face up. This is mainly used for 4. -
Page 12: Changing The Display Language
Note: If your machine is connected locally (via USB), when it transitions to Sleep mode its status is viewed as off-line. To use the printer in this state, you must press the Power Save to exit sleep mode. _________________ – Introduction... -
Page 13: Switching Off
Switching off Model C530 only: If you have an SD card fitted, always follow the correct shutdown procedure to ensure that no data is lost. Press the OK button on the control panel to enter the menu. Press the Menu down button and scroll to the Shutdown menu. -
Page 14: Paper Recommendations
Your printer will handle a variety of print media, including a range of paper weights and sizes, labels and envelopes. This section provides general advice on choice of media, and explains how to use each type. The best performance will be obtained when using standard 20- 24 lb. -
Page 15: Tray 1 And Optional Tray 2
If you have identical paper stock loaded in another tray (2nd tray if you have one, or multi purpose tray) you can set the printer to automatically switch to the other tray when the current tray runs out of paper. When printing from Windows applications, this function is enabled in the driver settings. -
Page 16: Multi Purpose Tray
3/8-inch (10 mm). Face Down Stacker ______________ The face down stacker on the top of the printer can hold up to 150 sheets of 21 lb. US Bond (80 g/m²) standard paper, and can handle paper stocks up to 47 lb. US Bond (176 g/m²). -
Page 17: Loading Paper
Tray 1 and Optional Tray 2 ________ Remove the paper tray from the printer. Fan the paper to be loaded at the edges (1) and in the middle (2) to ensure that all sheets are properly separated, then tap the edges of the stack on a flat surface to make it flush again (3). - Page 18 Adjust the rear stopper (1) and paper guides (2) to the size of paper being used. – C330/C530 Loading Paper...
- Page 19 Load paper as shown, keeping the stack below the maximum fill line (1). Note Letterhead paper should be loaded face down with the top edge towards the front of the printer. – C330/C530 Loading Paper...
- Page 20 Gently insert the paper tray in the printer. To prevent paper jams: • Do not leave space between the paper and the guides and rear stopper. • Do not overfill the paper tray. Capacity depends on the type of paper stock.
- Page 21 • For face down printing, make sure the face up (rear) stacker (a) is closed (the paper exits from the top of the printer). Stacking capacity is approximately 150 sheets, depending on paper weight. • For face up printing, make sure the face up (rear) stacker is open and the paper support (1) is extended.
- Page 22 CAUTION! Do not open or close the rear paper exit while printing as it may result in a paper jam. – C330/C530 Loading Paper...
-
Page 23: Multi-Purpose Tray
Multi-Purpose Tray ________________________ Note Do not exceed the paper capacity of about 100 sheets or 10 envelopes. Maximum stacking depth is 3/8-inch (10 mm). – C330/C530 Loading Paper... - Page 24 Open the multi purpose tray. Fold out the paper supports. – C330/C530 Loading Paper...
- Page 25 Press gently down on the paper platform to ensure it is latched down. Adjust the paper guides (1) to the size of paper being used. – C330/C530 Loading Paper...
- Page 26 • Envelopes: load face up with top edge to the left and short edge into the printer. Do not select duplex printing on envelopes. – C330/C530 Loading Paper...
- Page 27 Press the tray latch button inwards to release the paper platform, so that the paper is lifted and gripped in place. Set the correct paper size for the multi purpose tray in the Media Menu (see “Menu Functions” on page 28). –...
-
Page 28: Menu Functions
This section lists the menus accessed via the controls on the printer’s operator panel and displayed in the LCD window. Operator Panel ___________________ C330 Panel Item 1. Ready LED 2. Attention 3. Display Function ON: Ready to receive data. BLINKING: Processing data. - Page 29 Panel Item Function 4. Menu • When the printer is off line or on line, press to Buttons • In Menu mode, scrolls through the menu item • Press for 2 secs. or longer to jump from top to 5. On Line •...
- Page 30 Panel Item Function 8. Cancel • In Print mode, deletes the data being printed or Button • If any of the following error messages appears • In the Menu mode, press to exit the menu and 9. Power Save Model C530 only. Pressing this button switches the Button machine into sleep or wake-up mode.
-
Page 31: How To Print The Menu Map
How to Print the Menu Map __________ The Menu Map provides a listing of the current printer menu settings. To print one out: Press the OK button. Press the down arrow key to go to the Information Menu. Press OK. -
Page 32: How To Change The Settings: Users
It should be noted that many of these settings can be, and often are, overridden by settings in the Windows printer drivers. However, several of the driver settings can be left at “Printer Setting”, which will then default to the settings entered in these printer menus. -
Page 33: How To Change The Settings: Administrator
Disabled categories are not displayed in the User’s menu. Only a system administrator can change these settings. Turn OFF the printer. Turn ON the printer while pressing the OK button. When Admin Menu appears, take your finger off the button. Press the OK button. -
Page 34: Menus
Note This guide may reference menu items or features that your model does not have installed or does not support. Print Jobs Menu: Model C530 Only Note: This menu only displays if the optional SD card is installed. ITEM ACTION ENCRYPTED NOT FOUND PRINT... - Page 35 ITEM ACTION STORED NOT FOUND PRINT DELETE Used to print out a stored job in the SD card. Not Found will be displayed where a file, which could be printed is not available. The following message will appear if a print- able file is available.
-
Page 36: Information Menu
Prints Network information. Prints a list of overlays, macros, fonts and other files stored on the printer’s SD card (if installed). Prints a list of all internal PCL fonts plus those stored in ROM (slot 0), flash memory and SD card (if installed). -
Page 37: Shutdown Menu
This item should always be selected before switching the printer off, to ensure that no data is lost. ITEM SETTING SHUTDOWN EXECUTE START Performs controlled shutdown of the printer. Only power the printer off when the dis- play indicates that shutdown is complete. -
Page 38: Print Menu
If this function is not enabled, the printer will stop and request the correct size of paper to be loaded. Sets whether the printer checks the matching of printed data size and that of the tray. - Page 39 Similarly, when the paper size of a job is set to Letter but there is no Letter set in the printer, if there is A4 paper in the printer, the job will be printed on A4 paper without requesting the user to fill the paper tray with Letter paper.
- Page 40 ITEM ACTION ORIENTATI PORTRAIT LANDSCAPE LINES PER 5 - 128 PAGE LINES DEFAULT IS 64 LINES EDIT SIZE CASSETTE SIZE,A4, A5, A6,B5, LEGAL14, LEGAL13.5, LEGAL13, LETTER, EXECUTIVE, CUSTOM, COM-9 ENVELOPE, COM-10 ENVELOPE, MONARCH ENVELOPE, ENVELOPE, C5, INDEX CARD X DIMEN- 2.5 - 8.5 SION INCH...
-
Page 41: Media Menu
TOM setting see X-DIMENSION and Y-DIMEN- SION in “Print menu” above. Selects the type of media loaded in this tray. This will help the printer to adjust its internal operating parameters, such as engine speed and fusing temperature, to better accommo- date the media to be fed. - Page 42 X-DIMENSION and Y-DIMENSION in “Print menu” above. Selects the type of media loaded in this tray (if installed). This will help the printer to adjust its internal operating parameters, such as engine speed and fusing temperature, to better accommodate the media to be fed. For...
- Page 43 ITEM ACTION MPT PAPER SIZE LEGAL14 LEGAL13.5 LEGAL13 LETTER EXECUTIVE CUSTOM COM-9 ENVELOPE COM-10 ENVELOPE MONARCH DL ENVE- LOPE C5 ENVE- LOPE INDEX CARD Selects the size of paper to be fed from the multi purpose tray. For CUSTOM setting see X-DIMENSION and Y-DIMENSION in “Print menu”...
- Page 44 Millimeter MEASURE Inch Selects the type of media to be fed from the multi purpose tray so that the printer can adjust its internal parameters to better accommodate the selected type of media. Note: USERTYPEn are displayed only if regis- tered in the host PC/Server.
-
Page 45: Color Menu
ITEM ACTION DENSITY AUTO CONTROL MANUAL ADJUST EXECUTE DENSITY COLOR PRINT TUNING PATTERN -3~0~+3 C HIGHLIGHT C MID-TONE -3~0~+3 C DARK -3~0~+3 M HIGHLIGHT -3~0~+3 M MID-TONE -3~0~+3 M DARK -3~0~+3 Y HIGHLIGHT -3~0~+3 Y MID-TONE -3~0~+3 Y DARK -3~0~+3 K HIGHLIGHT -3~0~+3 K MID-TONE... - Page 46 ITEM ACTION AJST EXECUTE REGISTRATION C REG FINE -3~0~+3 ADJUST -3~0~+3 M REG FINE -3~0~+3 ADJUST Y REG FINE ADJUST SIMULATION SWOP EURO- SCALE JAPAN MEDIUM HIGH CMY100% DISABLE DENSITY ENABLE CMYK CONVERSION Performs automatic color registration adjustment. Normally this is done on power on and when the top cover is opened and then closed.
-
Page 47: Sys Config Menu
In this mode power consumption is reduced to a low level required to just keep the printer operating and ready to receive data. When a job is sent the printer will require a warm-up time of up to 1 minute before printing can begin. - Page 48 Specifies whether the printer should perform jam recovery after a paper jam has occurred. If ON, the printer will attempt to re-print any pages lost due to a paper jam once the jam has been cleared. If ON, the printer will print error details when a PostScript Emulation error occurs.
-
Page 49: Pcl Emulation Menu
ITEM ACTION FONT SOURCE RESIDENT RESIDENT FONT NO. I0 ~ 190 FONT PITCH 0.44 CPI ~ 10.00 CPI ~ 99.99 FONT HEIGHT 4.00 POINT ~ 12.00 POINT ~ 999.75 POINT SYMBOL SET PC-8 (DEFAULT SYMBOL SET ONLY SHOWN) A4 PRINT WIDTH COLUMN COLUMN... - Page 50 ITEM ACTION PRINT MARGIN NORMAL 1/5 INCH 1/6 INCH TRUE BLACK PEN WIDTH ADJUST TRAY ID# MP TRAY 1 ~ 4 ~ 59 TRAY 2 1 ~ 5 ~ 59 Sets the non-printable page area. NORMAL is PCL compatible. Selects whether black image data is printed using black toner (ON) or 100% CMY (OFF).
-
Page 51: Ppr Emulation Menu
ITEM ACTION CHARACTER 10 CPI; PITCH 12 CPI; 17 CPI; 20 CPI; PROPORTI ONAL FONT 12CPI TO CONDENSE 20CPI 12CPI TO 12CPI CHARACTER SET-1 SET-2 SYMBOL SET IBM-437 (DEFAULT SYMBOL SET ONLY SHOWN) LETTER O DISABLE STYLE ENABLE ZERO NORMAL CHARACTER SLASHED LINE PITCH... - Page 52 ITEM ACTION 11 INCH FORM LENGTH 11.7 INCH 12 INCH TOF POSITION 0.0INCH 1.0INCH LEFT MARGIN 0.0INCH 1.0INCH FIT TO LETTER DISABLE ENABLE TEXT HEIGHT SAME DIFF Specifies the length of paper. Specifies the distance of print from the top edge of the paper.
-
Page 53: Fx Emulation Menu Calibration
ITEM ACTION CHARACTER 10 CPI; PITCH 12 CPI; 17 CPI; 20 CPI; PROPOR- TIONAL CHARACTER SET-1 SET-2 SYMBOL SET IBM-437 (Default Symbol Set only shown) LETTER 0 DISABLE STYLE ENABLE ZERO CHAR- NORMAL ACTER SLASHED LINE PITCH 6 LPI; 8 WHITE PAGE OFF / ON Selects whether blank pages are printed or SKIP... -
Page 54: Usb Menu
ITEM ACTION LEFT MARGIN 0.0INCH 1.0INCH FIT TO LET- DISABLE ENABLE TEXT HEIGHT SAME DIFF USB Menu This menu controls the operation of the printer’s USB data interface. ITEM SETTINGS SOFT ENABLE RESET DISABLE SPEED 12 MBPS 480 MBPS OFFLINE... -
Page 55: Network Menu
ITEM ACTION TCP/IP ENABLE DISABLE IP VERSION IP v4 IP v4+v6 IP v6 NETBEUI ENABLE DISABLE NETBIOS C330: OVER TCP ENABLE / DISABLE C530: ENABLE / DISABLE NETWARE C330: ENABLE / DISABLE C530: ENABLE / DISABLE ETHERTALK ENABLE\ DISABLE Enables or disables this network protocol. Sets up the IP version. - Page 56 ITEM ACTION FRAME TYPE AUTO / 802.2 / 802.3 / ETHER- NET II / SNAP IP ADDRESS AUTO / MANUAL IPV4 xxx.xxx.x ADDRESS xx.xxx SUBNET xxx.xxx.x MASK xx.xxx GATEWAY xxx.xxx.x ADDRESS xx.xxx ENABLE / DISABLE TELNET ENABLE / DISABLE ENABLE / DISABLE IPSEC ENABLE /...
- Page 57 HALF FACTORY EXECUTE DEFAULTS Selects network size. When NORMAL is selected, printer can work effectively, even when connected to a HUB that has a spanning tree feature. However, printer start up time gets longer when computers are connected with two or three small LANs.
-
Page 58: Memory Menu
ITEM ACTION RECEIVE BUF AUTO SIZE 0.5MB 16MB 32MB RESOURCE AUTO SAVE 0.5MB 16MB 32MB Sys Adjust menu ITEM ACTION X ADJUST +2.00MIL LIMETER 0.00MILL IMETER 2.00MILLI METER Sets the size of the receive Sets the size of the resource saving area. Adjusts the position of a whole print image in the direction perpendicular to the direc- tion the paper runs, that is horizontally, in... - Page 59 ITEM ACTION Y ADJUST +2.00MIL LIMETER 0.00MILL IMETER 2.00MILLI METER DUPLEX X +2.00MIL ADJUST LIMETER 0.00MILL IMETER 2.00MILLI METER DUPLEX Y +2.00MIL ADJUST LIMETER 0.00MILL IMETER 2.00MILLI METER DRUM CLEAN- HEX DUMP EXECUTE Adjusts the position of a whole print image in the direction the paper runs, that is verti- cally, in 0.25 mm increments.
-
Page 60: Maintenance Menu
ITEM ACTION MENU RESET EXECUTE SAVE MENU EXECUTE RESTORE EXECUTE MENU POWER SAVE ENABLE / DISABLE SLEEP ENABLE / DISABLE PAPER BLACK –2~0~+2 Used for small adjustments when you expe- Resets menus to default settings. Saves the current menu settings. The last menu executed is saved and the menu pre- viously saved is overwritten and erased. -
Page 61: Usage Menu
Usage Menu This menu is for information only, and provides an indication of total usage of the printer and the expected life left in its consumable items. This is particularly useful if you do not have a full set of replacement consumables to hand and you need to know how soon you will need them. -
Page 62: Administrator Menu
This menu should only be changed by the System Administrator. In order to gain access to this menu, follow the instructions in “How to change the settings - administrator” earlier in this chapter. This menu is in ENGLISH only. SECTION Enter Password OP MENU ALL CATE-... - Page 63 SECTION OP MENU SHUTDOWN (cont.) MENU PRINT MENU MEDIA MENU COLOR MENU ENABLE SYS CONFIG MENU ITEM SETTING ENABLE DISABLE ENABLE DISABLE ENABLE DISABLE DISABLE ENABLE DISABLE – C330/C530 Menu Functions EXPLANATION Set up ENABLE/DISABLE con- dition for SHUTDOWN MENU category.
- Page 64 SECTION OP MENU PCL EMULA- (cont.) TION PPR EMULA- TION FX EMULA- TION USB MENU NETWORK MENU MEMORY MENU ITEM SETTING ENABLE DISABLE ENABLE DISABLE ENABLE DISABLE ENABLE DISABLE ENABLE DISABLE ENABLE DISABLE – C330/C530 Menu Functions EXPLANATION Set up ENABLE/DISABLE con- dition for PCL EMULATION category.
- Page 65 Enable: Display a near-life warning. Disable: Do not display a near-life warning. If DISABLE is selected, the printer does not display life warning after cover opening and closing. Display Condition: NEARLIFE STATUS is set to DISABLE.
- Page 66 SECTION CONFIG. NEARLIFE MENU (cont.) ECO MODE SECURITY JOB LIMITA- MENU TION ITEM SETTING ENABLE DISABLE ENCRYPT ED JOB – C330/C530 Menu Functions EXPLANATION Enables/disables illumination of front panel LED when “near-end-of-life” warning of a toner, drum, fuser, or belt occurs.
- Page 67 Are You Sure? If No is selected, the display will return to the previous menu. If Yes is selected, the printer will be automatically reboo- ted and the encoding function will become effective. Display Conditions:...
- Page 68 Are You Sure? If No is selected, the display will return to the previous menu. If Yes is selected, the printer will be automatically reboo- ted and the encoding function will become invalid. Display Conditions:...
- Page 69 Are You Sure? If No is selected, the display will return to the previous menu. If Yes is selected, the printer will be automatically reboo- ted and the resetting of the cipher key will be executed. Display Conditions:...
- Page 70 ARE YOU SURE? YES/NO If “NO” is selected, the dis- play will go back to the source menu. If “YES” is selected, the printer will automatically reboot and execute SD card Initializa- tion. This item is displayed only if the SD card (option) is installed.
- Page 71 YES/NO If NO is selected, the display will go back to the source menu. If YES is selected, the printer will automatically reboot and initialize the spec- ified partition. This item is displayed only if the SD card (option) is installed.
- Page 72 When No is set, access to the SD Card results in FAIL because the SD Card is regarded as not attached. After setting change and exit from the menu, the printer will restart. This item is displayed only if the SD card (option) is installed.
- Page 73 Deletion of all data stored in the SD Card. Data cannot be recovered. DoD 5220.22-M sanitizing formula is used for clearing the card. The printer will restart after changing the setup menu. The progress of the proce- dure is displayed as a per- centage.
- Page 74 SECTION FILE SYS INITIAL LOCK YES MAINTE2 (cont.) LANGUAGE LANG INI- MENU TIALIZE PS MENU L1 TRAY SIDM MENU SIDM MAN- UAL ID# SIDM MANUAL2 SIDM MP TRAY ID# SIDM TRAY1 SIDM TRAY2 ITEM SETTING EXECUTE TYPE1 TYPE2 0 ~ 2 ~ 9 Set up Pn specified in MAN- 0 ~ 3 ~ 9 Set up Pn specified MANUAL 0 ~ 4 ~ 9 Set up Pn specified 0 ~ 1 ~ 9 Set up Pn specified TRAY 1by...
-
Page 75: Print Statistics Menu
EXPLANATION Set a new password for entering the administrator’s menu. Password should be from 6 to 12 digits of alpha/numeric characters (or mix) The default value is “aaaaaa” The printer will restart after the ADMIN MENU. Verification of above. EXPLANATION... - Page 76 SECTION ITEM GROUP COUNTER SUPPLIES REPORT RST MAIN CNT CHANGE NEW PASS- PASSWORD WORD VERIFY PASSWORD SETTING ENABLE/ Specifies if the Group counter is DISABLE displayed in the Usage Report Print. Enable: Displayed, Disable: Not displayed. Conditions for display: Enable must be selected in Print Statistics >...
-
Page 77: Replacing Consumables And Maintenance Items
Maintenance Items Order Information ______________ Only use genuine Oki Original products to ensure the best quality and performance from your hardware. Non Oki Original products may adversely affect your printer's performance. Item Toner, black Standard Capacity High Capacity Toner, cyan... -
Page 78: Toner Cartridge Replacement
Toner Cartridge Replacement Note: When the LCD display indicates TONER LOW, or if print appears faded, first open the top cover and try tapping the cartridge a few times to evenly distribute the toner powder. This will enable you to obtain the best "yield" from your toner cartridge. - Page 79 Press the cover release and open the printer’s top cover fully. If the printer has been powered on, the fuser may be hot. This area is clearly labelled. Do not touch. Note the positions of the four cartridges. It is essential that they go back in the same order.
- Page 80 Slide the colored release collar (1) on the cartridge to be replaced fully towards the right hand side of the printer. Lift the right-hand end of the cartridge and then draw the cartridge to the right to release the left-hand end as shown, and withdraw the toner cartridge out of the printer.
- Page 81 Put the cartridge down gently onto a piece of paper to prevent toner from marking your furniture Clean the top of the ID unit with a clean, lint free cloth. Remove the new cartridge from its box but leave its wrapping material in place for the moment.
- Page 82 Pressing gently down on the cartridge to ensure that it is firmly seated, slide the colored collar (1) fully towards the left hand side of the printer. This will lock the cartridge into place and release toner into the image drum unit.
- Page 83 10. Gently wipe the LED head surface with a clean, lint free cloth. 11. Finally, close the top cover and press down firmly so that the cover latches closed. – C330/C530 Replacing Consumables and Maintenance...
-
Page 84: Image Drum Replacement
Image Drum Replacement. ________ Static sensitive devices, handle with care. Press the cover release and open the printer’s top cover fully. If the printer has been powered on, the fuser will be hot. This area is clearly labelled. Do not touch. - Page 85 5 minutes. If the drum unit needs to be out of the printer for longer than this, please wrap the cartridge inside a black plastic bag to keep it away from light. Never expose the drum to direct sunlight or very bright room lighting.
- Page 86 Note the positions of the toner cartridges in the drum (1 = Yellow, 2 = Magenta, 3 = cyan, 4 = black). It is essential that you replace them in the same order. Remove the four toner cartridges from the drum: –...
- Page 87 Slide the colored release collars (1) on the cartridges fully to the right. This will release the bond between the toner cartridge and the image drum unit. – C330/C530 Replacing Consumables and Maintenance...
- Page 88 Lift the right-hand end of each toner cartridge and draw the cartridge to the right to release the left-hand end. Then lift each toner cartridge out of the image drum and place them on a piece of paper to avoid marking your furniture. Note: See the instructions that come with the new image drum for additional information such as the removal of...
- Page 89 Take the new image drum cartridge out of its packaging and place it on the piece of paper where the old cartridge was placed. Keep it the same way round as the old unit. Pack the old cartridge inside the packaging material for disposal. Place each of the toner cartridges in the new image drum reversing the process used to remove them.
- Page 90 Holding the complete assembly by its handles, lower it into place in the printer, locating the pegs at each end into their slots in the sides of the printer cavity. – C330/C530 Replacing Consumables and Maintenance...
- Page 91 10. Finally, close the top cover and press down firmly so that the cover latches closed. Important! If you need to return or transport your printer for any reason, please make sure you remove the image drum unit beforehand and place it in the bag provided.
-
Page 92: Replacing The Transfer Belt Unit
Replacing the Transfer Belt Unit ____ The belt unit is located under the image drum assembly. Switch off the printer and allow the fuser to cool for about 10 minutes before opening the cover. Press the cover release and open the printer’s top cover fully. - Page 93 5 minutes. If the drum unit needs to be out of the printer for longer than this, please wrap the cartridge inside a black plastic bag to keep it away from light.
- Page 94 Pull the locking levers at each side of the transfer belt up and towards the front of the machine. – C330/C530 Replacing Consumables and Maintenance...
- Page 95 Using the locking levers, lift the belt upwards and withdraw it from the printer. – C330/C530 Replacing Consumables and Maintenance...
- Page 96 Unpack the new transfer belt. Position the transfer belt drive gear (1) toward the left rear of the printer and lower the belt into the printer. – C330/C530 Replacing Consumables and Maintenance...
- Page 97 Push the lock levers toward the back of the printer. – C330/C530 Replacing Consumables and Maintenance...
- Page 98 Align the pegs on the sides of the image drum with the slots in the sides of the printer and place the image drum and toner cartridges back into the printer. Close the top cover and press down firmly so that the cover latches closed.
-
Page 99: Fuser Replacement
Fuser Replacement ______________ The fuser is located inside the printer just behind the toner cartridges. If the printer has recently been powered on, some fuser components will be very hot. Handle the fuser with extreme care, holding it only by its handle, which will only be mildly warm to the touch. - Page 100 Pull the two fuser retaining levers (1) towards the front of the printer so that they are fully upright. Holding the fuser by its handle (2), lift the fuser straight up and out of the printer. If the fuser is still warm, place it on a flat surface which will not be damaged by heat.
- Page 101 Holding the new fuser by its handle (1), make sure that it is the correct way round. The retaining levers (2) should be fully upright, and the two locating lugs (3) should be towards you. – C330/C530 Replacing Consumables and Maintenance...
- Page 102 Lower the fuser into the printer, locating the two lugs into their slots in the sides of the printer cavity. Then push the two retaining levers towards the rear of the printer to lock the fuser in place. Close the top cover and press down firmly so that the cover latches closed.
-
Page 103: Cleaning The Led Head
LED heads. Do not use methyl alcohol or other solvents on the LED head as damage to the lens surface will occur. Press the cover release and open the printer’s top cover fully. – C330/C530 Replacing Consumables and Maintenance CAUTION! - Page 104 Gently wipe the LED head surfaces with a clean, lint free cloth. Close the top cover and press down firmly so that the cover latches closed. – C330/C530 Replacing Consumables and Maintenance...
-
Page 105: Cleaning The Housing
Cleaning the Housing ____________ Do not use solvents such as benzene, thinner or alcohol as a cleaning agent. Turn off the printer. Wipe the housing with a soft cloth moistened sparingly with water or neutral detergent. Use a soft, dry cloth to dry the housing. - Page 106 Switch the power back on. – C330/C530 Replacing Consumables and Maintenance...
-
Page 107: Available Options
See the installation instructions supplied with the options. Additional Memory ______________ Oki P/N 70061801 The basic printer comes equipped with the following main memory: • Model C330: 128 MB • Model C530: 256 MB. This can be upgraded with an additional memory board of 256 MB or 512 MB, giving a maximum total memory capacity of: •... -
Page 108: Additional Paper Tray
Additional Paper Tray ____________ Oki P/N 44274501 The paper tray holds 530 sheets of 20-lb. US Bond (75 g/m paper and require no tools to install. – C330/C530 Available Options... -
Page 109: Troubleshooting
Provided that you follow the recommendations in this guide on the use of print media, and you keep the media in good condition prior to use, your printer should give years of reliable service. However, paper jams occasionally do occur, and this section explains how to clear them quickly and simply. -
Page 110: Paper Sensor Error Codes
Paper Sensor Error Codes _________ Code # Location Duplex Unit Duplex Unit Paper Feed Paper Path Paper Exit Not shown above: Code 409, jam at face up stacker (rear exit). If fitted. – C330/C530 Troubleshooting Code # Location Duplex Unit MP Tray Paper Tray 1 Paper Tray *... -
Page 111: Clearing Paper Jams
If a sheet is well advanced out of the top of the printer, simply grip it and pull gently to draw it fully out. If it does not remove easily, do not use excessive force. It can be removed from the rear later. - Page 112 Holding it by its handles, lift the image drum, complete with its toner cartridges, up and out of the printer. – C330/C530 Troubleshooting...
- Page 113 Do not touch it and do not expose it to normal room light for more than 5 minutes. If the drum unit needs to be out of the printer for longer than this, wrap the cartridge inside a black plastic bag to keep it away from light.
- Page 114 • To remove a sheet with its leading edge at the front of the belt, lift the plastic guard at the front of the printer (1), then carefully lift the sheet (2) from the belt and pull it CAUTION! –...
- Page 115 forwards into the internal drum cavity and withdraw the sheet. • To remove a sheet from the central area of the belt, carefully separate the sheet from the belt surface and withdraw the sheet. – C330/C530 Troubleshooting...
- Page 116 • To remove a sheet just entering the fuser (1), separate the trailing edge of the sheet from the belt (2), push the fuser pressure release lever (3) towards the front and down to release the fuser’s grip on the sheet, and withdraw the sheet through the drum cavity area.
- Page 117 (a)Push the two retaining levers (1) towards the rear of the printer to release the fuser. Withdraw the fuser unit using the handle (2). (b)Press release lever (1) and pull the trapped paper from the fuser. – C330/C530 Troubleshooting...
- Page 118 (c)Replace the fuser unit, and move the fuser locking levers (1) toward the rear of the printer. – C330/C530 Troubleshooting...
- Page 119 If you were duplex printing when the jam occurred, check for any jammed sheets in the duplexer: Pull the transfer belt lock levers (1) up and toward the front of the printer. – C330/C530 Troubleshooting...
- Page 120 (b)Lift the transfer belt out of the printer. (c)Remove any sheets of paper. – C330/C530 Troubleshooting...
- Page 121 (d)Position the transfer belt drive gear (1) toward the left rear of the printer and lower the belt back into the printer. (e)Push the lock levers toward the back of the printer. – C330/C530 Troubleshooting...
- Page 122 Align the pegs on the sides of the image drum with the slots in the sides of the printer and place the image drum and toner cartridges back into the printer. Lower the top cover but do not press down to latch it closed yet.
- Page 123 If it is not already open, open the rear exit tray. • Pull out any sheets found in this area. • If the sheet is low down in this area and difficult to remove, it is probably still gripped by the fuser. In this case raise the top cover, reach around and press down on the fuser pressure release lever (d).
- Page 124 10. If you are not using the rear exit tray, close it once any paper has been removed from this area. 11. Pull out the paper tray and remove any jammed paper. Ensure that all paper is stacked properly, is undamaged, and –...
- Page 125 that the paper guides are properly positioned against the edges of the paper stack. Replace the tray. – C330/C530 Troubleshooting...
- Page 126 12. Finally, close the top cover and press down firmly so that the cover latches closed. When the jam has been cleared, if Jam Recovery is set to ON in the Sys Config Menu, the printer will attempt to reprint any pages lost due to paper jams. – C330/C530 Troubleshooting...
-
Page 127: Troubleshooting Print Problems
The LED head is dirty. images are fading vertically. The toner is low. The paper is not suitable for the printer unit. – C330/C530 Troubleshooting _________ Steps to take Open the top cover and wipe the LED heads with a soft, lint-free cloth (see page 103). - Page 128 The toner cartridge is light. not properly seated. The toner is low. The paper is moist. The paper is not suitable for the printer unit. Thickness and type of paper are inappropriate. Recycled paper is being used. Partially faded Paper is moist or dry.
- Page 129 Symptoms Possible causes Horizontal When the interval is Lines and about 4 inches (94 spots appear mm), the image drum periodically. (the green tube) is damaged or dirty. When the interval is about 1.2 in (30 mm), there may be foreign particles in the image drum cartridge.
-
Page 130: Possible Causes
Symptoms Possible causes Glossiness is The thickness and type not uniform. of the paper are incorrectly set. – C330/C530 Troubleshooting Steps to take Set the correct value of media type and media weight in the Media menu or set one value lighter for media weight. -
Page 131: Utilities
Utilities: Windows _______________ To get to the utilities on the CD: Insert the CD-ROM into the CD drive. Select your language in the box at the top right, then click Next. Click “I Agree” to accept the software license agreement. Click the appropriate selection (see below) from the Menu screen. -
Page 132: Color Software Utilities
Print pdf files without first opening them in an application. • Configuration Tool Use to discover the printer and to set up the NIC card. Provides information including the IP address, Subnet Mask, Default Gateway Address and Mac Address of devices connected to the host computer. -
Page 133: Internet Downloads
This selection takes you directly to the Oki Data web site for downloading any of the utilities listed below. Follow the on-screen instructions to download the utilities of your choice. • PrintSuperVIsion (PSV) View the real-time status of printers, monitor and report... -
Page 134: Profile Assistant
Generate reports of how the printer has been used for color versus mono, etc. • Network Card Setup Use to set up the printer network card. • Operator Panel Language Setup Use to change the language of the printer’s display. -
Page 135: Specifications
Specifications are subject to change without notice. ITEM Dimensions 16.1” W x 19.8” D x 9.5” H (410 x 504 x 242 mm) Weight 48.5 lbs. (22 kg) approx. Power supply 110-127 V ac @ 50/60 Hz ± 2% 220 to 240 V ac @ 50/60 Hz ± 2% Power Operating (77°F / 25°C): consumption...