Advertisement
Quick Links
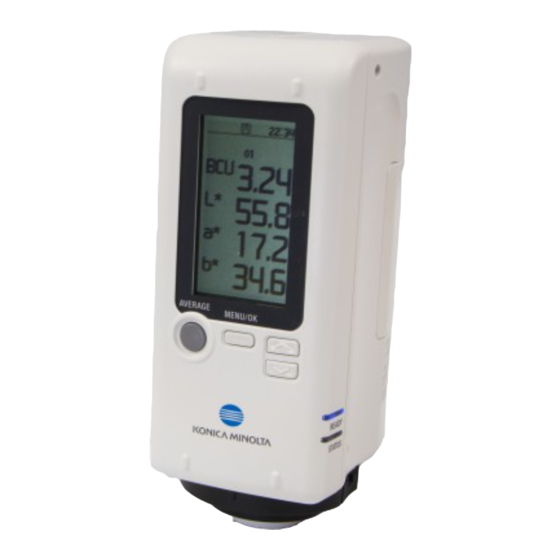
9222-A80F-52
Before using the COLOR READER CR-10 Plus
Notes on Instruction Manual
The Operation Manual of COLOR READER CR-10 Plus is stored in the instru-
ment as a PDF file.
To view the PDF file, you need a PDF viewing software.
The latest instruction manual also can be downloaded from the following URL:
https://www.konicaminolta.com/instruments/download/instruction_manual/
index.html
Introduction
Thank you for purchasing this KONICA MINOLTA instrument. This instrument is a lightweight,
compact colorimeter for reflecting an object's color. It was developed to provide color difference
measurements in a variety of industrial fields.
In addition, when used with the included PC application, data saved in the instrument can be
displayed in a list and saved to the PC.
Packing materials of the product
Be sure to keep all packing materials used for shipping the product (cardboard box, cushioning
material, plastic bags, etc.).
This instrument is a precision measuring instrument. When transporting the instrument to a
service facility for maintenance or for other reasons, be sure to use the packing materials to
minimize shock or vibration. If the packing materials are lost or damaged, contact a KONICA
MINOLTA-authorized service facility.
Safety Symbols
The following symbols are used in this manual to prevent accidents that may occur as result of
incorrect use of the instrument.
Denotes a sentence regarding a safety
Denotes a prohibited operation.
warning or note.
Never disassemble the instrument.
Read the sentence carefully to ensure
Denotes an instruction.
safe and correct use.
Always disconnect the AC adapter
Denotes a prohibited operation.
from the AC outlet.
The operation must never been
This symbol indicates alternating
performed.
current (AC).
Denotes an instruction.
This symbol indicates direct current
The instruction must be strictly
(DC).
adhered to.
This symbol indicates class II
protection against electric shock.
Safety Precautions
To ensure correct use of this instrument, read the following points carefully and adhere to them.
After you have read this manual, keep it in a safe place where it can be referred to anytime a ques-
tion arises.
Warning
(Failure to adhere to the following points may result in death
or serious injury.)
Do not use the instrument in places where flammable or combustible gases (gasoline, etc.)
are present. Doing so may cause a fire.
Always use KONICA MINOLTA's optional accessory AC adapter (AC-A308) or USB bus
power AC adapter (AC-A305J,K,L,M) connected to an AC outlet of the rated voltage and
frequency 100-240 VAC (50/60 Hz). If an AC adapter other than those specified by KONICA
MINOLTA is used, or if the adapter is connected to an unsupported voltage, it may result in
damage to the adapter, fire, or electric shock.
If the instrument will not be used for a long time, disconnect the AC adapter power plug
from the AC outlet. Accumulated dirt or water on the prongs of the AC adapter's plug may
cause a fire and should be removed.
Do not insert or disconnect the AC adapter with wet hands. Doing so may cause electric
shock.
Do not disassemble or modify the instrument or the AC adapter. Doing so may cause a fire
or electric shock.
The instrument should not be operated if it is or the AC adapter is damaged, or if smoke or
odd smells occur. Doing so may cause a fire. In such situations, turn the power OFF imme-
diately, disconnect the AC adapter power plug from the AC outlet (or remove the batteries if
using battery power) and contact the nearest KONICA MINOLTA-authorized service facility.
Take special care not to allow liquid or metal objects to enter the instrument and the AC
adapter. Doing so may cause a fire. Should liquid or metal objects enter the instrument, turn
the power OFF immediately, disconnect the AC adapter power plug from the AC outlet (or
remove the batteries if using battery power) and contact the nearest KONICA MINOLTA-
authorized service facility.
Do not forcibly bend, twist or pull the power cord. Do not place heavy objects on, or damage
or modify the power cord. Doing so may damage the power cord and cause fire or electric
shock.
Always disconnect the power cord by holding the power plug. Pulling the power cord itself
may damage it and cause fire or electric shock.
Firmly push the AC adapter power plug completely into the outlet. If the power plug is not
pushed completely in, it may cause a fire or electric shock.
©2015-2022 KONICA MINOLTA, INC.
Before using this instrument, please read this manual.
Do not dispose of the batteries in a fire or charge, short-circuit, heat, or disassemble the
batteries. Doing so may ca
In the event that a battery leaks and the fluid comes into contact with your eye, do not rub
your eye and wash it with clean water, and then immediately consult a doctor. If the leaked
fluid comes into contact with skin or clothing, immediately rinse with water. In addition, stop
using the instrument if one of its batteries has leaked.
Use a dedicated charger (of the specified type, model, etc.) to charge nickelmetal hydride
batteries. If charging conditions or a charger different from that specified is used for charg-
ing, the battery may leak, overheat, or catch fire.
Correctly dispose of batteries used in the instrument. Batteries incorrectly disposed of may
short-circuit, overheat, and catch fire. This may lead to fire, injury, or burns. Battery dis-
posal methods vary depending on each municipality. Adhere to municipal instructions when
disposing of batteries, or give the batteries to your contracted waste disposal contractor.
Do not touch the batteries with wet hands. Doing so may result in electric shock or a
malfunction.
Do not look directly at the lamp. The lamp is extremely bright and emits ultraviolet rays.
Doing so may injure the eyes.
Caution
(Failure to adhere to the following points may result in injury
or damage to the instrument or other property.)
When using the AC adapter, provide an environment such that there is an outlet near the
instrument and the power plug of the AC adapter can be easily plugged or unplugged.
Take care not to pinch yourself on the areas of the instrument that open and close. Doing so
may result in injury
Do not use any batteries other than those specified for the instrument. Do not use a new battery
and an old battery or batteries of different types together.
When loading the batteries into the instrument, ensure they are oriented according to the polarity
indication (positive + and negative -) on the instrument.
Otherwise, the batteries may break or leak, resulting in a fire or injury, or contamination of the area.
Do not use the instrument if the sample surface aperture (measurement area) is in the line
of sight. Doing so may result in injury to the eye.
When cleaning the instrument, unplug the AC adapter power plug from the outlet. Failure to
do so may cause electric shock.
Connecting to a PC
This instrument is equipped with a USB connection terminal.
The included USB cable (IF-A25) can be used to connect the instrument to a PC and transmit data
as well as to allow the instrument to be controlled or configured from a PC application.
Notes • Do not connect any cable other than the designated cable to the USB connection terminal.
• When connected via USB and communicating, communications may be interrupted by being
exposed to strong external static electricity or radio waves from the surrounding area. In such
cases, turn the power OFF and then turn it ON again.
• Firmly connect the USB connector plug in the correct orientation.
• Always connect and disconnect the USB cable by the connector's plug.
Do not pull it out by the cable itself or bend it with unreasonable force.
Doing so may break the cable.
• Connect the instrument using a cable with a suitable length. If the cable is not of a suitable
length, connection problems may arise or the cable may break.
• Firmly push in the USB cable connector that matches the shape of the port (connection
terminal) until it can go in no further.
• With Windows 10 or 11, if the instrument can only be operated using USB Feed, set "USB
selective suspend setting" under Power Options to "Disabled".
Memo • The USB communication port on the instrument is USB 2.0-compliant.
Connecting to a PC
PC System Requirements
●OS
Windows 10 Pro 32bit, 64bit
Windows 11 Pro
(English, Simplified Chinese, or Japanese)
●The hardware of the computer system to be used must meet or exceed the recommended system
requirements for compatible OS being used.
●One USB2.0 port is necessary.
(Connection diagram)
USB cable
IF-A25
COLOR READER
PC
CR-10 Plus
(commercially available)
Printed in Japan
CCMCKK
Connecting to a PC
Operating Procedure
❶
Connect the Micro-B connector of the USB cable to the USB connection
terminal on the instrument.
Firmly push it in until it can go no further and verify that it is securely connected.
❷
Verify that the instrument power has been turned ON.
MENU/OK
❸
Press
, move the selection frame to "USB Connec." using either
MENU/OK
or
, and then press
.
❹
Move the selection frame to "PC" using either
MENU/OK
press
.
"Connecting to PC" will be displayed on the instrument.
Memo Pressing the MENU/OK key while "Connecting to PC" is displayed on the screen will cause
the instrument to be disconnected from the PC.
❺
Connect the A connector of the USB cable to the USB port on the PC.
After connecting to the PC, the instrument will be recognized as a mass storage device, and
an AutoPlay dialog box will be displayed.
Memo If the instrument is not recognized as a mass storage device, disconnect and reconnect the
cable, and start the procedure over again from step 2.
When First Connecting to the PC
Notes • To use a PC application with the instrument connected to a PC, the dedicated USB driver
must be installed.
• If the PC being used is connected to the Internet, the Windows updater will be used to
automatically install the drivers.
• Installation may take several minutes.
• Once installation is complete, a COM port will be assigned to the instrument.
If the PC's operating system is Windows 10 or Windows 11, the USB driver will be installed auto-
matically the first time the instrument is connected to the PC.
If the PC is not connected to the Internet, manually install the drivers by accessing the APP folder
in the instrument's mass storage folder.
❶
Checking the connection status (COM port number)
[Windows 10/11]
Right-click on the Start button in the lower-left corner of the screen, and navigate to [Device
Manager] → [Ports (COM & LPT)].
Measuring Instruments(COM**): The COM port number assigned to the instrument will be
displayed for "**".
"USB Serial Device (COM**)" may be displayed.
Regardless of the PC's OS, if the connected instrument is not displayed under [Ports (COM
& LPT)] and is instead displayed under [Unknown device] with an "!" mark, follow the proce-
リストストラップ
dure under "Updating the drive manually".
CR-A73
❷
Updating the drive manually
If the connected instrument is not displayed under [Ports (COM & LPT)] and is instead dis-
played under [Other Devices] as "! Unknown Device", the USB driver will need to be installed
manually.
保護カバー
保管ケース
❷ -1
Right-click on the unknown de-
CR-A91
CR-A90
ソフトケース
vice marked with "!"
CR-A94
❷ -2
Select [Update Driver Software],
and click "Locate and install
driver software manually."
保護キャップ
白色校正板付き
CR-A93
キャップ
CR-A86
❷ -3
Specify the APP folder in the in-
strument's mass storage folder
標準付属品
as the save destination, and click
別売付属品
"Next".
Click "Install" on the confirma-
tion screen with the message that
reads, "Would you like to install
this device software?"
After installing, click "Close".
❷ -4
Confirm the COM port number
from step 1, and then navigate
to [Device Manager] → [Ports
(COM & LPT)]. If "Measur-
ing Instruments(COM**)"
or
, and then
is displayed, driver update
has been completed.
Launching the PC Application
Notes on Use
• This software is application software for use with Windows 10 or Windows11 Please note that this
software does not include any OS.
• One of the above OS must be installed on the PC in order to install this software.
Memo
The PC application cannot be run when logged in to the PC under a
"Guest" account.
Notes
[Windows 10/11]
When starting the PC application, if ".NET Framework 3.5" is requested, follow the proce-
dure below to configure the settings.
(Procedure)
Under [Control Panel] → [Programs and Features], select "Turn Windows features on or
off".
In the Windows Features window, check the box next to ".NET Framework 3.5" and click
"OK". Follow the displayed procedure to install.
If this installation is not completed properly, be sure to verify that Windows Update works as
it should.
❶
When connecting to a PC, an AutoPlay dialog will be displayed. Click
"Open folder to view files"
Notes
Writing to the instrument memory is not permitted. Note that even if
files are moved they will not be saved to the instrument.
❷
Copy the "CRX_APP.exe" file in the APP folder and the MANUAL folder
to the PC's hard drive.
Notes
If the PC application is run from within the APP folder, some
functions may not be usable depending on the PC. Copy the file to
単3形乾電池
the PC's hard drive before using.
ACアダプター
(4本)
❸
AC-A308
Double-click the "CRX_APP.exe" file copied to the PC's hard drive to
カラーリーダー
launch the PC application.
CR-20
Notes
If a screen app "No instrument could be found",
click "OK" to close the dialog, check the following
points, and then reconnect the instrument via
USB.
If "Connecting to PC" is not shown in the
display, repeat steps ❶ to ❷ of Connecting to
USBケーブル
a PC.
IF-A25
Check the connection status (see When First
Connecting to the PC) and update the driver
manually if necessary.
Memo T h e P C a p p l i c a t i o n d o e s n o t s u p p o r t
connections to multiple instruments.
About the folder structure in the mass storage
パーソナルコンピューター
of the instrument
(市販品)
The mass storage of the instrument has the following structure. Files in each folder are as follows:
PC application
(stored in the instrument)
・ ・ ・ ・ Application "CRX_APP.EXE" is contained.
APP
・ ・ ・ ・ The instrument can hold data.
DATA
・ ・ ・ ・ Various manuals can be accessed.
MANUAL
WARNING
USBバスパワー用
ACアダプター
AC-A305J
プリンターセット
CR-A95
ロールペーパー
(5巻入り)
DP-A22
Advertisement

Related Manuals for Konica Minolta CR-10 Plus


Summary of Contents for Konica Minolta CR-10 Plus
- Page 1 9222-A80F-52 CCMCKK Before using the COLOR READER CR-10 Plus Connecting to a PC Click “Install” on the confirma- Before using this instrument, please read this manual. Operating Procedure tion screen with the message that reads, “Would you like to install ❶...
- Page 2 Power button USB terminal Install the PC application in accordance with the "Before using COLOR READER CR-10 Plus" on the back, and start the application. One of three languages can be selected for the display language: Chinese, Japanese, or English.