Table of Contents
Advertisement
Quick Links
Venipuncture and Injection Training Arm
LF00698U (Light), LF01252U (Medium), LF00997U (Dark)
Instruction Manual
WARNING: Products may contain dry natural rubber. 5-Year Warranty
901 Janesville Avenue, P.O. Box 901 • Fort Atkinson, Wisconsin 53538-0901
1.800.431.4310 • nascohealthcare.com • Email: lifeform@eNasco.com
COPYRIGHT © NASCO 2001 HC190001INM3
About The Simulator
The Life/form® Venipuncture and Injection Training Arm Simulator will provide years of trouble-free usage,
the skin and veins can be readily replaced when needed. The life of the replaceable skin and veins will be
prolonged by utilizing smaller needle sizes (such as 20- to 25-gauge). However, if instruction with larger
Advertisement
Table of Contents

Related Manuals for Nasco Healthcare LF00698U


Summary of Contents for Nasco Healthcare LF00698U
- Page 1 Venipuncture and Injection Training Arm LF00698U (Light), LF01252U (Medium), LF00997U (Dark) Instruction Manual WARNING: Products may contain dry natural rubber. 5-Year Warranty 901 Janesville Avenue, P.O. Box 901 • Fort Atkinson, Wisconsin 53538-0901 1.800.431.4310 • nascohealthcare.com • Email: lifeform@eNasco.com COPYRIGHT © NASCO 2001 HC190001INM3 About The Simulator The Life/form®...
-
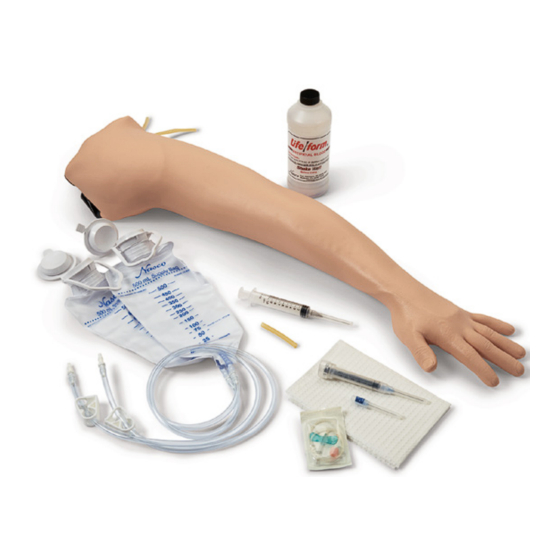
Page 2: List Of Components
needle sizes is required, this can be done; the skin and veins will merely need to be replaced sooner. The Skin and Vein Kits are available through Nasco (see list of supplies). List of Components A. Adult Venipuncture and Injection Training Arm B. - Page 3 FIGURE 1 - top image, FIGURE 2 - bottom image General Instructions For Use A. Pressurizing the Veins with Synthetic Blood 1. Add 1 pint of distilled water to the pint bottle with blood powder; shake it to mix. (See figure 3.) FIGURE 3...
- Page 4 2. Be sure the clamp on the fluid supply bag tubing is closed, fill it with the blood and hang the bag no more than 18" above the level of the arm. (See Figure 4.) (Fluid Supply Stand shown sold separately.) 3.
- Page 5 FIGURE 6 B. IV Injection and Withdrawal 1. Start with a fully pressurized arm. See procedure A under General Instructions for Use. 2. Close the clamp on the resting fluid supply bag. 3. Open the clamp on the hanging fluid supply bag. The arm is now ready to perform injections or withdrawals along any of the 8 fluid lines present in the arm.
- Page 6 C. Intravenous Infusions 1. Begin with a fully pressurized arm. See procedure A under General Instructions for Use. 2. Select the appropriate intravenous infusion needles or butterfly included. Nasco recommends small gauge needles (20- to 25-gauge). 3. Make sure the arm is palm down and the clamps on both fluid supply bags are closed. 4.
-
Page 7: Care And Maintenance
FIGURE 10 - left side, FIGURE 11 - right side Care And Maintenance The Adult Venipuncture Injection and Training Arm should be completely drained of fluid and dry after each use. Simulated blood can be reused. A. Draining and Rinsing the Simulator 1. -
Page 8: Troubleshooting
4. DO NOT allow “blood” to dry on simulator &8211; it may stain the skin. 5. Use only 500 cc of infusion fluid, as a larger amount will also increase the pressure of the venous system, resulting in leaks. 6. DO NOT clean the simulator with solvents or corrosive material as they will damage it. 7.