Table of Contents
Advertisement
Quick Links
GERi
™
– LF04040U, LF04001U, LF04030U, LF04003U, LF04005U (Light)
LF04115U, LF04116U, LF04117U, LF04118U, LF04119U (Medium)
KERi
™
– LF04021U, LF04020U, LF04022U, LF04023U, LF04026U (Light)
LF04120U, LF04121U, LF04122U, LF04123U, LF04124U (Medium)
GERi
™
Nursing Skills Manikins
The ideal manikin for all OBRA
required training!
/KERi
™
The
Advertisement
Table of Contents

Related Manuals for Nasco Healthcare Lifeform GERi LF04040U


Summary of Contents for Nasco Healthcare Lifeform GERi LF04040U
- Page 1 GERi /KERi ™ ™ Nursing Skills Manikins The ideal manikin for all OBRA required training! GERi ™ – LF04040U, LF04001U, LF04030U, LF04003U, LF04005U (Light) LF04115U, LF04116U, LF04117U, LF04118U, LF04119U (Medium) KERi ™ – LF04021U, LF04020U, LF04022U, LF04023U, LF04026U (Light) LF04120U, LF04121U, LF04122U, LF04123U, LF04124U (Medium)
- Page 3 GERi KERi Congratulations for choosing a ™ ™ Nursing Skills Manikin. This realistic, fully functional, light- weight nursing manikin comes with a superior range of motion and allows you to simulate over 35 nursing and medical procedures. The quality and simple design makes this manikin easy to use and care for while teaching basic patient care techniques, so please familiarize yourself with this manual before using the manikin for training.
-
Page 4: Additional Features
Basic GERi ™ LF04040U (Light), LF04115U (Medium) Basic KERi ™ LF04021U (Light), LF04120U (Medium) List of Components Part Numbers • Male and Female Genitalia M: LF04109U; F: LF04110U • GERi ™ : LF04087U KERi ™ : LF04086U • Dentures LF04085U •... - Page 5 Advanced GERi ™ LF04030U (Light), LF04117U (Medium) Advanced KERi ™ LF04022U (Light), LF04122U (Medium) List of Components Part Numbers • Male and Female Genitalia M: LF04075(N)U; F: LF04076(N)U (Light) • GERi ™ : LF04087U KERi ™ : LF04086U • Dentures LF04085U •...
-
Page 6: Part Numbers
Auscultation GERi ™ LF04003U (Light), LF04118U (Medium) Auscultation KERi ™ LF04023U (Light), LF04123U (Medium) List of Components Part Numbers • Male and Female Genitalia M: LF04075(N)U; F: LF04076(N)U (Light) • GERi ™ : LF04087U KERi ™ : LF04086U • Dentures LF04085U •... - Page 7 Advanced Auscultation GERi ™ LF04005U (Light), LF04119U (Medium) Advanced Auscultation KERi ™ LF04026U (Light), LF04121U (Medium) List of Components Part Numbers • Male and Female Genitalia M: LF04075(N)U; F: LF04076(N)U (Light) • GERi ™ : LF04087U KERi ™ : LF04086U •...
- Page 8 Superior Range of Motion GERi ™ /KERi ™ manikins offer the most complete and realistic range of motion with no pinch points. This allows for correct patient positioning. The manikin’ s articulation includes: • Trunk — rotation, hyperextension • Shoulder — abduction, adduction, rotation, hyperextension •...
- Page 9 Bed Baths and Hair Washing Figure 4 To simplify cleanup, dry bed baths and shampoos are recommended to eliminate the chance of water entering the inside of the manikin. However, a soft cloth and water can be used for bathing exercises, and a mild shampoo and cool water can be used for hair washing.
- Page 10 Lift and push the bottom of the genital insert The prostate gland represents stage B progres- sion of prostatic cancer. A discrete hard nodule is into the genital opening in the body. Push the palpable in the upper right quadrant, simulating top of the genital insert down and in to secure a beginning state of carcinoma.
- Page 11 Thoroughly lubricate the 16 French Foley cathe- To simplify cleanup, you may choose to leave ter supplied with your manikin prior to insertion. the applicator in place while positioning the manikin to drain, or remove applicator and After completion of the exercise, remove the position the manikin over a drainage basin.
- Page 12 Ostomy Care (Exterior Ostomy Care available on all GERi ™ /KERi ™ models) Figure 14 Figure 13 Colostomy and ileostomy care can be practiced on GERi ™ /KERi ™ models, including stoma dilation, Inside the upper torso is a reservoir bag with cleaning, and ostomy bag changing procedures.
- Page 13 Rinse with water to clean. Reverse the procedure Following completion of the procedures, com- to reattach the internal stoma reservoirs. Ensure pletely drain the stomach reservoir and allow reservoirs are clean and dry prior to reattaching drying prior to reattaching and storing inside for storage.
- Page 14 B. Preparing the Arm for Intravenous Infusions Setup Start with an “empty” unpressurized arm. A. Filling the Venous System and Preparing the Close the clamp at the end of IV Bag A and Arm for Blood Draws then fill with distilled water, 500 cc maximum. Prepare the synthetic blood by filling the pint Hang IV Bag A not more than 18"...
- Page 15 Check to ensure hanging bags are hung to the To start the IV flow, open the clamps on both appropriate height. Hanging the supply bags IV Bags A and B. slightly higher for bags not producing enough Proof of proper procedure will be evidenced by the pressure can create just enough gravitational flow of fluid from IV Bag A.
- Page 16 Cautions This synthetic blood is specially formulated to be compatible with the self-sealing veins and plastics used in manufacturing the injectable training arm. NEVER use synthetic blood for intramuscular injection. DO NOT use dull or burred needles, these will cause leaks in the system. Burred needles will cause permanent damage.
- Page 17 Setting Systolic and Diastolic Pressure Press the Menu Key once. Figure 25 Figure 28 The “Set SYSTOLIC” pressure menu will display Attach this end of the pressure line to the in the Electronic Control Unit window. (See female luer fitting assembled at the top of Figure 28.) the electronic control unit marked CUFF.
- Page 18 Setting the Palpable Pulse Setting the Auscultatory Gap Pulse Location Figure 31 Figure 33 The palpable pulse is found at the radial location. This function is included to simulate the gap that is (See Figure 31.) sometimes present between phases 1 and 2 in which no audible sound is noted.
-
Page 19: Low Battery Indicator
Low Battery Indicator Preparing Your Sphygmomanometer for Use with Blood Pressure Simulator When the battery supply diminishes to a level near the point the unit will no longer function properly, In the event the supplied sphygmomanometer a “low batt” message will display on the systolic would cease to operate, any standard sphygmo- pressure menu when the systolic pressure reaches manometer can be adapted for use with the blood... - Page 20 Supplies/Replacement Parts for Blood After the unit is activated, the LCD display on Pressure Simulator the remote control will be in the “status” mode, displaying the current menu settings for the LF01189U Speaker System heart and lung conditions. LF01096U Electronic Control Unit with Note: Powering on one remote control will activate Sphygmomanometer...
-
Page 21: Available Supplies
Select the desired heart and lung sounds fol- General Instruction for Care of Your Basic, lowing the instructions above. Complete, Advanced, Auscultation, and GERi /KERi Advanced Auscultation ™ ™ Manikin Place the diaphragm of the SmartScope ™ over the appropriate sites on the manikin. Most cleaning can be done with a soft cloth, mild soap, and warm water. - Page 22 Anterior Heart Sites Second left intercostal space Second right (pulmonic) intercostal space (aortic) Third left intercostal space (Erb’s point) (lower left sternum) Fourth left intercostal space Apex Erb’s Point Aortic Second Pulmonic Second Fourth Left Third Left Lower Left Right Intercostal Left Intercostal Intercostal Apex...
- Page 23 Anterior/Posterior Lung Sites First right intercostal space Tracheal Site First left intercostal space Lower anterior Upper posterior Lower posterior Midaxillary Midaxillary Lower Posterior Lung Sites First Left & Right Upper Posterior Tracheal Site Two Midaxillary Sites Intercostal Sites Lung Sites 2 Lower Anterior Sites 1.
-
Page 24: Replacement Parts
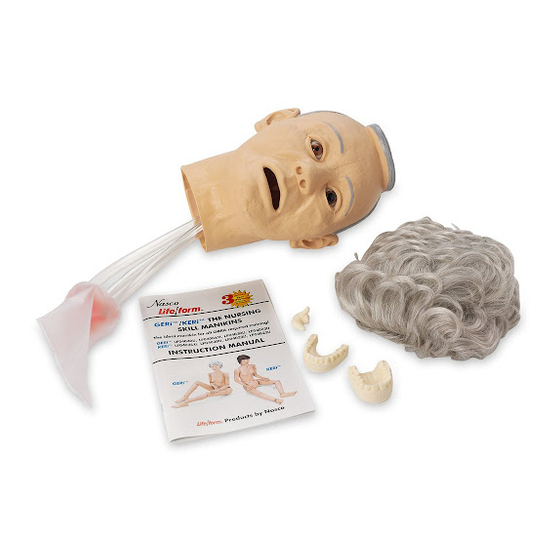
GERi ™ KERi ™ Replacement Parts LF03136U Constricted Pupil LF03135U LF04086U Dilated Pupil KERi ™ Female Wig LF04090U LF04087U Hearing LF04088(N)U LF04083(N)U GERi ™ Female Wig GERi ™ Head KERi ™ Head LF04054(N)U LF04085U Left Shoulder Joint Dentures LF04063(N)U Right Shoulder Joint LF04055(N)U Shoulder (Left) LF04051(N)U... -
Page 25: Hardware Guide
GERi ™ KERi ™ Hardware Guide Complete Single Arm Hardware Set LF04108U 2 – 1 ⁄ " screw post 2 – 2 ⁄ " screw post Replacement Neck Pivot 1 – 2 ⁄ " screw post LF04106U 1 – 3 ⁄... - Page 26 Life/form Supplies for GERi ™ KERi ™ Manikins ® Ankle Sh. wt. 0.69 lbs. LF04069(N)U Arm, Complete Right Sh. wt. 3.50 lbs. LF04091(N)U Arm, Complete Left LF01130U Sh. wt. 3.50 lbs. LF00846U LF04092(N)U Foot, Left Arm, Upper Sh. wt. 1.75 lbs. Sh.
- Page 27 Nasco Cleaner LF09919U Life/form Use to remove stubborn stains from simulators. LF01189U ® 12-oz. bottle. Sh. wt. 0.88 lbs. LF09919U Replacement Blood Pressure Cuff Sh. wt. 1.25 lbs. LF01073U LF04081U Shoulder Injection Site Sh. wt. 1.25 lbs. Sh. wt. 0.25 lbs. LF04061(N)U LF04051(N)U Hip Injection Site for...
- Page 28 Other Available Simulators LF01280U Micro-Preemie, Light LF01281U Micro-Preemie, Dark LF01400U Newborn Nursing Skills and ALS Simulator LF01420U C.H.A.R.L.I.E. Neonatal Resusciltation Simulator with Interactive ECG Simulator LF01280U LF01280U LF01420U LF01400U 901 Janesville Avenue, P.O. Box 901 Fort Atkinson, Wisconsin 53538-0901 1.888.558.9595 nascohealthcare.com •...