Table of Contents
Advertisement
Quick Links
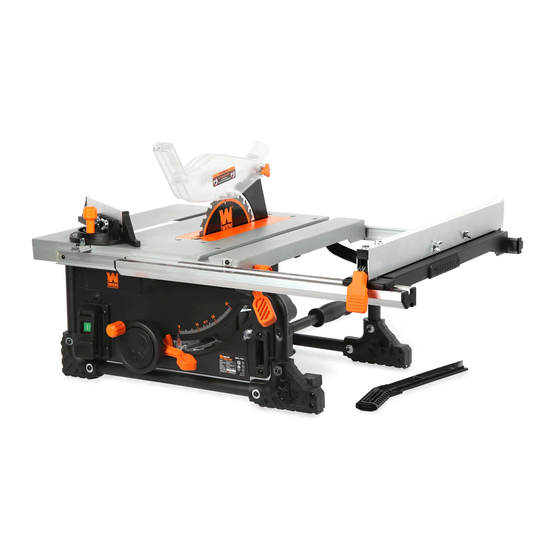
MODEL TT0811
8.25" BENCHTOP
TABLE SAW
Instruction Manual
NEED HELP? CONTACT US!
Have product questions? Need technical support? Please feel free to contact us:
1-800-232-1195 (M-F 8AM-5PM CST)
TECHSUPPORT@WENPRODUCTS.COM
IMPORTANT: Your new tool has been engineered and manufactured to WEN's highest standards for dependability,
ease of operation, and operator safety. When properly cared for, this product will supply you years of rugged,
trouble-free performance. Pay close attention to the rules for safe operation, warnings, and cautions. If you use
your tool properly and for its intended purpose, you will enjoy years of safe, reliable service.
WENPRODUCTS.COM
For replacement parts and the most up-to-date instruction manuals, visit
Advertisement
Table of Contents

Related Manuals for Wen TT0811


Summary of Contents for Wen TT0811
- Page 1 1-800-232-1195 (M-F 8AM-5PM CST) TECHSUPPORT@WENPRODUCTS.COM IMPORTANT: Your new tool has been engineered and manufactured to WEN’s highest standards for dependability, ease of operation, and operator safety. When properly cared for, this product will supply you years of rugged, trouble-free performance. Pay close attention to the rules for safe operation, warnings, and cautions. If you use your tool properly and for its intended purpose, you will enjoy years of safe, reliable service.
-
Page 2: Table Of Contents
CONTENTS WELCOME Introduction ..................... 3 Specifications ....................3 SAFETY General Safety Rules ..................4 Specific Rules for Your Table Saw ..............6 Electrical Information ..................8 BEFORE OPERATING Unpacking & Packing List ................9 Know Your Table Saw ..................10 Assembly &... -
Page 3: Welcome
INTRODUCTION Thanks for purchasing the WEN Table Saw. We know you are excited to put your tool to work, but first, please take a moment to read through the manual. Safe operation of this tool requires that you read and understand this operator’s manual and all the labels affixed to the tool. -
Page 4: Safety
GENERAL SAFETY RULES WARNING! Read all safety warnings and all instructions. Failure to follow the warnings and instructions may result in electric shock, fire and/or serious injury. Safety is a combination of common sense, staying alert and knowing how your item works. The term “power tool” in the warnings refers to your mains-operated (corded) power tool or battery-operated (cordless) power tool. - Page 5 GENERAL SAFETY RULES WARNING! Read all safety warnings and all instructions. Failure to follow the warnings and instructions may result in electric shock, fire and/or serious injury. Safety is a combination of common sense, staying alert and knowing how your item works. The term “power tool” in the warnings refers to your mains-operated (corded) power tool or battery-operated (cordless) power tool.
-
Page 6: Specific Rules For Your Table Saw
SPECIFIC RULES FOR YOUR TABLE SAW WARNING! Do not operate the power tool until you have read and understood the following instructions and the warning labels. SAW BLADE SAFETY PERSONAL SAFETY 1. Always wear protective gloves when handling saw 1. Operate in a well ventilated area. Keep the floor area blades. - Page 7 SPECIFIC RULES FOR YOUR TABLE SAW WARNING! Do not operate the power tool until you have read and understood the following instructions and the warning labels. TABLE SAW SAFETY 7. Power tools must always be held by the insulated gripping surfaces when performing an operation, en- 1.
-
Page 8: Electrical Information
ELECTRICAL INFORMATION DOUBLE-INSULATED TOOLS The tool’s electrical system is double-insulated where two systems of insulation are provided. This eliminates the need for the usual three-wire grounded power cord. Double-insulated tools do not need to be grounded, nor should a means for grounding be added to the product. All exposed metal parts are isolated from the internal metal motor components with protecting insulation. -
Page 9: Before Operating
UNPACKING & PACKING LIST WARNING! Do not plug in or turn on the tool until it is fully assembled according to the instructions. Failure to follow the safety instructions may result in serious personal injury. UNPACKING With the help of a friend or trustworthy foe, carefully remove the table saw from the packaging. Make sure to take out all contents and accessories. -
Page 10: Know Your Table Saw
TOOL PURPOSE Make smooth, straight cuts easily with your WEN Table Saw. Refer to the following diagrams to become familiar- ized with all the parts and controls of your table saw. The components will be referred to later in the manual for assembly and operation instructions. -
Page 11: Assembly & Adjustments
ASSEMBLY & ADJUSTMENTS WARNING! Do not plug in or turn on the tool until it is fully assembled according to the instructions. Read through and become familiarized with the following procedures of handling and adjusting your tool. Failure to follow the safety instructions may result in serious personal injury. INSTALLING THE BLADE GUARD Fig. - Page 12 ASSEMBLY & ADJUSTMENTS ADJUSTING THE EXTENSION TABLE Fig. 4 The extension table gives you the ability to increase the length of the table for greater ripping capacity. To use the extension table: 1. Flip the rip fence lock (Fig. 4 - 1) up to unlock the rip fence (Fig.
- Page 13 ASSEMBLY & ADJUSTMENTS REPLACING THE BLADE Fig. 6 1. Remove the blade guard. 2. Lower the saw blade using the height adjustment wheel and remove the table insert. See "REMOVING & REPLAC- ING THE TABLE INSERT" section on page 11. 3.
-
Page 14: Operation & Maintenance
OPERATION WARNING! Do not plug in or turn on the tool until it is fully assembled according to the instructions. Read through and become familiarized with the following procedures of handling and adjusting your tool. Failure to follow the safety instructions may result in serious personal injury. WARNING! Before operating the table saw, make sure to equip yourself with a dust mask, ear protection, and safety glasses for protection from possible injuries. - Page 15 OPERATION USING THE MITER GAUGE Fig. 12 The miter gauge provides greater accuracy in angled cuts. For very close tolerances, test cuts are recommended. The miter gauge can be turned 60° to the right or left. 1. Loosen the lock knob (Fig. 12 - 1). 2.
- Page 16 OPERATION MAKING A BEVEL CROSS CUT 1. Remove the rip fence. See "ADJUSTING THE EXTENSION TABLE" section on page 12. 2. Unlock the bevel locking knob and adjust the bevel angle to the desired setting. Lock the bevel locking knob once the desired angle has been set.
-
Page 17: Maintenance
WARNING! Any attempt to repair or replace electrical parts on this tool may be hazardous. Servicing of the tool must be performed by a qualified technician. When servicing, use only identical WEN replacement parts. Use of other parts may be hazardous or induce product failure. -
Page 18: Exploded View & Parts List
EXPLODED VIEW & PARTS LIST NOTE: Not all parts may be available for purchase. Parts and accessories that wear down over the course of normal use are not covered under the warranty. - Page 19 0-02 TT0811-002 Motor assembly 0-25 TT0811-025 bending Washer 0-03 TT0811-003 Base assembly 0-26 TT0811-026 Lock nut M6 0-04 TT0811-004 Blade guard assembly 0-27 TT0811-027 Data label 0-05 TT0811-005 Table insert assembly 0-28 TT0811-028 Logo 0-06 TT0811-006 Miter gauge assembly 0-29...
- Page 20 Hex screws M6x18 Cross head screws Extension Table 1-03 TT0811-103 1-25 TT0811-125 M5x16 Locking Block 1-04 TT0811-104 Table 1-26 TT0811-126 Socket screws M5x14 Cross head screws 1-27 TT0811-127 Small link 1-05 TT0811-105 M4x12 1-28 TT0811-128 Slide rail 1-06 TT0811-106 Carry handle...
- Page 21 TT0811-246 Gear 2-19 TT0811-219 Washer 2-47 TT0811-247 Flat key 2-20 TT0811-220 Threaded rod holder 2-48 TT0811-248 Arbor 2-21 TT0811-221 Socket screws M5x20 Cross head screws 2-22 TT0811-222 Self-tapping screws 2-49 TT0811-249 M5x10 2-23 TT0811-223 Threaded rod 2-50 TT0811-250 Bearing 2-24...
- Page 22 3-39 TT0811-339 Switch trigger 3-17 TT0811-317 (Right) 3-40 TT0811-340 Self-tapping screws 3-18 TT0811-318 Carry handle 3-41 TT0811-341 Fixed Switch 3-19 TT0811-319 Self-tapping screws 3-42 TT0811-342 Switch 3-20 TT0811-320 Connecting Rod (Left) 3-43 TT0811-343 Over-load switch 3-21 TT0811-321 Cord storage M4x10...
- Page 23 EXPLODED VIEW & PARTS LIST BLADE GUARD TABLE INSERT Part No. Description Qty. Part No. Description Qty. 4-01 TT0811-401 Label (left) 5-01 TT0811-501 Lock table insert 4-02 TT0811-402 Set screws M6x6 5-02 TT0811-502 O-ring 4-03 TT0811-403 Self-tapping screws 5-03 TT0811-503...
- Page 24 EXPLODED VIEW & PARTS LIST RIP FENCE ASSEMBLY Part No. Description Qty. Part No. Description Qty. 7-01 TT0811-701 Lock nut 7-17 TT0811-717 Connect block 7-02 TT0811-702 Self-tapping screws Cross head screws 7-18 TT0811-718 M4x5 7-03 TT0811-703 Rear clamp plate 7-19...
- Page 25 EXPLODED VIEW & PARTS LIST LOWER BLADE GUARD ASSEMBLY Part No. Description Qty. Part No. Description Qty. 8-01 TT0811-801 Carriage bolt M6x25 8-06 TT0811-806 Wing nut M6 8-02 TT0811-802 Saw blade cover 8-07 TT0811-807 Lower blade guard 8-03 TT0811-803 E ring...
-
Page 26: Warranty Statement
Contact techsupport@wenproducts.com or 1-800-232-1195 with the following information to make arrangements: your shipping address, phone number, serial number, required part numbers, and proof of purchase. Damaged or defective parts and products may need to be sent to WEN before the replacements can be shipped out. - Page 27 NOTES...
- Page 28 THANKS FOR REMEMBERING V. 2022.02.15...