Table of Contents
Advertisement
Quick Links
Advertisement
Table of Contents

Related Manuals for Roland BRIDGE CAST

Summary of Contents for Roland BRIDGE CAST
- Page 1 BRIDGE CAST Owner’s Manual...
-
Page 2: Table Of Contents
Installing the Dedicated App and Driver ......9 Editing the Output Audio Settings ........49 About the BRIDGE CAST App ..........9 Installing the BRIDGE CAST App and Driver ...... 10 Operating Panel Settings (on the BRIDGE CAST) ..50 Connecting to Your Computer or External Equipment Configuring How the Operating Panel Works.... -
Page 3: Bridge Cast Owner's Manual
BRIDGE CAST Owner’s Manual About the “BRIDGE CAST” dedicated app The BRIDGE CAST app is a dedicated app used for configuring the settings of this unit and helps you to use this unit’s features (for computers running Windows/macOS). You can use this app for a variety of operations, such as adjusting the mic sound quality, adjusting the game sound or voice chat audio, backing up/restoring the settings on this unit and more. -
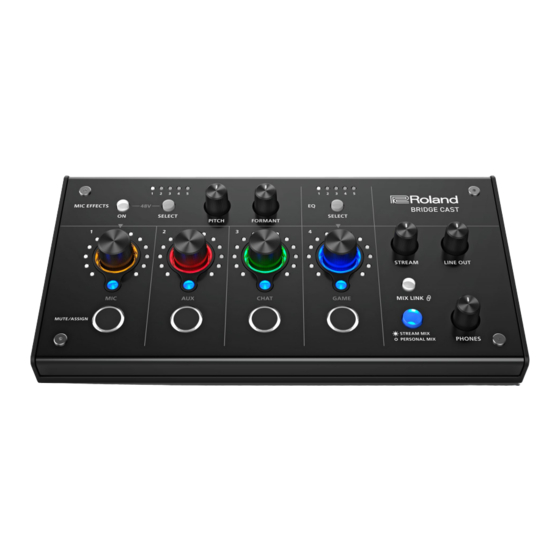
Page 4: Panel Descriptions (On Bridge Cast)
â Rear Panel(P.7) Top Panel You can use the “BRIDGE CAST” dedicated app to access more detailed settings. For details, refer to “About the BRIDGE CAST App(P.9)”. MIC EFFECTS area These are the settings for the mic effects and for the mics that you use. - Page 5 This recalls a mic effect preset. Each press of the button cycles between settings 1 through 5 in order. About the presets You can customize the mic effect settings and overwrite the presets when using the BRIDGE CAST app. â...
- Page 6 CH [1]–[4] knobs These adjust the volume of the input sources assigned to each channel. Set the input sources from “CHANNEL” Ó “CH.1”–“CH.4” Ó “SOURCE(P.50)” in the menu screen of the BRIDGE CAST app. CH 1–4 color indicators These blink when a channel is muted.
-
Page 7: Rear Panel
PERSONAL (PERSONAL ● SYSTEM “BRIDGE CAST CTRL” and “BRIDGE CAST APP” are recognized as MIDI devices, MIX bus audio) when accessing from a MIDI-compatible app on your computer. The dedicated driver must be installed when you use the “PC” setting. - Page 8 Connect this jack to your monitor speakers or other audio equipment. This is a 3.5 mm stereo mini plug. Set the audio to output from “OUTPUT” Ó MODE(P.49)” in the menu screen of the BRIDGE CAST app. “LINE OUT AUX jack (4-pole stereo mini-phone 3.5 mm type) Connect this to your tablet, smartphone or similar device.
-
Page 9: Installing The Dedicated App And Driver
Installing the BRIDGE CAST App and Driver(P.10) About the BRIDGE CAST App The BRIDGE CAST app is a dedicated app used for configuring the settings of this unit and helps you to use this unit’s features (for computers running Windows/macOS). -
Page 10: Installing The Bridge Cast App And Driver
Installing the BRIDGE CAST App and Driver To operate this unit and configure its settings, install the “BRIDGE CAST” dedicated app on your computer. A dedicated driver must be installed to connect this unit to a computer and to handle multiple audio sources. - Page 11 Launch your browser and access the following Web page. https://roland.cm/bridgecast From the downloads page, search for “BRIDGE CAST Driver Ver.xxx for macOS” and click on the link. “xxx” indicates the version number. Follow the onscreen instructions to download the dedicated driver.
-
Page 12: Connecting To Your Computer Or External Equipment And Configuring The Settings
Connecting to Your Computer or External Equipment and Configuring the Settings Connecting to Your Computer or External Equipment and Configuring the Settings This section explains how to connect this unit to your computer or external equipment (such as a mic, monitor speakers or tablet) and how to configure your computer’s device settings. -
Page 13: Connecting To A Computer/External Equipment
Mac users “Connecting to a Mac(P.3)”. Turn on your external equipment. Launch the BRIDGE CAST app. to ensure a listenable volume balance while playing the Adjust the volume game or voice chat sound on your , or while talking into the... - Page 14 Connecting to Your Computer or External Equipment and Configuring the Settings About the power supply This unit does not have a power switch. The power automatically turns on when this unit is connected to a computer (bus power). To turn off the power, first turn off all external equipment and then unplug the USB cable that connects this unit to your computer.
- Page 15 Adjusting the Volume (Level Meter Screen)(P.25) You can change the maximum volume of the headphones/headset. Set this from “SYSTEM” Ó GAIN(P.67)” in the menu screen of the BRIDGE CAST app. “PHONES * Change this setting only after turning the headphones/headset volume all the way down.
-
Page 16: Configuring The Device Settings On Your Computer
See the owner’s manual of your computer or of the respective app for details on the audio input/output settings. When using a game app To output the sound from a game app on your computer to this unit, set the game app output device to “GAME (BRIDGE CAST)”. When using a voice chat app To input the mic audio from this unit into the voice chat app of your computer, and then output the audio of the other party in the voice chat from your computer to this unit, set the input/output device of your voice chat app as shown below. - Page 17 (P.50)” in the menu screen of the BRIDGE CAST app. ● Set the MIDI input device on your MIDI-compatible app to “BRIDGE CAST CTRL”. Receiving (from a MIDI-compatible app to this unit) ● Set the MIDI output device on your MIDI-compatible app to “BRIDGE CAST CTRL”.
-
Page 18: Connecting To A Video Game Console, Ipad Or Iphone
Connecting to a Video Game Console, iPad or iPhone Connecting to a Video Game Console, iPad or iPhone This section explains how to connect this unit to a video game console, iPad or iPhone. â Connecting to a Video Game Console(P.18) â... - Page 19 Connecting to a Video Game Console, iPad or iPhone About the power supply This unit does not have a power switch. The power automatically turns on when this unit is connected to a video game console (bus power). To turn off the power, first turn off all external equipment and then unplug the USB cable that connects this unit to your video game console.
- Page 20 Plays a sound effect (preset sound). ● You can’t use the BRIDGE CAST app while a video game console is connected to the USB port. Before connecting the video game console, make the appropriate settings in the BRIDGE CAST app.
-
Page 21: Connecting To An Ipad/Iphone
Connecting to a Video Game Console, iPad or iPhone Connecting to an iPad/iPhone This is an example of how to connect the devices when you want to use your tablet or smartphone to have a voice chat while listening to the sound of the game. * To prevent malfunction and equipment failure, always turn down the volume, and turn off all the units before making any connections. - Page 22 Connecting to a Video Game Console, iPad or iPhone About the power supply ● This unit does not have a power switch. The power automatically turns on once you connect a USB AC adaptor (commercially available) to supply power. ● This unit may operate in an erratic manner if you try to power it from your iPad/iPhone (bus power), due to insufficient bus power.
- Page 23 Mutes/unmutes the audio for each channel. Plays a sound effect (preset sound). ● You can’t use the BRIDGE CAST app while an iPad/iPhone is connected to the USB port. Before connecting the iPad/iPhone, make the appropriate settings in the BRIDGE CAST app. ●...
-
Page 24: App
Adjusting the Voice Chat Audio Making the Voice Chat Audio Easier to Hear(P.48) Output Settings Editing the Output Audio Settings(P.49) Operating Panel Settings (on the BRIDGE CAST) Configuring How the Operating Panel Works(P.50) Registering a Sound Effect(P.52) Configuring a Profile Creating a Profile(P.55) -
Page 25: Adjusting The Volume (Level Meter Screen)
Adjusting the Volume (Level Meter Screen) Adjusting the Volume (Level Meter Screen) The BRIDGE CAST app features two different screens: a level meter screen and a menu screen. The level meter screen is shown when you launch the app. * The image above shows what the screen looks like when the USB port connection setting is “PC”. - Page 26 This indicates which bus is being controlled, and changes when you operate the bus selection buttons on the BRIDGE CAST. When the input source is “MIC” For the mic audio (not routed through a bus) and PERSONAL MIX, use the BRIDGE CAST app to set which one is being controlled on this unit. Bus selection indicator Links/unlinks the two buses (STREAM MIX, PERSONAL MIX).
- Page 27 Adjusting the Volume (Level Meter Screen) [MENU Ø] button Switches to the menu screen. Click the [Ù LEVEL METER] button in the menu screen to return to the level meter screen. Menu tab See the pages below for details. MIC SETUP Getting Ready to Use a Mic(P.28) MIC CLEANUP...
-
Page 28: Adjusting The Mic Audio
Adjusting the Mic Audio Adjusting the Mic Audio This section explains how to adjust the mic audio. â Getting Ready to Use a Mic(P.28) â Calibrating the Mic Sound Quality (Cleanup)(P.30) â Processing the Mic Audio (Mic Effects)(P.32) â Saving the Mic Effect Settings as a Preset(P.34) â... - Page 29 Adjusting the Mic Audio Adjusting the input gain (sensitivity) Here’s how to adjust the mic’s input gain so that the input audio is at the appropriate level. On the menu screen, click the “MIC SETUP” tab and speak into the mic while adjusting the “GAIN”. Raise the input gain as high as possible, while making sure that the waveform in the graph stays within the blue area.
-
Page 30: Calibrating The Mic Sound Quality (Cleanup)
Adjusting the Mic Audio Calibrating the Mic Sound Quality (Cleanup) Here’s how to adjust the sound quality of the mic audio to make your voice sound listenable and clear. This feature helps you to suppress ambient noise or to normalize the differences in volume between mics, for instance. On the menu screen, click the “MIC CLEANUP”... - Page 31 Adjusting the Mic Audio COMPRESSOR: Makes louder sounds quieter. This reduces the difference between the louder and softer sounds, making the audio more listenable. COMPRESSOR Off, On Turns the compressor on/off. THRESHOLD -48–0 dB Specifies the level used as the threshold at which the compressor is applied. Reduces the level of sounds that exceed the level you specify here.
-
Page 32: Processing The Mic Audio (Mic Effects)
Adjusting the Mic Audio Processing the Mic Audio (Mic Effects) You can apply effects to the mic audio (voice changer and reverb) to process the voice. â Changing the audio (Voice Changer) â Adding reverb to audio (Reverb) Changing the audio (Voice Changer) This effect alters the pitch and tonal quality of your voice. - Page 33 Adjusting the Mic Audio Adding reverb to audio (Reverb) You can add reverb to a voice to give the impression of spatial depth. This is also effective for giving emphasis when announcing the title of a production or program. On the menu screen, click the “MIC EFFECTS” tab and set the parameters in the respective menus. Menu Value Explanation...
-
Page 34: Saving The Mic Effect Settings As A Preset
Adjusting the Mic Audio Saving the Mic Effect Settings as a Preset You can save the current mic effect settings as presets and recall them as needed. You can save up to five presets. * Editable presets are preregistered by factory default. â... - Page 35 Adjusting the Mic Audio Recalling a preset On the menu screen, click the “MIC EFFECTS” tab and then click the preset you want to recall. This recalls the effect settings. When you edit the settings of a preset you recalled, the preset name changes from white to yellow. Initializing a preset Here’s how to initialize a preset and restore the settings of presets 1–5 to their default state.
- Page 36 Adjusting the Mic Audio Click the [OK] button. A confirmation message appears after the data has been initialized. Click the [OK] button to close the message. Related links: Exporting a Mic Effect Preset File(P.37)
-
Page 37: Exporting A Mic Effect Preset File
Adjusting the Mic Audio Exporting a Mic Effect Preset File You can save the effect presets (1–5) as a single file (.brdgcEfx) to your computer. Use the BRIDGE CAST app when you want to reload the saved file into this unit. - Page 38 Adjusting the Mic Audio Loading a preset file Here’s how to apply the settings you saved for the effect presets (1–5) back to this unit. On the menu screen, click the “MIC EFFECTS” tab and then click the [LOAD FILE] button. In the LOAD FILE dialog box, select the file you wish to load (.brdgcEfx), and then click the [Open] button.
- Page 39 Adjusting the Mic Audio Click the [OK] button. A message appears after the effect preset settings have been applied. Click the [OK] button to close the message. Related information: Saving the Mic Effect Settings as a Preset(P.34)
-
Page 40: Adjusting The Game Sound
Adjusting the Game Sound Adjusting the Game Sound This section shows you how to adjust the game sound (input source: GAME ) that’s input from the USB port. *1: When the connection setting for the USB port is “CONSOLE/MOBILE”, the input source is “USB”. â... - Page 41 Adjusting the Game Sound Frequency Band 1 20.9–396 Hz Specifies the boost/cut center frequency for each frequency band. (horizontal sliders) Bands 2–4 20.9–471 Hz * This setting is available when the “DETAIL” switch is enabled. Bands 5–7 341 Hz–3.36 kHz Bands 8, 9 3.00–20.2 kHz Band 10 793 Hz–20.2 kHz...
-
Page 42: Saving The Equalizer Settings As A Preset
Adjusting the Game Sound Saving the Equalizer Settings as a Preset You can save the current equalizer settings as presets and recall them as needed. You can save up to five presets. * Editable presets are preregistered by factory default. â... - Page 43 Adjusting the Game Sound Recalling a preset On the menu screen, click the “GAME” tab and then click the preset you want to recall. This recalls the effect settings. When you edit the settings of a preset you recalled, the preset name changes from white to yellow. Initializing a preset Here’s how to initialize a preset and restore the settings of presets 1–5 to their default state.
- Page 44 Adjusting the Game Sound Click the [OK] button. A confirmation message appears after the data has been initialized. Click the [OK] button to close the message. You can save the equalizer presets as a single file. â Exporting an Equalizer Preset File(P.45)
-
Page 45: Exporting An Equalizer Preset File
Adjusting the Game Sound Exporting an Equalizer Preset File You can save the equalizer presets (1–5) as a single file (.brdgcEQ) to your computer. Use the BRIDGE CAST app when you want to reload the saved file into this unit. - Page 46 Adjusting the Game Sound Loading a preset file Here’s how to apply the settings you saved for the equalizer presets (1–5) back to this unit. On the menu screen, click the “GAME” tab and then click the [LOAD FILE] button. In the LOAD FILE dialog box, select the file you wish to load (.brdgcEQ), and then click the [Open] button.
- Page 47 Adjusting the Game Sound Click the [OK] button. A confirmation message appears after the equalizer preset settings have been applied. Click the [OK] button to close the message. Related links: Saving the Equalizer Settings as a Preset(P.42)
-
Page 48: Adjusting The Voice Chat Audio
Adjusting the Voice Chat Audio Adjusting the Voice Chat Audio This section shows you how to adjust the voice chat sound (input source: CHAT ) that’s input from the USB port. *1: When the connection setting for the USB port is “CONSOLE/MOBILE”, the input source is “USB”. â... -
Page 49: Output Settings
(the audio signal that’s input from the BRIDGE CAST to your computer). By applying delay to the audio output, you can make the timing of the video and audio match. -
Page 50: Operating Panel Settings (On The Bridge Cast)
Registering a Sound Effect(P.52) Configuring How the Operating Panel Works Here’s how to select the input source controlled by the CH [1]–[4] knobs on the BRIDGE CAST, and the functions that are executed by the MUTE/ASSIGN [1]–[4] buttons. You can also change the color of the CH 1–4 indicators. - Page 51 Operating Panel Settings (on the BRIDGE CAST) Menu Value Explanation CH MUTE TO STREAM Mutes/unmutes audio for the channels routed to the STREAM MIX bus. MIX (*3) Mutes/unmutes audio for the channels routed to the PERSONAL MIX bus. CH MUTE TO...
-
Page 52: Registering A Sound Effect
Operating Panel Settings (on the BRIDGE CAST) Registering a Sound Effect You can register a sound effect that you like and make it play back when you press a MUTE/ASSIGN button on this unit. Sound effects are saved in the memory (SFX A, SFX B) of this unit. The memories contain preset sounds when the unit is shipped from the factory. - Page 53 Operating Panel Settings (on the BRIDGE CAST) In the LOAD SFX FILE dialog box, select the WAV file you wish to register, and then click the [Open] button. The WAV file path is shown. Click the [PREVIEW] button to playback a preview of the WAV file you set.
- Page 54 Operating Panel Settings (on the BRIDGE CAST) Click the [OK] button to close the message. To adjust the volume balance between SFX A and SFX B, use the “SFX SOUND SELECT” SFX A or SFX B slider (volume adjustable from 0 to 100).
-
Page 55: Configuring A Profile
Configuring a Profile Configuring a Profile This section explains how to create and use profiles. â Creating a Profile(P.55) â Exporting a Profile(P.59) Creating a Profile The profile function lets you save your own custom settings. By creating profiles for different uses, you can recall your custom settings for each, simply by switching between profiles. - Page 56 Configuring a Profile Creating a profile * Editable profiles are preregistered by factory default. Customize the settings on this unit. On the menu screen, click the “PROFILE” tab and then click the [WRITE] button. Input the profile name and click the save destination memory number in “WRITE TO”. Profile names can contain up to 18 single-byte alphanumeric characters or symbols.
- Page 57 Configuring a Profile Switching between profiles On the menu screen, click the “PROFILE” tab and then click the profile you want to switch to. This switches between settings on this unit. When you edit the settings of a profile you recalled, the profile name changes from white to yellow. Initializing a profile Here’s how to initialize a profile and restore the settings of profiles 1–5 to their default state.
- Page 58 Configuring a Profile Click the [OK] button. A confirmation message appears after the data has been initialized. Click the [OK] button to close the message. You can save the profiles (1–5) as a single file. â Exporting a Profile(P.59)
-
Page 59: Exporting A Profile
Configuring a Profile Exporting a Profile You can save the profiles (1–5) as a single file (.brdgcProfile) to your computer. Use the BRIDGE CAST app when you want to reload the saved file into this unit. â Exporting a profile â... - Page 60 Configuring a Profile Loading a profile Here’s how to apply the settings you saved for the profile (1–5) back to this unit. On the menu screen, click the “PROFILE” tab and then click the [LOAD FILE] button. In the LOAD FILE dialog box, select the file you wish to load (.brdgcProfile), and then click the [Open] button.
- Page 61 Configuring a Profile Click the [OK] button. A confirmation message appears after the profile settings have been applied. Click the [OK] button to close the message. Related information: Creating a Profile(P.55)
-
Page 62: System Settings
System Settings System Settings This section explains about the system-related operations and settings on the BRIDGE CAST. â Backing Up/Restoring the Settings on This Unit(P.62) â Restoring the Factory Settings (Factory Reset)(P.66) â Other Settings(P.67) Backing Up/Restoring the Settings on This Unit You can back up the settings on this unit as a single file (.brdgcBackup). - Page 63 System Settings Backing up On the menu screen, click the “SYSTEM” tab and then click the [BACKUP] button. In the Save dialog box, name the file and specify the save destination, and click the [Save] button. This backs up the file (.brdgcBackup).
- Page 64 System Settings Restoring Here’s how to restore the settings for this unit that you backed up. Restoring the settings overwrites the current settings. On the menu screen, click the “SYSTEM” tab and then click the [RESTORE] button. In the LOAD FILE dialog box, select the file you wish to load (.brdgcBackup), and then click the [Open] button.
- Page 65 System Settings Click the [OK] button. A confirmation message appears after the data has been restored. Click the [OK] button to close the message.
-
Page 66: Restoring The Factory Settings (Factory Reset)
System Settings Restoring the Factory Settings (Factory Reset) This shows you how to restore this unit to its factory settings. * When you execute a factory reset, all of the settings except for the sound effects (SFX A, SFX B) are restored to their factory settings. -
Page 67: Other Settings
Other Settings These are the settings for the brightness of the indicators on the BRIDGE CAST as well as for what the level meters display. On the menu screen, click the “SYSTEM” tab and set the parameters in the respective menus. -
Page 68: Appendix
■■■ Appendix ■■■ ■■■ Appendix ■■■ Removing and Attaching the Faceplate of This Unit(P.69) Main Specifications(P.71) Mixer Block Diagram (PC)(P.72) Mixer Block Diagram (CONSOLE/MOBILE)(P.73) -
Page 69: Removing And Attaching The Faceplate Of This Unit
Removing and Attaching the Faceplate of This Unit emoving and Attaching the Faceplate of This Unit You can remove the faceplate of this unit when you want to customize the top panel. ● When removing or attaching the faceplate, be careful not to cut your fingers or hands on the edges of the faceplate. ●... - Page 70 Removing and Attaching the Faceplate of This Unit Attaching the faceplate Follow the steps from above in reverse order when attaching the faceplate. Place the faceplate on top on this unit. Make sure that all of the buttons and indicators are protruding and visible from the holes in the faceplate.
-
Page 71: Main Specifications
Main Specifications Main Specifications CHAT (*1) GAME (*1) Input Channel MUSIC (*1) SYSTEM (*1) USB (*2) (*1) When the USB port connection setting is “PC” (*2) When the USB port connection setting is “CONSOLE/MOBILE” LINE OUT PHONES MIC (*3) STREAM (*3) Output Channel PERSONAL (*3) USB (*4) -
Page 72: Mixer Block Diagram (Pc)
Mixer Block Diagram (PC) Mixer Block Diagram (PC) -
Page 73: Mixer Block Diagram (Console/Mobile)
Mixer Block Diagram (CONSOLE/MOBILE) Mixer Block Diagram (CONSOLE/MOBILE) - Page 74 Mixer Block Diagram (CONSOLE/MOBILE) Owner’s Manual ©2023 Roland Corporation...