Table of Contents
Advertisement
Quick Links
Advertisement
Table of Contents

Related Manuals for Axor ShowerSelect Round 36723 1 Series


Summary of Contents for Axor ShowerSelect Round 36723 1 Series
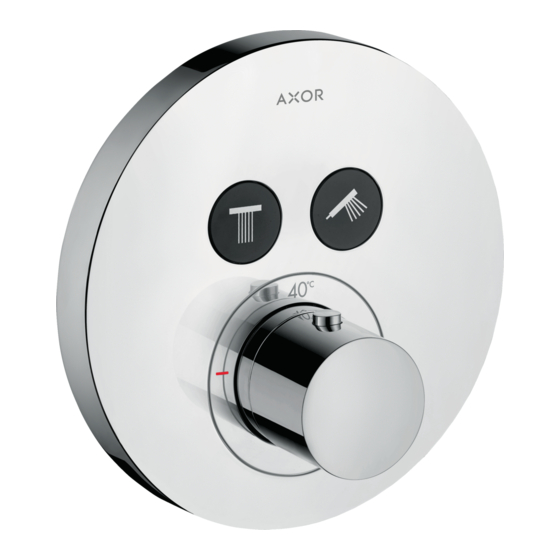
- Page 1 AXOR ShowerSelect Round 36723xx1 AXOR ShowerSelect Square 36715xx1 EN Installation / User Instructions / Warranty AXOR ShowerSelect Soft Cube FR Instructions de montage / Mode d'emploi / Garantie 36707xx1 ES Instrucciones de montaje / Manejo / Garantía I N S T A L L A T I O N...
-
Page 2: Installation Considerations
E N G L I S H T EC HN I C A L INF O RM AT IO N Water pressure Recommended 15 - 75 PSI (0.1 - 0.5 MPa) Maximum 145 PSI (1 MPa) Hot water temp. Recommended 120°-140°... -
Page 3: Données Techniques
F R A N A I S D ON N É ES T EC HNIQ UE S Pression d’eau recommandée 15 - 75 PSI (0.1 - 0.5 MPa) maximum 145 PSI (1 MPa) Température d'eau chaude recommandée 120°-140° F (48° - 60° C)* maximum 158°F (70°... -
Page 4: Datos Tecnicos
E S P A Ñ O L DATO S TEC N ICO S Presión en servicio recomendada 15 - 75 PSI (0.1 - 0.5 MPa) max. 145 PSI (1 MPa) Temperatura del agua caliente recomendada 120°-140° F (48° - 60° C)* max. - Page 5 AXOR ShowerSelect Soft Cube AXOR ShowerSelect Round 36707xx1 36723xx1 6¾" (170 mm) ⅞" (22 mm) ⅞" (22 mm) 2⅛"-3¼" 2⅛"-3¼" (54-82 mm) (54-82 mm) AXOR ShowerSelect Square 36715xx1 6¾" (170 mm) ⅞" (22 mm) 2⅛"-3¼" (54-82 mm) Button #1 (left) controls the TOOLS R EQUI RED / OUTIL ES REQUIS / bottom outlet.
- Page 6 SERVICE STOPS / BUTÉES D’ARRÊT D’ISOLATION / CIERRES DE SERVICIO closed ferme cerrado open 4 mm ouvert abierto 4 mm IMPORTANT AVIS IMPORTANTE corps d'encastrement iBox The 01850181 iBox Universal Plus El cuerpo empotrado iBox Universal rough valve (not included) incorpo- Universal Plus, #01850181, (non Plus, #01850181, (no incluido) in- rates service (isolation) stops on the...
- Page 7 I N S T A L L A T I O N / I N S T A L L A T I O N / I N S T A L A C I Ó N Remove the cover. TO REDUCE THE RISK OF SCALD INJURY AND PROPERT Y DAMAGE, MAKE SURE THE STOPS ARE CLOSED.
- Page 8 Remove the flush insert and the flush insert seals. Dry the inside of the valve using a soft cloth. Retirez le module encastré et les joints d’étanchéité du module encastré. Essuyez l’intérieur de la soupape. Retire el inserto de lavado y los sellos del inserto de 5 mm lavado.
- Page 9 Lower the spacer using a 4 mm Allen wrench. Abaissez l’entretoise à l’aide d’une clé Allen de 4 mm. 4 mm Baje el separador con una llave Allen de 4 mm. Remove the backing from the adhesive pads on the fitting aid.
- Page 10 Cut the shutoff stem so that it is even with the front of the fitting aid. Coupez le tige d’arrêt afin qu’elles soient de niveau avec le devant de l’aide au montage. Corte el vástago de cierre de modo que esté parejo con el frente de la ayuda de montaje.
- Page 11 Raise the spacer so that it is even with the back of the fitting aid. Remontez l’entretoise afin qu’elle soit de niveau avec l’arrière de l’aide au montage. 4 mm Eleve el separador para que quede parejo con la parte trasera de la ayuda de montaje. Remove the fitting aid.
- Page 12 Tighten the nut on the spacer using a 10 mm wrench. Serrez l’écrou sur l’entretoise à l’aide d’une clé de 10 mm. Apriete la tuerca en el separador con una llave de 10 mm. Install the nuts on the shutoff stems. Installez les écrous sur les tiges des vannes d’arrêt.
- Page 13 Measure the distance between the outside edge of the plaster shield and the screw flange (X). Mesurez la distance entre le bord extérieur de la coque de protection et la collerette de la vis (« X »). Mida la distancia entre el borde externo del protector de yeso y la brida del tornillo (“X”).
- Page 14 Place a small amount of caulk at the top and side grout joints. Make sure that the stops are open. Placez une petite quantité de pâte d’étanchéité au niveau des joints de coulis en haut et sur les côtés. Assurez-vous que les vannes d’arrêt soient ouvertes. Coloque una pequeña cantidad de calafate en la parte superior y uniones de lechada de cemento laterales.
- Page 15 Turn the water on at the main. IMPORTANT: Remove the safety guards from the shutoff valves. Ouvrez l’eau au niveau de la conduite principale. IMPORTANT: Retirez les pièces de protection des vannes d’arrêt. Abra el paso del agua en la entrada del suministro. IMPORTANTE: Retire las protecciones de seguridad de las válvulas de cierre.
- Page 16 If your local plumbing code requires it, install the throttle to reduce the total flow of water in the shower to 2 GPM @ 80 PSI (7.6 l/min @ 0.55 Mpa). See the instructions on page 27. Si votre code de plomberie exige, installez le limiteur de débit pour réduire le débit total de l'eau dans la douche à...
- Page 17 Install the thermostatic mixer sleeve. Installez la douille du mitigeur thermostatique. Instale el manguito del mezclador termostático. Install the buttons on the escutcheon. Installez les boutones d’arrêt sur l’écusson. Instale los botones de cierres.
- Page 18 Install the escutcheon. Press the shutoff button. Installez l’écusson. Poussez le bouton d’arrêt. Instale el escudo. Pulse el botón de cierre. In the "off" position, the front of the shutoff button should be flush with the front of the escutcheon. If it is, go to step 24.
- Page 19 Remove the escutcheon Retirez l’écusson Retire el escudo. Rotate the nuts on the shutoff stems slightly counter- clockwise, to bring them out farther. Tournez légèrement les écrous sur les tiges d’arrêt dans le sens antihoraire, pour les positionner plus loin. Gire las tuercas de los vástagos de cierre levemente en sentido antihorario para sacarlas un poco más.
- Page 20 Reinstall the escutcheon. Go to step 24 to continue the installation. Réinstallez l’écusson. Passez à l’étape 24 pour continuer l’installation. Vuelva a instalar el escudo. Vaya al paso 24 para continuar con la instalación. Turn the thermostatic mixer stem until the output water is 104°F (40°C).
- Page 21 Install the handle so that the lever is next to the index- ing mark on the sleeve and the 100° marking on the escutcheon. Tighten the handle screw using a 2 mm Allen wrench. Installez la manette afin que le levier se trouve à côté de la marque de positionnement sur la douille et de la marque 100°...
- Page 22 If the escutcheon is tilted 5° or less, follow these steps. max. 5° Si l’écusson est incliné de 5° ou moins, suivez ces étapes. Si el escudo está inclinado 5° o menos, siga estos pasos. Turn the water off at the main or at the stops. Remove the function block.
- Page 23 Use a ¼” drill bit to slightly enlarge the screw holes on the function block. Utilisez une mèche de ¼ po pour légèrement agrandir les trous de vis du bloc fonction. Use una broca de ¼” para agrandar levemente los orificios para los tornillos en el bloque de función.
- Page 24 O P T I O N A L I N S TA L L AT I O N / E N O P T I O N / I N S TA L A C I Ó N O P C I O N A L If the homeowner would like the Select buttons to stand approximately ¹⁄₁₆”...
- Page 25 SET THE HIGH TEMPERATURE LIMIT STOP, JUSTIFY THE HANDLE / RÉGLEZ LA BUTÉE DE LIMITE D’EAU CHAUDE, RÉGLEZ LA POIGNÉE / FIJE EL TOPE DE LÍMITE DE ALTA TEMPERATURA, AJUSTE LA MANIJA * Follow all applicable local plumbing codes when setting the high temperature limit stop.
- Page 26 - l b / 7 f t ( 0 . 104°F 40°C 2 mm 0.7 ft-lb / 1 Nm...
- Page 27 INSTA LL T HE T H ROTT L E / IN STA L L AT IO N DU L IM IT E UR D E D É BI T / L A INSTA L ACI Ó N D EL LI MITA DOR DE C AU DA L If your local plumbing code requires it, install the throttle 27 mm to reduce the total flow of water in the shower to...
- Page 28 R E P L A C E M E N T P A R T S / P I È C E S D É T A C H É E S / R E P U E S T O S AXOR ShowerSelect Soft Cube...
- Page 29 AXOR ShowerSelect Square 36715xx1 96525000 92594000 (M5x20) 97980000 4 mm 98133000 (16x2) 95758000 98368000 92540000 (M28x1 19 mm) 92219000 92696000 94073000 98156000 (36x2) 98134000 (16x2.5) 95508000 98197000 (48x3) 98282000 (20x1.5) 92544610 98146000 98913000 (M34x1.5) (25x1.5) 27 mm 92146000 96454000 (25x2.5)
- Page 30 AXOR ShowerSelect Round 36723xx1 96525000 92594000 (M5x20) 97980000 4 mm 98133000 (16x2) 95758000 98368000 (M28x1 19 mm) 92219000 92540000 92696000 94073000 98156000 (36x2) 98134000 (16x2.5) 95508000 98197000 (48x3) 98282000 (20x1.5) 92544610 98913000 98146000 (M34x1.5) (25x1.5) 27 mm 92146000 96454000 (25x2.5)
- Page 31 U S E R I N S T R U C T I O N S / I N S T R U C T I O N S D E S E R V I C E / M A N E J O ouvert fermé...
- Page 32 C L E A N I N G / N E T T O Y A G E / L I M P I E Z A 4 mm 27 mm...
- Page 33 27 mm 5.9 ft-lb / 8 Nm 4 mm 3.7 ft-lb / 5 Nm 0.07 ft-lb /0.1 Nm 2 mm 0.7 ft-lb / 1 Nm...
-
Page 34: Troubleshooting
M A I N T E N A N C E ⁄ Should the volume of water decrease over time, ⁄ When reassembling after maintenance, set the first inspect and clean the showerhead(s). If the high temperature limit stop before reinstalling the problem persists, inspect the cartridge. -
Page 35: Dépannage
E N T R E T I E N ⁄ Si le débit d’eau devait décroître avec le temps, ⁄ Lors du réassemblage après l’entretien, réglez la commencez par inspecter et nettoyer la ou les butée limite d’eau chaude avant de réinstaller la pomme(s) de douche. - Page 36 M A N T E N I M I E N T O ⁄ Si el volumen del agua disminuye con el tiempo, ⁄ Al rearmar después de realizar el mantenimiento, primero inspeccione y limpie el cabezal de configure el tope de límite de alta temperatura de ducha.
-
Page 37: Po Ur De M Ei Lle U R S Ré Su Ltats
C L E A N I N G R E C O M M E N D AT I O N F O R H A N S G R O H E P R O D U C T S Modern bathroom faucets, kitchen faucets and shower products are made from different materials to comply with the needs of the market with regard to design and functionality. -
Page 38: Par A Obten E R M E Jo Res Resu Lta Do S
IMPORTA N T ⁄ Les residus de produits pour le corps comme les savons liquides, shampooings, gels de douche, teintures pour cheveux, parfums, apres-rasage et vernis a ongles peuvent causer des deteriorations. Rincez le produit avec de l’eau propre après chaque utilisation. ⁄... -
Page 39: What We Will Do
In requesting warranty service, you will need to provide: (a) one (1) year for hansgrohe products and (b) five (5) years for AXOR products, in each case from the date of purchase. The war- 1. The sales receipt or other evidence of the date and place of ranty period for products in the Rubbed Bronze, Matte Black and purchase. - Page 40 This warranty gives you specific legal rights, and you may also write us or call us toll-free at 800 -334- 0455. have other rights which vary from state to state. AXOR ⁄ Hansgrohe, Inc. 1490 Bluegrass Lakes Parkway Alpharetta, GA 30004 Tel.