Table of Contents
Advertisement
Quick Links
Advertisement
Table of Contents

Related Manuals for Axor ShowerSelect Round


Summary of Contents for Axor ShowerSelect Round
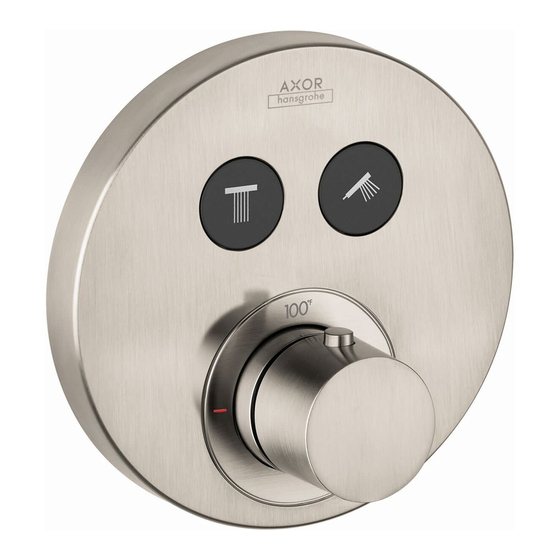
- Page 1 EN ⁄ Installation / User Instructions / Warranty FR ⁄ Instructions de montage / Mode d'emploi / Garantie ES ⁄ Instrucciones de montaje / Manejo / Garantía A XOR ShowerSelect Round 36723X X1 A XOR ShowerSelect Square 36715X X1 A XOR ShowerSelect Soft Cube 36707 X X1 I N S T A L L A T I O N...
-
Page 2: Données Techniques
E N G L I S H F R A N A I S T EC HN I C A L INF O RM AT IO N D O N NÉ ES TEC H N IQUES Water pressure Pression d’eau Recommended 15 - 75 PSI (0.1 - 0.5 MPa) recommandée... -
Page 3: Datos Tecnicos
E S P A Ñ O L DATO S TEC N ICO S TOO LS REQ UIRED / OUTILE S UTIL E S / HERR AM I EN TAS ÚTIL ES Presión en servicio recomendada 15 - 75 PSI (0.1 - 0.5 MPa) max. - Page 4 A XOR ShowerSelect Soft Cube A XOR ShowerSelect Round 36707 X X1 36723X X1 6¾" (170 mm) ⅞" (22 mm) ⅞" (22 mm) 2⅛"-3¼" 2⅛"-3¼" (54-82 mm) (54-82 mm) A XOR ShowerSelect Square 36715X X1 6¾" (170 mm) ⅞" (22 mm) 2⅛"-3¼"...
- Page 5 I N S T A L L A T I O N / I N S T A L L A T I O N / I N S T A L A C I Ó N 90° 4 mm 90°...
- Page 6 5 mm 4 mm 3.7 ft-lb 5 Nm E N G L I S H F R A N A I S E S P A Ñ O L Remove the flush insert and the Retirez le module encastré et Retire el inserto de lavado y los flush insert seals.
- Page 7 4 mm E N G L I S H F R A N A I S E S P A Ñ O L Lower the spacer. Abaissez l'entretoise. Baje el separador. Remove the backing from the Retirez la pellicule protectrice Retire la parte posterior de las adhesive pads on the fitting des plaquettes adhésives sur...
- Page 8 E N G L I S H F R A N A I S E S P A Ñ O L Cut the shutoff stem so that it is Coupez le tige d'arrêt afin Corte el vástago de cierre de even with the front of the fitting qu'elles soient de niveau modo que esté...
- Page 9 4 mm E N G L I S H F R A N A I S E S P A Ñ O L Reposition the fitting aid so that Repositionnez l'aide au mon- Vuelva a colocar la ayuda de one of the small holes is over tage afin que l'un des petits montaje de modo que uno de...
- Page 10 E N G L I S H F R A N A I S E S P A Ñ O L Tighten the nut on the spacer. Serrez l'écrou sur l'entretoise. Apriete la tuerca en el separador. Install the nuts on the shutoff Installez les écrous sur les tiges Instale las tuercas en el stems.
- Page 11 ⁷ ⁄ ₁ ₆ " ( X + 1 1 m E N G L I S H F R A N A I S E S P A Ñ O L Measure the distance between Mesurez la distance entre le Mida la distancia entre el the outside edge of the plaster bord extérieur de la coque de...
- Page 12 0.07 ft-lb /0.1 Nm open ouvert abierto E N G L I S H F R A N A I S E S P A Ñ O L Place a small amount of caulk Placez une petite quantité de Coloque una pequeña can- at the top and side grout joints.
- Page 13 E N G L I S H F R A N A I S E S P A Ñ O L Turn the water on at the main. Ouvrez l'eau au niveau de la Abra el paso del agua en la conduite principale.
- Page 14 E N G L I S H F R A N A I S E S P A Ñ O L If your local plumbing Si votre code de plom- Si el código de insta- code requires it, install berie exige, installez le lación local requiere, the throttle to reduce the...
- Page 15 E N G L I S H F R A N A I S E S P A Ñ O L Install the thermostatic mixer Installez la douille du mitigeur Instale el manguito del mezcla- sleeve. thermostatique. dor termostático. Install the buttons on the Installez les boutones d'arrêt Instale los botones de cierres.
- Page 16 E N G L I S H F R A N A I S E S P A Ñ O L Install the escutcheon. Installez l'écusson. Instale el escudo. Press the shutoff button. Poussez le bouton d'arrêt. Pulse el botón de cierre. Turn the thermostatic mixer stem Tournez la tige du mitigeur Gire el vástago del mezclador...
- Page 17 2 mm 0.7 ft-lb / 1 Nm E N G L I S H F R A N A I S E S P A Ñ O L Install the handle so that the Installez la manette afin que Instale la manija de modo safety stop override button is le bouton se trouve à...
- Page 18 max. 5° 4 mm E N G L I S H F R A N A I S E S P A Ñ O L If the escutcheon is tilted 5° or Si l'écusson est incliné de 5° Si el escudo está inclinado 5° less, follow these steps.
- Page 19 ¼"/7mm 4 mm 5 Nm E N G L I S H F R A N A I S E S P A Ñ O L Use a ¼" drill bit to slightly Utilisez une mèche de ¼ po Use una broca de ¼"...
- Page 20 O P T I O N A L I N S TA L L AT I O N / E N O P T I O N / I N S TA L A C I Ó N O P C I O N A L ¹...
- Page 21 SET THE HIGH TEMPERATURE LIMIT STOP, JUSTIFY THE HANDLE / RÉGLEZ LA BUTÉE DE LIMITE D’EAU CHAUDE, RÉGLEZ LA POIGNÉE / FIJE EL TOPE DE LÍMITE DE ALTA TEMPERATURA, AJUSTE LA MANIJA **Follow all applicable local plumbing codes when setting the high temperature limit stop.
- Page 22 - l b / 7 f t ( 0 . 2 mm 0.7 ft-lb / 1 Nm...
- Page 23 IN STA LL TH E T H ROT T LE / IN STA LL ATIO N DU L I M ITE U R DE DÉ B I T / L A IN STA L AC I Ó N D E L LI MITA DOR DE C AU DAL If your local plumbing code requires it, install the throttle to reduce the total flow of water in the shower to 2 GPM @ 80 PSI.
- Page 24 R E P L A C E M E N T P A R T S / P I È C E S D É T A C H É E S / R E P U E S T O S A XOR ShowerSelect Soft Cube 36707 X X1 96525000...
- Page 25 A XOR ShowerSelect Round A XOR ShowerSelect Square 36723X X1 36715X X1 95508000 95508000 (48x3) (48x3) 92544610 92544610 92544610 92544610 95843000 95843000 92642xx1 3 mm 92643xx1 3 mm M4x16 M4x16 92534xx0 92534xx0 2 mm 2 mm 13595000 (25 mm) 98133000...
- Page 26 U S E R I N S T R U C T I O N S / I N S T R U C T I O N S D E S E R V I C E / M A N E J O ouvert fermé...
- Page 27 C L E A N I N G / N E T T O Y A G E / L I M P I E Z A 4 mm 27 mm...
- Page 28 27 mm 5.9 ft-lb / 8 Nm 4 mm 3.7 ft-lb / 5 Nm 0.07 ft-lb /0.1 Nm 2 mm 0.7 ft-lb / 1 Nm...
-
Page 29: Troubleshooting
T R O U B L E S H O O T I N G P RO BLEM POS S I BL E C AUS E S OLUTION Insufficient water Supply pressure inadequate Check water pressure (If a pump has been installed check to see if the pump is working). -
Page 30: Entretien
D É P A N N A G E DYS F O N C T ION NE M E N T OR I GIN E SO LUTION Pas assez d´eau Pression d´alimentation insuffisante Contrôler la pression Filtre de l´élément thermostatique Nettoyer les filtres encrassé... -
Page 31: Mantenimiento
L O C A L I Z A C I Ó N D E F A L L A S P RO BL EMA C AUSA SO LUCIÓN Sale poca agua presión insuficiente comprobar presión filtro del termoelemento sucio limpiar filtro Filtro de la teleducha sucio Limpiar / Cambiar filtro entre flexo y teleducha... -
Page 32: For Best Results
C L E A N I N G R E C O M M E N D A T I O N F O R H A N S G R O H E P R O D U C T S Modern bathroom faucets, kitchen faucets and shower products are made from different materials to comply with the needs of the market with regard to design and functionality. -
Page 33: Para Obtener Mejores Resultados
IMPORTANT ⁄ Les residus de produits pour le corps comme les savons liquides, shampooings, gels de douche, teintures pour cheveux, parfums, apres-rasage et vernis a ongles peuvent causer des deteriorations. Rincez le produit avec de l’eau propre après chaque utilisation. ⁄... - Page 35 TO OBTAIN WARRANTY PARTS OR INFORMATION products, and (ii) for 5 years, with respect to AXOR products. The Rubbed Bronze finish is subject to a 3-year limited warranty starting on the date of purchase.
- Page 36 AXOR ⁄ Hansgrohe, Inc. 1490 Bluegrass Lakes Parkway Alpharetta, GA 30004 Tel. 800-334-0455 Fax 770-889-1783 axor-design.com...