Table of Contents
Advertisement
Quick Links
Advertisement
Table of Contents
Troubleshooting

Related Manuals for natus xltek Trex HD


Summary of Contents for natus xltek Trex HD
- Page 1 Trex™ HD Monitoring Amplifier User & Service Manual...
- Page 2 This copy of the User Manual shall be used only in accordance with the conditions of sale of Natus Neurology Incorporated or its distributors. Natus Neurology Incorporated makes no representations or warranties of any kind whatsoever with respect to this document.
-
Page 3: Table Of Contents
1.3. Manual Conventions ........................6 Safety and Standards Conformity ................7 2.1. Safety and Standards Conformity for Natus Trex HD ............. 7 2.1.1. Standards of Compliance and Normative References ............7 2.1.2. Declaration of Compliance for IEC 60601-1-2 ..............9 Electromagnetic Immunity (EMI) Information –... - Page 4 Trex™ HD Monitoring Amplifier User & Service Manual 10.1. No Implied License ......................... 40 10.2. Indications for Use ......................... 40 10.3. Accessories..........................40 10.3.1. Cables ..........................40 10.3.2. Available Oximetry Sensors .................... 41 10.4. Measurements ........................42 10.5. Displayed Ranges ........................42 Guaranteeing Sufficient Battery Power ..............43 11.1.
-
Page 5: Introduction
Trex™ HD Monitoring Amplifier User & Service Manual 1. Introduction The Natus Trex HD amplifier for ambulatory monitoring provides you with maximum reliability and performance for clinical electroencephalographic (EEG) and polysomnographic (PSG) recordings. It is ® designed to be used with Natus SleepWorks™ or NeuroWorks v8.1.x software to assist with diagnosis. -
Page 6: Intended Use
NOTE: In addition to reading this manual, we encourage you to explore the online Help of the software to enable you to take advantage of everything that Natus has designed the Trex HD amplifier to do. More detailed instructions relating to the operation and customization of the system are provided in the online Help. -
Page 7: Safety And Standards Conformity
Trex™ HD Monitoring Amplifier User & Service Manual 2. Safety and Standards Conformity 2.1. Safety and Standards Conformity for Natus Trex HD 2.1.1. Standards of Compliance and Normative References Electroencephalograph system, model Trex HD; rated two AA 1.5V batteries, 0.065A, 0.170W. - Page 8 Trex™ HD Monitoring Amplifier User & Service Manual Medical devices – Application of usability engineering to IEC 62366:2007, Edition 1.0 medical devices Medical electrical equipment – Part 1-11: General IEC 60601-1-11:2010, Edition 1.0 requirements for basic safety and essential performance –...
-
Page 9: Declaration Of Compliance For Iec 60601-1-2
Trex™ HD Monitoring Amplifier User & Service Manual CISPR 11:2009 +A1:2010 / EN 55011:2009 Industrial, Scientific and Medical (ISM) Radio-Frequency +A1:2010 Equipment - Electromagnetic Disturbance Characteristics - Limits and Methods of Measurement 2.1.2. Declaration of Compliance for IEC 60601-1-2 Table 1 - Electromagnetic Emissions Guidance and Manufacturer’s Declaration –... - Page 10 Trex™ HD Monitoring Amplifier User & Service Manual Table 2 - Electromagnetic Immunity Guidance and Manufacturer’s Declaration – Electromagnetic Immunity The Trex HD is intended for use in the electromagnetic environment specified below. The customer or the user of the Trex HD should assure that it is used in such an environment. Immunity Test IEC 60601 Compliance...
- Page 11 Trex™ HD Monitoring Amplifier User & Service Manual Table 3 - Electromagnetic Immunity – for EQUIPMENT and SYSTEMS that are not LIFE- SUPPORTING Guidance and Manufacturer’s Declaration – Electromagnetic Immunity The Trex HD is intended for use in the electromagnetic environment specified below. The customer or the user of the Trex HD should assure that it is used in such an environment.
- Page 12 Trex™ HD Monitoring Amplifier User & Service Manual Table 4 - Recommended Separation Distances Recommended separation distances between portable and mobile RF communications equipment and the Trex HD The Trex HD is intended for use in the electromagnetic in which radiated RF disturbances are controlled. The customer or user of the Trex HD can help prevent electromagnetic interference by maintaining a minimum distance between portable and mobile RF communications equipment (transmitters) and the Trex HD as recommended below, according to the maximum output power of the communications...
-
Page 13: Electromagnetic Immunity (Emi) Information - Fcc
Connect the equipment into an outlet on a circuit different from that to which the receiver is connected. Consult the dealer or an experienced radio/TV technician for help. Changes or modifications not expressly approved by Natus may void the user’s WARNING: authority to operate the equipment. -
Page 14: Warnings And Cautions
IEC 60601-1-2:2007. Nonin 8000J pulse oximeter sensors used with the Trex HD amplifier are in compliance with the requirements of 6.1 and 6.2 when used with the Natus Nonin LP Trex Cable (p/n 010382). - Page 15 Trex™ HD Monitoring Amplifier User & Service Manual Natus systems are not AP or APG rated. DO NOT USE a Natus system in the presence of a flammable anesthetic mixture with air, oxygen, or nitrous oxide. Device accessories may include several kinds of disposable, sterile needle electrodes.
-
Page 16: Electrical Warnings And Cautions
Do not use with an electrical outlet in the bathroom. 3.2. Electrical Warnings and Cautions Natus systems are intended for connection to a properly grounded electrical outlet only. Conductive parts of electrodes and their connectors are not to contact other conductive parts including earth. -
Page 17: Electrostatic Discharge (Esd) Precautions
Trex™ HD Monitoring Amplifier User & Service Manual 3.3. Electrostatic Discharge (ESD) Precautions: Electrostatic Discharge (ESD) Precaution: Be sure to take the appropriate Electrostatic Discharge (ESD) precautions. Disconnect the cables before moving, cabling, or performing any set up procedures. Connectors marked with the ESD protection symbol should not be touched. -
Page 18: Pulse Oximeter Warnings
Trex™ HD Monitoring Amplifier User & Service Manual The patient event button attached to the Trex HD is NOT intended for critical patient-safety- related incidents. Patient connections are NOT intended for direct cardiac contact. As with all medical equipment, carefully route patient cabling to reduce the possibility of patient entanglement or strangulation. - Page 19 Trex™ HD Monitoring Amplifier User & Service Manual A pulse oximeter should NOT be used as an apnea monitor. A pulse oximeter should be considered an early warning device. As a trend towards patient deoxygenation is indicated, blood samples should be analyzed by a laboratory co-oximeter to completely understand the patient’s condition.
-
Page 20: Pulse Oximeter Sensor Warnings
Trex™ HD Monitoring Amplifier User & Service Manual Operation of this module below the minimum amplitude of 0.3% modulation may cause inaccurate results. Oximeter readings may be affected by the use of an electrosurgical unit (ESU). Inspection of monitors, cables, and probes should be completed prior to each use to ensure compatibility and maintain patient safety. -
Page 21: Transportation Warnings
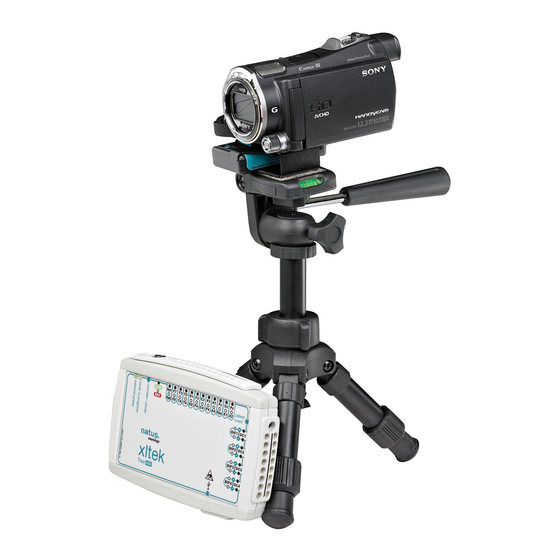
Make sure that any platform, table, cart, or other surface used during the operation, transport, or temporary or permanent storage of the system and its components is adequate, sturdy, and safe. Natus is not responsible for any injury or damage that may result from inadequate, poorly constructed, or unapproved transports, carts, or operating surfaces. -
Page 22: Procedures And Warnings
Trex™ HD Monitoring Amplifier User & Service Manual 4. Procedures and Warnings 4.1. Electrostatic Discharge (ESD) Handling Procedures and Warnings Before performing any setup or placement procedures, read the precautions outlined in this section. It is recommended that all staff receive both explanation and training in ESD procedures. WARNING: Be sure to take the appropriate Electrostatic Discharge (ESD) precautions. -
Page 23: Conducted Immunity Procedures And Warnings
Trex™ HD Monitoring Amplifier User & Service Manual 4.2. Conducted Immunity Procedures and Warnings Conducted immunity is defined as the ability of an electronic product to tolerate the influence of electrical energy from other electronic products or electromagnetic phenomena. The electrical energy from other electronic devices located in nearby equipment are usually propagated through the connecting cables. -
Page 24: Description Of Symbols
Trex™ HD Monitoring Amplifier User & Service Manual 5. Description of Symbols Symbol Description ATTENTION: Consult Accompanying Documents Consult Accompanying Documents Protective Earth (Ground) Type BF Equipment Dangerous Voltage Alternating Current Direct Current Power On Power Off EU only: Do Not Dispose as Unsorted Municipal Waste Class II Equipment (non-grounded enclosure) ESD Sensitive Static Sensitive... - Page 25 Trex™ HD Monitoring Amplifier User & Service Manual Symbol Description RF Equipment for Non-ionizing Radiation Wireless Bluetooth Identification Non-waterproof Device Not for Continuous Monitoring (no alarm for SpO2)
-
Page 26: Specifications
Trex™ HD Monitoring Amplifier User & Service Manual 6. Specifications Specification Value(s) Patient Electrical Connections 24 Referential Inputs (+ ground, + reference) 10 mV pk-to-pk Resolution 16 bit A/D 4 Differential Inputs 10 mV pk-to-pk Resolution 16 bit A/D Common Mode Rejection Ratio -113 dB @ 60 Hz DC Removal ±... - Page 27 Trex™ HD Monitoring Amplifier User & Service Manual Specification Value(s) Operating Parameters Operating Environmental Limits Temperature: 5°C to 40°C Humidity: 15% to 93% Atmospheric Pressure: 700 hPa to1060 hPa Transport and Storage Temperature Range - 40°C to 70°C Transport and Storage Humidity Range 10% to 100%, including condensation 500 hPa to 1060 hPa Transport and Storage Atmospheric Pressure...
-
Page 28: Product Images
Trex™ HD Monitoring Amplifier User & Service Manual 7. Product Images 7.1. Front View Trex HD Amplifier Power LED Status LED Oximeter / Photic Connection Reference Input (forward) Common Input (rear) 24 Referential Inputs (two rows) Patient Event Button Connection DC Inputs (rear row) Differential Inputs (forward row) USB Connection (bottom) -
Page 29: Rear View
Trex™ HD Monitoring Amplifier User & Service Manual 7.2. Rear View NOTE: Dispose of used, non-rechargeable batteries in accordance with local regulations and manufacturer’s instructions. -
Page 30: Unpacking
Trex™ HD Monitoring Amplifier User & Service Manual 8. Unpacking 8.1. Trex HD Monitoring Package Items The Trex HD monitoring package includes the following items: Trex HD Amplifier for Monitoring Trex HD Monitoring User & Service Manual ... -
Page 31: Optional Accessories
Nonin Xpod® Oximeter Natus Photic Stimulator and Trex HD Cable for Natus Photic Stimulator (2.4 m / 7.9 ft) NOTE: The Trex HD amplifier should only be used with cables, transducers, electrodes, sensor, and switches that are supplied or approved by Natus. -
Page 32: Setting Up
User & Service Manual 9. Setting Up The Trex HD is designed to work with a qualified Natus tablet computer running Natus Database and NeuroWorks or SleepWorks v8.1.1 software for Trex HD monitoring. WARNINGS: The NeuroWorks 8.1.1 software for Trex HD monitoring is strictly for use with the Trex HD monitoring amplifier. -
Page 33: Monitoring An Ongoing Ambulatory Study
Trex™ HD Monitoring Amplifier User & Service Manual 9.1.3. Monitoring an ongoing ambulatory study The Trex HD is equipped with a Bluetooth module that communicates with the acquisition computer with NeuroWorks software. When the Trex HD is within a 10m range of the acquisition computer, an ongoing ambulatory study may be monitored. -
Page 34: Powering Down The System
Trex™ HD Monitoring Amplifier User & Service Manual NOTE: If a power pack (p/n 019822) is connected to the Trex HD, disconnect the pack prior to Step 2 above. Reconnect the battery pack after the Trex HD is disconnected from the computer. -
Page 35: Lanyard Setup
Trex™ HD Monitoring Amplifier User & Service Manual 9.2.2. Lanyard Setup To use the lanyard setup: 1. Attach the lanyard to the two (2) rings on the back of the pouch. 2. After attaching the electrodes to the patient, place the Trex HD into the pouch with the electrode wires exiting at the top or on the sides, as required. - Page 36 Trex™ HD Monitoring Amplifier User & Service Manual...
-
Page 37: Setting Up Trex Hd Amplifier For A Non-Video Study
To verify that the Trex HD amplifier is correctly calibrated, perform the following procedure: 1. Connect the Trex HD to a Natus computer and turn on the system. 2. Start Natus Database (XLDB). 3. To start a new study, click New EEG or Sleep. -
Page 38: Channel Test
Trex™ HD Monitoring Amplifier User & Service Manual 5. On the Acquisition tab, set the Reference Electrode to Common. 6. Design four bipolar montages that take the difference of adjacent channels; for example, C3–CZ, C4–T4, T5–P3, etc. 7. Apply a sine wave of 50 microvolts, peak-to-peak amplitude, 10 Hz to all channels of the group using a signal generator. -
Page 39: Impedance Check
Trex™ HD Monitoring Amplifier User & Service Manual 9.4.3. Impedance Check An impedance check is performed to ensure that the electrode contact with the patient is satisfactory. You can perform an impedance check at any time during a study. To Run an Impedance Check from the Software When an impedance check is initiated, the software scans all channels (in auto scan mode). -
Page 40: Nonin Xpod Pulse Oximeter
Trex™ HD Monitoring Amplifier User & Service Manual 10. Nonin Xpod Pulse Oximeter NOTE: Refer to the Instructions for Use for any pulse oximeter, sensor, or cable extender prior to use. The following topic lists the specifications for the Nonin Xpod board that is built into the Trex HD Amplifier. The board connects to sensors and provides oxygen saturation, pulse rate, pulse waveform, and other output information via the NeuroWorks software. -
Page 41: Available Oximetry Sensors
Trex™ HD Monitoring Amplifier User & Service Manual 10.3.2. Available Oximetry Sensors Model Number Description 8000AA-1 Adult Articulated Internal Spring Finger Clip, 1 m (3 ft) cable 8000AA-3 Adult Articulated Internal Spring Finger Clip, 3 m (9.8 ft) cable 8000AP-1 Pediatric External Spring Finger Clip, 1 m (3 ft) cable 8000AP-3 Pediatric External Spring Finger Clip, 3 m (9.8 ft) cable... -
Page 42: Measurements
Trex™ HD Monitoring Amplifier User & Service Manual 10.4. Measurements This pulse oximeter module is designed to determine the percentage of arterial oxygen saturation of functional hemoglobin. Pulse rate and SpO2 values are updated every 1/3 second and consist of a 4-beat average. Measurement Wavelengths and Output Power ... -
Page 43: Guaranteeing Sufficient Battery Power
Trex™ HD Monitoring Amplifier User & Service Manual 11. Guaranteeing Sufficient Battery Power 11.1. Battery Power with AA Batteries (only) The Trex HD is powered by two AA alkaline batteries for ambulatory recordings. An optional power pack is available to extend recording time without the need to replace batteries. For more information, see Battery Power with AA Batteries and Power Pack. -
Page 44: Battery Power With Aa Batteries And Power Pack
11.2. Battery Power with AA Batteries and Power Pack Natus offers a power pack (p/n 019822) to extend the recording time of the Trex HD to up to 72 hours without requiring replacement of the internal AA batteries. The power pack kit includes a power pack (p/n 018795), a power supply (p/n 019755), and a Trex HD cable (p/n 018727). -
Page 45: External Power Pack
Trex™ HD Monitoring Amplifier User & Service Manual 12. External Power Pack 12.1. Power Pack Symbols Symbol Description Power Pack is charging Power Pack charge status. This mark along with the 4 LEDs to the left of the Refresh Push Button will show state of charge of the battery. External Power Pack LED Indicators for charging details. -
Page 46: External Power Pack Warnings And Cautions
Trex™ HD Monitoring Amplifier User & Service Manual 12.3. External Power Pack Warnings and Cautions Charge battery only in clean, well-ventilated, non-hazardous locations. For infrequently used batteries, or batteries for long-term storage (longer than 3 months), the recommended method of storage is to leave the battery connected to the power supply. If stored disconnected from the power supply, charge the battery to approximately 40% charge prior to storing and recharge annually if not used sooner. -
Page 47: Using The External Power Pack Kit
Trex™ HD Monitoring Amplifier User & Service Manual 12.4. Using the External Power Pack Kit The Trex HD external battery pack is connected to the Trex HD via the mini-USB input. When the external battery pack is providing power to the Trex HD, the green external power LED light remains on. To use the power pack kit: Insert two brand new AA batteries into the Trex HD. -
Page 48: External Power Pack And Charging Details
Trex™ HD Monitoring Amplifier User & Service Manual 12.5. External Power Pack and Charging Details The Li-Ion battery provides approximately 500 charge/discharge cycles over the course of a two-year expected life. The life of the power pack will be significantly reduced if exposed to excessively high/low temperatures. -
Page 49: Charging The External Power Pack
Trex™ HD Monitoring Amplifier User & Service Manual 12.6. Charging the External Power Pack To charge the power pack: Inspect the power pack. If there are any cracks or damage do not charge the power pack. Properly dispose of the power pack and replace. Keep batteries and power supplies in a cool, well ventilated location free of particulates or other airborne contamination. - Page 50 Trex™ HD Monitoring Amplifier User & Service Manual Problem Probable Cause Corrective Action Power pack is fully charged. No action necessary. Remove the power supply plug, Power pack is not connected and reconnect to the power pack properly to the power supply. Power pack will not go into connector.
-
Page 51: How To Disable Channels And Set Frequency
Trex™ HD Monitoring Amplifier User & Service Manual 13. How to Disable Channels and Set Frequency Disabling unused channels will help maximize battery life. In NeuroWorks or SleepWorks, choose Edit > Settings > Acquisition. Select Trex HD Ambulatory in the first drop-down box. -
Page 52: Maintenance, Cleaning, & Disposal
For servicing problems that require corrective maintenance and/or internal component service, call Technical Support at 1-800-303-0306, or contact your local Natus representative. Periodically check cable connections and electrodes for damage and wear. Inspect cables for bent pins. -
Page 53: Disposal
At the end of the expected service life, when disposing of the Trex HD amplifier and its components, it is recommended that federal, state, and local laws be followed for proper disposal of printed circuit boards, plastics, and metal parts. For disposal of non-Natus accessories, please follow the instructions provided with these items. -
Page 54: Troubleshooting
Trex™ HD Monitoring Amplifier User & Service Manual 15. Troubleshooting If you are experiencing problems, try the solutions listed below. Troubleshooting Checklist Ask the patient to relax. Inspect your cables. Make sure there is a tight connection between the Trex HD and the computer. Make sure the patient electrodes are connected to the correct channel in the amplifier. -
Page 55: Getting Help
User & Service Manual 16. Getting Help Natus is committed to providing you with support so you can operate the Trex HD amplifier with ease and confidence. If you need help, follow these steps to find a solution: Step 1: Document the Incident Carefully document the incident. -
Page 56: Eeg And Sleep Accessories
17. EEG and Sleep Accessories EEG and Sleep accessories which can be used with the Trex HD amplifier are available for you to browse the Natus Neurology Catalog online at www.natus.com or call Natus Sales and Support at 1-800-303- 0306. -
Page 57: Index
Trex™ HD Monitoring Amplifier User & Service Manual 18. Index External Power Pack ............ 48 Power Pack ..............48 Disposal ..............51, 52 Accessories ............. 31, 39, 40, 55 Optional ................ 31 Electrical Warnings and Cautions ..........16 Battery Power ..............42 Electromagnetic Emissions .......... - Page 58 Trex™ HD Monitoring Amplifier User & Service Manual Nonin Accessories .............. 39 Impedance Check .............. 38 Cables ..............39 Intended use ............... 6 Oximetry Sensors ..........40 Indications for Use ........... 39 Measurements ............41 Sensor LED color functionality ............36 Warnings and Cautions ..........
- Page 59 Trex™ HD Monitoring Amplifier User & Service Manual Impedance Check ............38 Trex HD Amplifier ............36 Unpacking................. 30 Verification ..............36 Transportation External Power Pack ............ 46 Warnings and Cautions..........21 Power Pack ..............46 Trex Using the Manual ............... 6 Features ................
- Page 60 A Total Service Solution Standing behind every XLTEK product is Natus Medical Incorporated, an internationally respected innovator of medical products and services. Our Neurology systems are backed up by an in-house support team staffed with technical and clinical experts, 24/7 support, remote support via WebEx or VPN, the largest clinical and technical field support network in Neuro/Sleep and customized service contracts that include preventative maintenance visits and computer upgrades.