Table of Contents
Advertisement
Quick Links
Advertisement
Table of Contents

Related Manuals for Baumatic BCS460SS-AUS


Summary of Contents for Baumatic BCS460SS-AUS
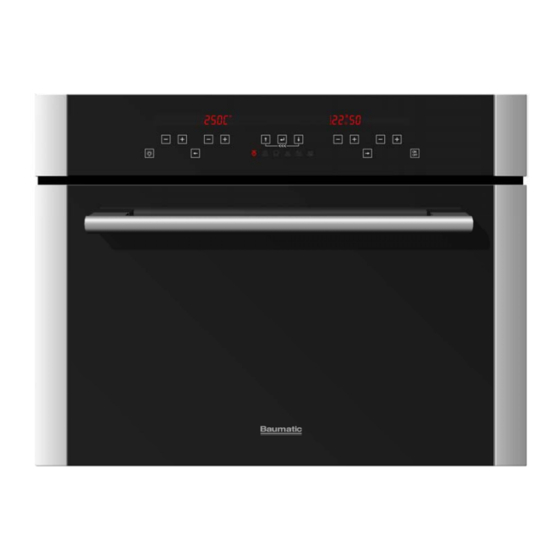
- Page 1 BCS460SS-AUS 46cm Combi Steamer Touch Control Oven.
- Page 2 User Manual for your Baumatic BCS460SS-AUS 46 cm combi steamer touch control oven with personalised recipes. NOTE : This User Instruction Manual contains important information, including safety & installation points, which will enable you to get the most out of your appliance. Please keep it in a safe place so that it is easily available for future reference;...
-
Page 4: Table Of Contents
Contents Environmental note Important safety information 6 – 8 Specifications 9 – 12 Product and aperture dimensions 9 - 10 Cooling fan Product specifications Standard accessories Electrical details Description of the oven and accessories 11-12 Control panel Using your oven 12-23 Before first use Initial start up and setting the time of day... -
Page 5: Environmental Note
Environmental note o The packaging materials that Baumatic uses are environmentally friendly and can be recycled. o Please discard all packaging material with due regard for the environment. -
Page 6: Important Safety Information
Baumatic’s Conditions Of Guarantee. The foregoing does not affect your statutory rights. o Repairs may only be carried out by Baumatic Service Engineers or their authorised service agent. - Page 7 Warning and safety instructions o This appliance complies with all current European safety legislation. Baumatic do wish to emphasise that this compliance does not remove the fact that the appliance surfaces will become hot during use and retain heat after operation.
- Page 8 This appliance must be correctly installed by a suitably qualified person, strictly in accordance with the manufacturer’s instructions. o Baumatic Ltd. declines any responsibility for injury or damage, to person or property, as a result of improper use or installation of this appliance.
-
Page 9: Specifications
Specifications... -
Page 10: Cooling Fan
Product dimensions Height: 460 mm Width: 597 mm Depth: Aperture dimensions Height: 460 mm (built under) / 445 mm (built in) Width: 560 mm Depth: 560 mm Cooling fan o A tangential cooling fan is fitted inside of this appliance, to make the internal temperature of the oven stable and the external surface temperature lower. -
Page 11: Description Of The Oven And Accessories
For future reference please record the following information which can be found on the Rating Plate and the date of purchase which can be found on your sales invoice. The rating plate for your oven can be located by opening the oven door and looking on the right hand side of the oven chassis. -
Page 12: Control Panel
9) Grill 10) Handle 11) Door 12) Oven cavity 13) Side racks 14) Food probe connector 15) Connector cap (to be inserted on the connector when probe is not in use). Control Panel Using your oven Before first use o The appliance should be disconnected from your mains supply before commencing any cleaning process. -
Page 13: Initial Start Up And Setting The Time Of Day
Initial start up and setting the time of day o When the appliance is initially connected to the power supply, the display will light up and will show the message “WAIT”. DO NOT touch any other button until the time selection menu appears. -
Page 14: Setting The Minute Minder
o You should leave the oven on maximum setting for 30 – 40 minutes. Setting the minute minder You are able to set the minute minder, regardless of whether an oven function has been selected. You can set a period of time using the minute minder and an alarm will sound when this period of time has elapsed. -
Page 15: Setting The Duration Function
Setting the duration function This function will allow you to set a countdown time similar to the minute minder function. However the oven will no longer continue to heat, once the countdown period has elapsed. o Press the oven ON/OFF button (6). o Select an oven function by using the oven function selection buttons. -
Page 16: Setting The Start And End Time Function
Setting the start and end time function This function will allow you to set a time in the future that the oven will switch on at and a time that the oven will switch off at. o Press the oven ON/OFF button. o Select an oven function by using the oven function buttons. -
Page 17: Oven Function And Temperature Selection
o Press the oven ON/OFF button to cancel the audible signal and switch the oven off. Oven function and temperature selection This option allows you to select the preset cooking functions that the oven offers and the temperature that the oven will cook at. o Select an oven function by using the oven function selection buttons. -
Page 18: Oven Functions
Oven functions Function name Function description Min. Default Food and symbol – temp. probe default temp. temp. STEAM Steam from the boiler flows 40 – 100°C 70°C into the oven cavity. The 100°C steam heats oven COOKING cavity and cooks the food. This cooking mode is ideal for cooking any type of vegetables. -
Page 19: Water Hardness
The meat probe must be used whilst using low temperature cooking mode. Water hardness o Baumatic recommend that you fill the water jug with distilled water. If this is unavailable then cold drinking water should be used. o The oven can be adjusted to take into account the hardness of the water that you are filling the water jug with. -
Page 20: Cooking With Steam
Cooking with steam IMPORTANT: This process MUST be followed when you are using a cooking function that involves steam. o Fill the water jug with distilled water, or if this is unavailable cold drinking water. o Fill the water jug up to the 1.2 litre mark. DO NOT fill the jug right to the top. -
Page 21: Cooking Guidelines
PRESS TO STOP STEAM will appear on the display to remind you that it is possible to do this. Cooking guidelines o Please refer to the information given on food packaging for guidance on cooking temperatures and times. Once familiar with the performance of your appliance, temperatures and times can be varied to suit personal preference. -
Page 22: Accessories
o Important: Be careful when opening the door, to avoid contact with hot parts and steam. o The drip pan handle should only be used to reposition the drip tray and NOT for removing it from the oven cavity. When removing the drip tray, you should ALWAYS use an oven glove. -
Page 23: Cooking Charts
o The perforated drip pan is mainly used for steam cooking fresh or frozen vegetables, fish etc. o Position the perforated drip pan on level 2 or 3. You must insert the drip pan below the perforated drip pan, to collect any liquid that is released from the food during the cooking process. - Page 24 Fish recipe list Dish Cooking Cooking Level Cooking chamber time (from cycle temperature (hr:min) bottom) °C Mussels and 00:30 clams Plaice fillet 00:10 Scorpion 00:30 fish fillet Prawns and 00:30 flat lobster Trout 00:35 Desserts recipe list Dish Cooking chamber Cooking Level Cooking...
- Page 25 rump Roast pork Pork neck Medium chop Rare chop Medium beef filet Rare beef filet Beef roll Turkey breast Roast beef Rare roast beef Beef shoulder Veal shoulder Vegetables recipe list Dish Cooking Cooking Level Cooking chamber time (from cycle temperature (hr:min) bottom)
-
Page 26: Memorising Cooking Programmes
Memorising cooking programmes Your oven can memorise oven functions, temperatures and timings that you have used previously. o After you have set a cooking function and temperature, it is possible to get the oven to memorise this setting. You can also memorise a food probe temperature or the cooking time. -
Page 27: Deleting Saved Cooking Programmes
o Use the oven setting buttons until the cooking cycle number that you want to select appears on the display. Press the confirm button to confirm your choice. If the word EXIT appears, it means that no personal recipes have been saved. Deleting saved cooking programmes o To delete a saved cooking programme, switch the oven on using the oven ON/OFF button. - Page 28 o IMPORTANT: The temperature sensor must be fully inserted into the middle of the food that you are cooking. o When you turn the oven on with the food probe connected to the oven, the display shows a bar symbol and the probe temperature (this is preset to 70°C).
-
Page 29: Menu Options
Roast pork 80 – 85 Pork Back of pork 65 – 70 Meat loaf Roast veal 75 – 80 Veal Breast of veal, stuffed 75 – 80 Back of veal, medium - rare 65 - 70 Venison Leg of venison 75 –... -
Page 30: Recipes
o To exit menu options, you should use the oven setting buttons until “Exit” appears on the display, and then press the confirm button. Recipes o Select the Recipes menu option using the oven setting selection buttons and then pressing the confirm button. If you use the oven setting buttons, a list of various types of food will appear on the display;... - Page 31 Language: Lets you modify the language that the oven display shows. o When display shows message “LANGUAGE”, select the language that you wish the oven to operate in by using the language selection buttons. o Once the display shows your desired choice of language, press the confirm button to confirm your choice.
-
Page 32: Locking The Keypad
Reset settings: o You can restore all settings (language, time and programme) to their default settings. To do this you will need to press the confirm button twice. Locking the keypad o If you have switched on the automatic lock setting through the menu, then the keypad will lock after it has been inactive for one minute. -
Page 33: Cleaning And Maintenance
Any damage that is caused to the appliance by a cleaning product will not be fixed by Baumatic free of charge, even if the appliance is within the guarantee period. -
Page 34: Oven Cavity Cleaning Cycle
Oven cavity cleaning cycle The purpose of this feature is to facilitate the removal of food and grease from the oven cavity after cooking. o Fill the water jug with distilled water, or if this is unavailable cold drinking water. o Fill the water jug up to the 1.2 litre mark. -
Page 35: Boiler Descaling
Boiler descaling The purpose of this feature is to remove any limescale that may have built up in the steam boiler. o IMPORTANT: We recommend that you use distilled water in the water jug, this will minimise the chances of limescale building in the first place. -
Page 36: Boiler Wash
o The display will show how long remains until the end of the descaling process. o When the descaling process is complete, a boiler wash and rinsing process will need to be followed (see below). Boiler wash IMPORTANT: After completing boiler descaling, this process MUST be followed. -
Page 37: Removing The Side Racks
Removing the side racks o Turn the front nut (D) anticlockwise and remove it from the oven cavity. o Remove the side racks (G) one at a time by pulling them away from the oven cavity. o To replace the side racks, insert them back into the oven cavity. o IMPORTANT: The indent on one end of the side racks, must be positioned at the front of the oven cavity (as shown in the above picture). -
Page 38: Removing The Oven Door For Cleaning
o Remove the light cover by removing the 4 screws located in the corners of the glass cover. o Place the glass cover gently on a supported surface, so that damage is not caused to it whilst the bulb is being replaced. - Page 39 o IMPORTANT: You should make sure that the door is supported at all times and that you place the door on some padded material whilst cleaning it. o The oven door and door glass should only be cleaned using a damp cloth and a small amount of detergent.
-
Page 40: Installation
INSTALLATION The installation must be carried out by a suitably qualified person, in accordance with the current version of the following. o AS/NZS 3000:2007 Wiring Regulations o 2010 Electricity Safety Regulations Before connecting the appliance, make sure that the supply voltage marked on the Rating Plate corresponds with your mains supply voltage. -
Page 41: Installing The Oven Into The Kitchen Cabinet
Installing the oven into the kitchen cabinet Positioning the appliance o Ensure that the aperture that you will be fitting the oven into is of the size given in the above diagram. o The oven must be fitted into an oven housing with the ventilation cut-outs shown in the “Ventilation requirements”... -
Page 42: Ventilation Requirements
Ventilation requirements (Figure shows the ventilation and cut-out requirements for the installation of the appliance into a standard kitchen unit). (Figure shows the ventilation and cut-out requirements for the installation of the appliance into a tall housing unit). o Ensure that the oven has been securely fixed into the housing unit. -
Page 43: Installing The Drip Catcher
Installing the drip catcher o Fix the drip catcher to the base of the appliance, with a suitable sized screwdriver, using the screws provided. -
Page 44: My Appliance Isn't Working Correctly
My appliance isn’t working correctly Error codes chart Error Cause Solution code BOILER OVERHEAT Check that there is water in the pitcher. This alarm is caused by the fill Turn the oven off and then on again pump being unable pump If the failure occurs again, make a note water from the water jug to the... - Page 45 o The oven isn’t coming on. * Check that you have selected a cooking function and a cooking temperature. o There appears to be no power to the oven. * Check that the appliance has been connected to the electrical mains supply correctly.
- Page 46 Or any installation other than the one specified by Baumatic Ltd. has been completed. Please refer to the conditions of guarantee that appear on the...
-
Page 47: Contact Details
Service Telephone 1800 444 357 Website www.thinkappliances.com Applico Ltd. P.O. 92900 Onehunga, Auckland, New Zealand 1061 Website www.applico.nz United Kingdom Baumatic Ltd., Baumatic Buildings, 6 Bennet Road, Reading, Berkshire RG2 0QX United Kingdom Sales Telephone (0118) 933 6900 Website: www.baumatic.co.uk...