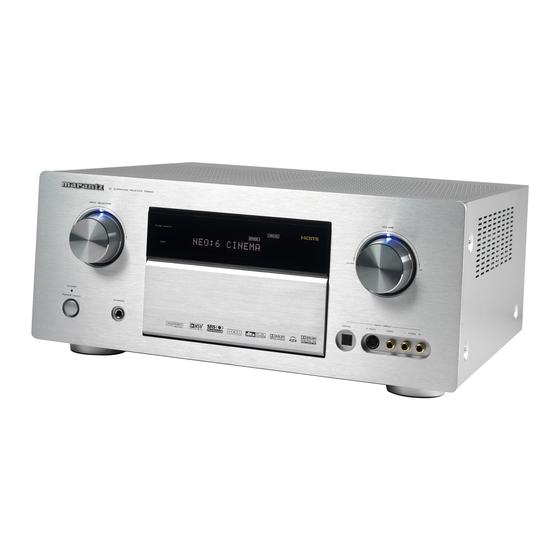
Marantz SR6001 User Manual
Av surround receiver
Hide thumbs
Also See for SR6001:
- Brochure & specs (19 pages) ,
- Specifications (2 pages) ,
- Specification (19 pages)
Table of Contents
Advertisement
Advertisement
Table of Contents
Troubleshooting

Related Manuals for Marantz SR6001


Summary of Contents for Marantz SR6001
- Page 1 Model SR6001 User Guide AV Surround Receiver...
- Page 2 This - Connect the equipment into an outlet on a equipment generates, uses and can radiate radio circuit different from that to which the receiver is frequency energy and, if not installed and used in connected.
-
Page 3: Declaration Of Conformity
NEC - NATIONAL ELECTRICAL CODE Cet appareil numérique de la Classe B est conforme à la norme NMB-003 du Canada. DECLARATION OF CONFORMITY U.S. Responsible Party: Marantz America, Inc. 100 Corporate Drive, Mahwah, NJ, 07430, U.S.A. TEL: 630-741-0300 Type of Product:... -
Page 4: Table Of Contents
FUNCTION AND OPERATION ...9 SELECTING THE SURROUND MODE ...44 OPERATION OF REMOTE CONTROL UNIT ...11 ADJUSTING THE MAIN VOLUME ...44 GENERAL INFORMATION OF RC5001SR TO SR6001 ..12 NIGHT MODE ...44 CONTROLLING MARANTZ COMPONENTS ...13 ADJUSTING THE TONE (BASS & TREBLE) CONTROL ..44 BASIC OPERATION ...15... -
Page 5: Introduction
Thank you for purchasing the Marantz SR6001 DO NOT LOCATE IN THE FOLLOWING PLACES Surround receiver. To ensure long-lasting use, do not locate the SR6001 This remarkable component has been engineered where it is: to provide you with many years of home theater •... - Page 6 DTS 96/24 offers the following: About Dolby Pro Logic IIx 1. Sound quality transparent to the original 96/24 Dolby Pro Logic IIx technology delivers a natural master. and immersing 7.1-channel listening experience to the home theater environment. A product of 2.
- Page 7 out-of-phase relative to the others. It measures the distance to each loudspeaker from the main listening position and adjusts the delays so that sound from There are several factors that can degrade the sound each loudspeaker arrives at the same time. Finally, from even the best loudspeakers in a listening room.
-
Page 8: Features
SR6001, buttons are kept to a minimum. Source • Front Optical AUX Input selectors and volume controls are intuitively placed. (Digital Camera, Portable DVD) The SR6001 is here to perform in your unrivaled home • Programmable, learning remote control entertainment setup. • Video convert system HDMI ←... -
Page 9: Front Panel
(See page 60) HEADPHONE jack for stereo headphones This jack may be used to listen to the SR6001’s Press this button to activate the Multiroom Speaker output through a pair of headphones. Be certain system. -
Page 10: Fl Display And Indicator
C 6.1 ¡9 ¡8 ITAL DIGI DISP (Display Off) indicator This indicator is illuminated when the SR6001 is in 1 INP the display off condition. SLEEP timer indicator Caution: This indicator is illuminated when the sleep timer • Be careful not to pinch your fi ngers between the function in the main-room is in use. -
Page 11: Rear Panel
DVD and CD player to these outlets. SWITCHED and UNSWITCHED outlets are provided. The one marked SWITCHED provides power only when the SR6001 is turned on and is useful for Multiroom Output (Audio output) components which you use every time you play your system. -
Page 12: Remote Control Operation
SLEEP button This button is used for setting the sleep timer. DISPLAY button ‹5 Selects the display mode for the front display of the SR6001. Numeric buttons ⁄7 LEARN SEND These buttons are used to switch between 0 to +10 ⁄8... - Page 13 Indicates when the remote controller is transmitting a signal. ⁄8 / POWER ON and OFF buttons (When AMP mode is selected) These buttons are used to turn the SR6001 on or off. ⁄9 SURROUND button This button is used to selects the surround mode.
-
Page 14: Operation Of Remote Control Unit
The distance between the transmitter of the remote are getting weak. control and the IR SENSOR of the SR6001 should be less than 5 meters. If the remote control is pointed Remove the back cover. -
Page 15: General Information Of Rc5001Sr To Sr6001
GENERAL INFORMATION OF RC5001SR TO SR6001 To control the SR6001 by your RC5001SR, you have to select the device AMP or TUNER by pressing the SOURCE button. Please refer below for the details in AMP and TUNER mode. AMP MODE... -
Page 16: Controlling Marantz Components
Press the desired operation buttons to play the selected component. • For details, refer to the component’s user guide. • It may not be possible to operate some models. CONTROLLING A MARANTZ DVD PLAYER (DVD MODE) SOURCE ON / OFF Turns the DVD player on and off POWER OFF... - Page 17 CONTROLLING A MARANTZ CD RECORDER (CDR MODE) SOURCE ON / OFF Turns the CD recorder on and off POWER OFF Turns the CD recorder off LEARN SEND POWER ON Turns the CD recorder on SOURCE SOURCE Inputs the numeric SLEEP DISPLAY P.DIRECT...
-
Page 18: Basic Operation
TUNER, CD, CD-R, MD, TAPE (tape deck), AUX1, AUX2, and AMP (amplifi er). Learning is not necessary for Marantz products. You PROGRAMMING WITH THE 4-DIGIT CODE can use these products without setting any codes. Press the SOURCE button. - Page 19 For codes which are not learned, the remote control will transmit either the Marantz preset codes from the initial settings, or remote codes from another manufacturer’s AV equipment which is set by the customer.
-
Page 20: Connections
Surround left and right speakers CONNECTIONS When the SR6001 is used in surround operation, the preferred location for surround speakers is on the side walls of the room, at or slightly behind the SPEAKER PLACEMENT listening position. The center of the speaker should face into the The ideal surround speaker system for this unit is 7- room. -
Page 21: Connecting Audio Components
Dolby Digital RF output jack of the videodisc player to the digital input jack. • The digital signal jacks on the SR6001 conform to the EIA standard. If you use a cable that does not conform to this standard, the SR6001 may not function properly. - Page 22 HDMI signal may be affected by noise. An HDMI cable (sold separately) is used to connect the HDMI jack on the SR6001 with the HDMI jack on a DVD player, TV, projector or other component. To transmit multichannel audio via HDMI, the connected player must support multichannel audio transmission through its HDMI jack.
-
Page 23: Connecting Video Components
MULTI video signals properly. 7.1CH • If you connect the S-VIDEO or component signal to the S-VIDEO or component jack on the SR6001, it is AUDIO (AUX2) not necessary to connect the conventional video signal to the VIDEO (composite) jack. If you use both video... -
Page 24: Advanced Connecting
EXTERNAL INTERNAL EXTERNAL INTERNAL Whenever external infrared sensors or similar devices are connected to RC-5 IN of the SR6001, be sure to always disable operation of the infrared sensor on the main unit by using the following procedure. Hold down the MULTI button and the MENU button on the front panel at the same time for fi... -
Page 25: Connecting The Antenna Terminals
Connecting the supplied AM loop antenna The supplied AM loop antenna is for indoor use SURROUND SPEAKER MODEL NO. SR6001 BACK SYSTEMS only. FRONT Set it in the direction and position it to where you RS-232C receive the clearest sound. -
Page 26: Xm Radio Overview
XM RADIO OVERVIEW SR6001 is the XM Ready ® receiver. You can receive XM Satellite Radio and Home Dock (sold separately) and subscribing the XM service. Introducing XM Satellite Radio There’s a world of audio listening pleasure beyond AM and FM. XM Satellite Radio which includes: •... -
Page 27: Connecting For The Multi Room
(The STANDBY indicator will fl ash.) In such case, recheck the connections between the speakers and the receiver. • Turn power to the receiver off before changing the setting of the SPEAKER C selector switch. • If the speaker is fi tted with a shorting bar, remove the shorting bar. -
Page 28: Connecting Other Equipment
Connect an external control device or other device for servicing. (Use a straight cable for the connection.) s DC OUT (DC TRIGGER) External devices can be controlled from the SR6001 by connecting them to the DC OUT terminal (12 V). d FLASHER IN This receiver can be controlled by connecting a control box or other control device to this receiver. -
Page 29: Setup
After all components are connected, initial setup must be performed. ONSCREEN DISPLAY MENU SYSTEM The SR6001 incorporates an onscreen menu system, which makes various operations possible by using the cursor (3, 4, 1 , 2) and ENTER buttons on the remote control unit or on the front panel. - Page 30 Note: • After you complete this portion of the setup, move cursor to “RETURN” with the 3, 4, 1 and 2 cursor buttons and press the ENTER button. R E T U R N “1. INPUT SETUP” (P. 28) R E T U R N “2.
-
Page 31: Input Setup
1 INPUT SETUP This menu is for setting the matching the output of connected audio devices and the input jacks of this receiver. • FUNC INPUT SETUP : “1-1 FUNC INPUT SETUP” (see page 29) • 7.1 CH INPUT SETUP : “1-2 7.1 CH INPUT SETUP”... - Page 32 HDMI and COMPONENT inputs can be assigned to HDMI AUDIO of “5. PREFERENCE” is set to the preferred source. THROUGH, audio is not output from the SR6001. Use this menu to select which digital input jacks are (See page 40) to be assigned to which input source.
- Page 33 10 characters long, including spaces. (Characters are selected from those appearing on DEFAULT: the display.) This name appears on the receiver's FL display and the OSD, but it does not appear in the OSD Setup menu.
-
Page 34: Spkr (Speaker) Setup
2 SPKR (SPEAKER) SETUP After you have installed the SR6001 connected all the components and determined the speaker layout, it is now time to perform the settings in the Speaker Setup menu for the optimum sound acoustics for your environment and speaker layout. - Page 35 • During measurement, step away from the microphone and operate the SR6001 via the remote control unit from a position that is out of the path of the speaker sound.
- Page 36 R E T U R N A U T O A U T O Note: • Do not turn the power to the SR6001 off while storing parameters in memory. This may erase all data in the SR6001’s memory and may damage the receiver.
-
Page 37: Error Messages
ERROR MESSAGES Displayed Error MIC SET ERROR!! A U T O S E T U P A U T O S E T U P : S T A R T M A I N R O O M S U R R B A C K : 2 C H M I C... - Page 38 Note: This is important for the timing of the acoustics to create the proper sound space that the SR6001 and • If using small front speakers, set a slightly higher frequency. If using large front speakers, set a slightly today’s sound systems are able to produce.
- Page 39 1 or 2 cursor buttons. Move the cursor to FRONT L by pressing the 4 cursor button. The SR6001 will emit a pink noise from the front left speaker. Remember the level of this noise and then press the 4 cursor button.
-
Page 40: Surround Setup
3 SURROUND SETUP This menu is for setting surround effect parameters for the various surround input signals so as to bring out the live audio effect of your speaker system. • CHANNEL LEVEL: “3-1 CHANNEL LEVEL” (see page 37) • PLIIx MUSIC PARAMETER: “3-2 PLIIx MUSIC PARAMETER”... - Page 41 • If “NONE” was selected for the subwoofer speaker such as CDs. setting in the SPEAKER SIZE, then this setting will In this mode, the SR6001 includes three controls to not appear. fi ne-tune the sound fi eld as follows.
-
Page 42: Video Setup
4-1 VIDEO CONVERT 4 VIDEO SETUP The SR6001 is equipped to convert video signals for Video settings are made as follows. monitor output. This section explains how to set up conversion for Select “4. VIDEO SETUP” from the MAIN each type of video input. -
Page 43: Preference
2 cursor buttons. HDMI AUDIO: This setting determines whether to play back audio input to the HDMI jacks through the SR6001 or output it through the receiver to a TV or projector. ENABLE: The audio input to the HDMI jacks can be played back by this receiver. - Page 44 5-1 MULTI ROOM SETUP LEVEL (VOLUME LEVEL): Adjust the multiroom output level with the 1 or 2 The SR6001 has source selectors, sleep timers and cursor buttons. The volume can be set between multispeaker output remote control units for the other -90 dB and 0 dB in 1 dB increments.
-
Page 45: Acoustic Eq
6 ACOUSTIC EQ This display is for setting up the equalizer and changing the Equalizer mode. After you complete this portion of the setup, move the • PRESET G. EQ ADJ : cursor to “RETURN” with the 3, 4, 1 and 2 cursor “6-1 PRESET G. - Page 46 6-1 PRESET G. EQ ADJ 6-2 CHECK AUTO These modes allow you to set a 9-band graphic These menus are for confirming the results of equalizer for each of the 7 channels. AUTO SETUP function equalizer measurement (AUDYSSEY, FRONT, FLAT). Select “6.
-
Page 47: Basic Operation (Play Back)
SELECTING THE SURROUND MODE BASIC OPERATION Example: AUTO SURROUND (PLAY BACK) SELECTING AN INPUT SOURCE Before you can listen to any input media, you must fi rst select the input source on the SR6001. Example : DVD DISC+ ANGLE SUB TITLE AUDIO... -
Page 48: Video Convert
S-VIDEO MONITOR OUT terminals. OSD information is also output when the video conversion feature is on and the video signal input AV SURROUND RECEIVER SR6001 to the VIDEO or S-VIDEO input jack of the SR6001 READY INPUT SELECTOR VOLUME PURE DIRECT... -
Page 49: Surround Mode
AUTO SURROUND MODE When this mode is selected, the SR6001 determines whether the digital input signal is Dolby Digital, Dolby SURROUND Digital Surround EX, DTS, DTS-ES, DTS 96/24 or PCM audio. The SR6001 is equipped with many surround Surround EX & DTS-ES will operate for multichannel modes. - Page 50 • You may not be able to play some HDCD source signals from certain CD players if you connect the player to the SR6001 digitally. This is because the digital signal has been processed (such as the output level, sampling frequency or frequency response) and the SR6001 cannot recognize the signal as HDCD data.
- Page 51 The surround mode is selected with the surround AUTO mode selector on the SR6001 or the remote control unit. However, the sound you hear is subject to the relationship between the selected surround mode and the input signal. That relationship is as follows:...
- Page 52 Surround Mode Input Signal Decoding Dolby Virtual Dolby Surr.EX Dolby Virtual Speaker Dolby D (5.1ch) Dolby Virtual Speaker Speaker Dolby D (2ch) Dolby Virtual Speaker Dolby D (2ch Surr) Dolby Virtual Speaker DTS-ES Dolby Virtual Speaker DTS 96/24 Dolby Virtual Speaker DTS (5.1ch) Dolby Virtual Speaker Multi Ch-PCM...
-
Page 53: Other Function
ON and TV is selected automatically. LISTENING THROUGH HEADPHONES AUTO POWER OFF This jack may be used to listen to the SR6001’s output through a pair of headphones. Be certain that In the above situation, turn the TV TUNER OFF the headphones have a standard 1/4”... -
Page 54: Display Mode
SETUP” from the MAIN MENU. (See page 29) RECORDING AN ANALOG SOURCE In normal operation, the audio or video source selected for listening through the SR6001 is sent to the record outputs. TUNER This means that any program you are watching... -
Page 55: 7.1 Ch Input
7.1 CH. Input is in use. LIP.SYNC Depending on the image device (TV, monitor, projector, etc.) connected to the SR6001, a time lag can occur between image signal processing and audio signal processing. Though minor, this time lag can interfere with movie and music enjoyment. -
Page 56: Basic Operation (Tuner)
AUTO TUNING Automatic searching begins then stops when a station is tuned in. LEARN SEND If tuning does not stop at the desired station, use to AV SURROUND RECEIVER SR6001 SOURCE the “Manualtunin” operation. INPUT SELECTOR SLEEP DISPLAY P.DIRECT... -
Page 57: Preset Memory
This function automatically scans the FM and AM IRECT HT-EQ band and enters all stations with proper signal strength into the memory. 2. 4. 1. 3. (Using the SR6001) AV SURROUND RECEIVER SR6001 READY INPUT SELECTOR VOLUME PURE DIRECT SURROUND DISP... - Page 58 • To clear all stored preset stations, press and hold the CLEAR and the ENTER buttons for two seconds. NAME INPUT OF THE PRESET STATION. This function allows the name of each preset channel AV SURROUND RECEIVER SR6001 to be entered using alphanumeric characters. READY VOLUME...
-
Page 59: Listening To Xm Satellite Radio
CHECKING THE XM SIGNAL STRENGTH LISTENING TO XM SATELLITE RADIO AND RADIO ID SELECTING AN INPUT SOURCE Before you can listen to XM Satellite Radio, you must fi rst select the input source on the SR6001. SOURCE SLEEP DISPLAY P.DIRECT... -
Page 60: Search Mode
Press the INFO button again. The information Note: display will go out. • To change the display content from XM information to SR6001 functions, do so from the display mode. Note: (See “DISPLAY MODE” on page 51) • If the information contains a character that cannot... -
Page 61: Preset Memory
AUX1 AUX2 REMOTE CONTROLLER RC5001SR (Using the SR6001) Press the ENTER button on the front panel. Press the 1 or 2 button on the front panel to select the desired Category. After selecting the Category, Press the 3 or 4 cursor button to select the desired station of the category. - Page 62 PRESET SCAN CLEARING STORED PRESET STATIONS You can remove preset stations from the memory EX/ES VIRTUAL T.MODE using the following procedure. M-CH ST STEREO NIGHT P.SCAN 2. 5 7.1CH IN HT-EQ MEMO VOLUME SPKR A/B MUTE MULTI/ M-SPKR SPKR A B V-OFF PEAK ANALOG...
-
Page 63: Multi Room System
AUX 1 INPUT PHONES DIGITAL S-VIDEO VIDEO AUDIO MULTI ROOM PLAYBACK USING THE MULTI SPEAKER TERMINALS The SR6001 allows you to connect another set 7.1CH IN 7.1CH IN HT-EQ MEMO of speakers and place them in a different room or VOLUME VOLUME... -
Page 64: Operation Of The Multi Room Outputs With
(Press the AMP button fi rst to enter the AMP can also be used to control multiroom. mode then press the MULTI button.) This operations will put the SR6001 into multi room mode and “MULTI” will be illuminated on the display. -
Page 65: Troubleshooting
If your trouble cannot be recovered with the remedy actions listed in the following table, malfunction of the internal circuitry is suspected; immediately unplug the power cable and contact your dealer, nearest Marantz authorized dealer or the Marantz Service Center in your country. -
Page 66: Hdmi
The signal format of the source Set the HDMI audio output so that it can component (DVD, Set Top Box, connect to the SR6001, as explained in the etc.) is not supported by the source component's instruction manual. SR6001. -
Page 67: Technical Specifications
AUDIO Should the operation or display seem to be abnormal, reset the unit with the following procedure. The SR6001 is turned on, press and hold the MULTI + SPEAKERS A/B buttons simultaneously for 3 seconds or more. Remember that the procedure will reset the settings of the function selector, Surround mode, delay time, TUNER PRESET etc., to their initial settings. -
Page 68: Setup Codes
1026, 1062, 1103, 1110 Magnavox ...1003, 1052, 1053 Daewoo ... 1003, 1013, 1024, 1035 1036, 1059, 1084, 1101 Daytron ...1003, 1013, 1016 Marantz ... 1003, 1031, 1067, 1122 Dimensia ...1103, 1110 Mitsubishi ...1003, 1024, 1051 Dumont ...1003, 1010, 1153 Electroband ... 1001 Motorola ...1014, 1069... - Page 69 Magnasonic ...3038, 3052, 3067 Magnavox ...3008, 3009, 3010 3045, 3067, 3071 Realistic ... 3008, 3009, 3012, 3021 Magnin ...3021, 3052 Marantz ...3009, 3029, 3034 3040, 3045, 3062, 3083 Ricoh ...3002, 3059 Marta ... 3052 Runco ... 3071 Samsung ...3013, 3020, 3021...
- Page 70 Hughes ...4001, 4016 Janeil ... 4025 JVC ... 4017 Mitsubishi ... 4001 Panasonic ...4004, 4010 Philips ...4031, 4035 Proscan ... 4002, 4008, 4009, 4011 Radio Shack ...4036, 4037 RCA ... 4002, 4008, 4009, 4029 Realistic ... 4040 Rural Cable ... 4036 Samsung ...4022, 4027 Sony ...4003, 4012, 4014 Star Choice ...
- Page 71 You can find your nearest authorized distributor or dealer on our website. is a registered trademark. Printed in China 12/2006 00M25CW851250 mzh-d...