Table of Contents
Advertisement
Quick Links
INSTALLER: Leave this manual with party responsible for use and operation.
OWNER: Retain this manual for future reference.
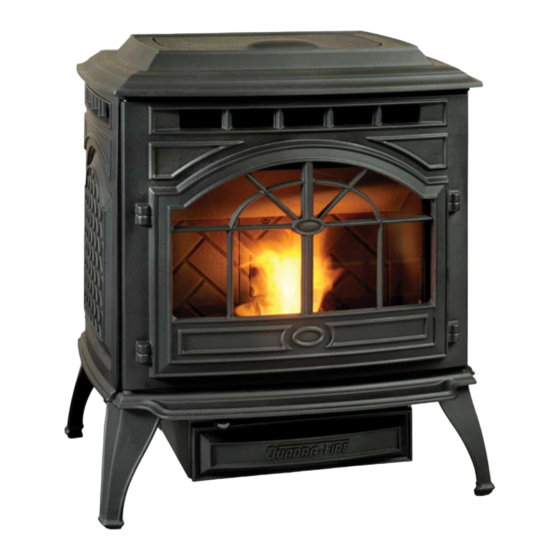
CASTILE-B PELLET APPLIANCE
MODEL(S):
CASTILE-MBK-C
CASTILE-PMH-C
CASTILE-TWL-C
Check building codes prior to installation.
• Installation MUST comply with local, regional, state
and national codes and regulations.
• Consult local building, fire officials or authorities having
jurisdiction about restrictions, installation inspection,
and permits.
Installation and service of this appliance should be performed by
qualified personnel. Hearth & Home Technologies recommends
HHT Factory Trained or NFI certified professionals.
1
Installation Manual
Installation & Appliance Set-Up
NOTICE: DO NOT DISCARD THIS MANUAL
CAUTION
R
If the information in these instructions is
not followed exactly, a fire could result
causing property damage, personal injury,
or death.
• Do not store or use gasoline or other flammable vapors
and liquids in the vicinity of this or any other appliance.
• Do not over fire - If appliance or chimney connector
glows, you are over firing. Over firing will void
your warranty.
• Comply with all minimum clearances to combustibles
as specified. Failure to comply may cause house fire.
• Do not touch glass until it is cooled
• NEVER allow children to touch glass
• Keep children away
• CAREFULLY SUPERVISE children in same room
as fireplace.
• Alert children and adults to hazards of high temperatures
• High temperatures may ignite clothing or other
flammable materials.
• Keep clothing, furniture, draperies and other flammable
materials away.
Tested and approved for wood pellets only. Burning of
any other type of fuel voids your warranty.
To obtain a French translation of this manual, please contact
your dealer or visit
Pour obtenir une traduction française de ce manuel, s'il vous
plaît contacter votre revendeur ou visitez
7021-801F
WARNING
WARNING
HOT SURFACES!
Glass and other surfaces are hot
during operation AND cool down. Hot
glass will cause burns.
CAUTION
NOTE
www.quadrafire.com
www.quadrafire.com
08/22
Advertisement
Table of Contents

Related Manuals for Quadra-Fire CASTILE-B


Summary of Contents for Quadra-Fire CASTILE-B
- Page 1 NOTICE: DO NOT DISCARD THIS MANUAL WARNING If the information in these instructions is not followed exactly, a fire could result CASTILE-B PELLET APPLIANCE causing property damage, personal injury, or death. MODEL(S): • Do not store or use gasoline or other flammable vapors CASTILE-MBK-C and liquids in the vicinity of this or any other appliance.
-
Page 2: Table Of Contents
G. Pipe Selection Chart ......16 Quadra-Fire is a registered trademark of Hearth & Home Technologies. 7021-801F... -
Page 3: Important Safety Information
Important Safety Information A. Appliance Certification B. BTU & Efficiency Specifications Emissions Report Model Castile Pellet Appliance 0061PM077E Number: Laboratory OMNI Test Laboratories, Inc. EPA Certification #: 175-19 Report No. 061-S-77d-6.2 EPA Certified Emissions: 1.1 grams per hour Solid Fuel Room Appliance/Pellet Fuel Type *LHV Tested Efficiency: 70.4% Burning Type... -
Page 4: Glass Specifications
C. Glass Specifications WARNING This appliance is equipped with 5mm ceramic glass. Replace glass only with 5mm ceramic glass. Please Fire Risk. contact your dealer for replacement glass. Hearth & Home Technologies disclaims any D. Electrical Rating responsibility for, and the warranty will be voided by, the following actions: 115 VAC, 60 Hz, Start 4.1 Amps, Run 1.1 Amps •... -
Page 5: Getting Started
Getting Started A. Design, Installation & Location Considerations Since pellet exhaust can contain ash, soot or sparks, you must consider the location of: 1. Appliance Location • Windows • Air Intakes NOTICE: Check building codes prior to installation. • Air Conditioner •... -
Page 6: Thermostat Wall Control Location
B. Thermostat Wall Control Location WARNING The thermostat wall control’s location will have some affect on the appliance’s operation. Risk of Fire! • Maximum wire length from appliance is 100 feet (30.48m) • Damaged parts could impair safe operation. with continuous non-spliced wire. Recommended 20 •... -
Page 7: Install Checklist
E. Install Checklist ATTENTION INSTALLER: Follow this Standard Work Checklist This standard work checklist is to be used by the installer in conjunction with, not instead of, the instructions contained in this installation manual. __________________________________________________________________________ Customer: ______________________________________________________________________ Date Installed: _______________________________________________________________________ Lot/Address: ________________________________________________________________ Location of Appliance:... -
Page 8: Dimensions And Clearances
Dimensions and Clearances A. Appliance Dimensions 11-7/8 in 11-7/8 in 5-3/4 in (302mm) (302mm) 3-1/2 in (146mm) (89mm) Figure 8.1 - Top View Figure 8.3 - Top View with TPVNT-6 and 811-0720 3 in 11-7/8 in 3-1/4 in (76mm) (297mm) (83mm) 3 in (76mm) - Page 9 23-5/8 in (600mm) 9-1/2 in 27 in (241mm) (686mm) 28-1/2 in (724mm) 28-5/8 in (727mm) 15-1/2 in Figure 9.4 - Side View with TPVNT-2 and 811-0720 (394mm) 24 in (610mm) Figure 9.1 - Front View 24-5/8 in (626mm) 26-3/4 in 22-7/8 in (679mm) (581mm)
-
Page 10: Clearances To Combustibles (Ul And Ulc)
B. Clearances to Combustibles (UL and ULC) Installations with: 3 to 3 inch Top Vent Adapter and 3 to 6 inch Offset Adapter Kit Horizontal Through the Wall Inches Millimeters Back Wall to Appliance Vertical Installation Inches Millimeters Side Wall to Appliance Back Wall to Flue Pipe Corner Installation Inches... -
Page 11: Hearth Pad Requirements (Ul And Ulc)
C. Hearth Pad Requirements (UL and ULC) 702MM CAUTION minimum Must extend 51mm beyond each side of pipe (shaded area) Hearth and Home Technologies does not recommend adhesive to the wall thimble. based vinyl flooring due to thermal expansion. Floating-style flooring (LVP - luxury vinyl plank or LVT –... -
Page 12: Alcove
NOTE: • Illustrations reflect typical installations and are FOR DESIGN PURPOSES ONLY. • Illustrations/diagrams are not drawn to scale. • Actual installation may vary due to individual design 1603 mm Must extend 51mm preference. beyond each side of pipe (shaded area) to the wall thimble. -
Page 13: Vent Information
Vent Information A. Venting Termination Minimum Requirements Electrical Service Inside Corner FIXED FIXED OPEN CLOSED CLOSED OPEN J or K Termination Cap Restricted Area Air Supply Inlet Gas Meter All minimum clearances are listed with an Outside Air Kit (OAK) installed, unless otherwise noted in table below. Above Finish Grade (the grade surface 24 in. -
Page 14: Avoiding Smoke And Odors
B. Avoiding Smoke and Odors Vent Configurations When installing a pellet appliance with a horizontal vent Negative Pressure, Shut-Down and Electrical Power configuration the frequency of power outages should be Failure considered: To reduce the probability of back-drafting or burn-back •... -
Page 15: Negative Pressure
• Exhaust fans (kitchen, bath, etc.) or the 3 to 6 inch (76-152mm) Top Vent Offset Adapter, • Range hoods use Listed double wall flue connector. A Quadra-Fire • Combustion air requirements for furnaces, water appliances and other combustion appliances Outside Air Kit must be used with manufactured home installations. -
Page 16: Equivalent Feet Of Pipe
F. Equivalent Feet of Pipe WARNING The table below can help you calculate the equivalent feet of pipe which is a method used to determine pellet vent size Vent surfaces get HOT, can cause burns (Figure 16.1). if touched. Non-combustible shielding or guards may be required. -
Page 17: Venting Systems
(152mm) from the wall. Approved for mobile home installations. Must use 3 or 4 inch (76-102mm) “L” or “PL” Listed pellet venting or Listed double wall pipe and a 6 in. Wall Quadra-Fire Outside Air Kit in mobile homes. Horizontal (152mm) Thimble Minimum Termination... -
Page 18: Vertical Into Existing Class A Chimney
B. Vertical into Existing Class A Chimney We recommend a minimum of 60 inches (1524mm) vertical, however above the eave is preferred. Rain Cap All three installations are approved for mobile home installations. Must use 3 or 4 inch (76 to 102mm) “L” or “PL” Listed pellet venting or Listed double wall pipe and Quadra- Fire Outside Air Kit in mobile homes. -
Page 19: Interior - Rear Vent
E. Interior - Rear Vent F. Masonry Fireclay flue Concrete Cap 12 in liner with airspace [305 mm] Minimum Flashing Wall Thimble 1 in. (25mm) clearance with firestop 1 in. (25mm) 60 in clearance [1524 mm] 3 in. (76mm) 6 in minimum Recommended... -
Page 20: Appliance Set-Up
Cap Assembly Cap Assembly Hose Clamp Hose Clamp Appliance Set-Up Trim Ring Trim Ring A. Outside Air Kit Instructions Attach air channel to stove with 2 screws CAUTION Never draw outside combustion air from: • Wall, floor or ceiling cavity •... -
Page 21: Top Vent Adapter Installation
B. Top Vent Adapter Installation C. Rear Vent & Rear Vent to Top Vent Adapter Installation 3 to 3 inch Top Vent Adapter 3 to 6 inch Top Vent Offset Adapter 1. Put a layer of high temperature silicone on the 3 inch (76mm) exhaust outlet. - Page 22 1. Separate the body of the thermostat from the mounting There is a 4 screw terminal block located on the back lower plate by gently pulling the two pieces apart (Figure 22.1)` left corner of the appliance directly above the power cord inlet.
-
Page 23: Leg Leveling System
E. Leg Leveling System F. Optional Log Set Placement Instructions 1. Thread Allen bolts through nuts until flush (Figure 23.1). 2 Piece Log Set Installation The Allen bolts and nuts are included in the component 1. Open door to expose the firebox. pack inside the appliance firebox. -
Page 24: Mobile Home Installation
Mobile Home Installation You must use a Quadra-Fire Outside Air Kit for installation in a mobile home. CAUTION 1. An outside air inlet must be provided for the combustion air and must remain clear of leaves, debris, ice and/or THE STRUCTURAL INTEGRITY OF THE MOBILE snow. -
Page 25: Reference Materials
Reference Materials A. Service and Maintenance Log Date of Service Performed By Description of Service 7021-801F 08/22... - Page 26 Date of Service Performed By Description of Service 7021-801F 08/22...
-
Page 27: Accessory List
B. Accessory List Castile-C Service Parts Beginning Manufacturing Date: April 2019 Ending Manufacturing Date: Active IMPORTANT: THIS IS DATED INFORMATION . Parts must be ordered from a dealer or Stocked Hearth and Home Technologies does not sell directly to consumers distributor. - Page 28 Hearth & Home Technologies 352 Mountain House Road Halifax, PA 17032 Division of HNI INDUSTRIES Please contact your Quadra-Fire dealer with any questions or concerns. For the number of your nearest Quadra-Fire dealer log onto www.quadrafi re.com CAUTION DO NOT DISCARD THIS MANUAL •...