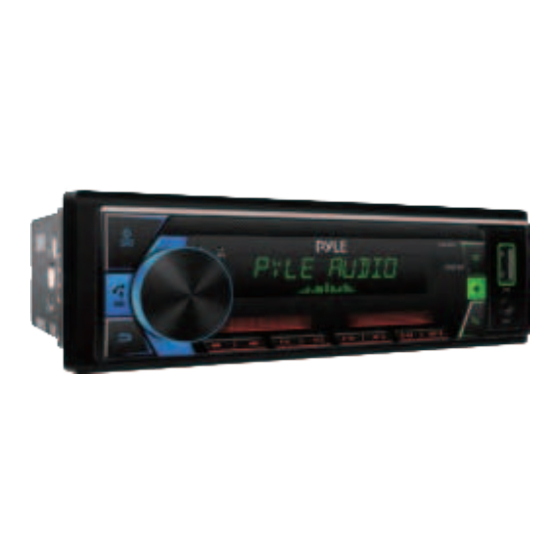
Summary of Contents for Pyle PLML50FB
- Page 1 PLML50FB Stereo Receiver Power Amplifier AM/FM/MP3/USB/AUX Stereo Receiver, Single DIN, 30 Preset Memory Stations, LCD Display with Remote Control (Black)
-
Page 2: Installation
INSTALLATION Preparation The preparation kit is necessary to mount the radio on the dashboard, this kit is available at electronics stores and car audio specialists, check the installation kit before using it to make sure it is the right one for your vehicle. INSTALL THE DEVICE 1. -
Page 3: Wiring Connections
WIRING CONNECTIONS PRECAUTION +12V DC NEGATIVE EARTH EXternal MIC FUSE 15A Rear RCA Output(Left) Power/speaker Connector Rear RCA Output(Right) ANT:RADIO ANTENNA JACK F-L:Front RCA Output(Left) Front RCA Output(Left) Front RCA Output(Right) F-R:Front RCA Output(Right) R-L:Rear RCA Output(Left) R-R:Rear RCA Output(Right) HARDS FREE PUSH-TO-TALK PUSH-TO-TALK •... -
Page 4: General Operation
CONTROL PANEL BUTTONS (Power)/Mode (source) button 2. SEL (select/menu) button and VOL (volume) knob Back to the previous configuration point; Press /Bass enhances the pulse function 4. Short press button display clock in all mode. In USB mode, Short press to select All info/Elapsed time/File info/Track info/clock operation. -
Page 5: Audio Mode
Adjust Volume (VOL) • Rotate the VOL knob on the front panel or press the VOL+ /VOL- button on the remote control to increase or decrease the volume level. FUNCTION Press the Volume knob and Rotate to select Audio/Display/Tuner/Clock/Beep/ Animation/Demo mode function. Press the Volume knob again to select desire function mode. - Page 6 X’OVER Press the Volume knob and Rotate to select Tweeter/Front HPF/Rear HPF/ Subwoofer LPF. TWEETER Press the Volume knob and Rotate to select Frequency/Gain left/Gain right. FRONT HPF Press the Volume knob and Rotate to select Frequency/Gain. REAR HPF Press the Volume knob and Rotate to select Frequency/Gain. SUBWOOFER LPF Press the Volume knob and Rotate to select Frequency/Gain/Phase.
-
Page 7: Demo Mode
SPECTRUM Press the Volume knob and Rotate to switch ON/OFF. ID3 TAG Press the Volume knob and Rotate to switch ON/OFF. VERSION Press the Volume button to check software version. TUNER Press the Volume button to select Local Seek/Mono Set/Regional/RDS Set. LOCAL SEEK Press the Volume button to rotate switch ON/OFF. - Page 8 Set the clock (CLK) 1. To display the Time press the CLK button. 2. To set the time, press and hold the CLK button and the time will start flashing. 3. Press the button on the front panel or on the remote control to set the time.
-
Page 9: Radio Operation
GENERAL OPERATION Integrated Microphone For voice reception when making a call using the hands-free system. Auxiliary Input Connector 3.5mm auxiliary input stereo is designed for devices with line output 3.5 mm or hearing aids. Reset System The RESET button is used to reset all factory settings parameters, this function can be used when the LCD screen does not work properly or if the sound is distorted, or when some of the controls are disable. -
Page 10: Usb Operation
To Store/Recall Preset Stations The radio can store 6 pre-set stations for each band (FM1, FM2 and FM3) for a total of 18 preset stations. Memorize a station • Turn the radio on and select the desired band and station. •... - Page 11 EJECT/USB To eject a USB device, press the button to stop playback, then remove the USB device. Play/Pause Press the (play/pause) button to pause or resume playback Next/Previous Track • To play the next track, press the button. • To play the previous track, press the button.
-
Page 12: Auxiliary Input Operation
Track/Folder Navigation • During a disc, USB mode, press the 5/-10 button to go backward 10 tracks. Press the 6/+10 button to jump forward 10 tracks. • During a MP3 disc, USB mode, press and hold the 5/-10 button to go back the previous folder. - Page 13 4. When pairing is complete, the mobile phone audio will automatically transfer to the ship/car audio system whenever a call is made or received, or when the mobile phone plays music. Make a Call • To make a call, dial the call directly from the paired mobile phone. •...
-
Page 14: Remote Control
REMOTE CONTROL Name of buttons and location (Power ON/OFF) Button switched on 2. VOL +/VOL- (volume up/down) 3. Band button, (reply call) button: Tune down, seek down; Track down, fast reverse 5. SEL (selection) button button: Tune up, seek up; Track up, fast forward 7. - Page 15 Remove Insulating Sheet The remote control comes with an insulating sheet attached to the underside of the remote control, as illustrated on the right. The remote control will not work until the insulating sheet is removed. Replace Lithium Battery Cell 1.
-
Page 16: Troubleshooting
Remote Control Operation Position the emitting window of the remote control toward the sensor window of the unit. • The operation angle for front panel remote control reception is about 30 degrees. • The distance between the emitting window of the remote control and the sensor window of the unit should remain less 5 meters. - Page 17 • Insert the antenna cable firmly into the antenna socket of this receiver. 3. Preset station is reset. • Battery cable is not correctly connected. Connect the battery cable to the terminal that is always live. Scan the QR code to download the PYLE App. Android App IOS App Technical Specs: •...
- Page 18 Questions? Issues? We are here to help! Phone: (1) 718-535-1800 Email: support@pyleusa.com...


