Table of Contents
Advertisement
Quick Links
Quick Reference
Using the 2.4-inch display printer
model
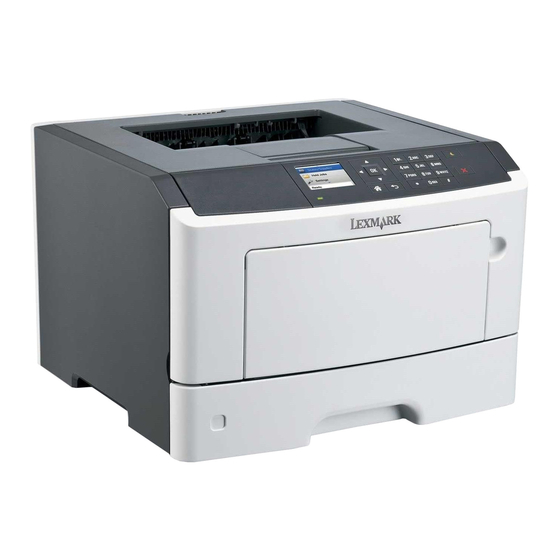
Learning about the printer
Using the printer control panel
3
4
5
2
1
13
12
10
11
Use the
To
1
Display
•
View the printer status and messages.
•
Set up and operate the printer.
2
Left arrow
Scroll to the left.
button
3
Select button
•
Select menu options.
•
Save settings.
4
Up arrow
Scroll up.
button
5
Right arrow
Scroll to the right.
button
6
Keypad
Enter numbers, letters, or symbols.
Use the
7
Sleep button
8
USB port
6
7
9
Stop or cancel
button
10
Back button
11
Down arrow
button
12
Home button
13
Indicator light
8
9
Understanding the colors of the Sleep button
and indicator lights
The colors of the Sleep button and indicator lights on the printer control
panel signify a certain printer status or condition.
Indicator light
Off
Blinking green
Solid green
Blinking red
Sleep button light
Off
Solid amber
To
Enable Sleep mode or Hibernate mode.
The following actions wake the printer from
Sleep mode:
•
Pressing any hard button
•
Opening a tray or the front door
•
Sending a print job from the computer
•
Performing a power‑on reset using the
main power switch
•
Attaching a device to the USB port
Connect a flash drive to the printer.
Notes:
•
Only the front USB port supports flash
drives.
•
This feature is available only in select
printer models.
Stop all printer activity.
Return to the previous screen.
Scroll down.
Go to the home screen.
Check the status of the printer.
Printer status
The printer is off or in Hibernate mode.
The printer is warming up, processing data,
or printing.
The printer is on, but idle.
The printer requires user intervention.
Printer status
The printer is off, idle or in Ready state.
The printer is in Sleep mode.
1
Sleep button light
Printer status
Blinking amber
The printer is entering or waking from
Hibernate mode.
Blinking amber for 0.1
The printer is in Hibernate mode.
second, then goes
completely off for 1.9
seconds in a slow, pulsing
pattern
Setting the paper size and type
1
From the printer control panel, navigate to:
> Settings >
> Paper Menu >
Size/Type >
2
Press the up or down arrow button to select the tray or feeder, and
then press
.
3
Press the up or down arrow button to select the paper size, and
then press
.
4
Press the up or down arrow button to select the paper type, and
then press
to change the settings.
Configuring Universal paper settings
The Universal paper size is a user‑defined setting that lets you print on
paper sizes that are not preset in the printer menus.
Notes:
•
The smallest Universal paper size is 6 x 127 mm (3 x 5 inches),
and is supported only from the multipurpose feeder.
•
The largest Universal paper size is 216 x 355.6 mm (8.5
x 14 inches), and is supported from all paper sources.
1
From the printer control panel, navigate to:
> Settings >
> Paper Menu >
Setup >
> Units of Measure >
measure >
> Paper
> Universal
> select a unit of
Advertisement
Table of Contents

Related Manuals for Lexmark MS510dtn


Summary of Contents for Lexmark MS510dtn
- Page 1 Use the Sleep button light Printer status Quick Reference Sleep button Enable Sleep mode or Hibernate mode. Blinking amber The printer is entering or waking from Hibernate mode. The following actions wake the printer from Sleep mode: Blinking amber for 0.1 The printer is in Hibernate mode.
-
Page 2: Adjusting Toner Darkness
Insert a flash drive into the USB port. Select Portrait Width or Portrait Height, and then press Press the left or right arrow button to change the setting, and then press Adjusting toner darkness Using the Embedded Web Server Open a Web browser, and then type the IP address of the printer in the address field. -
Page 3: Learning About The Printer
Supported flash drives and file types Note: You can also change the paper size and type settings using the Use the printer control panel. For more information, see “Setting the paper size and type” on page Sleep button Enable Sleep mode or Hibernate mode. Flash drive File type The following actions wake the printer from... -
Page 4: Understanding The Home Screen
Understanding the home screen Touch Feature Description When the printer is turned on, the display shows a basic screen, Status message Printer IP address The IP address of your printer is located at the • Show the current printer status such as referred to as the home screen. -
Page 5: Setting The Paper Size And Type
Printing from a flash drive Touch Notes: Return to the home screen. • Before printing an encrypted PDF file, you will be prompted to type the file password from the printer control panel. • You cannot print files for which you do not have printing Open a context-sensitive Help dialog on the permissions. -
Page 6: Setting Up And Using The Home Screen Applications
Supported flash drives and file types Using the printer control panel For Macintosh users From the home screen, navigate to: From System Preferences in the Apple menu, select Network. Flash drive File type Select your connection type, and then click Advanced > TCP/IP. Many flash drives are tested and approved for use with Documents: >... -
Page 7: Activating The Home Screen Applications
on page 7 or see the documentation that came with the Open a Web browser, and then type the printer IP address in the Open a Web browser, and then type the printer IP address in the application. address field. address field. -
Page 8: Canceling A Print Job From The Computer
Note: To print on a specific paper type, adjust the – If a timeout occurs and a blank screen appears, then paper type setting to match the paper loaded, or select refresh the Web browser, and then click Apply. the appropriate tray or feeder. To export or import a configuration for multiple applications, do Click Print. - Page 9 Squeeze and then slide the length guide tab to the correct position Load the paper stack. for the size of the paper you are loading. Flex the sheets back and forth to loosen them, and then fan them. Do not fold or crease the paper. Straighten the edges on a level Notes: surface.
-
Page 10: Loading The Multipurpose Feeder
From the printer control panel, set the paper size and paper type Pull the multipurpose feeder extender. in the Paper menu to match the paper loaded in the tray. Note: Set the correct paper size and paper type to avoid paper jams and print quality problems. - Page 11 the printer first. For more information on loading Squeeze the tab on the left width guide, and then move the guides for the paper you are loading. transparencies, see the packaging that the transparencies came • Flex the stack of envelopes back and forth to loosen them, and then fan them.
-
Page 12: Clearing Jams
• Lift the green handle, and then pull out the imaging unit from the Load letterhead faceup with the top edge entering the printer Clearing jams printer. first. For two‑sided (duplex) printing, load letterhead facedown with the bottom edge entering the printer first. [x]‑page jam, open front door. - Page 13 Lift the green flap in front of the printer. Insert the imaging unit by aligning the arrows on the side rails of [x]‑page jam, open rear door. [20y.xx] the unit with the arrows on the side rails inside the printer, and then insert the imaging unit into the printer.
- Page 14 Note: Make sure all paper fragments are removed. [x]‑page jam, remove tray 1 to clear Locate the blue lever, and then pull it down to release the jam. duplex. [23y.xx] CAUTION—HOT SURFACE: The inside of the printer might be hot. To reduce the risk of injury from a hot component, allow the surface to cool before touching it.
- Page 15 [x]‑page jam, clear manual feeder. [25y.xx] From the multipurpose feeder, firmly grasp the jammed paper on each side, and then gently pull it out. Note: Make sure all paper fragments are removed. Firmly grasp the jammed paper on each side, and then gently pull it out.
- Page 16 From the printer control panel, touch to clear the message and continue printing. For non‑touch‑screen printer models, select Next > > Clear the jam, press OK >...