Advertisement
Quick Links
AVENTICS - INSTALLATION AND MAINTENANCE INSTRUCTIONS
AVENTICS - INSTRUCTIONS D'INSTALLATION ET DE MAINTENANCE
AVENTICS - INBETRIEBNAHME - UND WARTUNGSANLEITUNG
AVENTICS - INSTRUCCIONES DE PUESTA EN MARCHA Y MANTENIMIENTO
AVENTICS - INSTRUZIONI DI MESSA IN SERVIZIO E MANUTENZIONE
AVENTICS - ALGEMENE INSTALLATIE- EN ONDERHOUDSINSTRUCTIES
AVENTICS - INSTALLASJONS- OG VEDLIKEHOLDSINSTRUKSER
AVENTICS - INSTALLATIONS- OCH UNDERHÅLLSINSTRUKTIONER
AVENTICS - ASENNUS - JA HUOLTO-OHJEET
AVENTICS - INSTALLATIONS - OG VEDLIGEHOLDSANVISNINGER
AVENTICS - INSTRUÇÕES DE INSTALAÇÃO E MANUTENÇÃO
AVENTICS - ΟΔΗΓΙΕΣ ΤΟΠΟΘΕΤΗΣΗΣ ΚΑΙ ΣΥΝΤΗΡΗΣΗΣ
AVENTICS - POKYNY PRO INSTALACI A ÚDRŽBU
AVENTICS - INSTRUKCJA MONTAŻU I KONSERWACJI
AVENTICS - TELEPÍTÉSI ÉS KARBANTARTÁSI ÚTMUTATÓ
AVENTICS - ИНСТРУКЦИЯ ПО УСТАНОВКЕ И ОБСЛУЖИВАНИЮ
AVENTICS - ОРНАТУ ЖӘНЕ ҚЫЗМЕТ КӨРСЕТУ НҰСҚАУЛАР
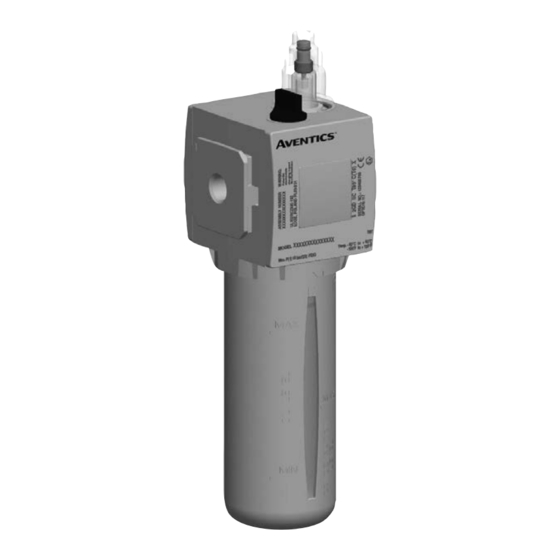
651 - 652 - 653
q
USABLE IN ATEX ZONES
1/8-1/4 (651) 1/4-3/8-1/2 (652)
B
Visit our website at www.emerson.com/aventics
ATEX
1/2-3/4-1 (653)
2
EN
FR
DE
ES
NON-ATEX VERSIONS
IT
652 SERIES
q
USABLE IN ATEX ZONES
This product category does not require certification. There is no potential ignition risk to the products themselves.
These product categories are named simple mechanical products and do not include moving parts. These products
can be used in specific explosion zones 1 and 21 in compliance with our installation instructions:
• Mounting components
4..20
• Assembly and connection components
• Filter and coalescing filter
• Mechanical accessories
• Lubricator
• Diverter block
• Shut-off valve
These conditioning units of compressed air and their accessories are envisaged for use in explosive atmos-
NL
pheres in the form of gas, steam, mists and dust.
______________________________________________________________________________________________
!
SPECIAL CONDITIONS FOR SAFE "X" USAGE :
Risk from electrostatic charges
Prevent electrostatic charging of external insulating surfaces by using the appropriate installation and cleaning
measures. To clean external insulating surfaces use a damp cloth.
When combined with other conditioning units, ensure that all metallic and conductive parts are always intercon-
Connect the conditioning units to the earth.
nected and linked to the earth to avoid significant electrostatic charges being created.
The earth is connected to the unit or to the combination of conditioning units by the downstream and upstream
use of metal pipes connected to the earth. If the pipes are non-conductive, earth connection should be performed
by the assembly and/or fixing devices adapted to the ATEX products.
______________________________________________________________________________________________
Installation, commissioning and servicing and maintenance
NO
These operations may only be carried out by authorised personnel and in accordance with the usage instructions.
EN
Only carry out maintenance in zones where there is no explosive atmosphere.
If during maintenance it is established that wearing and spare parts need exchanging, contact an ASCO
Numatics reseller.
Any modification of the product with parts not supplied by the manufacturer will invalidate the certification.
Lors d'un remplacement d'élément filtrant saturé du Filtre, procéder comme décrit ci-dessous :
Filtre et Lubrificateur équipés de cuve métallique : (Voir fig. A)
• Dévisser la vis (1)
• Enlever la cuve (2) du corps (3)
• Retirer l'élément filtrant et le remplacer par un neuf
• Remettre la cuve (2) en place
• Revisser la vis (1) dans le corps (3) jusqu'au contact de la cuve et effectuer ¼ à ½ tour supplémentaire pour
Pour ajouter de l'huile dans la cuve du Lubrificateur, procéder de la même façon que ci-dessus
assurer la continuité de masse.
SE
3
516025-001
FI
DK
PT
GR
CZ
PL
HU
RU
KZ
3
polycarbonate
AVENTICS SERIES 651-652-653
651 - 652 - 653
▼
▼
metal
fig. A
3
Visit our website at www.emerson.com/aventics
q
1
2
Advertisement

Related Manuals for Emerson AVENTICS 651 Series


Summary of Contents for Emerson AVENTICS 651 Series
- Page 1 AVENTICS - ИНСТРУКЦИЯ ПО УСТАНОВКЕ И ОБСЛУЖИВАНИЮ AVENTICS - ОРНАТУ ЖӘНЕ ҚЫЗМЕТ КӨРСЕТУ НҰСҚАУЛАР 651 - 652 - 653 ATEX metal USABLE IN ATEX ZONES fig. A 1/8-1/4 (651) 1/4-3/8-1/2 (652) 1/2-3/4-1 (653) polycarbonate Visit our website at www.emerson.com/aventics Visit our website at www.emerson.com/aventics...
- Page 2 • Revisser la vis (1) dans le corps (3) jusqu’au contact de la cuve et effectuer ¼ à ½ tour supplémentaire pour assurer la continuité de masse. Pour ajouter de l’huile dans la cuve du Lubrificateur, procéder de la même façon que ci-dessus Visit our website at www.emerson.com/aventics Visit our website at www.emerson.com/aventics...
- Page 3 Para agregar aceite al tanque del lubricador, proceda de la misma manera que anteriormente. lich drehen, um gute Erdung sicherzustellen. Zum Hinzufügen von Öl zum Schmiertank genauso wie oben beschrieben vorgehen. Visit our website at www.emerson.com/aventics Visit our website at www.emerson.com/aventics...
- Page 4 Om olie toe te voegen aan de tank van het smeertoestel gaat u op dezelfde manier te werk als hierboven be- schreven. Visit our website at www.emerson.com/aventics Visit our website at www.emerson.com/aventics...
- Page 5 Gå frem på samme måte som ovenfor når det gjelder å fylle olje på smøresystemtanken. Tillsätt olja i smörjtanken genom att utföra detta på samma sätt som ovan. Visit our website at www.emerson.com/aventics Visit our website at www.emerson.com/aventics...
- Page 6 • Stram skruen (1) i huset (3), indtil den berører beholderen, og drej den yderligere en kvart til en halv omgang vuuden. for at sikre jordkontinuitet. Kun lisäät öljyä voiteluainesäiliöön, toimi samoin kuin edellä. Følg ovenstående på samme måde, når der skal fyldes olie i smørebeholderen. Visit our website at www.emerson.com/aventics Visit our website at www.emerson.com/aventics...
- Page 7 • Σφίξτε τη βίδα (1) μέσα στο σώμα (3) μέχρι την επαφή της δεξαμενής και βιδώστε από το ένα τέταρτο έως το μισό της ώστε να διασφαλίσετε τη συνέχεια της γείωσης. Για την προσθήκη λαδιού στη δεξαμενή του λιπαντή, προβείτε στις ίδιες ενέργειες ως ανωτέρω. Visit our website at www.emerson.com/aventics Visit our website at www.emerson.com/aventics...
- Page 8 • Dokręcić śrubę (1) na korpusie (3) aż do uzyskania styku ze zbiornikiem, następnie dokręcić śrubę o dodatkowe ćwierć obrotu, aby zapewnić dobre połączenie. Przy uzupełnianiu oleju w zbiorniku urządzenia smarującego postępować w taki sam sposób, jak opisano powyżej. Visit our website at www.emerson.com/aventics Visit our website at www.emerson.com/aventics...
- Page 9 • Затяните винт (1) в корпусе (3) до контакта бака с винтом и дополнительно затяните на четверть до по- лувитка, чтобы обеспечить непрерывность заземления. Чтобы добавить масло в бак смазочной коробки, выполните вышеуказанные действия. Visit our website at www.emerson.com/aventics Visit our website at www.emerson.com/aventics...
- Page 10 AVENTICS GmbH ASCO, L.P. 46280 Dylan Drive, Novi, Michigan 48377 53 rue de la Beauce, 28110 Luce - FRANCE Ulmer Straße 4 P: 248-596-3200 - F: 248-596-3201 775 729 098 RCS Chartres 30880 Laatzen, GERMANY Visit our website at www.emerson.com/aventics http://www.asco.com...