
Related Manuals for Hoover HV-RTMWD526


Summary of Contents for Hoover HV-RTMWD526
- Page 1 FC2-45 5D ,不 带 外 显 F C2 -7 1 D ,带外 显 526 L Top Mount Refrigerator with Water Dispenser Model Number: HV-RTMWD526 INSTRUCTION MANUAL AFTER SALES SUPPORT (AU) 1300 886 649 (NZ) 0800 836 761 E209...
-
Page 2: Table Of Contents
Contents General Safety Instructions Product Overview Getting Started Instructions FAQs and Troubleshooting Guide Other Useful Information After Sales Support (AU) 1300 886 649 (NZ) 0800 836 761 | tempo.org/support... -
Page 3: General Safety Instructions
General Safety Instructions READ CAREFULLY AND KEEP FOR FUTURE REFERENCE Read this manual thoroughly before first use, even if you are familiar with this type of product. The safety precautions enclosed herein reduce the risk of fire, electric shock and injury when correctly adhered to. - Page 4 General Safety Instructions (Cont.) To reduce the risk of fire, electric shock or injury, always follow basic safety precautions and accident prevention measures when using this appliance, including the following: Electrical safety • Voltage: Plug the appliance in a 220–240 V, 50 Hz, properly earthed power outlet, which must be in good working order.
- Page 5 General Safety Instructions (Cont.) • This appliance is intended to be used in household and similar applications, such – staff kitchen areas in shops, offices and other working environments; – farm houses and by clients in hotels, motels and other residential type environments;...
- Page 6 General Safety Instructions (Cont.) • WARNING: Ventilation: To ensure proper ventilation, keep any ventilation openings, in the appliance enclosure or in the built-in structure, clear of obstructions. Ensure adequate air circulation around the appliance to prevent overheating. • Level: Install the appliance level in order to ensure proper operation (see page 9). •...
-
Page 7: Product Overview
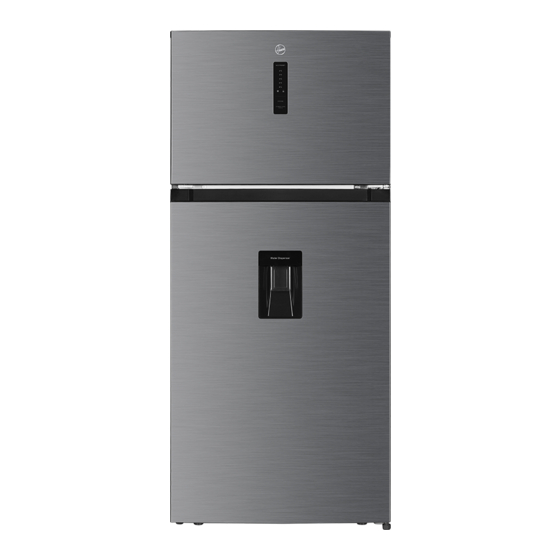
Product Overview Scope of delivery Top mount refrigerator Water Dispenser Other inclusions (not shown) Freezer shelf Decorative block Hinge cover (for door reversal) Fridge Shelves (x3) Instruction manual Crisper Quick start guide Leveling feet Warranty certificate Door balconies (2x freezer, 3x fridge*) *2x full-size fridge door balconies, 1x small fridge door balcony NOTE: Due to continued product improvement, images and illustrations in this... -
Page 8: Getting Started
Getting Started Unpacking • Packaging materials: This product has been packaged to protect it against transportation damage. Remove all packaging materials from around and inside the appliance and keep the original packaging carton and materials in a safe place. It will help prevent any damage if the product needs to be transported in the future, and you can use it to store the appliance when it is not in use. - Page 9 Getting Started (Cont.) • Overhanging wall units: To ensure best performance, if the appliance is positioned below an overhanging wall unit, the minimum distance between the top of the cabinet and the wall unit must be at least 100 mm. Ideally, however, the appliance should not be positioned below overhanging wall units.
-
Page 10: Instructions
Instructions Refrigerator temperature regulation The control panel (Fig. 5) is located on the outside door of the refrigerator compartment. It enables you to view and adjust the temperature in the fridge compartments, select an operation mode or lock the control panel. First Use The first time you turn the unit on, set the fridge temperature control to 2°C and the freezer temperature dial to COLDEST for 2–3 hours before loading the... - Page 11 Instructions (Cont.) Power cooling mode We recommend you press the POWER COOL button (e), to enter the power cooling mode when are you have added large amounts of fresh food to the fridge for fast chilling. The power cool icon (b) will illuminate when the fridge has entered this mode. Operation control feedback Every touch of an operation control will be acknowledged with a short beep.
- Page 12 Instructions (Cont.) Fresh food storage The fridge compartment is suitable for short-term storage of all your fresh food. • The temperature inside the fridge compartment varies depending on the amount of food stored and the frequency of door opening. It is low enough to limit some bacterial growth, but it is not suitable for long-term storage of perishable foods.
- Page 13 Instructions (Cont.) Water Dispenser The refrigerator is equipped with a water dispenser located in the door (Fig. 6), which allows for convenient access to chilled water at the touch of a button. Cleaning the Water Dispenser Before using the water dispenser for the first time, remove and clean the water tank. It is reccomended that you clean the water dispenser components every 3 to 6 months, depending on how often it is used.
- Page 14 Instructions (Cont.) Filling the Water Dispenser • Open the small lid on the tank balcony (Fig. 10). • Carefully fill the water tank with clean, drinkable water up to the 2.5 L mark. • Close the small lid. NOTE: • Do NOT fill the water dispenser with any liquids other than plain or purified water. •...
- Page 15 Instructions (Cont.) The freezer compartment The freezer compartment, located at the top of the appliance, is equipped with a glass shelf and door balcony for convenient access and organised storage. It is suitable for freezing domestic quantities of fresh food and long-term storage (up to three months) of frozen food.
- Page 16 Instructions (Cont.) Energy saving tips • Locate the appliance in the coolest area of the room, away from heat-producing appliances and out of direct sunlight. • Let hot foods cool to room temperature before placing them in the freezer. Overloading the compartments forces the compressor to run longer. •...
-
Page 17: Faqs And Troubleshooting Guide
FAQs and Troubleshooting Guide If you experience a problem with the appliance, check in the following table for solutions to help you solve the problem. If none of the solutions offered help you solve the problem, please contact our after sales support centre for advice. Problem Possible cause The appliance does not... - Page 18 FAQs and Troubleshooting Guide (Cont.) Problem Possible cause The appliance freezes or • The temperature is set too cold. Turn it to a warmer cools too much. setting temporarily. Food in the freezer • The freezer temperature is set too warm; set it to a compartment is not colder setting.
-
Page 19: Other Useful Information
Other Useful Information WARNING! To reduce the risk of electric shock or injury, always switch off the appliance and disconnect it from the power supply before cleaning or maintenance. Cleaning the appliance For hygienic reasons the appliance interior, including the interior accessories, should be cleaned regularly. - Page 20 Other Useful Information (Cont.) Door reversal This appliance has the capability of opening the door from either the left or right side. If your set-up requires changing the opening direction, proceed as follow: IMPORTANT! You will need: • Make sure you have someone there to help you, do not try to do this on your own. •...
- Page 21 Other Useful Information (Cont.) Carefully lay down the refrigerator and remove the levelling legs, then unscrew the lower hinge using a Phillips head screwdriver (Fig. 13). Fig. 13 Unscrew and remove the bottom hinge pin, turn the bracket over and replace it (Fig.
- Page 22 Other Useful Information (Cont.) Reverse the direction of the middle hinge by 180 degrees, then transfer it to the proper position on the left. Affix the middle hinge pin in the upper hole of the lower door, then tighten the screws (Fig. 16). Unscrew the right middle stopper with metal block from the bottom of the upper door (Fig.
- Page 23 Other Useful Information (Cont.) Defrosting the appliance Manually defrosting the freezer compartment is not necessary as this is a frost-free appliance which will be defrosted automatically. Storage If the appliance is not going to be used for an extended period of time, please store the unplugged, cleaned appliance safely in the original packaging in a dry location, out of reach of children.
- Page 24 Other Useful Information (Cont.) Technical specifications Model HV-RTMWD526 Rated voltage, frequency and current 220 – 240 V~ Rated frequency 50 Hz Rated current 1.3 A Climate category Electrical protection class Total input power 140 W Defrost power 220 W Refrigerant...
- Page 25 Other Useful Information (Cont.) Responsible disposal At the end of its working life, do not throw this appliance out with your household waste. Electrical and electronic products contain substances that can have a detrimental effect on the environment and human health if disposed of inappropriately. Observe any local regulations regarding the disposal of electrical consumer goods and dispose of it appropriately for recycling and recovery of the refrigerant and blowing agent.
- Page 26 This page has been left blank intentionally. After Sales Support (AU) 1300 886 649 (NZ) 0800 836 761 | tempo.org/support...
- Page 27 This page has been left blank intentionally. After Sales Support (AU) 1300 886 649 (NZ) 0800 836 761 | tempo.org/support...
- Page 28 Warranty returns Should you for any reason need to return this product for a warranty claim, make sure to include all accessories with the product. Product does not work? If you encounter problems with this product, or if it fails to perform to your expectations, make sure to contact our After Sales Support Centre on (AU) 1300 886 649 or (NZ) 0800 836 761 for advice.