Table of Contents
Advertisement
Quick Links
Advertisement
Table of Contents

Related Manuals for Nokia E72-1


Summary of Contents for Nokia E72-1
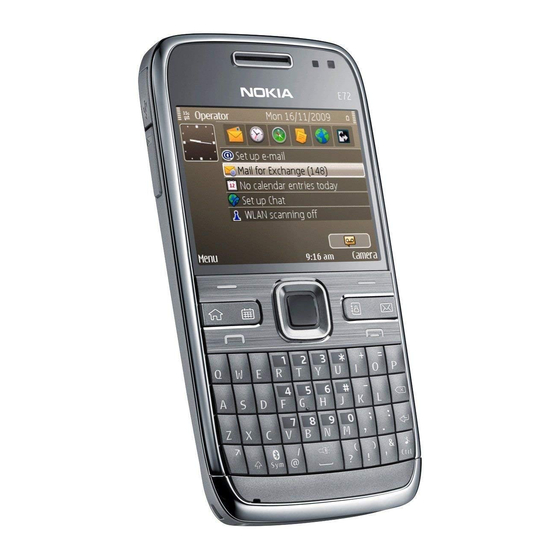
- Page 1 Nokia E72 User Guide Issue 2...
- Page 2 Nokia Corporation. Other product and company names mentioned herein may be trademarks or tradenames of their respective owners. Reproduction, transfer, distribution, or storage of part or all of the contents in this document in any form without the prior written permission of Nokia is prohibited.
- Page 3 The availability of particular products and applications and services for these products may vary by region. Please check with your Nokia dealer for details and availability of language options. This device may contain commodities, technology or software subject to export laws and regulations from the US and other countries.
-
Page 4: Table Of Contents
Charge the battery............18 Make a video call............35 Keys and parts...............18 Options during a video call..........36 Headset................19 Answer or decline a video call........36 Screen saver clock............20 Video sharing..............36 Wrist strap..............20 Log..................39 Write text...............20 Nokia Switch..............20 Messaging..........41 Your Nokia E72...........23 Messaging folders............41... - Page 5 Nokia Office Tools........77 Organise messages............42 Nokia Messaging............42 Active notes..............77 E-mail................42 Calculator...............77 Message reader.............45 File manager..............78 Speech................45 Quickoffice..............79 Text and multimedia messages........46 Converter................79 Special message types..........49 Zip manager..............80 Cell broadcast..............50 PDF reader..............80 Messaging settings............50 Printing................80 Instant messaging............53 Dictionary...............82 Notes ................82 Connectivity..........57 Positioning (GPS)........84...
- Page 6 About licences...............92 Recorder...............117 Walk to your destination..........93 Flash player..............118 Drive to your destination..........93 FM radio...............118 Traffic and safety............94 Security and data management....120 Weather information............95 Use Maps with the compass.........95 Lock the device............120 Calibrate compass............95 Memory card security..........120 Maps settings..............95 Encryption..............121 Internet settings............96 Fixed dialling...............121 Navigation settings............96...
- Page 7 Recycle.................154 Save paper..............154 Learn more..............154 Accessories..........155 Battery.............156 Battery and charger information......156 Nokia battery authentication guidelines....157 Taking care of your device.......158 Recycle.................158 Additional safety information....160 Small children..............160 Operating environment..........160 Medical devices............160 Vehicles................161 Potentially explosive environments......161 Emergency calls............161 Certification information (SAR)........162 Index............163...
-
Page 8: Safety
ACCESSORIES AND BATTERIES for third-party internet sites and may allow you to access third-party sites. These are not affiliated with Use only approved accessories and batteries. Nokia, and Nokia does not endorse or assume liability Do not connect incompatible products. -
Page 9: Network Services
for them. If you access such sites, take precautions for home network and when roaming on other networks. security or content. Your service provider can give you instructions and explain what charges will apply. Some networks may have limitations that affect how you can use network Warning: To use any features in this device, other services. -
Page 10: Battery Removing
Battery removing Switch the device off and disconnect the charger before removing the battery. -
Page 11: Find Help
Warning: If you install a software update, you cannot use the device, even to make emergency calls, If your issue remains unsolved, contact Nokia for repair until the installation is completed and the device is options. See www.nokia.com/repair. Before sending restarted. -
Page 12: In-Device Help
Increase font size. Nokia Software Updater is a PC application that enables You may find links to related topics at the end of the you to update your device software. To update your help text. If you select an underlined word, a short device software, you need a compatible PC, broadband explanation is displayed. -
Page 13: Additional Applications
You may have settings from your service providers For more information, contact a Nokia Care point or already installed in your device, or you may receive or your device dealer. -
Page 14: Prolong Battery Life
Select Menu > power. WLAN on your Nokia device deactivates Ctrl. panel Settings General > >... - Page 15 To free memory, transfer data to an alternative memory (if available) or compatible computer. To remove data you no longer need, use File manager or the respective application. You can remove the following: • Messages in the folders in Messaging and retrieved e-mail messages from the mailbox •...
-
Page 16: Get Started
Get started Insert the SIM card and battery Safe removal. Always switch the device off and disconnect the charger before removing the battery. 1. Remove the back cover. 4. Align the battery contacts with the battery compartment connectors, and insert the battery. 5. -
Page 17: Insert The Memory Card
Insert the memory Remove memory card and press 'OK' displayed. card 4. Press the memory card to release it from the slot. 5. Pull out the memory card, and close the memory card slot cover. If the device is switched on, select A memory card may already be inserted in the device. -
Page 18: Charge The Battery
USB hub. USB hubs may require service and additional charges be incompatible for charging a USB device. may apply. For more information, contact a Nokia When the USB data cable is connected, you can transfer Care point or your device dealer. -
Page 19: Headset
— Headset connector — Earpiece — Optical Navi™ key (scroll key) — Selection key — Call key — Microphone — Keypad — End key — Micro USB connector — Selection key — Memory card slot — Light sensor — Volume up key —... -
Page 20: Screen Saver Clock
The input methods provided in the device may vary You can use the Switch application to copy content such according to different sales markets. as phone numbers, addresses, calendar items, and images from your previous Nokia device to your device. - Page 21 To install the Switch application on the other device, open the If you cannot send an item, depending on the type of the other device, you can add the item to the Nokia...
- Page 22 C:\Nokia or E:\Nokia in your device. When you select the folder to transfer, the items are synchronised in the corresponding folder in the other device, and vice versa. Use shortcuts to repeat a transfer After a data transfer, you can save a shortcut with the transfer settings to the main view to repeat the same transfer later.
-
Page 23: Your Nokia E72
Find points of interest with the Maps Key features application. Switch from business to personal mode. Your new Nokia E72 helps you manage your business and personal information. Some of the key features are highlighted here: Edit the appearance and setup of your home screen with the Modes application. -
Page 24: Home Screen
Home screen from the list of proposed matches. This feature may not be available in all languages. Home screen To call the contact, press the call key. To disable the contact search, select Options > In the home screen, you can quickly access your most Contact search off. -
Page 25: Optical Navi Key
E-mail key — Contacts key — Calendar key To open your default mailbox, press the e-mail key — E-mail key briefly. To create a new e-mail message, press the e-mail key Home key for a few seconds. To access the home screen, press the home key briefly. Optical Navi key Press the home key briefly again to access the menu. -
Page 26: Calendar
To define the turning options, select Menu Ctrl. requests you must have a compatible mailbox > panel. configured to your device. Select Menu Ctrl. panel Settings General • Memo entries are related to the whole day but not > > >... -
Page 27: Contacts
1. To create a meeting entry, select a day and • To-do view shows all to-do items. Options New entry Meeting request. > > • Agenda view shows the events for the selected day 2. Enter the names of the required participants. To in a list. - Page 28 Work with contacts Search for contacts in a remote database Select Menu > Contacts. To create a contact, select Options contact, > To activate remote contact search, select Options > and enter the details of the contact. Settings Contacts Remote search server.
-
Page 29: Multitasking
Ovi Files remote contacts databases are supported by your service provider. With Ovi Files, you can use your Nokia E72 to access Multitasking content on your computer if it is switched on and connected to the internet. You will need to install the... - Page 30 can access your computer content with your mobile device. • Browse, search, and view your files and documents. • Transfer songs from your computer to your device. • Send files and folders from your computer without moving them to and from your device first. •...
-
Page 31: Make Calls
Make calls Voice calls Options during a call 1. In the home screen, enter the phone number, To adjust the volume during a call, use the volume key including the area code. To remove a number, press on the side of your device. You can also use the scroll the backspace key. -
Page 32: Voice Mail
Answer or decline a compatible headset with Bluetooth connectivity, to route the sound to the headset, select Options > call Activate handsfree. To switch back to the handset, select Options Activate handset. > To end an active call and replace it by answering the To answer the call, press the call key. -
Page 33: Speed Dial A Phone Number
Call waiting between a maximum of six participants, including yourself. To have a private conversation with one of the You can answer a call while you have another call in participants, select Options Conference progress. To activate call waiting, select Settings >... -
Page 34: Call Barring
length of time for the device to ring before diverting International calls — Prevent calling to foreign • the call. countries or regions. If out of reach — Divert calls when the device is International calls except to home country •... -
Page 35: Make A Video Call
Make a call with a voice tag image captured by the camera in your device is shown to the video call recipient. To be able to make a video call, you must have a USIM Note: Using voice tags may be difficult in a noisy card and be in the coverage of a UMTS network. -
Page 36: Options During A Video Call
The video call is active when you see two video To change the video quality, select Options Video > images, and hear the sound through the preference. Normal quality is framerate 10 fps. Use loudspeaker. The call recipient may deny video Clearer detailfor small, static details. - Page 37 Video sharing settings the voice call while you share video, you can also use a compatible headset. To adjust video sharing settings, select Menu Ctrl. > panel Settings Connection Video > > Warning: Continuous exposure to high volume sharing. may damage your hearing. Listen to music at a To set up video sharing, you need person-to-person moderate level, and do not hold the device near your and UMTS connection settings.
- Page 38 Options during video sharing • Contact your service provider to establish an agreement for you to use the UMTS network. Zoom the video (available for sender only). • Ensure that the UMTS access point connection Adjust the brightness (available for sender settings for your device are configured properly.
-
Page 39: Log
If someone sends you a share invitation and you are To view missed, received, and dialled calls, select not within UMTS network coverage, you will not know Missed calls, Received calls Dialled numbers. that you received an invitation. Tip: To open the dialled numbers list in the When you receive an invitation, select from the home screen, press the call key. - Page 40 To clear both sent and received information, select Options Clear counters. You need the lock code to > clear the information. Monitor all communication events Select Menu > Log. To open the general log where you can monitor all voice calls, text messages, or data and wireless LAN connections registered by the device, select the general log tab .
-
Page 41: Messaging
Messaging Messaging folders Select Menu > Messaging. In Messaging (network service), you can send and receive text messages, multimedia messages, audio Select Menu > Messaging. messages, and e-mail messages. You can also receive Messages and data received using Bluetooth web service messages, cell broadcast messages, and connectivity are stored in the Inbox folder. -
Page 42: Organise Messages
To sort messages in a specific order, select Options > Sort With the Nokia e-mail wizard, you can set up your To view the properties of a message, select the corporate e-mail account, such as Microsoft Outlook, message and Options Message details. - Page 43 Send e-mail Add attachments Select Menu > Messaging. Select Menu > Messaging. 1. Select your mailbox and Options Create email. To write an e-mail message, select your mailbox and > Options Create email. 2. In the To field, enter the recipient's e-mail address. >...
- Page 44 select Open to open the attachment. If there are To search for items within the recipients, subjects, and several attachments, select View list to see a list body texts of the e-mail messages in the mailbox, showing which attachments have been downloaded or select Options >...
-
Page 45: Message Reader
wireless connection, select Options > Disconnect. If Warn before delete — Set the device to display a • your mailbox does not have the Disconnect option, warning before you delete an e-mail message. select Options Exit to disconnect from the mailbox. Load HTML images —... -
Page 46: Text And Multimedia Messages
Text and multimedia To set the language for the message reader, select Language. To download additional languages to your messages device, select Options Download languages. > Tip: When you download a new language, you must download at least one voice for that Select Menu >... - Page 47 device may make it smaller so that it can be sent by 6. To capture an image or record a video or sound clip MMS. for a multimedia message, select Options Insert > content Insert image > New, Insert video >...
- Page 48 messages to a folder in the device. After copying the Tip: To add recipients to your reply, select messages to a folder, you can view them in the folder Options Add recipient to select the > or delete them from the SIM card. recipients of the message from Contacts, or enter the recipients' phone numbers or e- 1.
-
Page 49: Special Message Types
View and save multimedia 5. To insert images, sound or video clips, or notes in your presentation, scroll to the corresponding attachments object area, and select Options > Insert. 6. To add slides, select Options Insert > > To view multimedia messages as complete slide. -
Page 50: Cell Broadcast
To define the service message settings, select Cell broadcast messages cannot be received in UMTS Options Settings Service message. (3G) networks. > > To download the service or message content, select To receive cell broadcast messages, you may need to Options Download message. - Page 51 Text message settings Multimedia message settings Select Menu Messaging Options Settings > > > Text message. Select Menu Messaging Options Settings > > > Select from the following: Multimedia message. Message centres — View the available message • Select from the following: centres for your device, or add a new one.
- Page 52 Automatic retrieval may not be supported in all To select how to download services and service regions. message content, select Download messages > Allow anonymous msgs. — Receive messages Automatically or Manually. If you select • Automatically, you may still need to confirm some from unknown senders.
-
Page 53: Instant Messaging
Folder view — Select if you want to see folder New IM contact — Create, edit, or view the online • • information on one or two lines. status of your IM contacts. Saved conversations — View a previous instant •... - Page 54 View and start conversations Use screen name (shown only if IM groups are • supported by the server) — To enter a nickname, Under the Conversations heading you can see a list of select Yes. the contacts with whom you have an ongoing Show my availability —...
- Page 55 Record chats Open conversation — To open a conversation with • a contact. When viewing the content of a conversation, to record Send invitation — To invite a contact to chat. • the messages that are exchanged during a Blocking options —...
- Page 56 To prevent receiving messages from certain participants, select Back Options Blocking > > options. To leave the IM group, select Options Leave IM > group. IM server settings Select Options > Settings. The settings may be preconfigured in your device, or you may receive the settings as a confirmation message from the service provider that offers the IM service.
-
Page 57: Connectivity
Connectivity Your device offers several options to connect to the availability and subscription to packet data connection internet or to another compatible device or PC. services, contact your service provider. Data connections and Network settings access points Your device can automatically switch between the GSM and UMTS networks. -
Page 58: Wireless Lan
an error tone and asks you to reselect a network. wireless LAN connection. Using encryption reduces the The selected network must have a roaming risk of unauthorised access to your data. agreement with your home cellular network. Cell info display —... - Page 59 If the search finds WLANs, to create an internet access The infrastructure operating mode allows two kinds of point (IAP) for a connection and start the web browser communication: wireless devices are connected to using this IAP, select the connection and Start web each other through a WLAN access point device, or browsing.
-
Page 60: Access Points
Access points Data bearer — Select the data connection type. • Depending on the data connection you select, only Create a new access point certain setting fields are available. Fill in all fields marked with Must be defined or with a red *. Other fields can be left empty, unless your service provider Select Menu... - Page 61 group, scroll to an existing access point, and select Password — A password may be needed to make • Options Organise Copy to other dest.. a data connection and is usually provided by your > > service provider. To change the priority order of access points within a Authentication —...
-
Page 62: Active Data Connections
WLAN internet access points connection using this access point is created or Automatically to set the device to connect to the Select Menu Ctrl. panel Settings destination using this access point automatically. > > Connection Destinations Access point, and > >... -
Page 63: Sync
To manage sync profiles, select Options and the data calls desired option. packet data connections To synchronise data, select Options > Synchronise. wireless LAN (WLAN) connections To cancel synchronisation before it finishes, select Cancel. Note: The actual invoice for calls and services Bluetooth from your service provider may vary, depending on network features, rounding off for billing, taxes, and... - Page 64 Interface Device, Local Positioning, Object Push, Phone network. Book Access, SIM Access, Serial Port, Video Distribution. To ensure interoperability between other Security tips devices supporting Bluetooth technology, use Nokia approved accessories for this model. Check with the Select Menu Ctrl. panel Connectivity >...
- Page 65 2. Select the device, and enter the passcode. The same phone passcode must be entered on the other device as audio or video device well. other device 3. Some audio enhancements connect automatically to your device after pairing. Otherwise, scroll to the To interrupt the search, select Stop.
-
Page 66: Data Cable
item is placed in the Inbox folder in Messaging. To use the remote SIM mode with a compatible car kit Messages received through Bluetooth connectivity are enhancement, activate Bluetooth connectivity, and enable the use of the remote SIM mode with your indicated by device. -
Page 67: Pc Connections
Unplug or Eject Hardware wizard in Microsoft Windows, for example) to avoid damaging the Home network memory card. To use Nokia Ovi Suite with your device, install Nokia About home network Ovi Suite on your PC, connect the data cable, and select Suite. - Page 68 connection and have other UPnP enabled home devices You can view or change the settings of the WLAN connected to the same home network. internet access point in your device. After setting up your home network, you can share If you use the ad hoc operating mode to create a home your photos and video clips with your friends and network with a compatible device, enable one of the family at home.
- Page 69 Images and video clips, and use playlists you have your device, or you can download it from the device selected in Music. If you do not want other devices support pages on the Nokia website. to access your files, deactivate content sharing. Images and video clips —...
- Page 70 Copy media files 3. To stop sharing a media file, select Options Stop > showing. To copy or transfer media files from your device to Show media files stored on another device another compatible device, such as a UPnP compatible To show media files that are stored on another home PC, select a file in Photos and Options...
- Page 71 Synchronisation — Set automatic or manual To browse files in a specific category in your device, • select a file type and Options Show files. synchronisation. > Source devices — Select the source devices for • To create a predefined or customised list for incoming synchronisation.
-
Page 72: Internet
Internet With the Web browser, you can view hypertext markup To enter a web address, select Options Go to > > language (HTML) web pages on the internet as New web page. originally designed. You can also browse web pages Tip: While browsing, to visit a web page saved that are designed specifically for mobile devices, and as a bookmark in the bookmarks view, press 1,... -
Page 73: Browser Toolbar
Browser toolbar To move in Mini Map, scroll left, right, up, or down. When you find the desired location, stop scrolling. Mini Map disappears and leaves you at the selected location. The browser toolbar helps you select frequently used When you are browsing a web page that contains a functions of the browser. -
Page 74: Content Search
Content search Empty the cache Select Menu Internet > Web. The information or services you have accessed are > stored in the cache memory of the device. To search for text, phone numbers, or e-mail addresses A cache is a memory location that is used to store data within the current web page, select Options >... -
Page 75: Web Settings
Security certificates may be required for some services, Homepage — Define the homepage. • such as banking services. You are notified if the identity Mini map — Turn Mini Map on or off. Mini Map helps • of the server is not authentic or if you do not have the with web page navigation. - Page 76 hide the folder from the bookmarks view, select Hide folder. Form data saving — Select whether you want the • password data or data you enter on different forms on a web page to be saved and used the next time you open the page.
-
Page 77: Nokia Office Tools
Nokia Office Tools Nokia Office Tools support mobile business and enable Insert new — Add new items to the note. You can • effective communication with work teams. record sound and video clips, and capture images. Send — Send the note. -
Page 78: File Manager
Find and organise files This calculator has limited accuracy and is designed for simple calculations. Select Menu Office File mgr.. > > To make a calculation, enter the first number of the To find a file, select Options > Find. Enter a search calculation. -
Page 79: Quickoffice
Back up data you want to keep before formatting the mass memory. You can use Nokia Ovi Suite or Nokia Nseries PC Suite to back up data Work with files to a compatible PC. Digital rights management technologies (DRM) may prevent some backup data To open a file, scroll to it, and press the scroll key. -
Page 80: Zip Manager
the measurement type to use (other than currency) After you have set all the necessary exchange rates, you and OK. can make currency conversions. 2. Scroll to the first unit field, and select Options > Zip manager Select unit. Select the unit from which to convert and OK. - Page 81 File printing Print — Select pages, Even pages, or • pages as the print range. Print files Print range — Select All pages in range, Current • page, or Defined pages as the page range. Select Menu Ctrl. panel > Printers. >...
-
Page 82: Dictionary
Dictionary Image print You can print images from your device using a printer Select Menu Office > Dictionary. > compatible with PictBridge. You can only print images that are in the JPEG file format. To translate words from one language to another, enter text in the search field. - Page 83 To send a note to other compatible devices, select Options > Send. To synchronise or to define synchronisation settings for a note, select Options > Synchronisation. Select Start to initialise synchronisation or Settings to define the synchronisation settings for the note.
-
Page 84: Positioning (Gps)
GPS position faster. buildings, natural obstacles, and weather conditions. Your device is preconfigured to use the Nokia A-GPS GPS signals may not be available inside buildings or service, if no service provider-specific A-GPS settings underground and may be impaired by materials such are available. -
Page 85: Hold Your Device Correctly
You must have an internet access point defined in the • If you are outdoors, move to a more open space. device to retrieve assistance data from the Nokia A-GPS • Ensure that your hand does not cover the GPS service over a packet data connection. -
Page 86: Position Requests
Position requests Edit — Edit or add information to a saved landmark • (for example, a street address). Add to category — Add a landmark to a category • You may receive a request from a network service to in Landmarks. Select each category to which you receive your position information. -
Page 87: Positioning Settings
Route guidance In the position view, you can view the position information of your current location. An estimate of the Select Menu Applications GPS data accuracy of the location is displayed. > > > Navigation. To save your current location as a landmark, select Start the route guidance outdoors. - Page 88 Integrated GPS — Use the integrated GPS receiver • of your device. Assisted GPS — Use Assisted GPS (A-GPS) to receive • assistance data from an assistance data server. Bluetooth GPS — Use a compatible external GPS • receiver with Bluetooth connectivity. Network based —...
-
Page 89: Maps
You can quality of GPS signals may be affected by your location, also use the Nokia Map Loader PC software to download buildings, natural obstacles, and weather conditions. maps. To install Nokia Map Loader to a compatible PC, GPS signals may not be available inside buildings or visit www.nokia.com/maps. -
Page 90: Move On A Map
Display indicators Assisted GPS (A-GPS) is used to retrieve assistance data over a packet data connection, which assists in calculating the coordinates of your current location The GPS indicator shows the availability of when your device is receiving signals from satellites. the satellite signals. -
Page 91: Plan A Route
Save and send Find a place 1. Select Options Search > Places. > locations 2. Select from specific categories, or enter the search terms and select Search. To save a location to your device, press the scroll key, 3. Select the place from the list of proposed matches. and select Save. -
Page 92: Synchronise Your Favourite Locations With Ovi Maps
Ovi Maps About licences The Ovi website contains the internet services that Nokia provides. The Ovi Maps section contains services There are additional services available for Maps. To use related to Maps. a service, you need to buy a licence. Most services are region-specific. -
Page 93: Walk To Your Destination
View your valid licences — Select Options Shop 30 kph (18 mph). If the speed limit is exceeded, > & licences licences. navigation stops and is resumed once the speed is back > within limits. View the services available in other regions — If the destination is on off-road terrain, the route is Select Options... -
Page 94: Traffic And Safety
Content such as satellite images, guides, weather and amounts of data (network service). traffic information and related services are generated by third parties independent of Nokia. The content may Switch views during the navigation — Press the be inaccurate and incomplete to some extent and is... -
Page 95: Weather Information
To update the traffic information, select Update traffic circle around the compass is white, and the map view info. does not rotate automatically. To set your device to plan a new route automatically to Calibrate compass avoid traffic events, in the main view, select Options >... -
Page 96: Internet Settings
— Define the map settings. Traffic info update — Update the information • • Synchronisation — Define the settings for about traffic events. • Reroute due to traffic — Plan a new route to avoid synchronising saved items with the Ovi web service. •... -
Page 97: Map Settings
Ovi account automatically when you open and close the Maps application, select Synchronise with At start-up and shut-d.. > If your device has an older version of Maps, use Nokia Maps Updater to install the latest version of Maps to... -
Page 98: Shortcuts
5. www.nokia.com/maps. To use Nokia Maps Updater, Pedestrian navigation shortcuts you need to have Nokia PC Suite installed on your computer. To save a location, press 2. Connect your device to the computer, open Nokia Maps To search for locations, press 3. -
Page 99: Personalisation
Personalisation You can personalise your device by, for example, requirements when establishing and using these adjusting the various tones, background images, and features. screen savers. To set the profile to be active until a certain time within the next 24 hours, scroll to the profile, select Options >... -
Page 100: Customise Profiles
Customise profiles Alert for — Set the device to ring only upon calls • from phone numbers that belong to a selected contact group. Phone calls coming from outside that Select Menu Ctrl. panel > Profiles. > group have a silent alert. Select Options Personalise... -
Page 101: Change The Display Theme
Change the display To activate a theme, select Options > Set. theme Change audio themes Select Menu Ctrl. panel > Themes. > Select Menu Ctrl. panel Themes Audio > > themes. Select from the following: You can set sounds for various device events. The General —... - Page 102 To enable three-dimensional (3-D) sound effects for ringing tones, select 3-D ringing tone effects > On. Not all ringing tones support 3–D effects. To change the 3–D effect that is applied to the ringing tone, select Sound trajectory and the desired effect. To modify the 3–D effect, select from the following: Trajectory speed —...
-
Page 103: Media
Media Your device contains a variety of media applications for Activate the self-timer (images only). both business and leisure time use. Activate sequence mode (images only). Select a colour tone. Camera Adjust the white balance. The available options vary depending on the mode and Select Menu Media... - Page 104 To copy the settings of another scene, select Based on Send — Send the image to compatible devices. • scene mode and the desired scene. Send to caller — Send the image to the caller • during an active call. To activate your own scene, select User defined >...
- Page 105 Send to caller — Send the video clip to the caller Memory in use — Choose where to store your • • during an active call. images. Post to — Send the video clip to an online album Restore camera settings —...
-
Page 106: Gallery
Restore camera settings — Restore the camera To open a file, select the file from the list. Video clips • and streaming links open and play in Video centre, and settings to the default values. music and sound clips in Music player. Gallery To copy or move files to another memory location, select a file,... -
Page 107: Photos
With presentations, you can view scalable vector — View all items. • graphics (SVG) and flash files (SWF), such as cartoons Share online — Post your images or videos to the • and maps. SVG images maintain their appearance web. when printed or viewed with different screen sizes and Files stored on your compatible memory card (if resolutions. - Page 108 To open a file, select the file. When an image opens, to Duration — View the length of the video. • zoom in the image, use the zoom keys. The zooming Usage rights — To view the DRM rights of the •...
- Page 109 shows the currently used tags and the number of items Play the video clip. associated with each tag. Send the image or video clip. To open Tag manager, select an image or video clip and Upload the image or video clip to a compatible Options Details manager.
- Page 110 To end the slide show, select End. If you select Manual, a cross appears in the upper left corner of the image. Use the scroll key to select the area To browse the images, scroll left or right. to crop, and select Set. Another cross appears in the Before starting the slide show, to adjust the slide show lower right corner.
- Page 111 • To zoom in or out, press 5 or 0. Use Image print to print your images using a compatible USB data cable, or Bluetooth connectivity. • To move on a zoomed image, scroll up, down, left, You can also print images using wireless LAN. If a or right.
-
Page 112: Share Online
Media Share online. > > Create a post To subscribe to an online sharing service, go to the service provider's website, and check that your Nokia Select Menu Media Share online. device is compatible with the service. Create an >... - Page 113 One-click upload To post multimedia files to a service, select a service Options post. If the online sharing service > One-click upload lets you post images to an online provides channels for posting files, select the desired channel. sharing service immediately after capturing them. To add an image, video clip, or sound clip to the post, To use one-click upload, capture an image with your device camera, and select the online sharing icon from...
- Page 114 To start uploading a post, select the post and To check the details of a service, select the service from Options Upload now. the list. > To cancel uploading a post, select the post and To delete the selected service, select Options >...
-
Page 115: Music Player
To download new items from the service To pause playback, press the scroll key; to resume, automatically, select Download interval and the press the scroll key again. To stop playback, scroll interval for the downloads. To download items down. manually, select Manual. To fast-forward or rewind, press and hold the scroll key to the right or left. -
Page 116: Realplayer
Nokia Music Store. Select Default access point. In the Nokia Music Store, you may be able to edit the RealPlayer settings by selecting Options > Settings. -
Page 117: Recorder
View information about a RealPlayer does not necessarily support all variations of a media file format. media clip Play video clips and stream To view the properties of a video or sound clip, or web link, select Options Clip details. Information may links >... -
Page 118: Flash Player
Recorded sound clips are saved in the Sound clips folder accessory needs to be attached to the device for the FM in Gallery. radio to function properly. To record a telephone conversation, open recorder Select Menu Media > Radio. > during a voice call, and select . - Page 119 Saved stations Select Menu Media > Radio. > To open the list of your saved stations, select Options > Stations. To listen to a saved station, select Options > Station > Listen. To change station details, select Options Station > >...
-
Page 120: Security And Data Management
> device. When you remove the password, the data on the memory card is not protected against unauthorised If you lose the lock code, you must take the device to a use. Nokia authorised service facility. To unlock the device,... -
Page 121: Encryption
To open a locked memory card, select Options name for the key file. The pass phrase should be long > Unlock memory card. Enter the password. and complex. Encrypt with restored key — Encrypt the memory • If you cannot recall the password to unlock a locked card with a key you have received. -
Page 122: Certificate Manager
emergency number programmed into your device. Call identity of the server is not authentic or if you do not barring and call diverting cannot be active at the same have the correct certificate in your device. time. You can download a certificate from a web site, or You need your PIN2 code to activate and deactivate receive a certificate as a message. -
Page 123: View And Edit Security Modules
Certificate trust settings Symbian installation — New Symbian operating • system application. Select Menu Ctrl. panel Settings General Internet — E-mail and graphics. • > > > Security Certificate management. App. installation — New Java application. • > Online certif. check —... - Page 124 With Device manager, you can manage settings, data, User name Password — Enter your user ID and • and software on your device remotely. password for the configuration server. Allow configuration — Select to allow the • You can connect to a server, and receive configuration server to initiate a configuration session.
-
Page 125: Application Manager
Bluetooth connectivity. You can use to download it. If there is no access point defined Nokia Application Installer in Nokia PC Suite to install for the application, you are asked to select one. an application to your device. - Page 126 The files may use large amounts of memory and prevent you from storing other files. To maintain Online certificate check — Check the online • certificates before installing an application. sufficient memory, use Nokia Ovi Suite to back up...
-
Page 127: Software Updates Using Your Pc
Updating the software may or connect the charger before starting the update. also improve the device performance. Nokia Software Updater is a PC application that enables Warning: If you install a software update, you you to update your device software. To update your... -
Page 128: Licenses
— Change the settings, such as the default • service provider. access point used for downloading updates. Disclaimer — View the Nokia licence agreement. • Some activation keys may be connected to a specific SIM card, and the protected content can be accessed Licenses only if the SIM card is inserted in the device. -
Page 129: Sync
To cancel synchronisation before it finishes, select VPN policy servers — Edit the connection settings • Cancel. of VPN policy servers from which you can install and update VPN policies. A policy server refers to a Nokia Security Service Manager (NSSM), which is not necessarily required. - Page 130 VPN log — View the log for your VPN policy The settings available for editing may vary. • installations, updates and synchronisations, and For the correct settings, contact your company's IT other VPN connections. department. Edit VPN access points Use a VPN connection in an application Select Menu...
-
Page 131: Settings
Settings Select Menu Ctrl. panel > Settings. Positioning — Define the positioning method and • > server for GPS-based applications. You can define and modify various settings of your device. Modifying these settings affects the operation The available options may vary. of your device across several applications. - Page 132 Language settings Select General Personalisation Tones and from > > the following:. Select Menu Ctrl. panel Settings General > > > Ringing tone — Select a ringing tone from the list, • Personalisation > Language. or select Download sounds to open a bookmark Phone language —...
- Page 133 Date and time settings To set the device to answer phone calls automatically after 5 seconds when an accessory is attached, select Select Menu Ctrl. panel Settings General Automatic answer > On. If the ringing type is set to > >...
-
Page 134: Telephone Settings
Restore original settings emergency number. Codes are shown as asterisks. When you change a code, enter the current code, then To restore the original device settings, select Menu the new code twice. > Ctrl. panel Settings General Factory > > Device and SIM card security settings. - Page 135 Select from the following: Own video in recvd. call — Allow or deny video • sending during a video call from your device. Call — Define general call settings. • Image in video call — Display a still image if video •...
-
Page 136: Connection Settings
Network settings your device by your service provider, and you may not be able to create, edit, or remove them. Select Menu Ctrl. panel Settings Phone — Manage the settings for virtual private • > > > Network. networking. Packet data —... - Page 137 Access points Depending on the data connection you select, only certain setting fields are available. Fill in all fields Create a new access point marked with Must be defined or with a red *. Other fields can be left empty, unless your service provider Select Menu Ctrl.
- Page 138 To change the priority order of access points within a the connection using this access point is created, or group, scroll to an access point and Options Automatically if you want the device to connect to > Organise Change priority. the destination using this access point >...
- Page 139 Network status — Define whether the network Proxy server address — Enter the address for the • • name is displayed. proxy server. WLAN network mode — Select Ad-hoc to create Proxy port number — Enter the proxy port • •...
- Page 140 WLAN settings Long retry limit — Enter the maximum number of • transmission attempts if the device does not receive SelectMenu Ctrl. panel Settings a receiving acknowledgement signal from the > > Connection Wireless LAN. network. > Short retry limit —...
- Page 141 WEP security settings 802.1x security settings Select 802.1x as the WLAN security mode. Select as the WLAN security mode. 802.1x authenticates and authorises devices to access The wired equivalent privacy (WEP) encryption method a wireless network, and prevents access if the encrypts data before it is transmitted.
- Page 142 WPA2 only mode — To allow both TKIP and AES To edit the EAP plug-in settings, select Options • > Edit. (Advanced Encryption Standard) encryption, select Off. To allow AES only, select To change the priority of the EAP plug-in settings, select Options Raise priority to attempt to use the plug-...
- Page 143 — Enter a name for the SIP profile. • Port — Enter the port number of the proxy server. • Service profile — Select IETF Nokia 3GPP. • Default destination — Select the destination to • Edit registration servers use for the internet connection.
-
Page 144: Application Settings
To delete configurations for a trusted server, select Select an application from the list to adjust its settings. Options > Delete. The configuration settings for other applications provided by this server are also deleted. Restrict packet data Select Menu Ctrl. panel Settings >... -
Page 145: Shortcuts
Shortcuts Here are some of the available keyboard shortcuts in Call key Open the call log. your device. Shortcuts can make the use of the Press and hold to open your applications more efficient. homepage in the Web browser. General shortcuts Press and hold to call your voice mailbox. - Page 146 View the page in full screen. Move to the last e-mail message in the mailbox or move to the end of View the page overview. an e-mail message. Open the dialog for entering a new Open the list of e-mail folders for web address.
-
Page 147: Glossary
Domain name service. An internet service that translates domain names such as www.nokia.com into IP addresses such as 192.100.124.195. Domain names are easier to remember but this translation is needed because the internet is based on IP addresses. - Page 148 GPRS General packet radio service. GPRS HTTP Hypertext transfer protocol. A enables wireless access for mobile document transfer protocol used in the phones to data networks (network web. service). GPRS uses packet data HTTPS HTTP over a secure connection. technology where information is sent in short bursts of data over the mobile IMAP4 Internet mail access protocol, version...
- Page 149 browse the web faster than previously POP3 Post office protocol, version 3. A possible while simultaneously common mail protocol that can be speaking on the phone. used for accessing your remote mailbox. UPIN PIN code used in UMTS network. PUK and Personal Unblocking Key.
- Page 150 Wi-Fi Protected Access. Security method for WLAN. WPA2 Wi-Fi Protected Access 2. Security method for WLAN.
-
Page 151: Troubleshooting
This is normal, not a fault. device? Q: Why can’t I find my friend’s device while A: The WLAN on your Nokia device turns off when you using Bluetooth connectivity? are not trying to connect, not connected to another access point, or not scanning for available networks. - Page 152 often, for available networks in the background. WLAN Check also the following: you have the correct WPA turns off in between background scans. mode (preshared key or EAP), you have disabled all EAP types that are not needed, and all the EAP type settings To stop the background scans, select Menu Ctrl.
- Page 153 multimedia message centre. If you select Off, the • Change the time-out after which the backlight is device does not make any network connections related switched off. Select Menu Ctrl. panel > > to multimedia messaging. Settings General Personalisation > >...
-
Page 154: Green Tips
• Disable unnecessary sounds, such as keypad and ringing tones. Recycle Most of the materials in a Nokia phone are recyclable. Check how to recycle your Nokia products at www.nokia.com/werecycle, or with a mobile device, www.nokia.mobi/werecycle. -
Page 155: Accessories
Accessories Warning: Use only batteries, chargers, and accessories approved by Nokia for use with this particular model. The use of any other types may invalidate any approval or warranty, and may be dangerous. In particular, use of unapproved chargers or batteries may present a risk of fire, explosion, leakage, or other hazard. -
Page 156: Battery
Your device is powered by a rechargeable battery. The Extreme temperatures reduce the capacity and lifetime battery intended for use with this device is BP-4L. Nokia of the battery. A device with a hot or cold battery may may make additional battery models available for this not work temporarily. -
Page 157: Nokia Battery Authentication Guidelines
Nokia battery with the Always use original Nokia batteries for your safety. To hologram on the label is not an authentic Nokia check that you are getting an original Nokia battery,... -
Page 158: Taking Care Of Your Device
Nokia products at www.nokia.com/werecycle, or nokia.mobi/werecycle. • Do not use harsh chemicals, cleaning solvents, or strong detergents to clean the device. Only use a... - Page 159 This requirement applies in the European Union. Do not dispose of these products as unsorted municipal waste. For more environmental information, see the product Eco-Declarations at www.nokia.com/ environment.
-
Page 160: Additional Safety Information
Additional safety information Small children Medical devices Your device and its accessories are not toys. They may Operation of radio transmitting equipment, including contain small parts. Keep them out of the reach of small wireless phones, may interfere with the function of children. -
Page 161: Vehicles
• Follow the manufacturer directions for the dangerous to the operation of the aircraft and may be implanted medical device. illegal. If you have any questions about using your wireless Potentially explosive device with an implanted medical device, consult your health care provider. -
Page 162: Certification Information (Sar)
Use of device accessories may result in different SAR permission to do so. values. SAR values may vary depending on national reporting and testing requirements and the network band. Additional SAR information may be provided under product information at www.nokia.com. -
Page 163: Index
Index Symbols/Numerics audio messages 46 settings 75 audio themes 101 toolbar 73 3-D ringing tones 101 autolock period 134 802.1x security settings 141 cable 66 background image 101 cache memory 74 backing up device memory 78 calculator 77 access codes 13 battery calendar 26 access points 59, 60, 137... - Page 164 camera converting searching 44 capturing images 103 currencies 80 sending 43 image settings 105 measurements 79 set-up 42 playing videos 104 currency conversions 80 settings 45 e-mail key 25 scenes 103 sequence mode 104 e-mail key settings 134 toolbar 103 data connections video clips 104 plug-in settings 142...
- Page 165 GPS (Global Positioning location information 84 recording chats 55 System) 84 retrieving IM contact lists 54 lock code 13, 17, 120, 134 GPS (global positioning locking searching for groups and system) 84 users 55 device 120 server settings 56 device autolock 134 starting a new keypad 134 logos...
- Page 166 108 network settings 57 memory card 17 organising files 108 news feeds 73 locking 120 red-eye 110 Nokia Maps Updater 97 passwords 120 tags 109 Nokia Music Store 116 message reader 45 toolbar 108 Nokia support information 11...
- Page 167 profiles home network 68 creating 99 keypad lock 134 screen saver 101, 131 customising 99 language 132 scroll key 132 personalising 100 lights 132 searching selecting ringing tones 99 messages 51 contacts 28 proxy settings 61, 138 network 57, 136 security PUK codes 13 packet data 139...
- Page 168 video calls 35, 36 service content 114 service provider settings 114 options during 36 text video clips subscribing 112 changing size 131 tags 113 details 117 writing 20 shared video 36 playing 117 text messages sharing media files online 112 shared 36 messages on SIM card 47 shortcuts 145...
- Page 169 MAC address 59, 140 security settings 140 settings 59, 140 WEP keys 141 WPA security settings 141 WPA security settings 141 wrist strap 20 writing 20 Zip manager 80...