
Related Manuals for Brother Stampcreator PRO SC-2000USB


Summary of Contents for Brother Stampcreator PRO SC-2000USB
- Page 1 Questo manuale d’istruzione è fornito da trovaprezzi.it. Scopri tutte le offerte per Brother SC-2000USB o cerca il tuo prodotto tra le migliori offerte di Macchine per Ufficio...
- Page 2 The contents of this manual and the specifications of this product are subject to change without notice. Brother reserves the right to make changes without notice in the specifications and materials contained herein and shall not be responsible for any damages (including consequential) caused by reliance on the materials presented, including but not limited to typographical and other errors relating to the publication.
- Page 3 Safety precautions Read all of these instructions and save them for later reference. Follow all warnings and instructions marked on the product. Warning Tells you what to do to avoid the risk of injury. Caution Tells you about procedures you must follow to prevent damage to the printer. The symbols used in this manual are as follows: Action NOT allowed to do DO NOT disassemble the product.
- Page 4 Warning Follow these guidelines to avoid fire, electric shock, or other damage. I Power Cord Use only the authorized power source (120 V Do not cut, damage, alter or place heavy objects on AC) for the printer. the power cord. Use only the power cord included with the Do not use the power cord if it is damaged.
-
Page 5: Table Of Contents
SET UP Table of Contents SET UP Stampcreator Express ....... 33 FCC Compliance ........2 Formatting a stamp ........33 General Precautions ........ 2 Printing a draft sheet ......... 34 Unpacking ..........3 Making an ID label ........35 Adding new styles to the Stampcreator Machine Mode Operations ...... -
Page 6: Fcc Compliance
• The enclosed interface cable should be used in order to ensure compliance with the limits for a Class B digital device. • Changes or modifications not expressly approved by Brother Industries, Ltd. could void the user’s authority to operate the equipment. -
Page 7: Unpacking
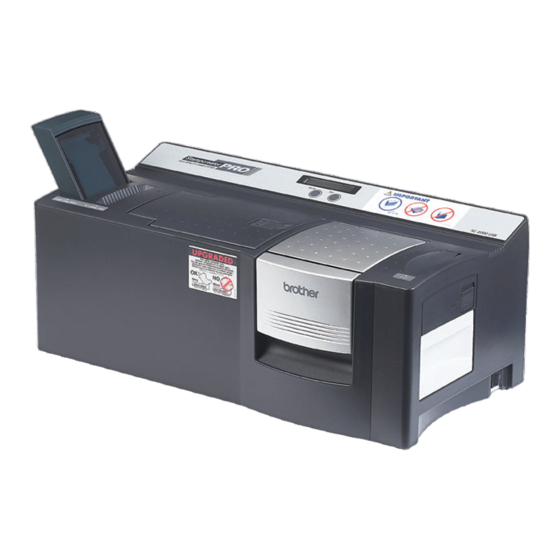
SET UP Unpacking SC-2000USB Xenon lamp unit Draft sheet magazine tray slot Mode and Set buttons release button Stamp compartment cover Exit slot Xenon lamp unit Ink ribbon ID label slot Power switch compartment cover STARTER KIT Power supply cord (for connecting the SC-2000USB to the AC outlet) 5 ID label sheets (for printing a label that can be attached to each stamp for identification) - Page 8 Brother Industries, Ltd. and its suppliers possess all rights and copyrights to this software (including, but not limited to, the programming, images, clip art, templates, and text incorporated into the software), the text in the enclosed manuals, and duplicates of the software.
-
Page 9: Machine Mode Operations
SET UP Machine Mode Operations The Stampcreator Pro has different modes for performing different operations. Follow the operations described below to select the desired mode. Initializing the machine • Turn the machine off, then on again to initialize it. The message “INITIALIZE” appears in the LCD. •... -
Page 10: Connecting The Interface And Power Supply Cables
SET UP Connecting the Interface and Power Supply Cables After connecting the interface and power supply cables to the SC-2000USB, it can be used to create stamps from any layout that you design in the Stampcreator P-touch Editor software or Stampcreator Express software installed on your computer. 1 Be sure both the SC-2000USB and the computer are turned off. -
Page 11: Installing The Software
SET UP Installing the Software Stampcreator P-touch Editor, Stampcreator Express and printer driver Before stamps can be engraved on the SC-2000USB, the stamp-editing tool Stampcreator P-touch Editor software, Stampcreator Express software and the SC-2000USB printer driver must be installed. Follow the procedure described below to install the software onto the computer. NOTE: You must have administrator privileges in order to install the software on a computer running Windows ®... - Page 12 SET UP 7 If you are satisfied with the settings that appear in the Start Copying Files dialog box, click the Next button to begin copying files. 8 When the Driver Setup dialog box appears, select “USB cable” if the SC-2000USB is connected to a USB port or select “Serial cable”...
- Page 13 SET UP ® ® For Windows Vista and Windows 7 users A Click the Finish button to exit the wizard. This completes the installation of Stampcretor P-touch Editor, Stampcreator Express and the printer driver for USB connection. Restart your computer now. ®...
- Page 14 For a serial port connection: F A Driver Setup dialog box appears, allowing you to select whether to install or uninstall the printer driver. Check that “Brother SC-2000USB” is selected for installation, select “Install”, and then click the Next button.
- Page 15 SET UP H In the dialog box that appears, allowing you to confirm how the installation will be carried out, check that the installation will be carried out as desired, and then click the Next button. I A dialog box showing that the printer has been installed appears. Click the Next button.
-
Page 16: First Steps
SET UP First Steps After you have designed a stamp layout using the Stampcreator P-touch Editor software or Stampcreator Express software, you can engrave it into a stamp. Installing the ink ribbon cassette 1 Press the ink ribbon compartment cover button to open the cover. NOTE: Open and close the ink ribbon compartment cover by pressing only on the position specified. - Page 17 SET UP Loading draft sheets and installing the draft sheet magazine tray 1 Slide the magazine tray out from its outer case. 2 Lift up the magazine tray lid. 3 Place the draft sheets (with the words “DRAFT SHEET” facing up) into the magazine tray so that the corners of the sheets fit under the tabs in the front corners of the tray.
-
Page 18: Desigining A Stamp
DESIGINING A STAMP Overview There are two stamp-editing tools: Stampcreator P-touch Editor and Stampcreator Express. Use the Stampcreator P-touch Editor software to create a stamp design with a wide variety of functions. The Stampcreator Express software is a simple stamp-editing tool. Simply select a style (template), and then change the text. -
Page 19: Stampcreator P-Touch Editor
DESIGINING A STAMP (Stampcreator P-touch Editor) Stampcreator P-touch Editor Start up Stampcreator P-touch Editor by following the procedure described below. (a) Click the Start button in the taskbar to display the Start menu. (b) Select “All Programs”. (c) Select “Stampcreator P-touch Editor 4.2”. (d) Click “Stampcreator P-touch Editor 4.2”. -
Page 20: Tools For Formatting
DESIGINING A STAMP (Stampcreator P-touch Editor) Tools for Formatting Properties Dock Print Properties Use to select the printer and to specify whether a stamp or an ID label will be printed (see figure 1). figure 1 Page Properties Use to specify the size of the page, stamp or ID label. You can also choose the orientation of your layout area. -
Page 21: Tools
DESIGINING A STAMP (Stampcreator P-touch Editor) Tools Select tool (figure 1a) Select this tool, and then select, move or change the size of an object. Dou- ble-click an object to display a dialog box for editing that object. Text Input tool (figure 1b) Select this tool, position the pointer in the layout area, and then click to begin typing your text. -
Page 22: Object Dock
DESIGINING A STAMP (Stampcreator P-touch Editor) Object Dock Text icon Add a new text block your layout. The same dialog box can be displayed by selecting the Text command in the Insert menu. Arrange Text icon Add text in different arrangements to your layout. The same dialog box can be displayed by selecting the Arrange Text command in the Insert menu. -
Page 23: Formatting A Stamp
DESIGINING A STAMP (Stampcreator P-touch Editor) Formatting a Stamp Selecting the stamp size 1 Display the Page Properties. 2 From the “Stamp Size” list, select the size of stamp to be made (see figure 1). figure 1 Typing text 1 Select the Text Input tool. 2 Click in the layout area. -
Page 24: Changing The Character Size
DESIGINING A STAMP (Stampcreator P-touch Editor) Changing the character size 1 Display the Text Properties. 2 With the Text Input tool, highlight the text to be changed. • The current character size is shown in the Text Properties. 3 From the “Size” drop-down list, select the desired character size (see figure 5). -
Page 25: Changing The Character Size Of A Text Block
DESIGINING A STAMP (Stampcreator P-touch Editor) Changing the character size of a text block 1 Display the Text Properties. 2 With the Select tool, click the block of text to be changed in the stamp layout. Handles appear around the text block. •... -
Page 26: Centering Text Within A Block
DESIGINING A STAMP (Stampcreator P-touch Editor) Centering text within a block This section explains how to center text within a text block. To align each block in the layout area, refer to the section “Vertical and horizontal block alignment” below. 1 Display the Text Properties, and then click the Enlarge/Reduce button to display the advanced settings. -
Page 27: Drawing Lines In A Stamp
DESIGINING A STAMP (Stampcreator P-touch Editor) Drawing lines in a stamp 1 Type in the text (refer to the section “Typing text” on page 19). NOTE: Text can be inserted before or after drawing a line. 2 Select the Line tool, and then drag the pointer in the layout area to draw the desired line (see figure 14). -
Page 28: Drawing A Frame
DESIGINING A STAMP (Stampcreator P-touch Editor) Drawing a frame 1 Select the Box tool, and then drag the pointer in the layout area to draw the desired frame (see figure 16). • If the inside of the frame is not translucent, use the Select tool to double- click inside the frame to display the Box Properties dialog box. -
Page 29: Using Special Design Frames
DESIGINING A STAMP (Stampcreator P-touch Editor) Using special design frames Selecting a frame design 1 Type in the text (refer to the section “Typing text” on page 19). NOTE: Text can be inserted before or after drawing a frame. 2 Select the Frame tool. -
Page 30: Creating Stamps With Clip Art Images
DESIGINING A STAMP (Stampcreator P-touch Editor) Creating stamps with clip art images Using clip art images 1 Type in the text (refer to the section “Typing text” on page 19). NOTE: Text can be inserted before or after selecting a clip art image. -
Page 31: Advanced Steps
DESIGINING A STAMP (Stampcreator P-touch Editor) Advanced Steps Importing graphics from a scanner, digital camera, or other clip art source 1 Save the graphic image taken from the scanner, digital camera, etc., as one of the file formats Stampcreator P-touch Editor supports. Bitmap file (bmp, dib) JPEG file (jpg, jpeg) Uncompressed TIFF file (tif) -
Page 32: Making A Stamp Containing A Photo
DESIGINING A STAMP (Stampcreator P-touch Editor) Making a stamp containing a photo The procedures for inserting and enhancing photo data are described in this section. Preparing photo data First save a photo image to your computer. Specifying the size of the stamp MEMO: Click to display the Page Properties. - Page 33 DESIGINING A STAMP (Stampcreator P-touch Editor) Inserting photo data Insert the photo data. 1 Click the Image icon on the object dock to display the Open dialog box. 2 Select the photo data that was saved to your computer. Adjusting photo data Adjust the photo data to enhance it.
- Page 34 DESIGINING A STAMP (Stampcreator P-touch Editor) • From the 9 samples, click the sample that looks good, and then click the OK button. • In the Image Properties dialog box, click the OK button to adjust the photo in the layout. Entering text 1 Click the Text Input button on the object dock.
- Page 35 DESIGINING A STAMP (Stampcreator P-touch Editor) Printing data containing graphics (photos) Stampcreator P-touch Editor automatically selects the print mode that best suits your design and will produce the best stamp quality. The various print modes are described below. 1 Select “Stamp”, and then select the appropriate setting in the “Document Type”...
-
Page 36: Auto Format
DESIGINING A STAMP (Stampcreator P-touch Editor) Auto Format There are more than 150 stamp templates available in the Stampcreator P- touch Editor. All of these designs can be easily produced using the Auto Format function. Using Auto Formats 1 Click the Auto Format button on the Standard toolbar, or select the Auto Format command in the File menu. -
Page 37: Stampcreator Express
DESIGINING A STAMP (Stampcreator Express) Stampcreator Express Formatting a stamp 1 Start up Stampcreator Express by following the procedure described below. (a) Click the Start button in the taskbar to display the Start menu. (b) Select “All Programs”. (c) Select “Stampcreator Express”. (d) Click “Stampcreator Express”. -
Page 38: Printing A Draft Sheet
DESIGINING A STAMP (Stampcreator Express) In this example, select text line 1, and then type in “Brother Industries, Ltd.” Change text lines 2 and 3 as you wish. If the entered text exceeds the length of the original text, the text size is automatically adjusted so that the text fits within the text field. -
Page 39: Making An Id Label
DESIGINING A STAMP (Stampcreator Express) Making an ID label 9 Below “Print ID Label or Make Stamp?” in the window, click the ID Label button. When the Print ID Label dialog box appears, check the stamp size, in- sert the appropriate ID label into the ID label slot of SC-2000USB, and then click the OK button. -
Page 40: Adding New Styles To The Stampcreator Express Software
DESIGINING A STAMP (Stampcreator Express) Adding new styles to the Stampcreator Express software A style in the Stampcreator Express software is a type of template. A template is created from the same type of file designed using the Stampcreator P-touch Editor software. For details on using the Stampcreator P-touch Editor software, refer to the P-touch Editor Help, which can be opened by selecting the How To command in the Help menu of the Stampcreator P-touch Editor software. - Page 41 2 Save the stamp design as a template file in the LBL file format. Select the Save As command in the File menu. Save the template file in the following folder. <Windows_drive>:\Program Files\Brother\SE42\Template\SC2000\ In this example, make a new folder titled “11_Original” in the “SC2000” folder and name the template file “1101”.
-
Page 42: Making A Stamp
Click in the Print Properties to display the Printer Setup dialog box. 5 Check that “Brother SC-2000USB” is selected below “Application Match- ing Printer”, and then click the OK button. Click in the Print Properties. The Print dialog box appears. - Page 43 DESIGINING A STAMP MAKING A STAMP 6 Select “Stamp”, and then select the appropriate setting in the “Docu- ment Type” drop-down list. Logo: Best for stamps with a logo mark Text: Good for stamps with text only Text+Photo: Good for stamps with text and photos (graphics) Photo: Best for stamps containing photos with the “Photo Enhance”...
-
Page 44: Engraving A Stamp
MAKING A STAMP Engraving a stamp Stamp compartment cover Doors 1 After the data is printed onto the draft sheet, which is then fed over the xenon lamp unit, the message “INSTALL STAMP !” appears in the LCD of the SC-2000USB. 2 Lift open the stamp compartment cover, slowly pull the lever toward you to open the doors in the stamp compartment, and then check that the printed draft sheet has stopped over the xenon lamp unit (see figure 1). - Page 45 DESIGINING A STAMP MAKING A STAMP 5 Insert a stamp between the doors so that the teeth in the center of the doors fit into the notches in the center of the stamp (see figure 5). Make sure that the stamp surface lies flat on the printed draft sheet. NOTE: Do not use a stamp that has the protective film removed from the stamp surface or that has been assembled with the skirt and grip.
-
Page 46: Assembling The Stamp
MAKING A STAMP Assembling the stamp 1 Peel off the protective film from the rubber surface of the stamp (see figure 8). 2 With the protective cap covering the surface of the stamp, place the stamp face down. 3 Place the skirt (middle section) over the top of the stamp (see figure 9), and then push it down firmly until the upper edge of the stamp skirt is below the top of the stamp holder. -
Page 47: Making An Id Label
DESIGINING A STAMP MAKING A STAMP Making an ID label ID label slot After engraving the stamp, we can print the same layout on a label that can be attached to the stamp for easy identification. In order to see how the stamp will appear when it is engraved, the ID label can be printed before engraving the stamp. -
Page 48: Care & Troubleshooting
CARE & TROUBLESHOOTING Periodic Maintenance It is recommended that the Stampcreator Pro be cleaned after 50 stamp engravings have been made. Use three cleaning sheets to clean inside of the machine. Three cleaning sheets are provided for every 50 draft sheets. DESIGINING A STAMP Cleaning the draft sheet rollers Sheet 1... -
Page 49: Cleaning The Print Heads
CARE & TROUBLESHOOTING Cleaning the Print Heads The print heads require cleaning whenever you change the ribbon cassette. Print head cover 1 Turn off the machine. 2 Open the ink ribbon compartment cover. 3 Pull back on the print head cover. •... -
Page 50: Removing A Jam And Correcting A Stamp
CARE & TROUBLESHOOTING Removing a Jam and Correcting a Stamp Removing a jammed draft sheet or ID label sheet For a jam at the draft tray slot (“CHECK TRAY !” or “REMOVE LABEL” appears in the LCD): 1 Grab the outer case of the magazine tray, and then pull out the tray. 2 Pull out the jammed draft sheet. -
Page 51: Correcting An Imperfect Stamp Surface
DESIGINING A STAMP CARE & TROUBLESHOOTING Correcting an imperfect stamp surface • Dust accumulating between the xenon lamp and the rubber surface of the stamp will prevent holes in the rubber from being properly filled in. • The surface of the stamp can be corrected by filling in the holes using the correction pen (part no. -
Page 52: Refilling The Stamp Ink
CARE & TROUBLESHOOTING Refilling the Stamp Ink If the stamp is faint or incomplete, use the ink bottle (sold separately) to refill the ink. 1 Remove the holder from the stamp. Holder 2 Use the ink bottle to add five drops of ink to each refill hole in the stamp. -
Page 53: Easy Reference Trouble Shooting Guide
DESIGINING A STAMP CARE & TROUBLESHOOTING Easy Reference Trouble Shooting Guide PROBLEM SOLUTION • Nothing happens after the OK button is clicked in the • Delete the print job and after turning the machine off, Print dialog box. then on again, try printing again. •... - Page 54 CARE & TROUBLESHOOTING PROBLEM SOLUTION • The stamp could not be engraved. • Check that the stamp is inserted correctly. (See page 41.) • Check that the stamp is the correct size. (See page 40.) • Check that the message “INSTALL STAMP !” appears in the LCD and that the printed draft sheet has stopped over the xenon lamp unit.
-
Page 55: Error Message List
DESIGINING A STAMP CARE & TROUBLESHOOTING Error message list MESSAGE SOLUTION CLOSE COVER ! • Close the ink ribbon compartment cover. • Install the ink ribbon cassette. CHECK RIBBON ! • Replace the ink ribbon cassette. • Install the xenon lamp unit. INSTALL Xe UNIT •... -
Page 56: Supplies & Accessories
SUPPLIES & ACCESSORIES Stamp Ordering Information How to order stamps 1. Choose the size. 2. Choose the ink color STAMP SIZE PART NUMBER NUMBER inch/mm COLOR Black Blue Green 1438 14 X 38/0.55 X 1.50 PR1438B PR1438R PR1438E PR1438G 1850 18 X 50/0.71 X 1.97 PR1850B PR1850R... -
Page 57: Stamp Samples
SUPPLIES & ACCESSORIES Stamp samples PR1060 • 0.37" x 2.36"; 10 x 60 mm http://www.bssmet.com • Web & e-mail address stamp sander@bssnet.com • Short message stamp PR1212 • 0.47" x 0.47"; 12 x 12 mm INSP. • ID stamp • Check and inspection stamp •... - Page 58 • 1.57" x 3.54"; 40 x 90 mm • 6- to 10-line stamp • Long message • Correction stamp • Routing stamp • Stamp with frame • Large and short message stamp • Business address stamp with logo #177 BROTHER RESTAURANT PARKING $8.00 OFF WITH THIS STAMP...
-
Page 59: Supply Items
Draft sheets are specially coated for optimum 600 dpi print quality (part no. PRDRFTN). NOTE: Do not use any replacement products other than genuine Brother Stampcreator Pro items. Supply Items Item Quantity/Yield Reorder No. -
Page 60: Maintenance Items
SUPPLIES & ACCESSORIES Maintenance items Cleaning sheets Use a cleaning sheet to clean the inside of the machine as indicated in this manual. Three cleaning sheets are provided for every 50 draft sheets. Print head cleaning pen Use this cleaning pen to clean the inside components (like the print heads) of the machine. -
Page 61: Support Numbers
SUPPORT NUMBERS For technical support, or service, warranty or repair infor- mation, dial our help line at: 877-Brother or 877-276-8437... - Page 63 FOR MORE INFORMATION PLEASE VISIT OUR WEB SITE AT http://www.brother.com BROTHER INTERNATIONAL CORPORATION 100 Somerset Corporate Blvd., Bridgewater, NJ 08807-0911 All specifications subject to change without notice. All registered trademarks referenced herein are the property of their respective companies. Printed in Japan...