GE Concord 4 Installation Manual
Hide thumbs
Also See for Concord 4:
- Quick setup manual (4 pages) ,
- Quick user manual (6 pages) ,
- Quick user manual (2 pages)
Table of Contents
Advertisement
Quick Links
Advertisement
Chapters
Table of Contents
Troubleshooting

Related Manuals for GE Concord 4


Summary of Contents for GE Concord 4
- Page 1 Security Concord 4 Installation Manual P/N 466-2182 • REV G • ISS 12JUL10...
- Page 2 Disclaimer The information in this document is subject to change without notice. GE Security, Inc. (“GE Security”) assumes no responsibility for inaccuracies or omissions and specifically disclaims any liabilities, losses, or risks, personal or otherwise, incurred as a consequence, directly or indirectly, of the use or application of any of the contents of this document.
-
Page 3: Table Of Contents
Sensors menu 65 Audio verification menu 69 Accessory modules menu 71 Onboard options menu 75 Macro keys menu 78 User programming mode 79 Downloader programming 89 Chapter 4 Testing and troubleshooting 91 Testing the system 92 Concord 4 Installation Manual... - Page 4 Reference tables 123 Sensor group characteristics 124 Sensor text 128 System event triggers 130 Sensor group event triggers 131 Sensor number event triggers 132 System feature event triggers 135 Response characteristics 136 Response numbers 136 Specifications 138 Concord 4 Installation Manual...
-
Page 5: Important Information
When necessary, this manual refers you to other documentation with compatible peripherals. The Concord 4 User Manual (P/N 466-2183) contains user worksheets that you should fill out during the installation and programming of the system. For multiple-partition systems, we suggest a user manual for each partition. - Page 6 Concord 4 Installation Manual...
-
Page 7: Introduction
Chapter 1 Introduction Summary This chapter provides information to help you plan your Concord 4 panel and system installation. Content Planning the installation 2 Standard panel 2 SuperBus 2000 bus devices 3 Concord 4 Installation Manual... -
Page 8: Planning The Installation
It sources 9 to 14 VDC, 90mA max. Built-in RF receiver Allows use of up to 96 (Concord 4) or 32 (Concord Express v4) 319.5 MHz. crystal and/or SAW learn mode wireless sensors and touchpads. Phone line connection Allows panel to communicate with central monitoring station and/or pagers. -
Page 9: Superbus 2000 Bus Devices
Chapter 1: Introduction SuperBus 2000 bus devices The following components can be used with the Concord 4 panel: Table 3: SuperBus devices Touchpads Use the following touchpads for installer/user programming and system operation. • SuperBus 2000 2x16 LCD touchpad •... - Page 10 Allows users to control and monitor the status of their system gateway from the alarm.com internet website. SuperBus 2000 2-amp power Provides an additional 12 VDC, 2 amps for powering system supply devices and is supervised via the panel data bus. Concord 4 Installation Manual...
-
Page 11: Installation
This chapter provides information on locating and installing the panel and system components. Content Installation overview 6 Mounting the panel 10 Intrusion detection devices 14 Smoke detectors 14 Speakers and sirens 17 SuperBus 2000 touchpads 21 SuperBus 2000 modules 21 Phones 27 Power 29 Concord 4 Installation Manual... -
Page 12: Installation Overview
• Leave space to the left and right of the panel for wiring, phone jack, and mounting optional modules. Allow at least 9 in. (23 cm) above the panel cabinet for antennas. Allow at least 24 in. (62 cm) in front of the panel to open the panel door. Concord 4 Installation Manual... - Page 13 Table 4 on page 8 describes the maximum wire length allowed between compatible devices and the panel, and the minimum and maximum current draw of each device. Concord 4 Installation Manual...
- Page 14 65 mA 1600 mA 18 ga.: 90 ft. Interrogator 200 22 ga.: 3,200 ft. 10 mA 10 mA 18 ga.: 4,500 ft. Interrogator AVM 22 ga.: 110 ft. 45 mA 300 mA 18 ga.: 260 ft. Concord 4 Installation Manual...
- Page 15 Speakers 2-conductor, 18-gauge, 100 ft. max. SuperBus 2000 devices 4-conductor, 22- or 18-gauge Interrogator 200 AVM power and microphone 4-conductor, 22-gauge, shielded 2-wire smoke detectors 2-conductor, 22-gauge, 330 ft. max. 2-conductor, 18-gauge, 830 ft. max. Concord 4 Installation Manual...
-
Page 16: Mounting The Panel
6. Recheck for level, insert the two lower screws, and tighten all four mounting screws. Figure 2: Panel components and mounting holes Antennas Mounting hole Mounting hole Snapcard connector Backup battery terminals Processor Programming touchpad header Terminal strip Mounting hole Mounting hole Concord 4 Installation Manual... - Page 17 Antenna shrouds Install a plastic antenna shroud (included with panel) over each antenna and snap them into the holes on the top of the enclosure (skip this step for hybrid and commercial systems). Concord 4 Installation Manual...
- Page 18 SnapCard. Install the SnapCard onto the panel SnapCard header and secure it in place with two screws, included with the SnapCard. To connect all necessary input/output wiring, refer to the SnapCard documentation. Figure 4: Installing a SnapCard Mounting hole Snapcard connector Snapcard Mounting hole Concord 4 Installation Manual...
- Page 19 If you don’t want to install EOL resistors, delete any unused zones from memory. Zone inputs 1 through 8 are supervised using the included 2-kohm, end-of-line resistors at the last device on each circuit. All eight zones accept either normally open (NO) or normally closed (NC) detection devices. Concord 4 Installation Manual...
-
Page 20: Intrusion Detection Devices
(all of the same model, as listed above) with 120 uA maximum idle current per detector. Maximum total loop current allowed in an alarm condition is 90 mA. Connect one or more, two-wire smoke detectors to the panel as shown in Figure 7 on page 15. Concord 4 Installation Manual... - Page 21 Maximum alarm current that the panel can source to all external devices is limited to 1 amp. Be sure to include the alarm current for all sounder smoke detectors in the alarm current calculation. Concord 4 Installation Manual...
- Page 22 Up to 30 mA total (combined alarm) current 8.1 VDC Up to 40 mA total (combined alarm) current 7.6 VDC Up to 60 mA total (combined alarm) current 7.1 VDC Up to 80 mA total (combined alarm) current Concord 4 Installation Manual...
-
Page 23: Speakers And Sirens
Connect only the large speaker to panel terminals 7 and 8 as shown. The smaller speaker cannot handle output to terminals 7 and 8. To avoid damaging the speaker, do not connect the smaller speaker to terminals 7 and 8. Concord 4 Installation Manual... - Page 24 4.5 or 5.0 Ah battery, or 190 mA continuous using a 7.0 Ah battery. Piezo dynamic exterior siren (13-950) Connect the siren to panel as shown in Figure 11 on page 19. Concord 4 Installation Manual...
- Page 25 This siren has two inputs, steady (#1) and warble (#2). Use the steady (#1) terminal for Concord 4 panels. The siren also includes a cover tamper switch that can be connected to a hardwired zone input on the panel, SnapCard or SuperBus 2000 hardwired input module.
- Page 26 Interrogator 200 speaker must be hooked up in series with that speaker to provide a 16-ohm load. Hooking up speakers in parallel to panel terminals 7 and 8 creates a 4- ohm load that can cause permanent damage to the panel. Concord 4 Installation Manual...
-
Page 27: Superbus 2000 Touchpads
Even if you don’t plan to mount modules inside the cabinet, install the support standoffs for future use and to avoid losing them. The cabinet has built-in mounting clips on the top and sides that module backplates slide onto for mounting. Concord 4 Installation Manual... - Page 28 The transceiver expands RF reception range when placed near sensors on the fringe of panel RF reception. Refer to the transceiver documentation for mounting information. Connect the transceiver (up to four) to the panel as shown in Figure 17 on page 23. Concord 4 Installation Manual...
- Page 29 GND SPK 1 SPK 2 AUD 1 AUD 2 Not used SuperBus 2000 phone interface/voice module The phone interface/voice module includes two backplates for mounting the module inside the control panel cabinet. You may also mount the module outside of the Concord 4 Installation Manual...
- Page 30 Make all of the connections shown in Figure 20 on page 25 only if the phone interface/voice module is being installed in partition 1 and alarm sounds are desired. In an alarm, the speaker alternates between alarm siren tones and voice status messages. Concord 4 Installation Manual...
- Page 31 Connect the energy saver module to the panel and premises thermostat as shown in Figure 21 below. Refer to the energy saver module documentation for thermostat wiring details. Figure 21: Wiring the thermostat and energy saver module Thermostat Energy saver module HVAC HVAC +12V A BUS B Panel terminals Concord 4 Installation Manual...
- Page 32 Connect the SuperBus 2000 automation module to the panel as shown in Figure 23 below. Figure 23: Connecting an automation device Automation module circuit board Automation device DB-9 serial cable Zone Com Zone 1 A Bus B +12V Panel terminals Concord 4 Installation Manual...
-
Page 33: Phones
48 VDC (on-hook or idle). • For full line seizure, install an RJ31X phone jack on the premises phone line so the panel is ahead of all phones and other devices on the line. This allows the panel to Concord 4 Installation Manual... - Page 34 2. Insert the DB-8 cord’s plug into the RJ31X. 3. Check the phones on the premises for a dial tone and the ability to dial out and make phone calls. If phones do not work correctly, check all wiring and correct where necessary. Concord 4 Installation Manual...
-
Page 35: Power
Connect the power transformer to the panel as shown in Figure 26 on page 30. Backup battery Use the 60-681 (12 VDC, 4.5 or 5 Ah) or 60-680 (12 VDC, 7Ah) backup battery. The battery is automatically tested every 24 hours. Without AC power, the panel will shut Concord 4 Installation Manual... - Page 36 6. Hold the outlet cover in place and plug the transformer into the lower receptacle. 7. Use the screw supplied with the transformer to secure the transformer to the outlet cover. Concord 4 Installation Manual...
-
Page 37: Programming
Chapter 3 Programming Summary This chapter provides instructions on how to program the Concord 4 and includes descriptions of the programming settings. Content Overview 32 Quick programming mode 34 Tier 1 programming menus 35 Tier 2 programming menus 37 Security menu 43... -
Page 38: Overview
4. Press 8, 4321, 0, 2. The touchpad sounds one short beep. Press and verify that the display shows SERVICE TOUCHPAD ACTIVE. 5. Press 8, 4321, 0, 0 and the display shows SYSTEM PROGRAMMING. 6. After programming is complete, disconnect the touchpad from the panel header. Concord 4 Installation Manual... - Page 39 Select off (1) or on (2) wherever needed. 1 to 6 Press and hold to enter alphabetical characters A through F for account numbers 7 and 9 Press and hold to enter * (7) or # (9) for phone numbers. Concord 4 Installation Manual...
-
Page 40: Quick Programming Mode
CS phone 1 CS phone none CS phone 2 CS phone none CS phone 3 CS phone none Learn sensors Sensor partition n (1 to 6) Sensor group 0 Trip sensor n (1 to 96) End programming Concord 4 Installation Manual... -
Page 41: Tier 1 Programming Menus
Exit programming This section guides you through tier 1 programming menu items as they appear in sequence. The exact order you follow depends on whether you’re installing a new system or changing programming in an existing system. Concord 4 Installation Manual... - Page 42 2 to 6, simply advance to the appropriate menu and make the necessary changes. To copy partition 1: 1. With the display showing PARTITION 1 COPY, press #, installer code, #. The display flashes. 2. Press #. The display shows DONE. Concord 4 Installation Manual...
-
Page 43: Tier 2 Programming Menus
Exit extension (0013 to 0063) [On] Ptn security (0004) [On] Keyswitch sensor (0014 to 0064) [None] Multi ptn arm (0005) [None] Keyswitch style (0015 to 0065) [Transition] Keychain tp ptn (0006) Duress code (0016 to 0066) [****] Concord 4 Installation Manual... - Page 44 Open/close rpts (01064) [Off] Open/close rpts (01074) [Off] Latchkey rpts (01065) [On] Latchkey rpts (01075) [On] Streamlining (01066) [On] Streamlining (01076) [On] Ptn assignment (01067) [1] Ptn assignment (01077) [1] Downloader phone Phone number (01090) [None] Concord 4 Installation Manual...
- Page 45 Report confirm (06111 to 06611) [Off] AC failure (06011) [Off] Receiver failure (06012) [Off] RF low bat rpt (06013) [Weekly] RF supv rpt (06014) [Weekly] Swinger limit (06015) [1] Ground fault (06017) [On] Aux power fail (06016) [On] Concord 4 Installation Manual...
- Page 46 Energy options Freeze temp [42°F] Temperature 40 to 90 °F Temperature 40 to 90 °F Outputs Output in Partition assign 1 2 3 4 5 6 Configuration * * * * * Cellular options Cellular system [B] Concord 4 Installation Manual...
- Page 47 Output programming Output text Output 1 Output 1 (1120) Partition assign (11100) [1] Output 1 item n Configuration (11101) [01614] Output 2 (1121) Output 2 Output 2 item n Partition assign (11110) [1] Configuration (11111) [01710] Concord 4 Installation Manual...
- Page 48 To go directly to some settings in tier 2, you can enter the shortcut number for that setting. Shortcut numbers in this section are provided after the setting name (where applicable). Shortcut numbers can be used from any setting location within tier 2. Concord 4 Installation Manual...
-
Page 49: Security Menu
8, code, 6, PTN. When off, you may jump partitions without an Default: On access code by pressing 7, 4, PTN n (n = 1 to 6). Regardless of the setting, you may always use an access code to jump partitions. Concord 4 Installation Manual... - Page 50 To disable mulitipartition arm/disarm, with the display showing MULTI- PTN ARM/DISARM n n n n n n n, select all of the partitions by entering the appropriate partition number. The partition numbers disappear from the display. Press #. Concord 4 Installation Manual...
- Page 51 3. Press # to accept this keyfob or press A or B until the desired keyfob appears, then press #. The display shows ARM PARTITION. 4. Enter the desired partitions 1 to 6 (at least two). The display flashes the entered partitions. Concord 4 Installation Manual...
- Page 52 3. Enter the partition numbers that are displayed (except for the partition you assigned the touchpad when it was learned). Each disappears from the display with the touchpad’s original partition number left flashing. 4. Press # and the display stops flashing. Concord 4 Installation Manual...
- Page 53 Stay or Away, then tripping the sensor could disarm the system (depending on keyswitch style). The panel reports opening, closing, and force-armed reports (if turned on) to the central monitoring station. Concord 4 Installation Manual...
-
Page 54: Phones Menu
• Central station phones 1 to 3 (see “Phones - central station phone 1 to 3 settings” on page 49). • Pager phones 1 to 5 (see “Phones - pager phone 1 to 5 settings” on page 50). • Downloader phone (see “Phones - downloader phone settings” on page 52). Concord 4 Installation Manual... - Page 55 01024 To use this feature, the opening reports and closing reports settings under Default: Off the “Reporting menu” on page 59 must be turned on for that partition. Concord 4 Installation Manual...
- Page 56 • No activity • Receiver failure (or jam) Default: On • Tamper conditions, including zone tampers and system tamper (40 incorrect key presses or touchpad supervisory) • Entering or exiting sensor test mode • Phone test Concord 4 Installation Manual...
- Page 57 01056, 01066, and 01076 Default: On Partition assignment This setting determines the partition that reports to a pager. All partitions may be set to report to a single pager. Shortcut: 01037, 01047, 01057, 01067, and 01077 Default: 1 Concord 4 Installation Manual...
-
Page 58: Phone Options Menu
When this feature is off, an automatic phone test is always conducted according to the schedule of the phone test frequency setting, even if the panel makes other reports to the central monitoring station during that time. Concord 4 Installation Manual... - Page 59 When this setting is on, the panel begins dialing as soon as it detects a dial tone. When this feature is off, the panel begins dialing a few seconds Shortcut: 02010 after seizing the phone line. There is no dial tone detect on the last dialing Default: On attempt. Concord 4 Installation Manual...
- Page 60 Use the default setting (#) to avoid conflicts between the security system and other phone devices and services. Many phone devices and services require * to initiate their operation, so using * for this security feature could cause conflicts. Concord 4 Installation Manual...
-
Page 61: Timers Menu
If no user interaction or device activation occurs in that time, the Shortcut: 0306 panel sends a report to the central station. Default: 24 hours Daylight saving When this setting is on, the panel clock automatically adjusts for daylight saving time changes. Shortcut: 0307 Default: On Concord 4 Installation Manual... - Page 62 When this feature is not set (default), the panel does not send or log no usage reports. To turn off no usage time, with the display showing NO USAGE TIME (current setting), press D. Concord 4 Installation Manual...
-
Page 63: Light Control Menu
X10 controlled lights for that partition to the same house code. The 04 E, 05 F, and 06 G letter that appears automatically after the house code number indicates the necessary house dial setting for X10 modules in that partition (1 to 255). Concord 4 Installation Manual... -
Page 64: Touchpad Options Menu
(for example, from off to stay, from stay to Shortcut: 0513 to 0563 away). Default: Off Star is no delay This setting determines whether the keyfob Star button controls an output (off) or the no delay feature (on). Shortcut: 0514 to 0564 Default: Off Concord 4 Installation Manual... -
Page 65: Reporting Menu
Shortcut: 06006 panel. Default: Off Buffer full report When this setting is on, the panel sends an event buffer full report to the central monitoring station when the event buffer is nearing full. When Concord 4 Installation Manual... - Page 66 When this setting is on, the panel reports a receiver failure under the following conditions: Shortcut: 06012 • No wireless sensor signals have been received for two hours. Default: Off • The receiver is being jammed with a constant signal. Concord 4 Installation Manual...
- Page 67 Shortcut: 06017 circuitry and the chassis. This indicates that a short to earth ground exists Default: On somewhere in the system. This feature must be on if hardwired smoke sensors are used in this system. Concord 4 Installation Manual...
- Page 68 Bypass when arming the system with open sensors/zones protesting, and then leave through an entry/exit door and the arming protest period expires. This causes the system to automatically bypass the open (protesting) sensors. Auto-forced arming always reports to the central monitoring station. Concord 4 Installation Manual...
- Page 69 • Advanced: Arming the partition by entering 2 (or 3), code, 6 (latchkey) within an assigned time schedule sends a page. Refer to the Concord 4 User Manual for complete latchkey setup and operation. Freeze alarm This setting determines whether the panel reports a freeze alarm to the central station or pager, when the selected partition’s energy saver...
-
Page 70: Siren Options Menu
This setting determines whether the panel supervises the panel speaker terminals (7 and 8). When this feature is on, the panel indicates a trouble Shortcut: 0710 condition if no speaker is connected to panel speaker terminals. Default: Off Concord 4 Installation Manual... -
Page 71: Sensors Menu
Zone input 1 – Group 10 (entry/exit) Zone input 2 – Group 17 (instant interior follower) Zone input 3 to Zone input 8 – Group 13 (instant perimeter) If the panel memory is cleared, all onboard zone factory programming will be erased. Concord 4 Installation Manual... - Page 72 2. Press # and the display shows DELETE SENSOR nn (lowest zone/sensor number in panel memory). 3. Press # to delete the displayed sensor or, enter the desired sensor number, then press #. 4. Repeat the process until all desired sensors are deleted. Concord 4 Installation Manual...
- Page 73 5. Enter the desired partition number, then press #. The display shows the new partition assignment. 6. Press A or B and the display shows SENSOR GROUP nn (current group assignment). 7. Enter the desired group number, then press #. The display shows the new group assignment. Concord 4 Installation Manual...
- Page 74 Press and release the Unlock button twice quickly, then press and hold until the LED flashes three times. Press and release the Unlock button once quickly, then press and hold until the LED flashes two times. Press and hold the Unlock button until the LED flashes once. Concord 4 Installation Manual...
-
Page 75: Audio Verification Menu
Default: 90 seconds an audio session. Beep delay This setting determines how long AVM access beeps are delayed (0 to 300 seconds, in 2-second intervals) at the beginning of a two-way audio session. Shortcut: 09005 Default: 2 seconds Concord 4 Installation Manual... - Page 76 Default: 08 the VOX microphone gain setting. If the VOX is not switching the speaker on when the central station operator is talking, raise this setting and lower the VOX microphone gain setting. Concord 4 Installation Manual...
-
Page 77: Accessory Modules Menu
Press # and the display shows the new setting. 3. Exit programming mode. 4. Remove AC and battery power from the panel. 5. Replace the defective bus device with a new one. 6. Apply AC and battery power to the panel. Concord 4 Installation Manual... - Page 78 This setting determines whether or not selected touchpads beep when their buttons are pressed. This feature is usually turned off for a touchpad that is Default: On located in or near bedrooms, to avoid disturbing sleeping persons. Concord 4 Installation Manual...
- Page 79 5. Press A or B until the display shows CONFIGURATION tttrr (current setting). 6. Enter the desired five-digit configuration number for this relay. Press # to confirm the setting. 7. Press # and repeat the process until all outputs are programmed. Concord 4 Installation Manual...
- Page 80 ITEM 1 0 -. 7. Repeat the process as needed to complete the output name. 8. Press * after entering the last character or word number. The display shows the complete text name. For example: OUTPUT 1 GARAGE DOOR. Concord 4 Installation Manual...
-
Page 81: Onboard Options Menu
This setting determines how onboard hardwired zone 8 is configured. When this setting is on, zone 8 will be configured for two-wire smoke detectors. Shortcut: 1101 When off, it will be configured for a normal hardwire input. Default: Off Concord 4 Installation Manual... - Page 82 5. Press B and the display shows CONFIGURATION tttrr (current setting). 6. Enter the configuration number. The display flashes the entered number. Press # and the display shows the new setting. 7. Press # and repeat the process until all outputs are programmed. Concord 4 Installation Manual...
- Page 83 ITEM 1 0 -. 6. Repeat the process as needed to complete the output name. 7. Press * after entering the last character or word number. The display shows the complete text name. For example, OUTPUT 1 GARAGE DOOR. Concord 4 Installation Manual...
-
Page 84: Macro Keys Menu
5. Enter the desired system command. The display flashes the entry. If you make a mistake, press the macro key twice to clear the entry and start over. 6. Press the macro key again to accept the entered command. The display stops flashing. Concord 4 Installation Manual... -
Page 85: User Programming Mode
Schedule 00 to 15 [Off] Exception closing Schedule 00 to 15 [Off] Lights 1 to 9 Schedule 00 to 15 [Off] Output 1 to 6 Schedule 00 to 15 [Off] Arming Schedule 00 to 15 [Off] Concord 4 Installation Manual... - Page 86 This setting lets you adjust the panel calendar to the correct month, day, and year. Enter the correct month (01 to 12), day (01 to 31), and year (00 to Shortcut: 021 99). For example, enter 090107 for September 1, 2007. Default: 01/01/00 Concord 4 Installation Manual...
- Page 87 #. The display shows USER nnn - nnnn. 4. Enter the system or partition master code. The display flashes the entered code. Press # and the display shows USER nnn -- **** (no code). Concord 4 Installation Manual...
- Page 88 4. Press A or B until the display shows SYSTEM TESTS OFF/ON (current setting). 5. Press 1 (off) or 2 (on). The display flashes the entered setting. Press # and the display shows the new setting. Concord 4 Installation Manual...
- Page 89 PARTITION MASTER CODE. 2. Press # and the display shows PARTITION nnnn (current code). 3. Enter a new four-digit code. The display flashes the entered code. Press # and the display shows the new code. Concord 4 Installation Manual...
- Page 90 VOM is connected to the panel. Chime on close When this setting is on, the panel sounds a single chime when a perimeter door or window is closed. Shortcut: 046 Default: Off Concord 4 Installation Manual...
- Page 91 15 and Y is start If you are programming schedules for your customer, be sure to record the (0)/stop (1) Monday to settings in the Concord 4 User Manual. Sunday (2 to 8) To set up a time schedule: Default: 00:00 1.
- Page 92 5. Press 1 (off) or 2 (on). The display flashes the entered selection. Press # and the display shows the new setting for the selected schedule. 6. Repeat the process until all desired lights are attached to schedules. Concord 4 Installation Manual...
- Page 93 5. Press 1 (off) or 2 (on). The display flashes the entered selection. Press # and the display shows the new setting for the selected schedule. 6. Repeat the process until all desired schedules are attached. Concord 4 Installation Manual...
- Page 94 To detach a light from a sensor: 1. With the display showing LIGHT 1 TO SENSOR y (current setting), press A or B to select the light number. 2. Enter 0 as the sensor number and press #. Concord 4 Installation Manual...
-
Page 95: Downloader Programming
SYSTEM DOWNLOAD IN PROGRESS during the downloading process. If the alphanumeric touchpad does not display SYSTEM DOWNLOAD IN PROGRESS, call the downloader operator to verify the downloader phone number. Also, make sure Enterprise ToolBox is set up properly. Concord 4 Installation Manual... -
Page 97: Testing And Troubleshooting
Chapter 4 Testing and troubleshooting Summary This chapter provides information to help you test and troubleshoot the system. Content Testing the system 92 Troubleshooting 101 Concord 4 Installation Manual... -
Page 98: Testing The System
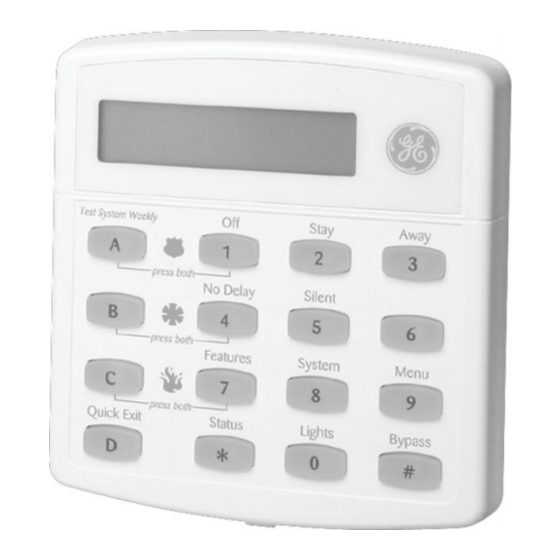
• “Cellular backup communication” on page 100 Basic system commands Table 14 below describes basic touchpad operating commands. For complete details on system operation, including user programming, refer to the Concord 4 User Manual. Table 14: Basic touchpad commands Command... -
Page 99: Zones/Sensors
3. The touchpad sounds one beep and displays SENSOR TEST. The panel starts a 15-minute timer. 3. Trip each zone/sensor one at a time. Touchpads (and interior sirens) should sound one short, high-pitched beep, and the display should show the sensor name (or number) and OK. Concord 4 Installation Manual... -
Page 100: Phone Communication
1. Contact the central monitoring station to inform them that you are testing the system. 2. Press 8, system master code, 2. The display reads PHONE TEST and the touchpad sounds one beep. When the panel completes the test, the system returns to the previous arming level automatically. Concord 4 Installation Manual... -
Page 101: Central Station/Pager Communication
Table 15 below describes pager system event codes Table 15: Pager system event codes Codes System event Zone restoral System disarmed Sensor test exit Trouble condition cleared Alarm canceled System armed to STAY System armed to AWAY Concord 4 Installation Manual... -
Page 102: Outputs And Sirens
3. Activate the appropriate device to trigger each output as programmed. 4. Verify that each output responds according to the programmed configuration number. For outputs that trigger sirens, verify that the correct alarm sounds are produced from these sirens (see Table 17 on page 97). Concord 4 Installation Manual... -
Page 103: Light Control
All lights should flash during a police or intrusion alarm. Energy saver module (ESM) Test the energy saver module to verify it overrides the thermostat. Note: The system must have high- and low-temperature limits set to test the energy saver module. Concord 4 Installation Manual... -
Page 104: Fixed Display Lcd Touchpad Chime And Trouble Beep Tones
The display shows DA nnn. 2. Press and release the 1 and 2 buttons together repeatedly, until the desired contrast level is displayed. 3. Press * and the display briefly shows DONE, and then shows the time and date. Concord 4 Installation Manual... -
Page 105: Audio Verification Module Communication
4. The central station operator waits for the alarm to be reported and initiates an audio session. 5. Walk through the vicinity of the AVM while speaking at a normal conversation level. 6. Have the operator speak to you. 7. When testing is complete, the operator will end the session. Concord 4 Installation Manual... -
Page 106: Cellular Backup Communication
Table 18: Cellular backup communication CS phone 1 option Test setting Previous setting Phone number Central station phone number High level reports Backup Off* Cellular backup *Can be set to On if no CS phone 2 phone number is programmed. Concord 4 Installation Manual... -
Page 107: Troubleshooting
• “Automation module issues” on page 110 Panel power issues Concord 4 transformers Concord 4 uses a 16.5 VAC transformer, (600-1023 or 600-1024 with power line carrier). Concord 3 uses a 24 VAC transformer. Using a 24 VAC transformer on Concord 4 damages the panel. - Page 108 • Check for proper panel and transformer wiring. • Check that the transformer is plugged into a nonswitched outlet and secured with the provided screw. • Check that the transformer is supplying AC to the panel. Concord 4 Installation Manual...
-
Page 109: Access Code Issues
• You may be trying to disarm using an incorrect code. Verify correct code and enter it. • Access code is not programmed or set up in user programming to disarm system. Wireless touchpad is not learned into system or hardwired touchpad is not communicating to panel. Concord 4 Installation Manual... -
Page 110: Bypassing Issues
1. Concord panels are polarity sensitive, so check for proper polarity: The positive green lead or (TIP) wires must connect to terminal 25 on the board. The negative red lead or (RING) wires must connect to terminal 28 on the board. Concord 4 Installation Manual... -
Page 111: Alphanumeric Touchpad Issues
Display is lit but does not respond to key presses. • Touchpad is not connected to panel bus terminals or is wired incorrectly. Check and correct wiring. • Check that touchpad is learned into panel memory. Concord 4 Installation Manual... -
Page 112: Speaker Issues
Output 2 (interior, follows status beeps) uses terminals 11 (positive) and 10 (ground). Hardwired zone issues System doesn’t go into alarm when zone is tripped. • System is disarmed. Arm system and then trip the zone. Concord 4 Installation Manual... -
Page 113: Wireless Sensor Zone Issues
• Use an RF Sniffer (60-401) to verify that sensor is transmitting. If sensor is not transmitting, check battery for low or no voltage and replace. • Change mounting position of sensor (from horizontal to vertical or vice versa) and test sensor several times for consistency. Concord 4 Installation Manual... -
Page 114: Wireless Touchpad Issues
• Check RJ31X jack wiring and TELCO block wiring. Replace RJ31X jack if necessary. • Check DB-8 cord connections at the panel and RJ31X jack. Replace cord if necessary. • Perform a phone test after troubleshooting the phone line. Constant dial tone, preventing dial-out on premises phones. Concord 4 Installation Manual... -
Page 115: Light Control Issues
To ensure accuracy, wait at least 15 minutes after installing the module before adjusting the temperature. To adjust the module room temperature setting, see Temperature under “Accessory modules - bus device settings” on page 71. Concord 4 Installation Manual... -
Page 116: Automation Module Issues
• Verify the automation device is powered and turned on. Module is not controlling or communicating with the panel and panel does not indicate a bus failure. Verify the automation module is learned into panel memory. Concord 4 Installation Manual... -
Page 117: Appendix A System Planning Sheets
Appendix A System planning sheets Summary This appendix provides various system planning sheets for the Concord 4. Content Customer information 112 Wireless devices 112 Hardware devices 113 Zone and sensor assignments 115 System settings index and record 118 Concord 4 Installation Manual... -
Page 118: Customer Information
Glass guard sensor 60-506 System sensor smoke sensor 60-838-95R 2100ARFT smoke sensor 60-848-02-95 ESL 562 smoke sensor 60-460 Rate-of-rise heat sensor 60-589 Manual fire pull sensor 60-504 Freeze sensor 60-452 Pendant panic sensor 60-458 Single button panic sensor Concord 4 Installation Manual... -
Page 119: Hardware Devices
SuperBus 2000/miscellaneous components 60-746-01 2x16 LCD alphanumeric touchpad 90 mA 60-820 Fixed display LCD touchpad 65 mA 600-1020 FTP 1000 75 mA 60-803 2x20 LCD alphanumeric touchpad 120 mA 60-804 2x20 VFD alphanumeric touchpad 120 mA Concord 4 Installation Manual... - Page 120 Hardwired interior speaker 35 mA 13-060 15-watt speaker 500 mA Total power consumption: Total power consumption not to exceed: 1,000 mA * Total current only for all two-wire smoke detectors connected to panel two-wire smoke loop. Concord 4 Installation Manual...
-
Page 121: Zone And Sensor Assignments
Appendix A: System planning sheets Zone and sensor assignments Table 22: Zone and sensor assignments No. RF zone Module Module Group Partition Zone/sensor text bus ID input number number Concord 4 Installation Manual... - Page 122 Appendix A: System planning sheets No. RF zone Module Module Group Partition Zone/sensor text bus ID input number number Concord 4 Installation Manual...
- Page 123 Appendix A: System planning sheets No. RF zone Module Module Group Partition Zone/sensor text bus ID input number number Concord 4 Installation Manual...
-
Page 124: System Settings Index And Record
Back in service (On) 06003 Backup CS phone 1 (On) 01005, 1__________ CS phone 2-3 (Off) 01015, 01025 2__________ 3__________ Battery restoral (Off) 06006 Beep delay (2 seconds) 09005 Buffer control (Off) 06002 Buffer full report (Off) 06007 Concord 4 Installation Manual... - Page 125 0013 to 0063 Extended delay (4 minutes) 0312 to 0362 Fire panic (On) 0510 to 0560 Fire shutdown (Off) 09002 Force armed (Off) 06104 to 06604 Freeze alarm (Off) 06106 to 06606 Freeze temp (42) 06107 to 06607 Concord 4 Installation Manual...
- Page 126 Multiple-partition arm (Off) 0005 Next phone test (7 days) 0304 No activity (Off) 06102 to 06602 Open/close reports phones (Off) 01004, 01014, 1__________2__________ 01024 3__________ Open/close reports pagers (Off) 01034, 01044, 1__________2__________ 01054, 01064, 3__________4__________ 01074 5__________ Concord 4 Installation Manual...
- Page 127 Reporting format (SIA/CID) 01006, 01016, 1__________2__________ 01026 3__________ Sensor text (None) Silent talkback (Off) 09003 Siren timeout (4 minutes) 0313 to 0363 Siren verify (Off) 0710 Sleep time (Off) 0314 to 0364 Smoke verify (Off) 1100 Concord 4 Installation Manual...
- Page 128 0214 to 0264 TP panic RPT FMT (Off) 06010 Two-trip error (Off) 06009 Two-wire smoke (Off) 1101 UL 98 options (Off) 0702 VOX gain range 09008 VOX mic gain 09007 VOX RX gain 09010 Zone restorals (Off) 06008 Concord 4 Installation Manual...
-
Page 129: Appendix B Reference Tables
This appendix provides reference tables and specifications. Content Sensor group characteristics 124 Sensor text 128 System event triggers 130 Sensor group event triggers 131 Sensor number event triggers 132 System feature event triggers 135 Response characteristics 136 Response numbers 136 Specifications 138 Concord 4 Installation Manual... -
Page 130: Sensor Group Characteristics
Appendix B: Reference tables Sensor group characteristics Table 24 below shows what the sensors on your Concord 4 system do. Every sensor is assigned to a group, and this table specifies those groups and functions. Every device must be assigned to one of these groups. - Page 131 Local Notify the user when a door Special Instant 1,2,3 special is opened. Sounds emit from chime chime a local annunciator. Fire 24-hour fire, rate-of-rise Fire Instant 1,2,3 heat, and smoke sensors. Concord 4 Installation Manual...
- Page 132 Note: Check marks ( ) represent characteristics present in a group. * Sounds instant police siren if two or more sensors are tripped within 4 minutes. Otherwise, sensors are followers to delayed sensors. If Alarm Verification is on, group 18 functions like group 17. Concord 4 Installation Manual...
- Page 133 Figure 28: Cross-zone diagram Motion sensor Path of person walking Motion sensor Note: We do not recommend cross-zoning for exit/entry zones. Each zone can individually protect the intended area. Concord 4 Installation Manual...
-
Page 134: Sensor Text
Freeze Please Back Front Furnace Police Basement Gallery Pool Bathroom Garage Porch Battery Power Bedroom Glass Press Bottom Goodbye Program Breezeway Hallway Progress Building Heat Quiet Hello Rear Bypass Help Receiver Bypassed High Report Cabinet Home Concord 4 Installation Manual... - Page 135 Dining Load Stairs Disarmed Loading Stay Door Supervisory Down Lower System Download Main Tamper Downstairs Master Temperature Drawer Test Driveway Medical Time Duct Memory Duress Menu Touchpad East Mother’s Trouble Energy Saver Motion Unbypass Enter Unit Concord 4 Installation Manual...
-
Page 136: System Event Triggers
Activation follows all system noises AVM trip (pulse) When an AVM alarm occurs, output is deactivated for 10 ms State of system status Follows the state of system status (ready or trouble). Tamper condition When any tamper is tripped Concord 4 Installation Manual... -
Page 137: Sensor Group Event Triggers
Group 29 in alarm Group 13 in alarm Group 30 in alarm Group 14 in alarm Group 31 in alarm Group 15 in alarm Group 32 in alarm Group 16 in alarm Group 35 in alarm Concord 4 Installation Manual... -
Page 138: Sensor Number Event Triggers
Open Sensor 23 In alarm Open Sensor 24 In alarm Open Sensor 25 In alarm Open Sensor 26 In alarm Open Sensor 27 In alarm Open Sensor 28 In alarm Open Sensor 29 In alarm Open Concord 4 Installation Manual... - Page 139 Open Sensor 57 In alarm Open Sensor 58 In alarm Open Sensor 59 In alarm Open Sensor 60 In alarm Open Sensor 61 In alarm Open Sensor 62 In alarm Open Sensor 63 In alarm Open Concord 4 Installation Manual...
- Page 140 Open Sensor 90 In alarm Open Sensor 91 In alarm Open Sensor 92 In alarm Open Sensor 93 In alarm Open Sensor 94 In alarm Open Sensor 95 In alarm Open Sensor 96 In alarm Open Concord 4 Installation Manual...
-
Page 141: System Feature Event Triggers
Fire panic Alarm Police panic Alarm Auxiliary panic Alarm Opening report Occurred Closing report Occurred Latchkey opening or Occurred closing Duress Alarm Forced armed report Occurred Fire in partition Alarm Recent closing report Occurred Sensor test Entered Concord 4 Installation Manual... -
Page 142: Response Characteristics
3 minutes [5] Siren time [2] Sustained [3] Yes [4] Momentary Yes [4] 3 minutes [5] Yes [4] Siren time [2] Yes [4] Sustained [3] Yes [1] Momentary Yes [1] 3 minutes [5] Yes [1] Siren time [2] Concord 4 Installation Manual... - Page 143 (auxiliary or fire) is active for long periods. A SnapCard relay output’s lifetime expectancy is about 350 total pulsing hours. Note: The trip delay is factory set for 30 seconds and cannot be changed. Concord 4 Installation Manual...
-
Page 144: Specifications
1,000 ft (305 m) typical open air Storage temperature - 30 to 140°F (-34 to 60°C) Operating temperature 32 to 120°F (0 to 49°C) Relative humidity 85% maximum noncondensing Dimensions 14 x 12 x 3 in. (356 x 305 x 76 mm) Concord 4 Installation Manual...