JVC XV-N5SL Instructions Manual
Jvc xv-n5sl: advanced operation
Hide thumbs
Also See for XV-N5SL:
- Instructions manual (204 pages) ,
- Service manual (82 pages) ,
- Instructions manual (72 pages)
Table of Contents
Advertisement
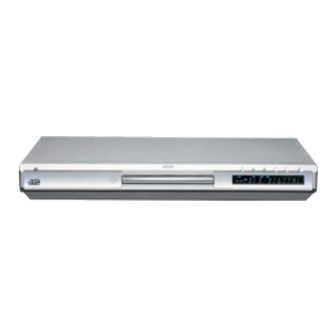
DVD VIDEO PLAYER
XV-N5SL
TV
DVD
STANDBY/ON
OPEN/
CLOSE
TV
DVD
TV1
TV2
TV3
1
2
3
TV4
TV5
TV6
4
5
6
TV7
TV8
TV9
7
8
9
TV-/--
TV0
MUTING
10
0
+10
TITLE/
TV/VIDEO
RETURN
SUBTITLE
GROUP
CANCEL
CH
+
VOL-
VOL+
ENTER
CH
-
PREVIOUS
NEXT
CLEAR
SELECT
STROBE
SLOW -
SLOW+
REPEAT
SUB TITLE
AUDIO
VFP
PROGRESSIVE
SCAN
DIGEST
ANGLE
ZOOM
3D
PHONIC
AMP VOL
RM-SXV023J
REMOTE CONTROL
V I D E O
DVD/SUPER VCD/VCD/CD PLAYER
PROGRESSIVE
INSTRUCTIONS
For Customer Use:
Enter below the Model No. and Serial No.
which are located on the rear, bottom or
side of the cabinet. Retain this information
for future reference.
Model No.
Serial No
LET0204-001A
2
6
13
24
41
44
49
58
[J]
Advertisement
Table of Contents

Related Manuals for JVC XV-N5SL


Summary of Contents for JVC XV-N5SL
-
Page 1: Table Of Contents
DVD VIDEO PLAYER XV-N5SL STANDBY/ON OPEN/ CLOSE TV-/-- MUTING TITLE/ TV/VIDEO RETURN SUBTITLE GROUP CANCEL VOL- VOL+ ENTER PREVIOUS NEXT CLEAR SELECT STROBE SLOW - SLOW+ REPEAT SUB TITLE AUDIO PROGRESSIVE SCAN DIGEST ANGLE ZOOM PROGRESSIVE PHONIC AMP VOL RM-SXV023J... -
Page 2: Xv-N5
XV-N5SL.book Page 2 Thursday, July 25, 2002 10:49 AM Warnings, Cautions and Others Mises en garde, précautions et indications diverses CAUTION RISK OF ELECTRIC SHOCK DO NOT OPEN CAUTION: TO REDUCE THE RISK OF ELECTRIC SHOCK. DO NOT REMOVE COVER (OR BACK) NO USER SERVICEABLE PARTS INSIDE. - Page 3 To install batteries in the remote control unit ...11 Remote sensor ...11 To use the remote control unit for TV operation...12 To control the volume of a JVC’s amplifier or receiver ...12 Basic operations Before operation...13 Turning on/off the unit...13 Initial setup before using the unit...14...
-
Page 4: Introduction
Introduction Supplied accessories • Audio/Video cable (Yellow/White/Red) ( 1) • Component video cable (Red/Green/Blue) ( 1) • Remote Control Unit ( 1) • R6P(SUM-3)/AA(15F) battery ( 2) -
Page 5: Notes On Handling
Notes on handling Important cautions Installation of the unit • Select a place which is level, dry and neither too hot nor too cold (between 5°C and 35°C, 41°F and 95°F). • Leave sufficient distance between the unit and the TV. •... -
Page 6: About Discs
Introduction About discs Playable disc types Playable and non-playable disc types are as follows: DVD VIDEO SVCD Video CD V I D E O The DVD Logo is a trademark. • CD-R and CD-RW discs recorded in the Audio CD, Video CD, SVCD, MP3 or JPEG format can be played back. -
Page 7: Disc Structure
Disc structure (For DVD VIDEO) A DVD VIDEO disc is comprised of "titles" and each title may be divided into "chapters." For example, if a DVD VIDEO disc contains some movies, each movie may have its own title number, and each movie may be divided into some chapters. -
Page 8: Getting Started
Getting started Connections *Before using the unit, you have to connect the unit to a TV and/or amplifier. Before making any connections • Do not connect the AC power cord until all other connections have been made. • Connect VIDEO OUT of the unit directly to the video input of your TV. Connecting VIDEO OUT of the unit to a TV via a VCR may cause a monitor problem when playing back a copy-protected disc. - Page 9 Connection to a TV equipped with component jacks You can enjoy high picture quality by connecting the unit’s COMPONENT VIDEO OUT jacks to the COMPONENT VIDEO IN jacks of your TV with the video cables. Blue Green The unit COMPONENT Scan mode selector White •...
- Page 10 DVD VIDEO disc in the Progressive scanning mode. In such a case, use the Interlaced scanning mode. To check the compatibility of your TV set, contact your local JVC customer service center. • All JVC progressive TV and High-Definition TV sets are fully compatible with the unit (Example : AV-61S902). Video source...
-
Page 11: To Connect To A Stereo Audio Amplifier/Receiver
To connect to a stereo audio amplifier/receiver You can enjoy high-quality audio by connecting the unit’s audio output to your amplifier or receiver. Connect the unit’s AUDIO OUT (LEFT/RIGHT) jacks to any line-level inputs (such as AUX, DVD, CD, etc.) of an audio amplifier or receiver. -
Page 12: To Connect The Power Cord
Getting started NOTES • When you make digital connection, we recommend also to make the analog connection, because, depending on discs, no signal may be output from the DIGITAL OUT. • When you connect the unit’s DIGITAL OUT to a digital audio device, before using, set "DIGITAL AUDIO OUTPUT" in the "AUDIO"... -
Page 13: Using The Remote Control Unit
Using the remote control unit Using the remote control, you can operate not only all the functions of the unit but also basic functions of your TV and amplifier/receiver. To install batteries in the remote control unit The battery compartment is located on the back of the remote control unit. -
Page 14: To Use The Remote Control Unit For Tv Operation
To control the volume of a JVC’s 04, 11 34, 38, 39 amplifier or receiver 10, 17, 21 You can control the volume of a JVC’s amplifier or receiver by using the AMP VOL +/– buttons on the remote control unit. 12, 33, 34, AMP VOL... -
Page 15: Basic Operations
Basic operations In the following description, we assume that the buttons on the remote control unit are mainly used; however, you may use the corresponding buttons on the front panel if available. NOTE Make sure that the TV - DVD switch on the remote control unit is set to "DVD" when using the 5/∞/2/3 and numeric buttons for controlling the unit. -
Page 16: Initial Setup Before Using The Unit
Basic operations Initial setup before using the unit We recommend you to set the display language, TV monitor type and digital output before using the unit, by following the procedure below. See "Changing the initial settings" beginning on page 49 for details about each setting item. Press CHOICE for a few seconds to bring up the first page of the DVD PLAYER SET UP display. -
Page 17: Basic Playback
Basic playback This section describes basic operations for playback of DVD VIDEO, Audio CD, Video CD and SVCD discs. For MP3 and JPEG disc playback, see the separate chapter beginning on pages 41 and 44. STANDBY/ON OPEN/ CLOSE STANDBY/ OPEN/CLOSE TV-/-- MUTING TITLE/... -
Page 18: To Start Playback
Basic operations To start playback Press 3. The unit starts playback from the beginning. About screen saver function • A television monitor may have an image burned into it if a static image is displayed for a long time. To prevent this, the unit automatically activates the screen saver function if a static picture, such as an on-screen display or menu, is displayed for over 5 minutes. -
Page 19: To Stop Playback Temporarily
To stop playback temporarily Press 8. The unit pauses playback. To resume playback, press 3. Resuming playback The unit can memorize the position on a disc where you interrupt playback, and resume playback from that position later. You can set two resume modes (DISC RESUME and ON) using the preference display. See page 54 for details about how to set the resume mode. -
Page 20: To Resume Playback
Basic operations • The interrupt position is also stored by pressing STANDBY/ON control unit). • To clear the memory, press 7 while the disc stopped. To resume playback When the resume mode is set to "DISC RESUME" ¶ While stopped, or no disc is inserted Press 0 to insert a disc for which the unit has stored an interrupt position. -
Page 21: Variable Speed Playback
Variable speed playback You can speed up or slow down playback, or advance the video frame by frame. STANDBY/ON OPEN/ CLOSE TV-/-- MUTING TITLE/ TV/VIDEO RETURN SUBTITLE GROUP CANCEL VOL- VOL+ ENTER 4/¢ PREVIOUS NEXT CLEAR SELECT STROBE SLOW- SLOW+ 1/¡... -
Page 22: To Playback In Slow Motion
Basic operations To playback in slow motion You can play back video in slow-motion. You can select from 1/32 times, 1/16 times, 1/8 times, 1/4 times and 1/2 times normal speed. ¶ During playback Press 8, then use 1/¡. To play forward slow motion, press ¡, and to play reverse slow motion (for DVD VIDEO discs only), press 1 . First, the unit plays the slowest speed, and each time you press the button, the playback speed increases. -
Page 23: To Locate The Beginning Of The Scene Or Song
To locate the beginning of the scene or song You can locate the desired title or chapter (for DVD VIDEO), or track (for Audio CD/Video CD/SVCD) from which the unit starts playback. Numeric buttons TV-/-- MUTING TITLE/ TV/VIDEO RETURN SUBTITLE GROUP CANCEL VOL-... -
Page 24: Other Convenient Functions
Basic operations NOTES • You can also specify the desired title during DVD VIDEO playback. See page 25 for details. • During DVD VIDEO playback, if a menu is shown on the TV screen, the numeric buttons may be used for selecting an item in the menu. -
Page 25: To Move Back The Playback Position During Dvd Video Playback [One Touch Replay Function]
The indication on the rightmost end of the status bar shows the unit’s transport status as follows: Icon Status Playback mode. Stop mode. Pause mode. Fast forward/backward playback mode. Slow motion playback mode. Note that pressing ON SCREEN again brings up the menu bar under the status bar, from which you can access various functions. -
Page 26: Advanced Operations
Advanced operations This chapter describes operations for various advanced functions of DVD VIDEO, Audio CD, Video CD and SVCD discs. For MP3 and JPEG disc playback, see the separate chapters beginning on pages 41 and 44. NOTE Make sure that the TV - DVD switch on the remote control unit is set to "DVD"... -
Page 27: To Specify A Desired Title
Use the numeric buttons to select the desired item. • To select a number between 1 and 10: Press the corresponding button for the number. • To select a number higher than 10: Use the +10 button. Examples: To select 13: To select 34: To select 40: The unit starts playback of the selected item. -
Page 28: To Locate A Specific Scene From The Display [Digest]
Advanced operations Use the numeric buttons (0 to 10) to enter the desired time. The specified time is displayed in the pull-down menu. • "10" button works as "0" and "+10" button is not used with this function. • You can specify the time in hour/minute/second format for DVD VIDEO discs, and in minute/second format for Audio CD and Video CD/SVCD discs. -
Page 29: Changing The Playback Order
Depending on the disc type and whether the disc is being played back or not, the contents shown on the TV screen differ. Disc type Unit status What is displayed While stopped The opening scene of each title During playback The opening scene of VIDEO each chapter in the... -
Page 30: To Playback In Random Order [Random Play]
Advanced operations Specify tracks in the desired order using the numeric buttons. • To select a number between 1 and 10: Press the corresponding button for the number. • To select a number higher than 10: Use the +10 button. Examples: To select 13: To select 34:... -
Page 31: Repeat Playback
Press ENTER. The unit starts random playback. With a Video CD/SVCD disc, the menu bar is automatically dismissed. During random playback, the RANDOM indicator lights in the display window on the front panel. After playing all tracks of the disc, the unit stops the disc and exits the random mode. -
Page 32: To Repeat A Desired Part [A-B Repeat Playback]
Advanced operations NOTES • You can also select the repeat mode via the menu bar. See pages 38 and 39. • When the program playback mode is active with an Audio CD, Video CD or SVCD, the repeat mode changes in the same manner. -
Page 33: Changing The Language, Sound And Scene Angle
Changing the language, sound and scene angle With some DVD VIDEO discs, you can choose a desired subtitle language and/or audio language/sound, as well as a desired camera angle. Similarly, you can choose a desired audio channel (or channel combination) of a Video CD/SVCD disc, as well as a subtitle channel of an SVCD disc. -
Page 34: To Change The Audio Language Or Sound [Audio]
Advanced operations To change the audio language or sound [AUDIO] Available : The audio selection setting allows you to change the audio language of a movie, or to listen to karaoke with or without the vocal. • At the beginning of the part where multiple audio tracks are recorded, appears on the TV screen (except when the "ON SCREEN GUIDE"... -
Page 35: To Select A Scene Angle Of Dvd Video [Angle]
To select a scene angle of DVD VIDEO [ANGLE] You can enjoy a variety of scene angles if the DVD VIDEO disc contains "multi-angle" parts, where multiple cameras were used to shoot the same scene from different angles. • At the beginning of a "multi-angle" part, TV screen (except when the "ON SCREEN GUIDE"... -
Page 36: Special Picture Playback And Picture/Sound Effect
ADVANCED_OPERATIONS.fm Page 34 Friday, July 26, 2002 4:19 PM Advanced operations Special picture playback and picture/sound effect You can view continuous still images, or zoom in or out of the picture. You can also adjust the picture characteristics, as well as simulate surround sound using a stereo system. To display continuous still pictures [STROBE] Available :... -
Page 37: To Adjust The Picture Character [Vfp]
NOTES • To return to normal playback. Press ENTER. • While zoomed, the picture may look coarse. To adjust the picture character [VFP] Available : The VFP (Video Fine Processor) function allows you to adjust the picture character according to the type of programming, picture tone or personal preferences. -
Page 38: To Simulate Surround Sound [3D Phonic]
Advanced operations NOTES • The number of setting steps varies for different parameters. • To dismiss the VFP mode selection window: Press VFP - PROGRESSIVE SCAN. • The window for VFP mode selection and parameter setting disappears if no operation is made for about 10 seconds. -
Page 39: Menu Bar Functions
Menu bar functions This section describes the functions you can perform via the menu bar. The available menu bar functions differ depending on the disc type. To bring up the menu bar STANDBY/ON OPEN/ CLOSE TV-/-- MUTING TITLE/ TV/VIDEO RETURN SUBTITLE GROUP CANCEL... -
Page 40: Menu Bar Functions For Dvd Video
Advanced operations Menu bar functions for DVD VIDEO TITLE 33 CHAP 33 8.5Mbps CHAP. Selected Icon Press ENTER to select the time mode from the following. TOTAL Time mode selection initial (During playback only) • TOTAL: Selects the time mode shown in •... -
Page 41: Menu Bar Functions For Audio Cd/Video Cd/Svcd
Selected Icon 1 Press ENTER to open the pull-down window. 2 Use 5/∞ to select a scene angle. Angle selection Example: (during playback only) 1/3 j 2/3 j 3/3 Selects a desired scene angle in a 3 Press ENTER to begin playback with the multi-angle part. - Page 42 Advanced operations Selected Icon 1 Press ENTER to activate random playback. RND. (See page 28 for details about random.) Random (While stopped only) Activates random playback. 1 Press ENTER to open the pull-down window. 2 Use 5/∞ to select a desired audio channel(s). Audio selection 3 Press ENTER to playback with the selected (During Video CD/SVCD playback...
-
Page 43: Mp3 Disc Playback
MP3 disc playback The unit can play back MP3 files on a personally recorded CD-R/RW disc or commercial CD. We refer to a disc that contains MP3 file as an "MP3 disc" in this manual. Though functions available with MP3 discs are limited, operations for the available functions are similar to those for Audio CD discs. -
Page 44: Selecting The Desired Group And Track
MP3 disc playback NOTES • The current Group and Track number are shown on the display window in the following manner. Current Group Current Track number number • You cannot advance or reverse playback of an MP3 disc rapidly. • You cannot see any other time information but the current track elapsed time. -
Page 45: Direct Selection
Direct selection You can select a desired Group directly by specifying the Group number. STANDBY/ON OPEN/ CLOSE TV-/-- MUTING TITLE/ TV/VIDEO RETURN SUBTITLE GROUP CANCEL TITLE/GROUP VOL- VOL+ ENTER PREVIOUS NEXT CLEAR SELECT STROBE SLOW- SLOW+ REPEAT SUB TITLE AUDIO PROGRESSSIVE SCAN DIGEST... -
Page 46: Jpeg Disc Playback
JPEG disc playback The unit can play back JPEG files on a personally recorded CD-R/RW disc. We refer to a disc that contains JPEG files as a "JPEG disc" in this manual. Note that if a disc contains both of MP3 and JPEG files, you can only play back files of the type selected by the MP3/JPEG setting in the PICTURE preference display (see page 52). -
Page 47: Basic Operations
Basic operations To see a desired picture When loading a JPEG disc, after the disc contents are read, the JPEG CONTROL display automatically appears on the TV screen. JPEG CONTROL Group : 01 / 10 File : 01 / 06 (Total 28) spring begonia.jpg sumer... -
Page 48: To Zoom In Or Out The Picture [Zoom]
JPEG disc playback To zoom in or out the picture [ZOOM] RETURN SUBTITLE GROUP CANCEL VOL- VOL+ ENTER PREVIOUS NEXT CLEAR SELECT STROBE SLOW- SLOW+ REPEAT SUB TITLE AUDIO PROGRESSSIVE SCAN DIGEST ANGLE ZOOM PHONIC AMP VOL ¶ While a JPEG image is displayed on the TV screen Press ZOOM + or –. -
Page 49: Selecting The Start Point Of The Slide Show
Selecting the start point of the slide show STANDBY/ON OPEN/ CLOSE TV-/-- MUTING TITLE/ TV/VIDEO RETURN SUBTITLE GROUP CANCEL VOL- VOL+ ENTER PREVIOUS NEXT CLEAR SELECT STROBE SLOW- SLOW+ REPEAT SUB TITLE AUDIO PROGRESSSIVE SCAN DIGEST ANGLE ZOOM PHONIC AMP VOL RM-SXV23J REMOTE CONTROL From the JPEG CONTROL display... -
Page 50: Repeat Function
JPEG disc playback NOTES • To stop slide show playback (to dismiss the picture) in the middle of slide show playback: Press 7 or MENU. The TV screen returns to showing the JPEG CONTROL display. Pressing 3 resumes slide show playback from the last picture you displayed. -
Page 51: Changing The Initial Settings
Changing the initial settings NOTE Make sure that the TV - DVD switch on the remote control unit is set to "DVD" when using the 5/∞/2/3 and numeric buttons for controlling the unit. Selecting preferences This chapter refers to the settings which are already made when you purchase the unit. -
Page 52: Language Menu
Changing the initial settings LANGUAGE menu LANGUAGE MENU LANGUAGE ENGLISH AUDIO LANGUAGE ENGLISH SUBTITLE ON SCREEN LANGUAGE ENGLISH SELECT USE 5∞23 TO SELECT, USE ENTER TO CONFIRM ENTER TO EXIT, PRESS CHOICE. Menu item MENU LANGUAGE You can select the default menu language to be displayed if it is contained on a DVD VIDEO disc. -
Page 53: Picture Menu
PICTURE menu PICTURE MONITOR TYPE 4:3 LB PROGRESSIVE MODE AUTO SCREEN SAVER MP3/JPEG SELECT USE 5∞23 TO SELECT, USE ENTER TO CONFIRM TO EXIT, PRESS CHOICE. ENTER Menu item MONITOR TYPE You can select the monitor type to match your TV when you playback DVD VIDEO discs recorded for wide-screen televisions. -
Page 54: Audio Menu
Changing the initial settings Menu item SCREEN SAVER You can set the screen saver function ON or OFF . See page 16 for details about the screen saver function. MP3/JPEG The unit can play MP3 and JPEG files recorded on a CD-R/CD-RW disc. -
Page 55: Digital Output Signal Chart
Digital output signal chart Disc type DVD with 48/44.1 kHz, 16/20/24 bit linear PCM DVD with 96/88.2 kHz, 16/22/24 bit linear PCM DVD with DTS DVD with Dolby Digital 48 kHz, 16 bit, stereo linear DVD with MPEG Multichannel Audio CD/Video CD/SVCD Audio CD with DTS CD-R/RW with MP3 Menu item... -
Page 56: Others Menu
Changing the initial settings OTHERS menu OTHERS RESUME ON SCREEN GUIDE AUTO STANDBY AV COMPULINK MODE DVD1 PARENTAL LOCK SELECT USE 5∞23 TO SELECT, USE ENTER TO CONFIRM TO EXIT, PRESS CHOICE. ENTER Menu item RESUME You can select the resume playback mode. -
Page 57: Limiting Playback By Children
Limiting playback by children This function restricts playback of DVD VIDEO discs which contain violent (and other) scenes according to the level set by the user. For example, if a movie which includes violent scenes supports the parental lock feature, such scenes which you do not want to let children view can be cut or replaced with other scenes. -
Page 58: To Change The Settings [Parental Lock]
Changing the initial settings While points [SET LEVEL], press ENTER to bring up the pull-down menu. In the pull-down menu, "NONE" and levels "8" to "1" are available. "NONE" does not restrict playback. Level "1" is the strictest level. Discs rated higher than the selected level are restricted. -
Page 59: To Temporarily Release The Parental Lock [Parental Lock]
To change the "COUNTRY CODE" or "SET LEVEL," press ENTER to bring up the associated pull-down menu when pointing the desired item. To select the item to be set, use 5/∞ when no pull- down menu is shown. Use 5/∞ to select the desired option and press ENTER. -
Page 60: Additional Information
Additional information Names of parts and controls Refer to the corresponding pages indicated in () for details. Front panel PROGRESSIVE 1 STANDBY/ON button (13) 2 7 button (16, 17, 41) 3 3 button (16, 18, 41) 4 8 PAUSE button (17, 19, 41) 5 4 button (19, 21, 41) 6 ¢... -
Page 61: Remote Control Unit
Remote control unit 1 OPEN/CLOSE button (15, 17) 2 Numeric buttons 3 RETURN button (24) 4 TOP MENU button (24) 5 Cursor selection (5 Up, ∞ Down) - CH (+/–) buttons (12) 6 Cursor selection (2 Left, 3 Right) - VOL (+/–) buttons (12) 7 CHOICE button (14, 49) 8 4/PREVIOUS button (19, 21, 41, 45) -
Page 62: Av Compu Link Remote Control System
Additional information AV COMPU LINK remote control system The JVC AV COMPU LINK system allows you to enjoy video or audio with the simplest operation. If your video/audio player (such as a DVD player, CD player and VCR) and television or/and amplifier/receiver support the JVC AV COMPU LINK system and are tied... -
Page 63: Troubleshooting
Troubleshooting What appears to be a malfunction may not always be serious. Please go through the following list before requesting service. POWER Symptom Power does not come on. OPERATION Symptom The remote control unit does not work. The TV/VIDEO - CANCEL, 5/∞/2/3 or numeric buttons do not work. - Page 64 Additional information PICTURE Symptom No picture is displayed on the monitor. No picture is displayed on the monitor or the screen is blurred or divided into two parts. The picture is noisy or blurred. The picture does not fit the television screen.
-
Page 65: Frequently Asked Questions
Frequently Asked Questions Question Can I play back DVD VIDEO and Video CD discs purchased abroad? Can I play back a DVD VIDEO disc without any Region Code number? Can I play back a CD-R/RW disc with still pictures in other than the JPEG format? Can I play back audio on a disc labeled "Dolby Digital EX"? Yes, you can play back the disc because Dolby Digital EX Can I play back audio on a disc labeled "DTS ES"? -
Page 66: Specifications
Additional information Specifications *Specifications and appearance are subject to change without prior notice. General Readable discs: DVD VIDEO, DVD-R (Video format), SVCD, Video CD, Audio CD (CD-DA), MP3 format, JPEG, CD-R/RW (CD-DA, SVCD, Video CD, MP3 format, JPEG) Video format: NTSC, 480i (Interlaced scan)/480p (Progressive scan) selectable Other AC 120 V Ó, 60 Hz... -
Page 67: Appendix A: Country/Area Code List For Parental Lock
Appendix A: Country/Area code list for Parental Lock This list is used for the Parental Lock operation. For details, see page 55. AD Andorra ER Eritrea AE United Arab Emirates ES Spain AF Afghanistan ET Ethiopia AG Antigua and Barbuda Finland AI Anguilla FJ Fiji... -
Page 68: Appendix B: Glossary
Additional information Appendix B: Glossary 480i/480p Indicates the number of scanning lines and scanning format of an image signal. 480i indicates 480 scanning lines with interlace format, and 480p indicates 480 scanning lines with progressive format. Aspect ratio A ratio which defines the shape of the rectangular picture in a TV. - Page 69 Letter box A type of video display for normal (4:3) TV screens. Black bars are shown at the top and bottom of the image to allow playing of a wide-screen (16:9) movie without cutting off any of the image. Linear PCM audio PCM stands for "pulse code modulation."...
-
Page 70: How To Locate Your Jvc Service Center
To prevent electrical shock,do not open the cabinet.There are no user serviceable parts inside.Please refer to qualified service personnel for repairs. Accessories To purchase accessories for your JVC product,please call toll free:1 (800)882-2345 or on the web at www.JVC.com BT-51005-5... - Page 71 If service is not available locally, box the product carefully, preferably in the original carton, and ship, insured, with a copy of your bill of sale plus a letter of explanation of the problem to the nearest JVC Factory Service Center, the name and location of which will be given to you by the toll-free number.
- Page 72 VICTOR COMPANY OF JAPAN, LIMITED 0702KTYBICJSC © 2002 VICTOR COMPANY OF JAPAN, LIMITED...