Table of Contents
Advertisement
Quick Links
Installation, Operation, and Maintenance
CyberAir® DX
Perimeter Precision Air Conditioners
21-105 kW / 60 Hz
Only qualified personnel should install and service the equipment. The installation, starting up, and servicing of
heating, ventilating, and air-conditioning equipment can be hazardous and requires specific knowledge and training.
Improperly installed, adjusted or altered equipment by an unqualified person could result in death or serious injury.
When working on the equipment, observe all precautions in the literature and on the tags, stickers, and labels that are
attached to the equipment.
April 2020
SAFETY WARNING
SS-SVX002B-EN
Advertisement
Table of Contents

Related Manuals for Trane CyberAir DX


Summary of Contents for Trane CyberAir DX
- Page 1 Installation, Operation, and Maintenance CyberAir® DX Perimeter Precision Air Conditioners 21-105 kW / 60 Hz SAFETY WARNING Only qualified personnel should install and service the equipment. The installation, starting up, and servicing of heating, ventilating, and air-conditioning equipment can be hazardous and requires specific knowledge and training. Improperly installed, adjusted or altered equipment by an unqualified person could result in death or serious injury.
- Page 2 Know the applicable laws and follow them. Copyright This document and the information in it are the property of Trane, and may not be used or reproduced in whole or in © 2020 Trane SS-SVX002B-EN...
- Page 3 Introduction part without written permission. Trane reserves the right to revise this publication at any time, and to make changes to its content without obligation to notify any person of such revision or change. Trademarks All trademarks referenced in this document are the trademarks of their respective owners.
-
Page 4: Table Of Contents
Table of Contents Model Number Descriptions Types of Control .....22 ....6 Remote Water Detector . - Page 5 Table of Contents Leak Repair ......40 Refrigerant Piping ....40 General Common Repairs/ Component Re- placement .
-
Page 6: Model Number Descriptions
Model Number Descriptions Digit 1, 2, 3, 4 - System TR-CF= CyberAir floor mounted systems Digit 5 - Air Pattern Downflow Upflow Rear Return Digit 6, 7, 8 - Capacity (kW) Digit 9 - Cooling Method Digit 10 - Number of Circuits Dual circuit Digit 11 - Heat Rejection Glycol... -
Page 7: Introduction
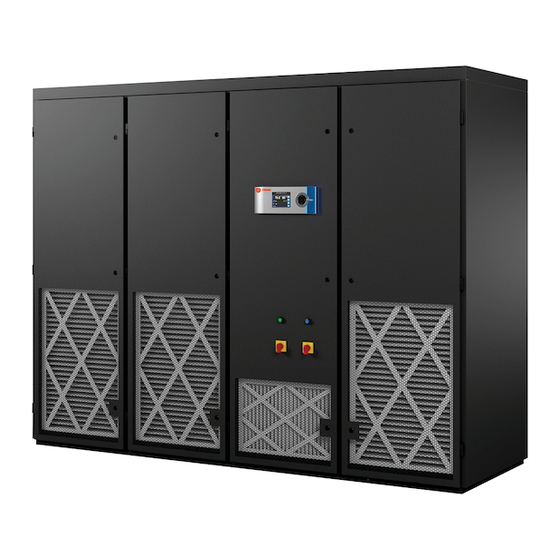
Introduction General The CyberAir unit is provided with a factory mounted, main power disconnect switch with a lockable handle. The disconnect switch electrically isolates the unit during The CyberAir floor mounted, precision air conditioning routine maintenance. The system incorporates state of the system unit will provide years of trouble-free service if art component protection with the use of motor start installed and maintained in accordance with this manual. -
Page 8: General Design
Introduction General Design figures depict the internal layouts of up-flow and down- flow CyberAir units and identifies the major components. Location of the major components may vary depending on The CyberAir unit is housed in a steel frame type cabinet model number and options purchased. -
Page 9: Internal Layout - Up-Flow Model
Introduction Figure 3. Down-flow Models Floor Discharge Plenum Extension Flow (Optional) Flow Internal Air Filters Accessible Behind Front Cabinet Doors Internal Layout - Up-flow Model The following figure depicts a sample internal layout of a TR-CFU (up-flow) unit and identifies the major components. -
Page 10: Internal Layout - Down-Flow Model
Introduction Internal Layout - Down-flow Model components. The location of major components vary depending on model number and options purchased. The following figure depicts a sample internal layout of a TR-CFD (down-flow) unit and identifies the major Figure 5. Typical Internal Layout- Down-flow STEAM DISTRIBUTER AIR FILTERS... -
Page 11: Ec Fan(S)
Introduction Optional Equipment by the factory. A condensate drain pan is provided to collect water condensed by the coils. The drain pan is emptied by gravity drain that directs the water away from Heaters the cabinet. A condensate pump may be provided as an option. -
Page 12: Auto Power Transfer Switching
Dual Cooling Circuits Stage Cut-in Offset Compressor(s) Capacity +2° F 5 tons CyberAir DX systems are designed with two stages of +3° F 10 tons cooling. The cooling circuits are typically comprised of +4° F 1B+2 15 tons one compressor per circuit. -
Page 13: Free-Cooling Operation
Introduction Four Stage Compressor Rotation Free-Cooling Operation Compressors 1A and 1B rotate the lead role after each run The free-cooling configuration is available to minimize the cycle in the cooling mode. That is, after compressor 1A has use of compressor operation during low ambient completed an operating cycle as the primary compressor conditions for system energy savings. - Page 14 Introduction Figure 8. Free-Cooling Diagram Remote Drycooler (Optional) Pump (Optional) 3-Way Mixing Free-Cooling Modulating Valve Coil Free-Cooling Aqua-Stat DX1 3-Way Head Pressure DX Cooling Control Valve Coil Water / Glycol Cooled Condenser Coil Scroll Electronic Compressor Expansion Valve Refrigerant Reclaim Port Sight Refrigerant Glass...
-
Page 15: Alternate Water Source Operation
Introduction Alternate Water Source Operation compressor turns on and operates in parallel with AWS cooling. The compressor runs until the cut-out set point temperature is reached provided the minimum run time An alternate water source (AWS) system utilizes an expires. independent chilled water source to provide coolant to an AWS cooling coil in the A/C unit. -
Page 16: Installation
Installation Receiving the Equipment furnished with your unit shows the recommended entry locations. Ensure access is available for routing the piping and wiring if entering through the side of the cabinet. The Your CyberAir system has been inspected and tested prior cabinet may be positioned in a corner and, if necessary, a to shipment. -
Page 17: Rigging
Installation Mounting/Placement Structure R-Value Ceiling R-38 CyberAir systems use a frame and panel construction for unit rigidity. The cabinet design allows full service Wall R-21 accessibility without moving the unit. CyberAir systems Floor R-19 that are not ducted are designed to be located in the space Door to be conditioned. - Page 18 Installation If a floor stand is selected (for down-flow units), see “Floor larger than the cabinet’s overall base dimension so the Stands,” p. 20 and refer to the installation drawing weight of the A/C unit is supported by the stand. provided.
-
Page 19: Air Distribution Connection
Installation Air Distribution Connection The supply air outlet is provided with a flange for connecting ductwork (refer to the installation drawing provided with the unit). The connection of ductwork to the Up-flow Configuration Air Patterns unit may be made with either pop rivets or self-tapping In an up-flow configured unit, the conditioned supply air screws. -
Page 20: Optional Equipment (Field Installed)
Installation Figure 14. Down-flow Configuration Air Patterns RETURN AIR INLET DUCT RETURN AIR INLET SUPPLY SUPPLY AIR OUTLET AIR OUTLET TOP FREE RETURN TOP DUCTED RETURN Optional Equipment (Field Standard Floor Stands- First loosen the middle hex nut (jam nut) on each leg. Turn the top hex nut to raise or lower Installed) the floor stand. -
Page 21: Plenum Box
Installation Figure 16. Low Seismic Floor Stand Figure 18. High Seismic 12 inches and Taller Floor Stands FLOOR STAND HEX NUT (FIXED) ATTACHMENT PLATES ATTACHMENT QUANTITY PLATES VARIES QUANTITY VARIES FLOOR STAND LEG TOP HEX NUT (JAM NUT) FLOOR STAND HEX NUT (FIXED) BOTTOM HEX NUT (FIXED) TOP HEX NUT (JAM NUT) Low Seismic Floor Stand... -
Page 22: Condensate Pump
Installation Figure 19. Plenum Installation Figure 20. Temperature/Humidity Sensor Location T/H SENSOR FOR RETURN AIR PLENUM EXTENSION T/H SENSOR FOR ROOM AIR HEIGHT > 60 in. SUPPLY AIR T/H SENSOR Condensate Pump FOR SUPPLY AIR An optional, factory installed condensate pump may be Supply Air Monitoring- As an option, a field installed T/ provided for automatically eliminating condensate and H sensor may be used for supply air monitoring. -
Page 23: Remote Water Detector
Installation 1. Remove the cover from the base of the sensor by squeezing it at the top and bottom. NOTICE Sensor Damage! Take care not to damage the exposed temperature/ humidity sensors on the PC board when the cover is removed. -
Page 24: Refrigerant Piping
Installation side panel. For special piping requirements contact the tubing while soldering at a rate of not less than 1-2 CFM product support. (.03 -.06 M3/minute). If piping is brought into the side of the cabinet, ensure Refrigerant lines for split systems must be sized according adequate working space is available on that side or cut a to the piping distance between the evaporator and the service opening into the adjacent wall if the unit is installed... -
Page 25: Water/Glycol And Hot Water Piping
Installation NOTICE Recommended Liquid Line Sizes Fluid coils and associated piping circuits are For R-410A Refrigerant pressurized (up to 100 psi) and sealed when the unit Receiver to Evaporator leaves the factory. Before installing the interconnecting (Equivalent Ft.)* TR-CFS Model No. /Total Btu piping, release the pressure via an available stem valve Capacity 50’... -
Page 26: Humidifier
Installation Condensate Pump In most cases the humidifier empties into the condensate drain line during the flush/drain cycle. Refer to the An optional condensate pump is normally factory installed installation drawing provided with your unit for the size with a 1/2 in. OD copper drain. The drain is stubbed outside and location of the connection. - Page 27 Installation Note: All wiring must conform to local and national Figure 23. Sample Template electrical code requirements. Only use copper conductors. Wiring terminations may become loose during transit of the equipment; therefore, it is required to verify that all wiring terminations be checked to verify they are secure.
-
Page 28: Optional Equipment
Installation 10. Expansion Module (Optional) wire connections. Refer to the electrical schematic supplied with your unit for proper wire terminations. Figure 24. Electric Box Remote Water Detector Each remote water detector requires two conductors to be wired to the control terminal board within the unit electrical box (see Figure 24). - Page 29 Installation supplied with the condenser (typically located in the terminal board within the A/C unit to the remote condenser electric box). condenser terminal board. If control wires aren’t installed (and the jumper remains in place), the condenser is always As an option, control wiring may be installed between the enabled and will turn on and off based on the condenser’s A/C system and the condenser for the system controller to pressure control settings.
-
Page 30: System Charging Procedures
Installation System Charging Procedures Note: Refrigerant charging must be performed by a qualified air conditioning technician. Water-Water/Glycol Systems R-410A is a blended refrigerant recognized for being safer for the environment. Refrigerants that are multi- All self-contained water-water/glycol cooled units (units component blends have component parts with different that require no refrigerant field piping) are factory charged volatilities that result in a change in composition and... - Page 31 Installation Table 2. Weight of R-410A refrigerant for A/C unit- per compressor circuit A/C Unit Approximate R-410A Charge Model Number Base Charge Circuit 1 Base Charge Circuit 2 TR-CFD-021-D2A 2.7 lbs 2.7 lbs TR-CFU-021-D2A 2.7 lbs 2.7 lbs TR-CFD-028-D2A 2.7 lbs 2.7 lbs TR-CFU-028-D2A 2.7 lbs...
-
Page 32: Preparing System For Charging
Installation Evacuate The System Table 4. Weight of R-410A refrigerant (lbs./100ft of type L tubing) NOTICE Line Size O.D. Liquid Line Discharge Line Compressor Damage! 5.88 1.27 A proper vacuum must be drawn on the refrigerant 9.44 2.03 system to remove moisture prior to charging. If this is 19.62 4.22 not done the refrigerant charge will combine with... -
Page 33: Refrigerant Charging Procedures
Installation down to 500 microns or less. Close the vacuum pump Fine Tuning The System Charge isolation valve and pressurize the system again with Once the initial charge is completed, refrigerant will need dry nitrogen and allow the system to stand for two to be added with the unit running. -
Page 34: Refrigerant Characteristics
Installation 7. While monitoring the pressure, take a sub-cooling through the hot gas reheat cycle, recheck the system temperature reading on the output side of the charge with the system only in the Cooling mode. condenser. The sub-cooling temperature should be 10- Important: Remove the blockage to the air intake of the 20°F. -
Page 35: Settings And Adjustments
Installation Head Pressure Controls- Air Cooled Table 5. R-410A refrigerant pressure/temperature Systems settings -20°F Condenser Fan Speed R-410A Refrigerant Pressure/Temperature Settings Normal Min. Max. Used for outdoor installations where ambient condenser air inlet temperatures may fall to -20°F, variable speed Sub-cooling °F condenser motor control is used to maintain head Superheat °F... -
Page 36: Head Pressure Control-Water/Glycol Cooled Systems
The snap acting hot gas bypass system also provides freeze protection for the evaporator coil by limiting the CyberAir DX units have two refrigeration circuits. Each minimum refrigerant pressure, thereby preventing the circuit has its own pressure transducer. The system... - Page 37 Installation It is recommended that if the humidifier capacity potentiometer requires adjustment, the adjustment is made in small increments and verified. Refer to the humidifier manual sent under separate cover with your unit for the location of the capacity adjustment potentiometer.
-
Page 38: Start-Up/Commissioning
Start-Up/Commissioning Operation leaving the steam head or feel if the cylinder is warm to verify if the humidifier is operational. For new installations, ensure the unit is ready to operate by Note: In all cases, 1 to 6 hours might be required to going through the Checklist for Completed Installation, achieve the desired level or rise in humidity in the located in... -
Page 39: Maintenance
Maintenance Periodic General Maintenance the refrigerant pressure/temperature table in Section 2.9.6. If necessary, adjust the refrigerant charge to achieve the correct values. If the refrigerant level is low, check the Systematic, periodic general maintenance of the CyberAir system for leaks. system is recommended for optimum performance. -
Page 40: Condensate Pump
Maintenance Note: Do not attempt to make repairs without the proper Note: The yellow LED may illuminate during initial start- up but it doesn’t necessarily mean the cylinder tools. needs to be replaced. It may be necessary to perform repairs on the A/C system. Refer to “Humidifier Cylinder Replacement,”... - Page 41 Maintenance Burn-Out/Acidic Cleanup Procedure making accurate acid measurements, but if they are not available, a check of the oil by sight and smell can give a quick indication if contamination remains in the system. WARNING WARNING Risk of Burns! Risk of Burns! Avoid touching or contacting the gas and oil with exposed skin.
- Page 42 Maintenance detailed instructions on changing the cylinder. The 10. The power wires to the cylinder are attached by following procedures are to be followed when replacing cylinder plugs to the electrode pins on top of the the cylinder. cylinder. Pull these plugs vertically off the pins. NOTICE WARNING Humidifier Damage!
-
Page 43: Troubleshooting
Troubleshooting Turn off all power to the unit before conducting any Note: When the switch is turned on, high voltage will be troubleshooting procedures unless the procedure present inside the cabinet. Exercise caution to specifically requires the system to operate. For prevent injury. - Page 44 Troubleshooting Table 7. Troubleshooting (continued) SYMPTOM PROBABLE CAUSE RECOMMENDATION Check pressure/temperature operating Condenser Pressure Too High (cont.) d. Condenser fan not operating. switches and motor. Replace as needed. e. Control pressure set too high Adjust setting to obtain correct pressure. f.
- Page 45 Troubleshooting Table 7. Troubleshooting (continued) SYMPTOM PROBABLE CAUSE RECOMMENDATION Water- Water/Glycol Valve Fails to Open or Close c. Actuator failed. Replace actuator. (cont.) Electric Heater Inoperable a. Circuit breaker tripped. Check for short circuit; reset circuit breaker. b. Temperature set point too low. Increase temperature set point.
-
Page 46: Product Support
Product Support Obtaining Warranty Parts Product Support provides aftermarket technical and field support, warranty authorization and part sales to contractors and end users. Factory authorized services are A support technician will provide troubleshooting available by request and include: assistance over the telephone. •... -
Page 47: Forms
Appendix A Forms Checklist for Completed Installation Ductwork completed or optional plenum installed (if Proper clearances for service access have been required). maintained around equipment. Incoming line voltage matches equipment nominal Equipment is level and mounting fasteners (if nameplated rating ±... - Page 48 For more information, please visit trane.com or tranetechnologies.com. Trane has a policy of continuous product and product data improvement and reserves the right to change design and specifications without notice. We are committed to using environmentally conscious print practices.